How to Register
Set up your account and begin turning your voice into notes instantly.
Sign Up
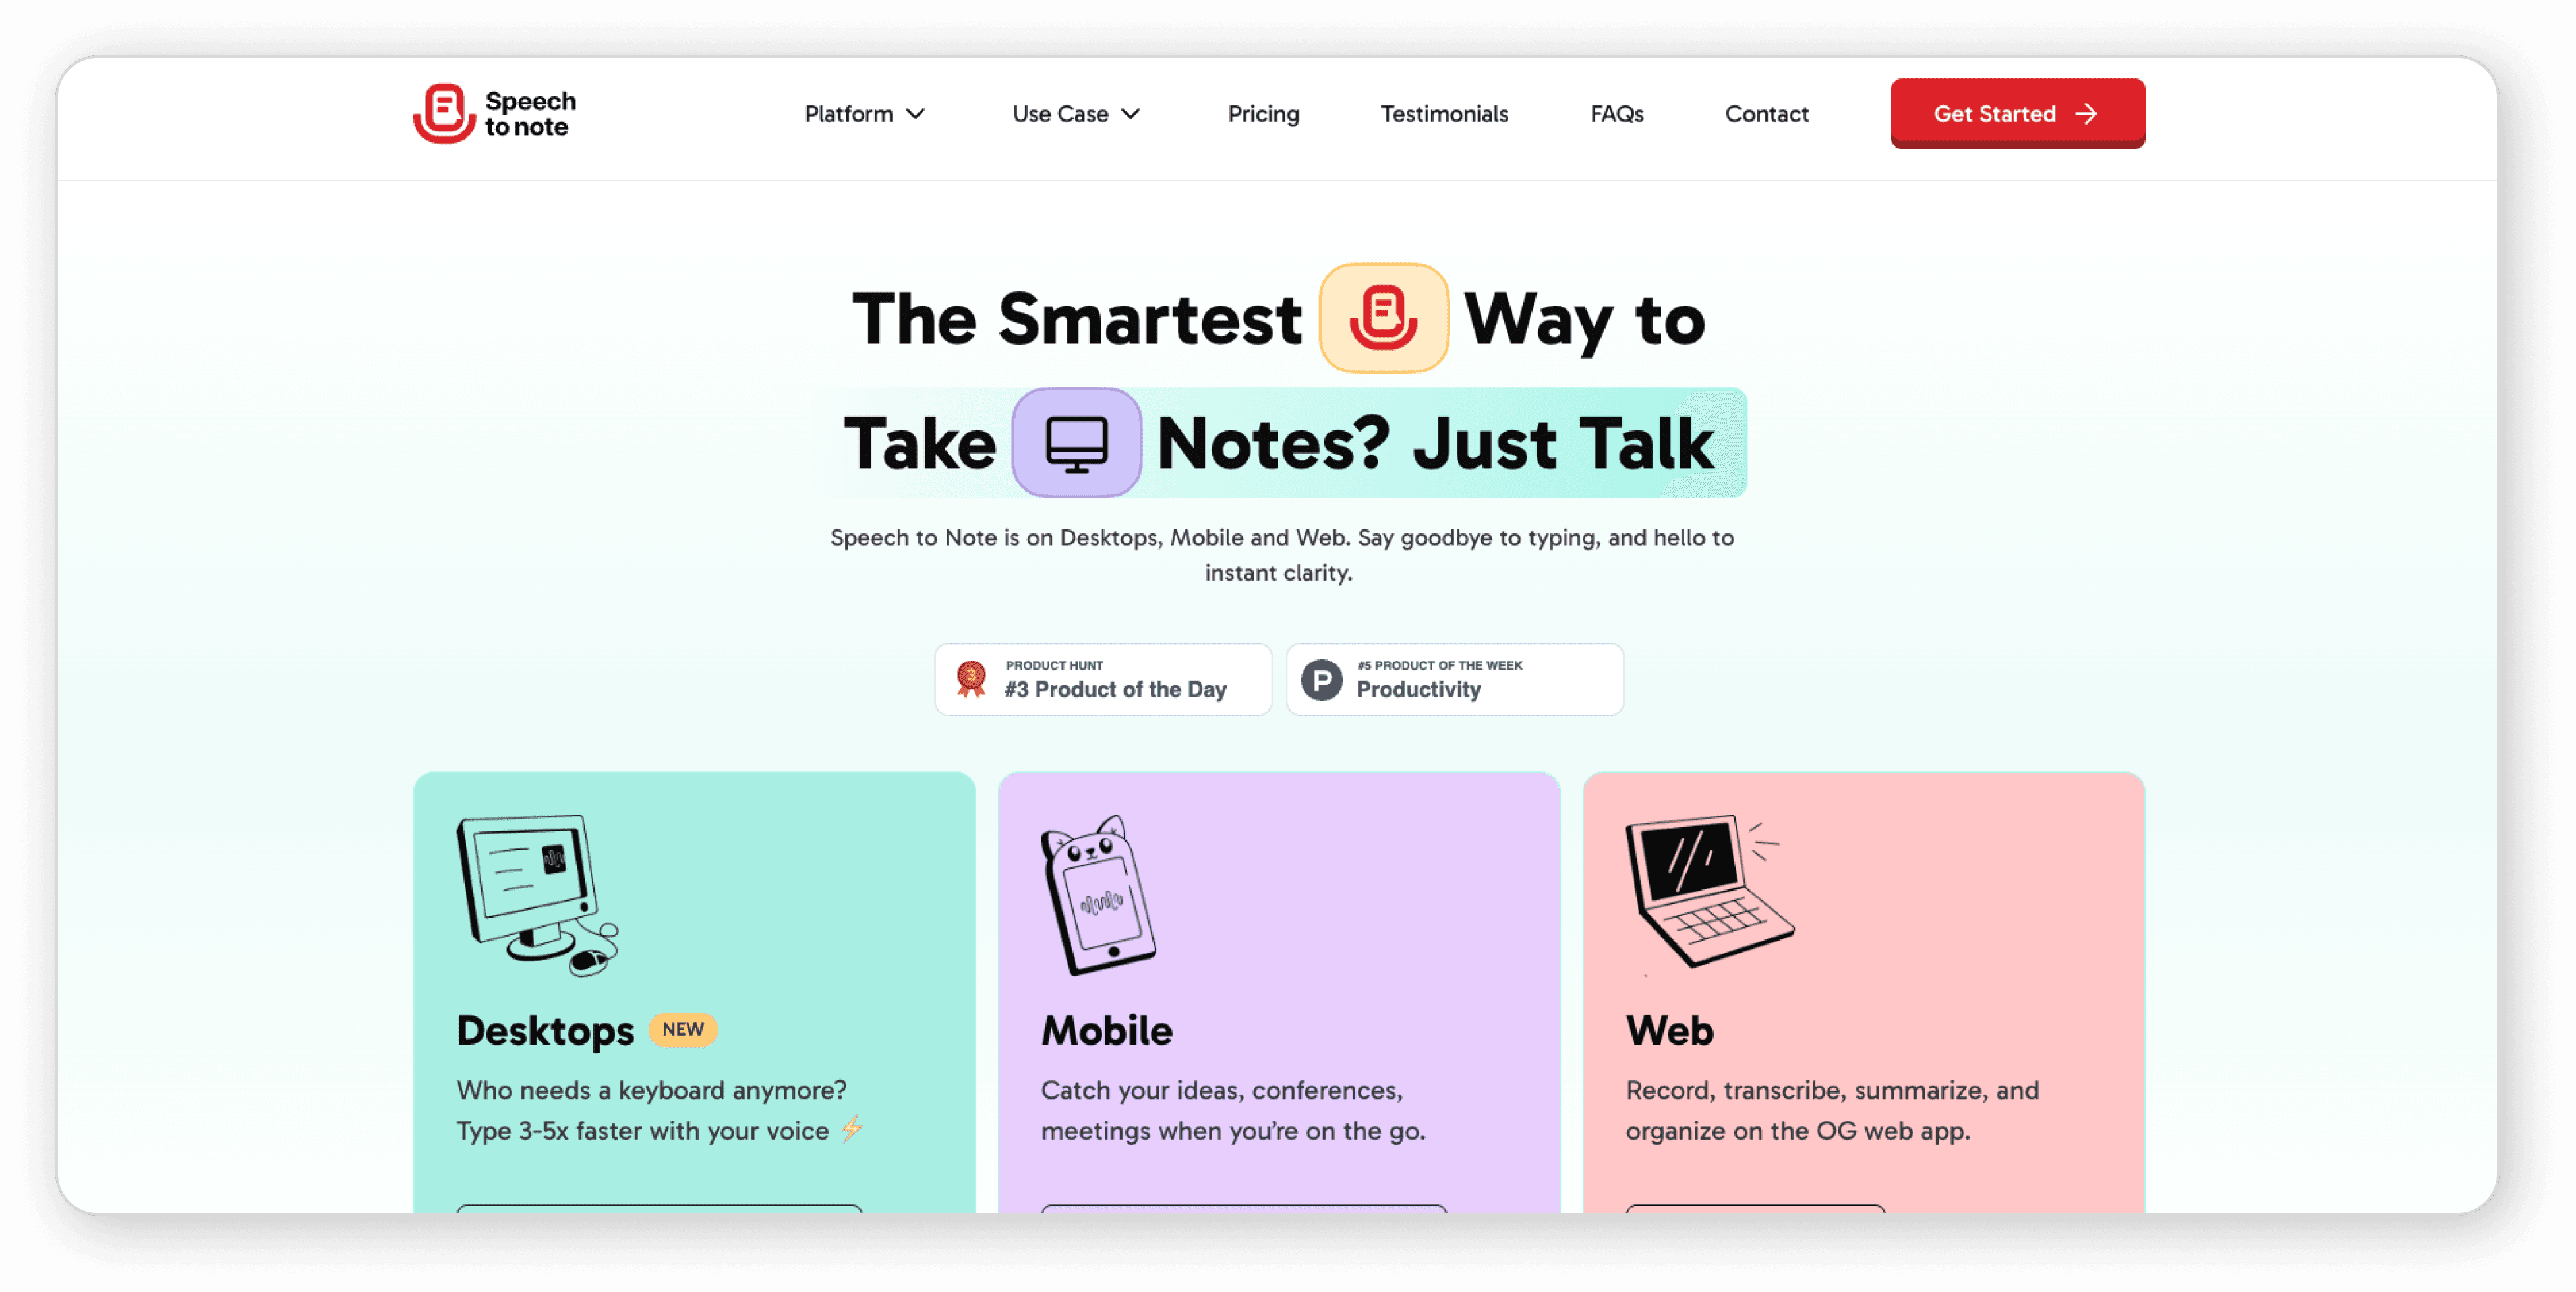
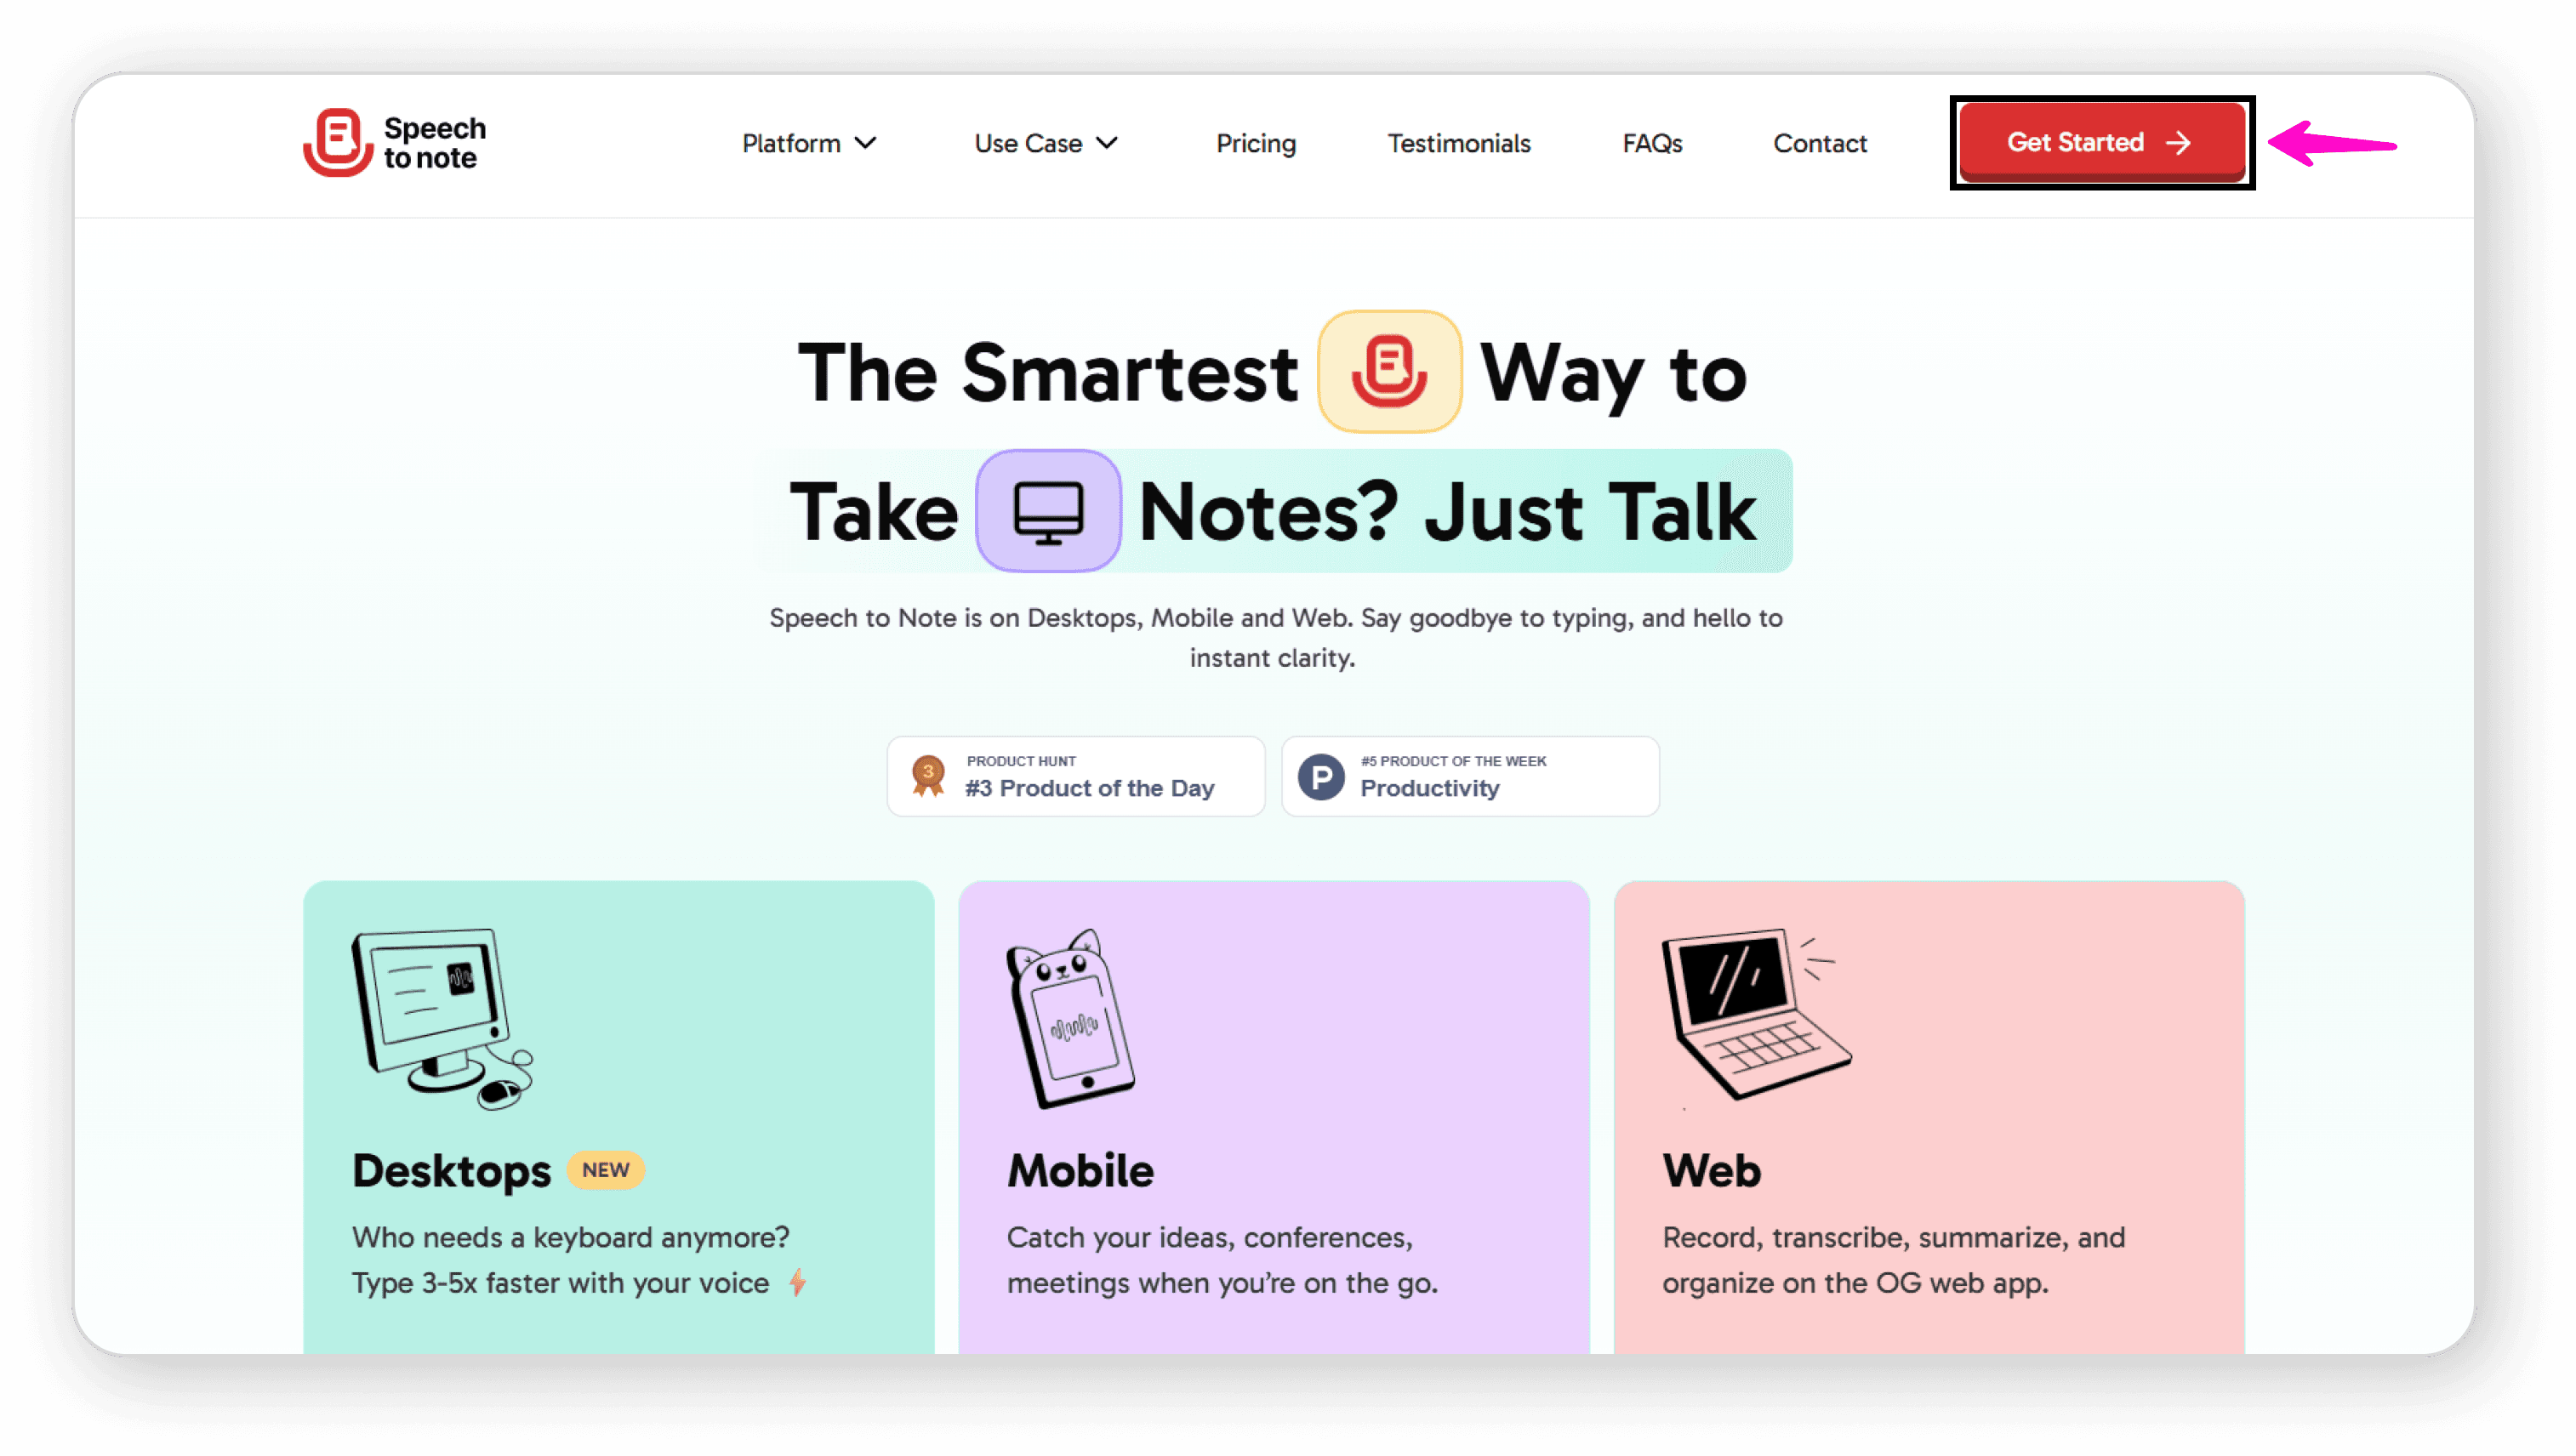
Visit speechtonote.com and click “Get Started ”
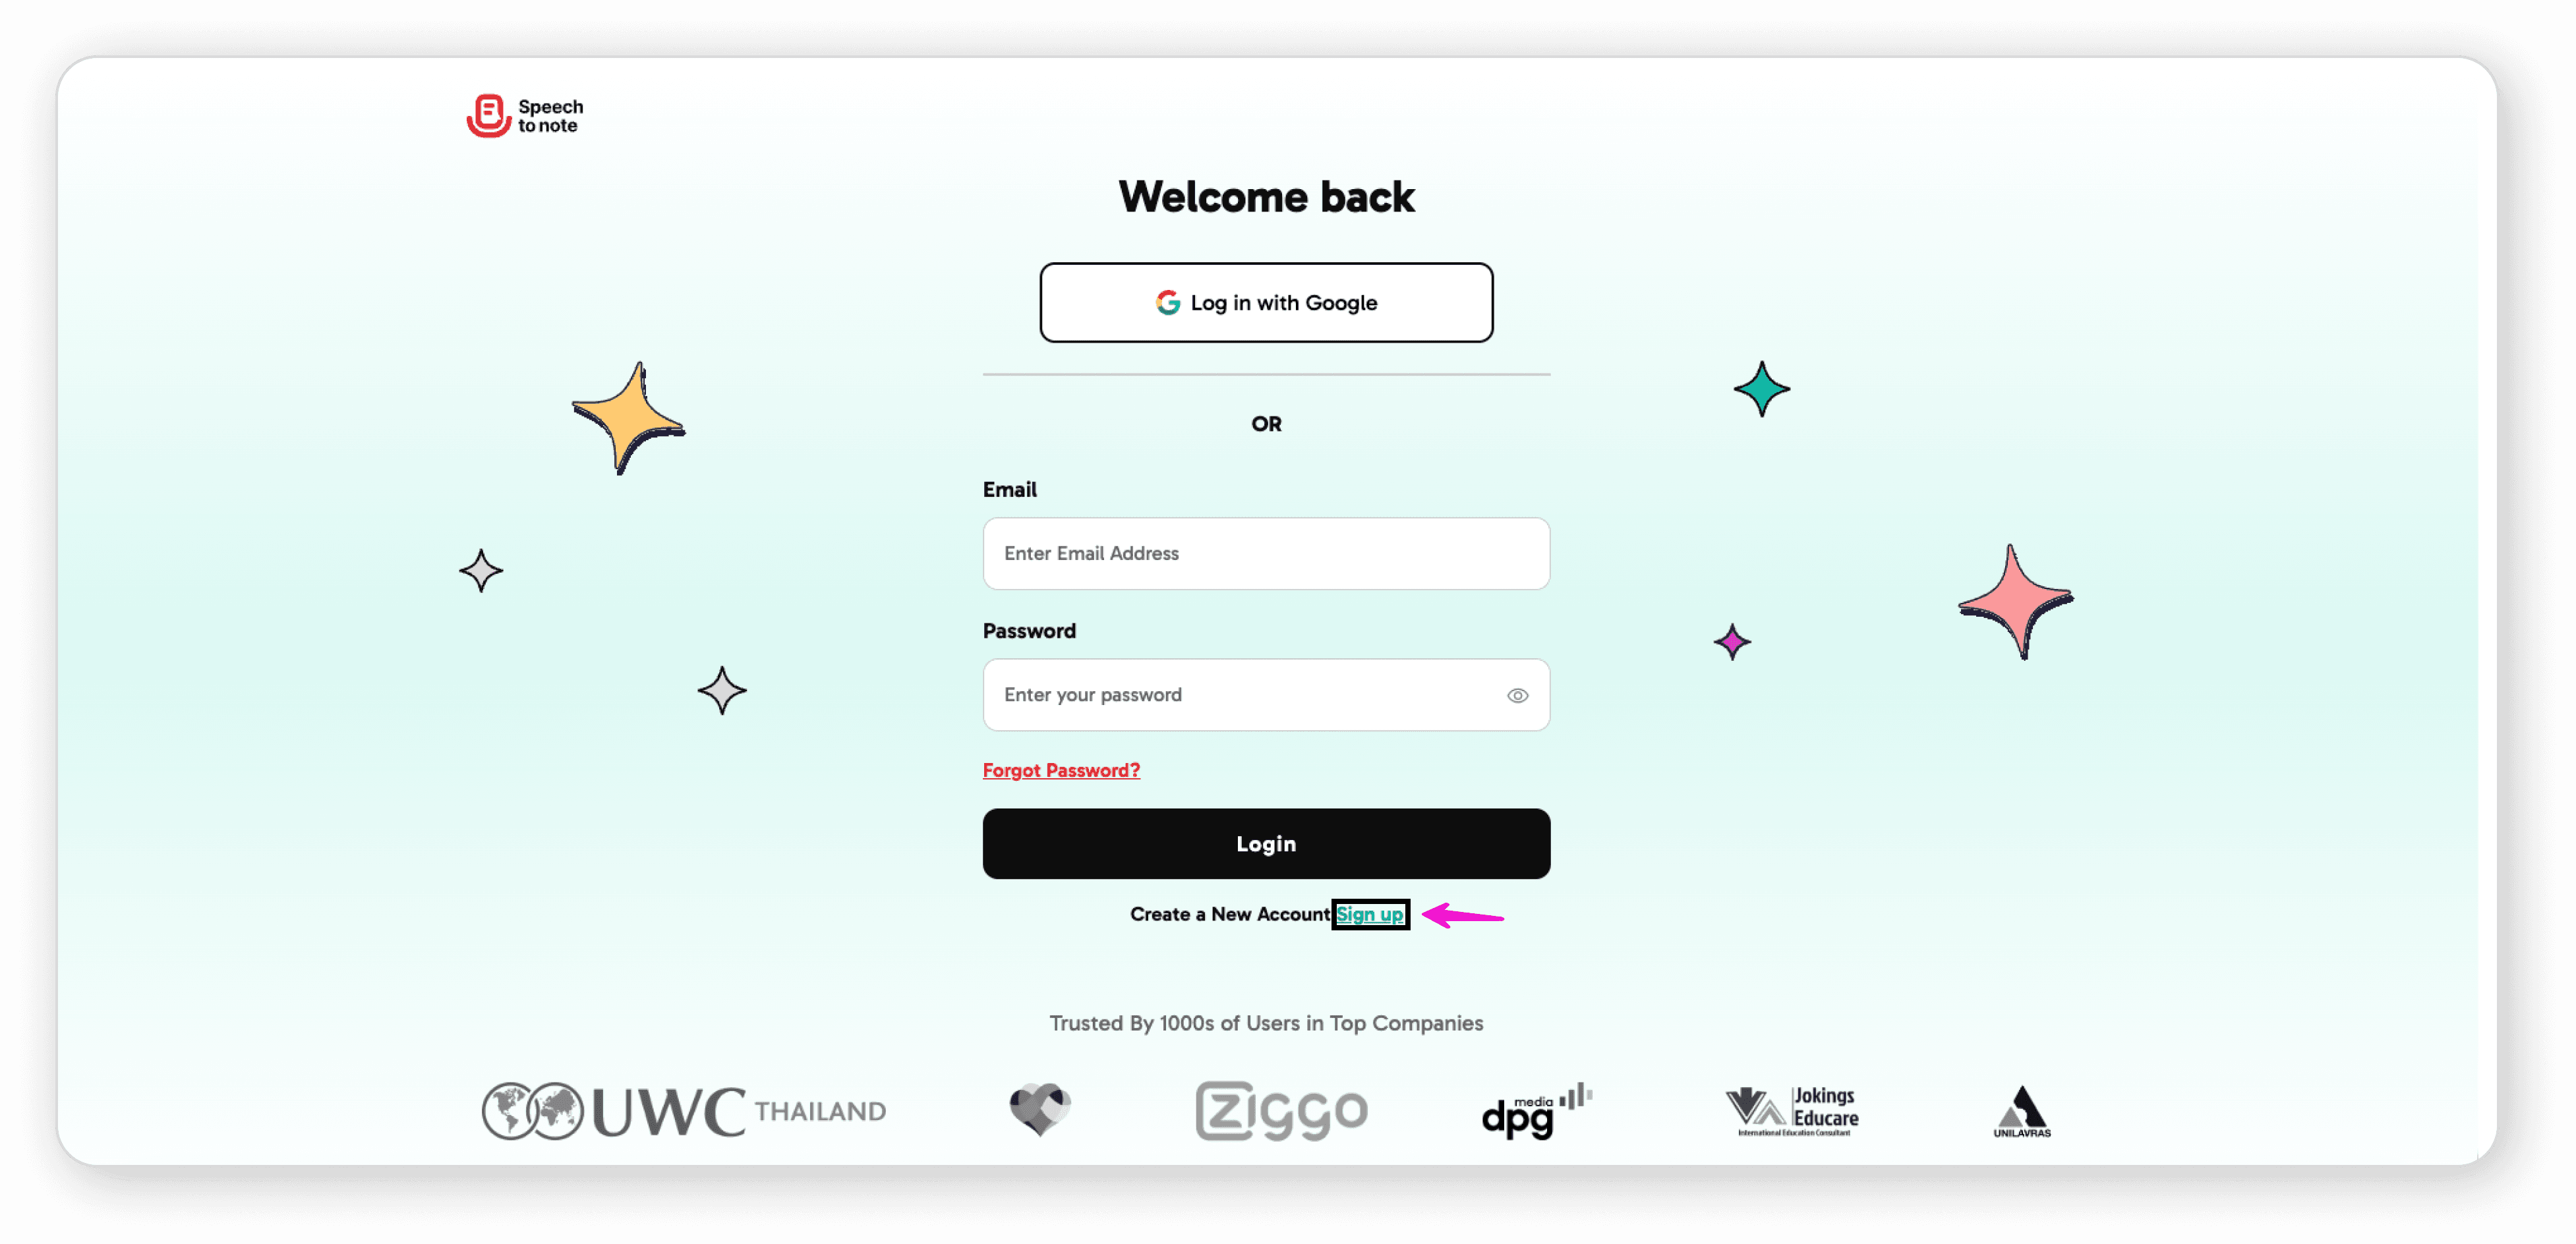
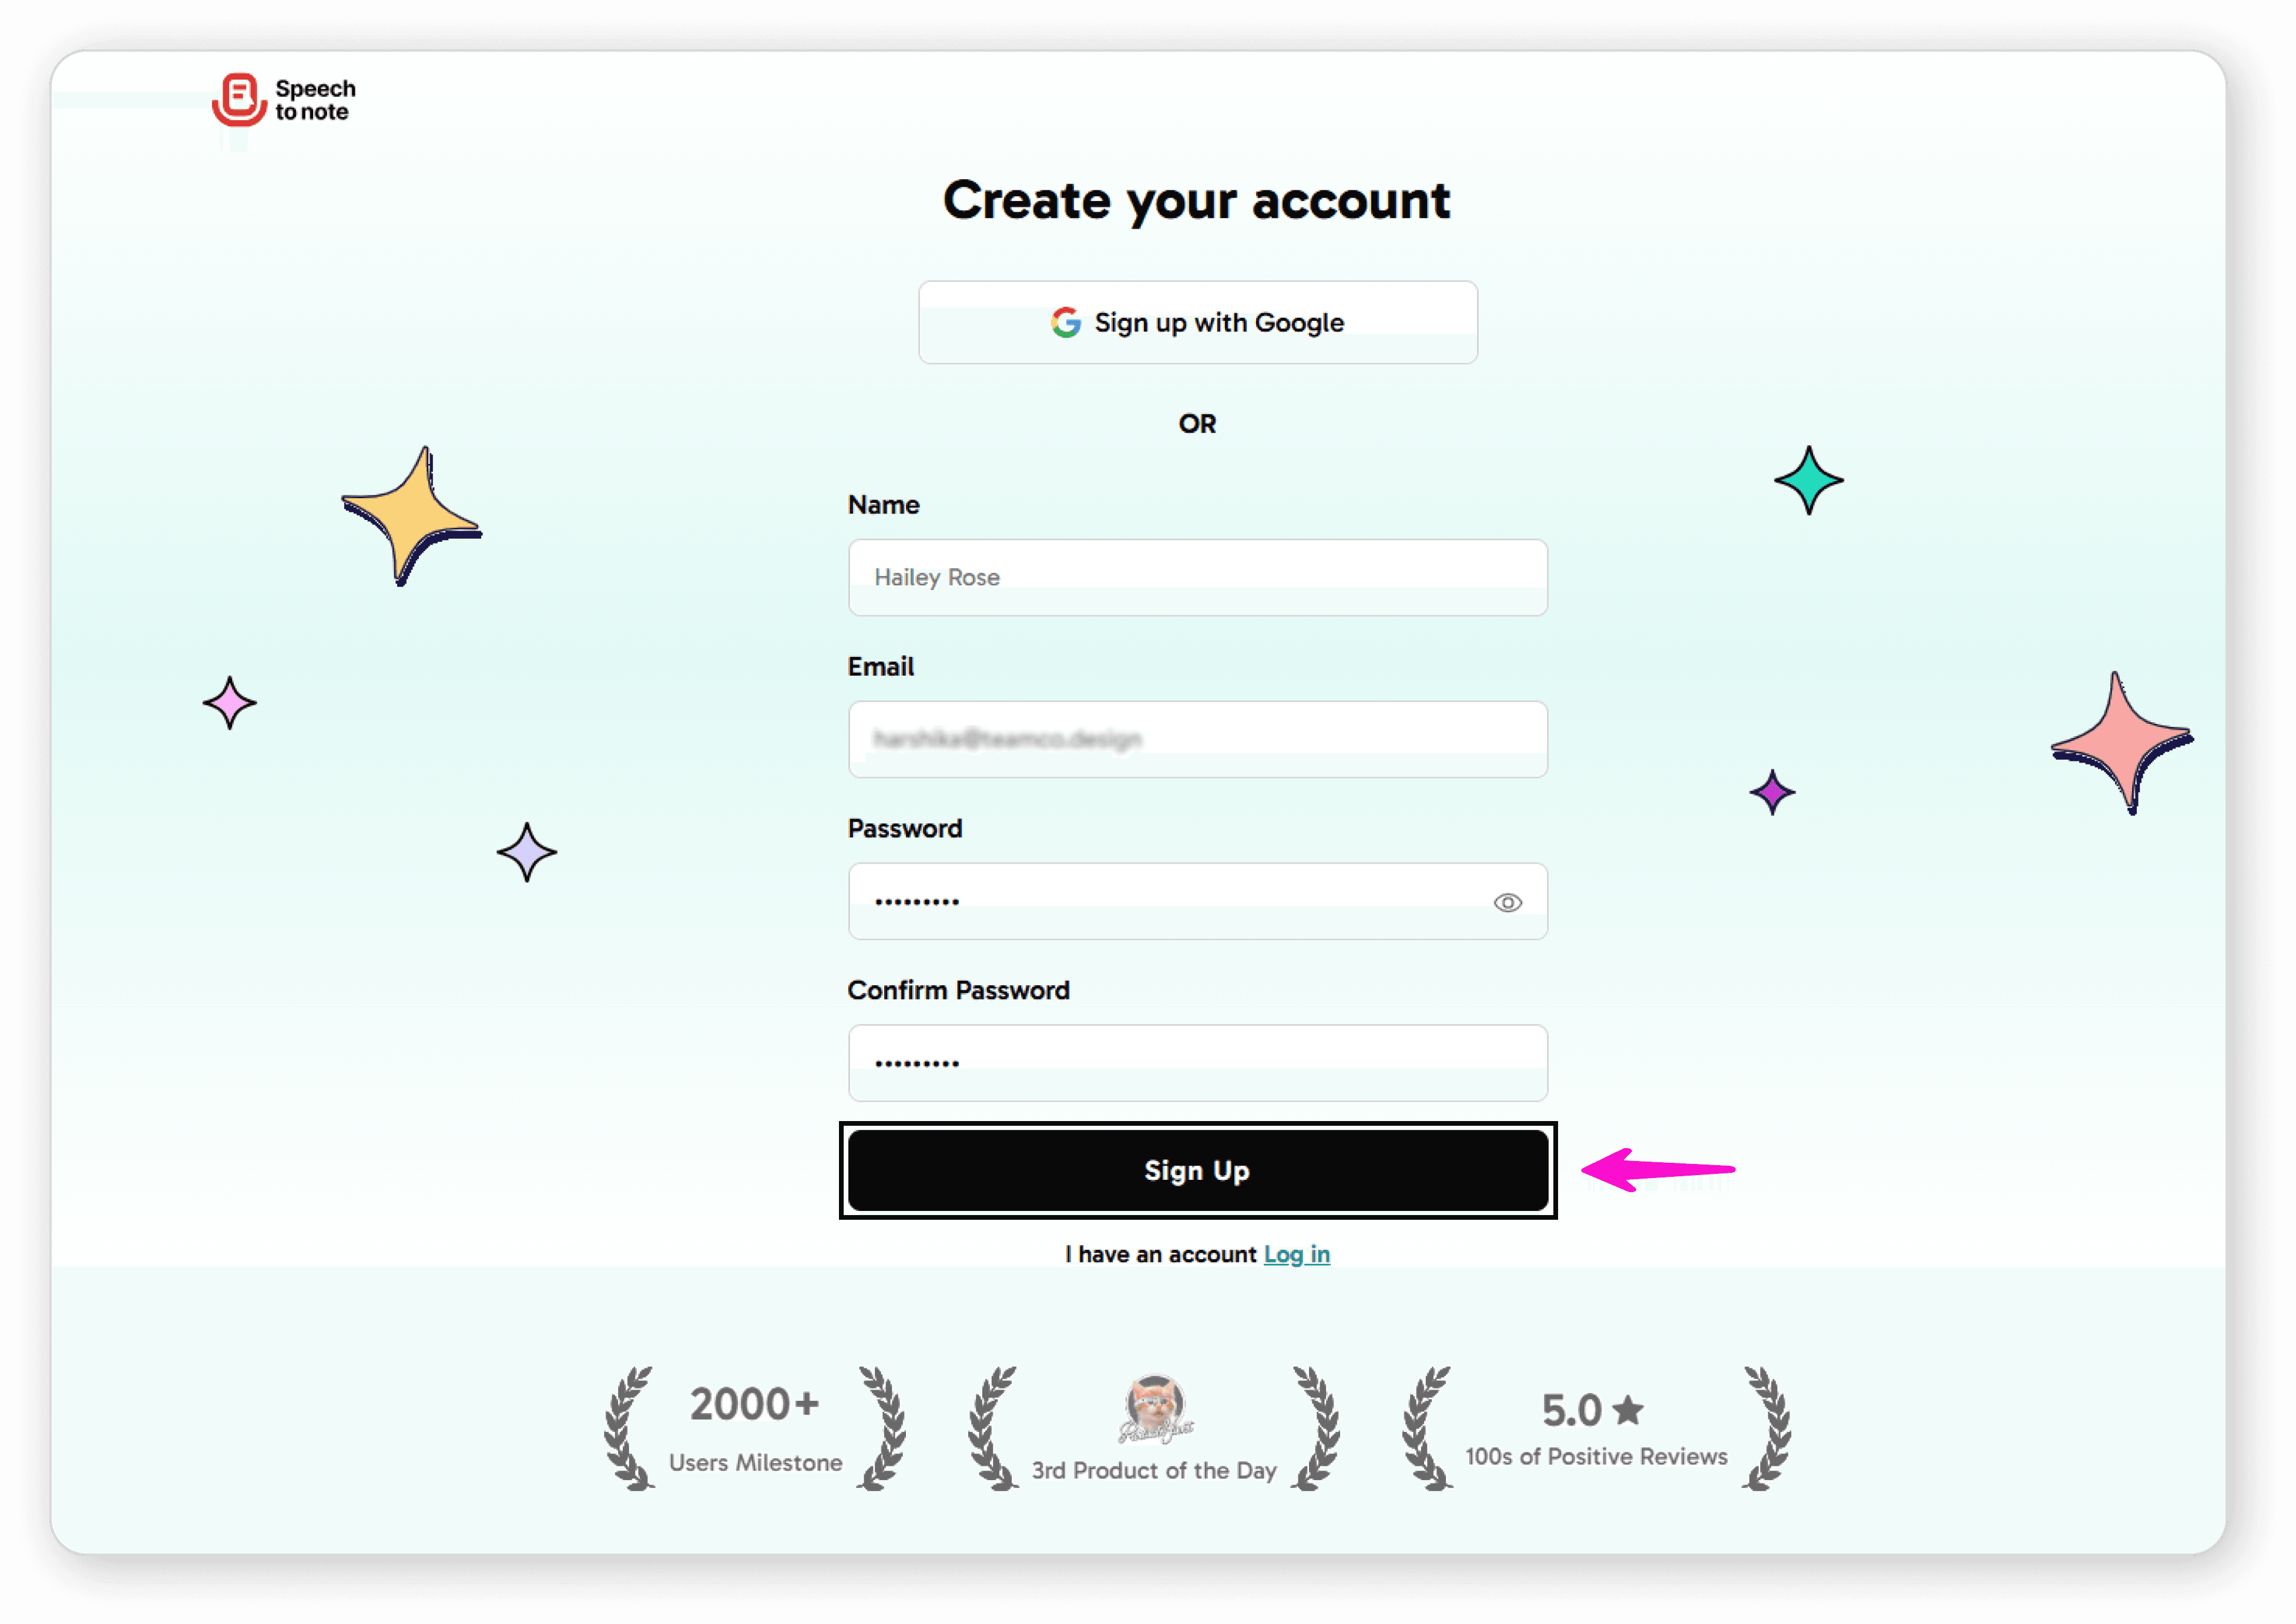
Click on "Sign Up"
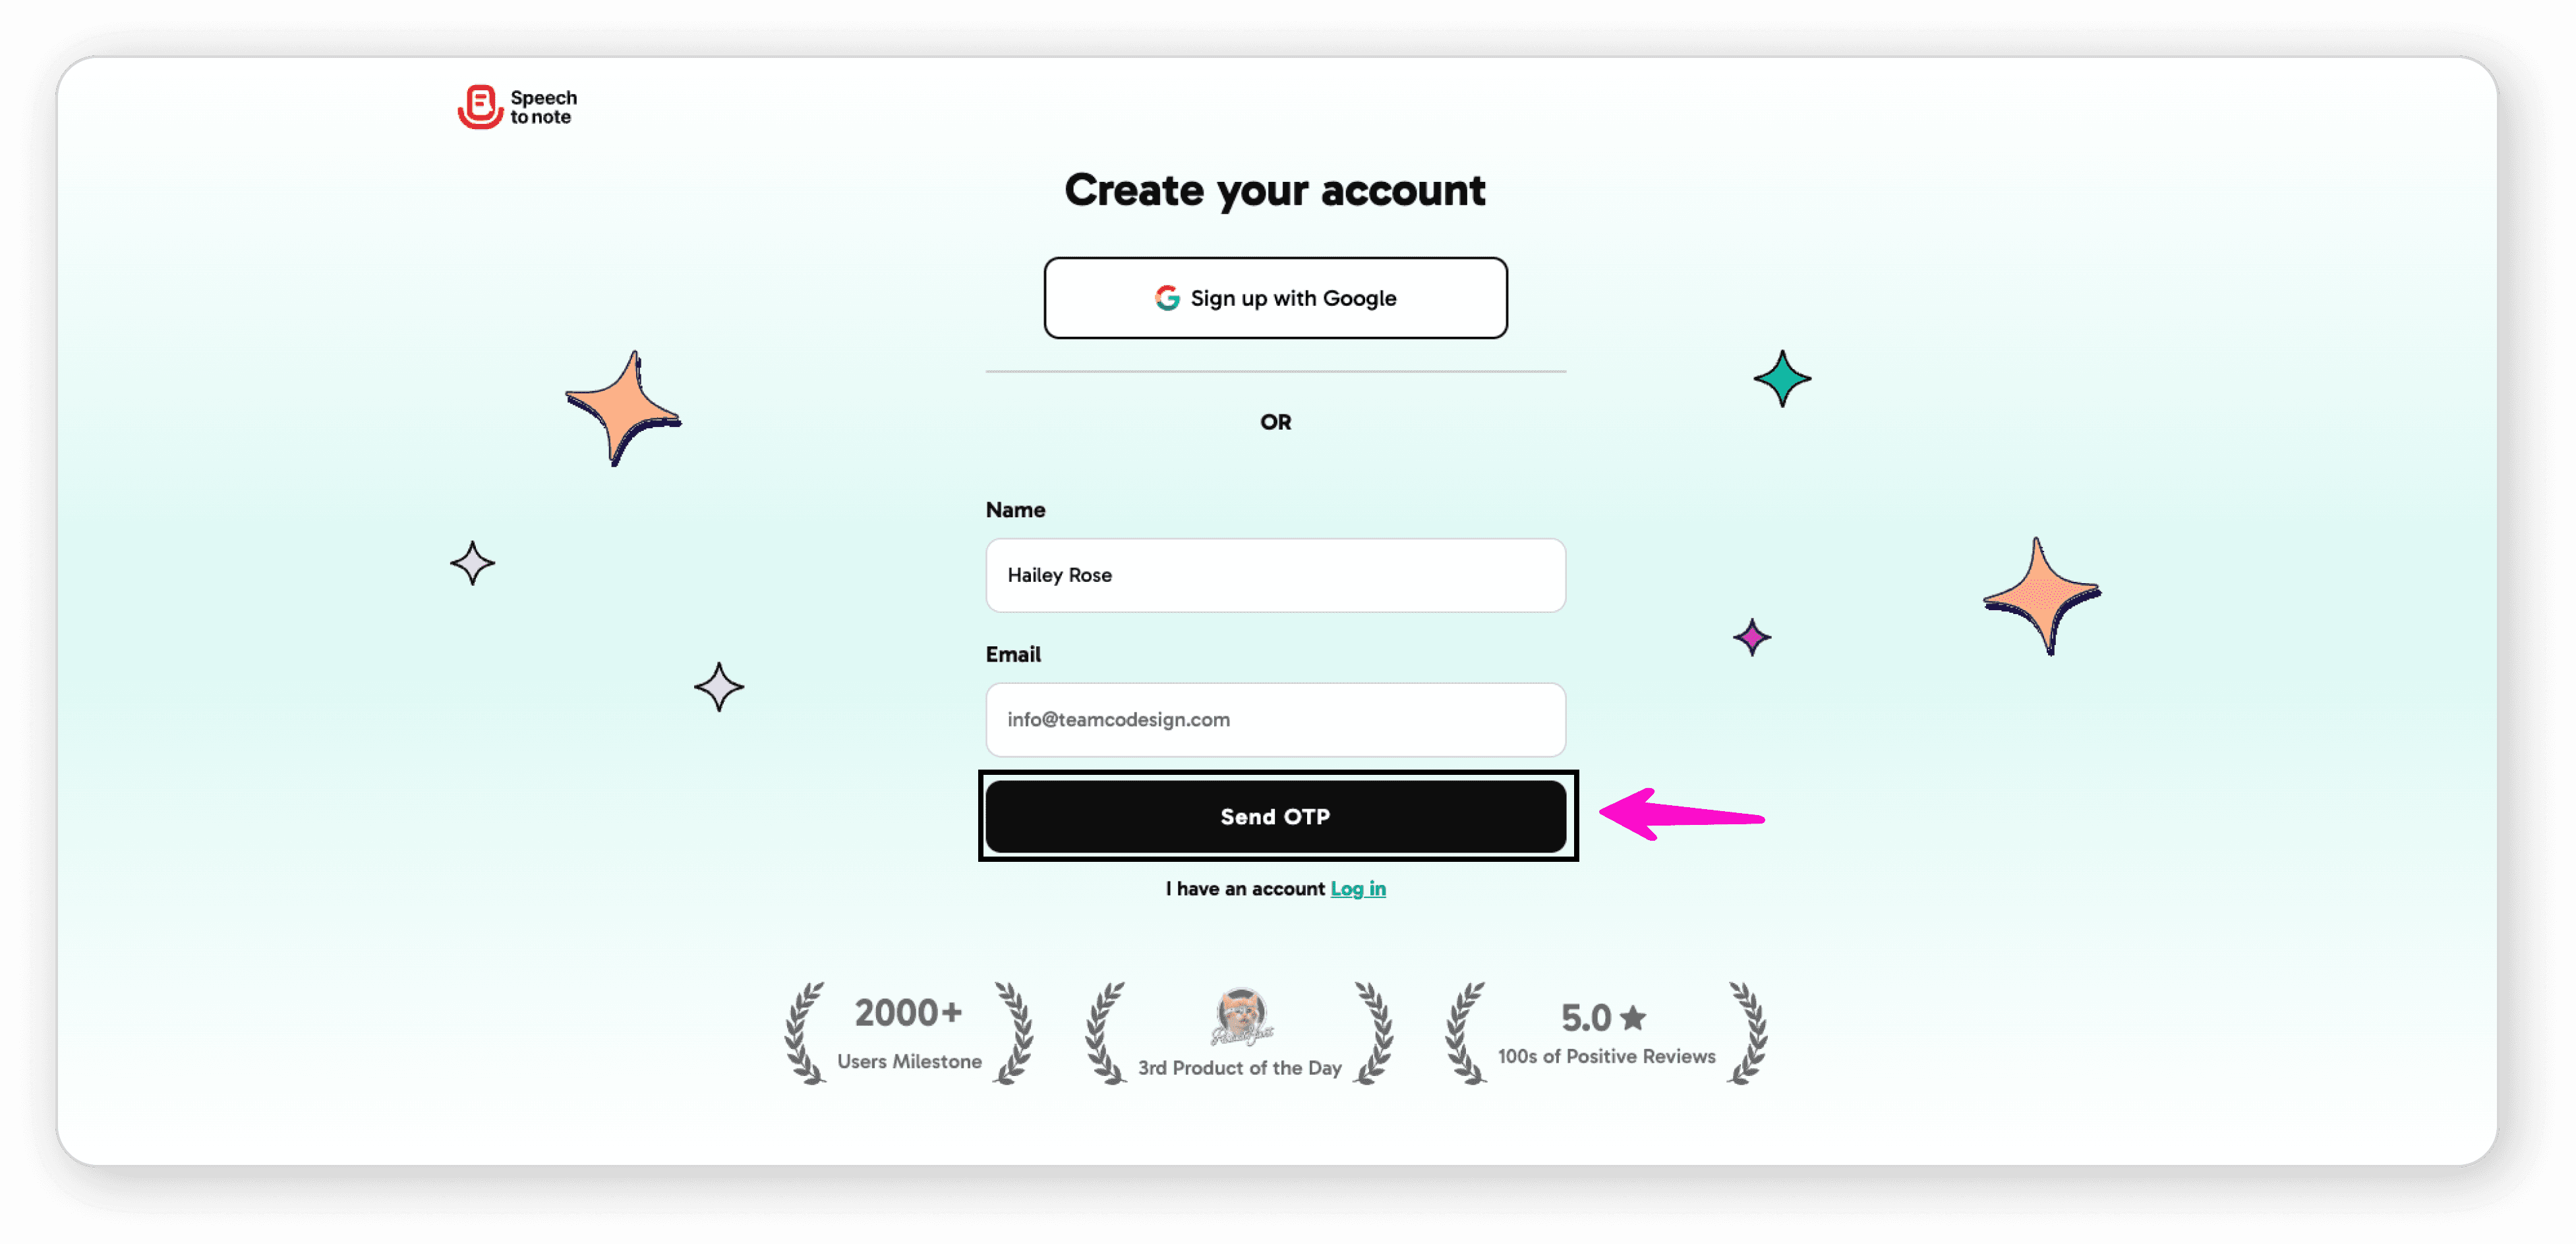
Enter your name and email address
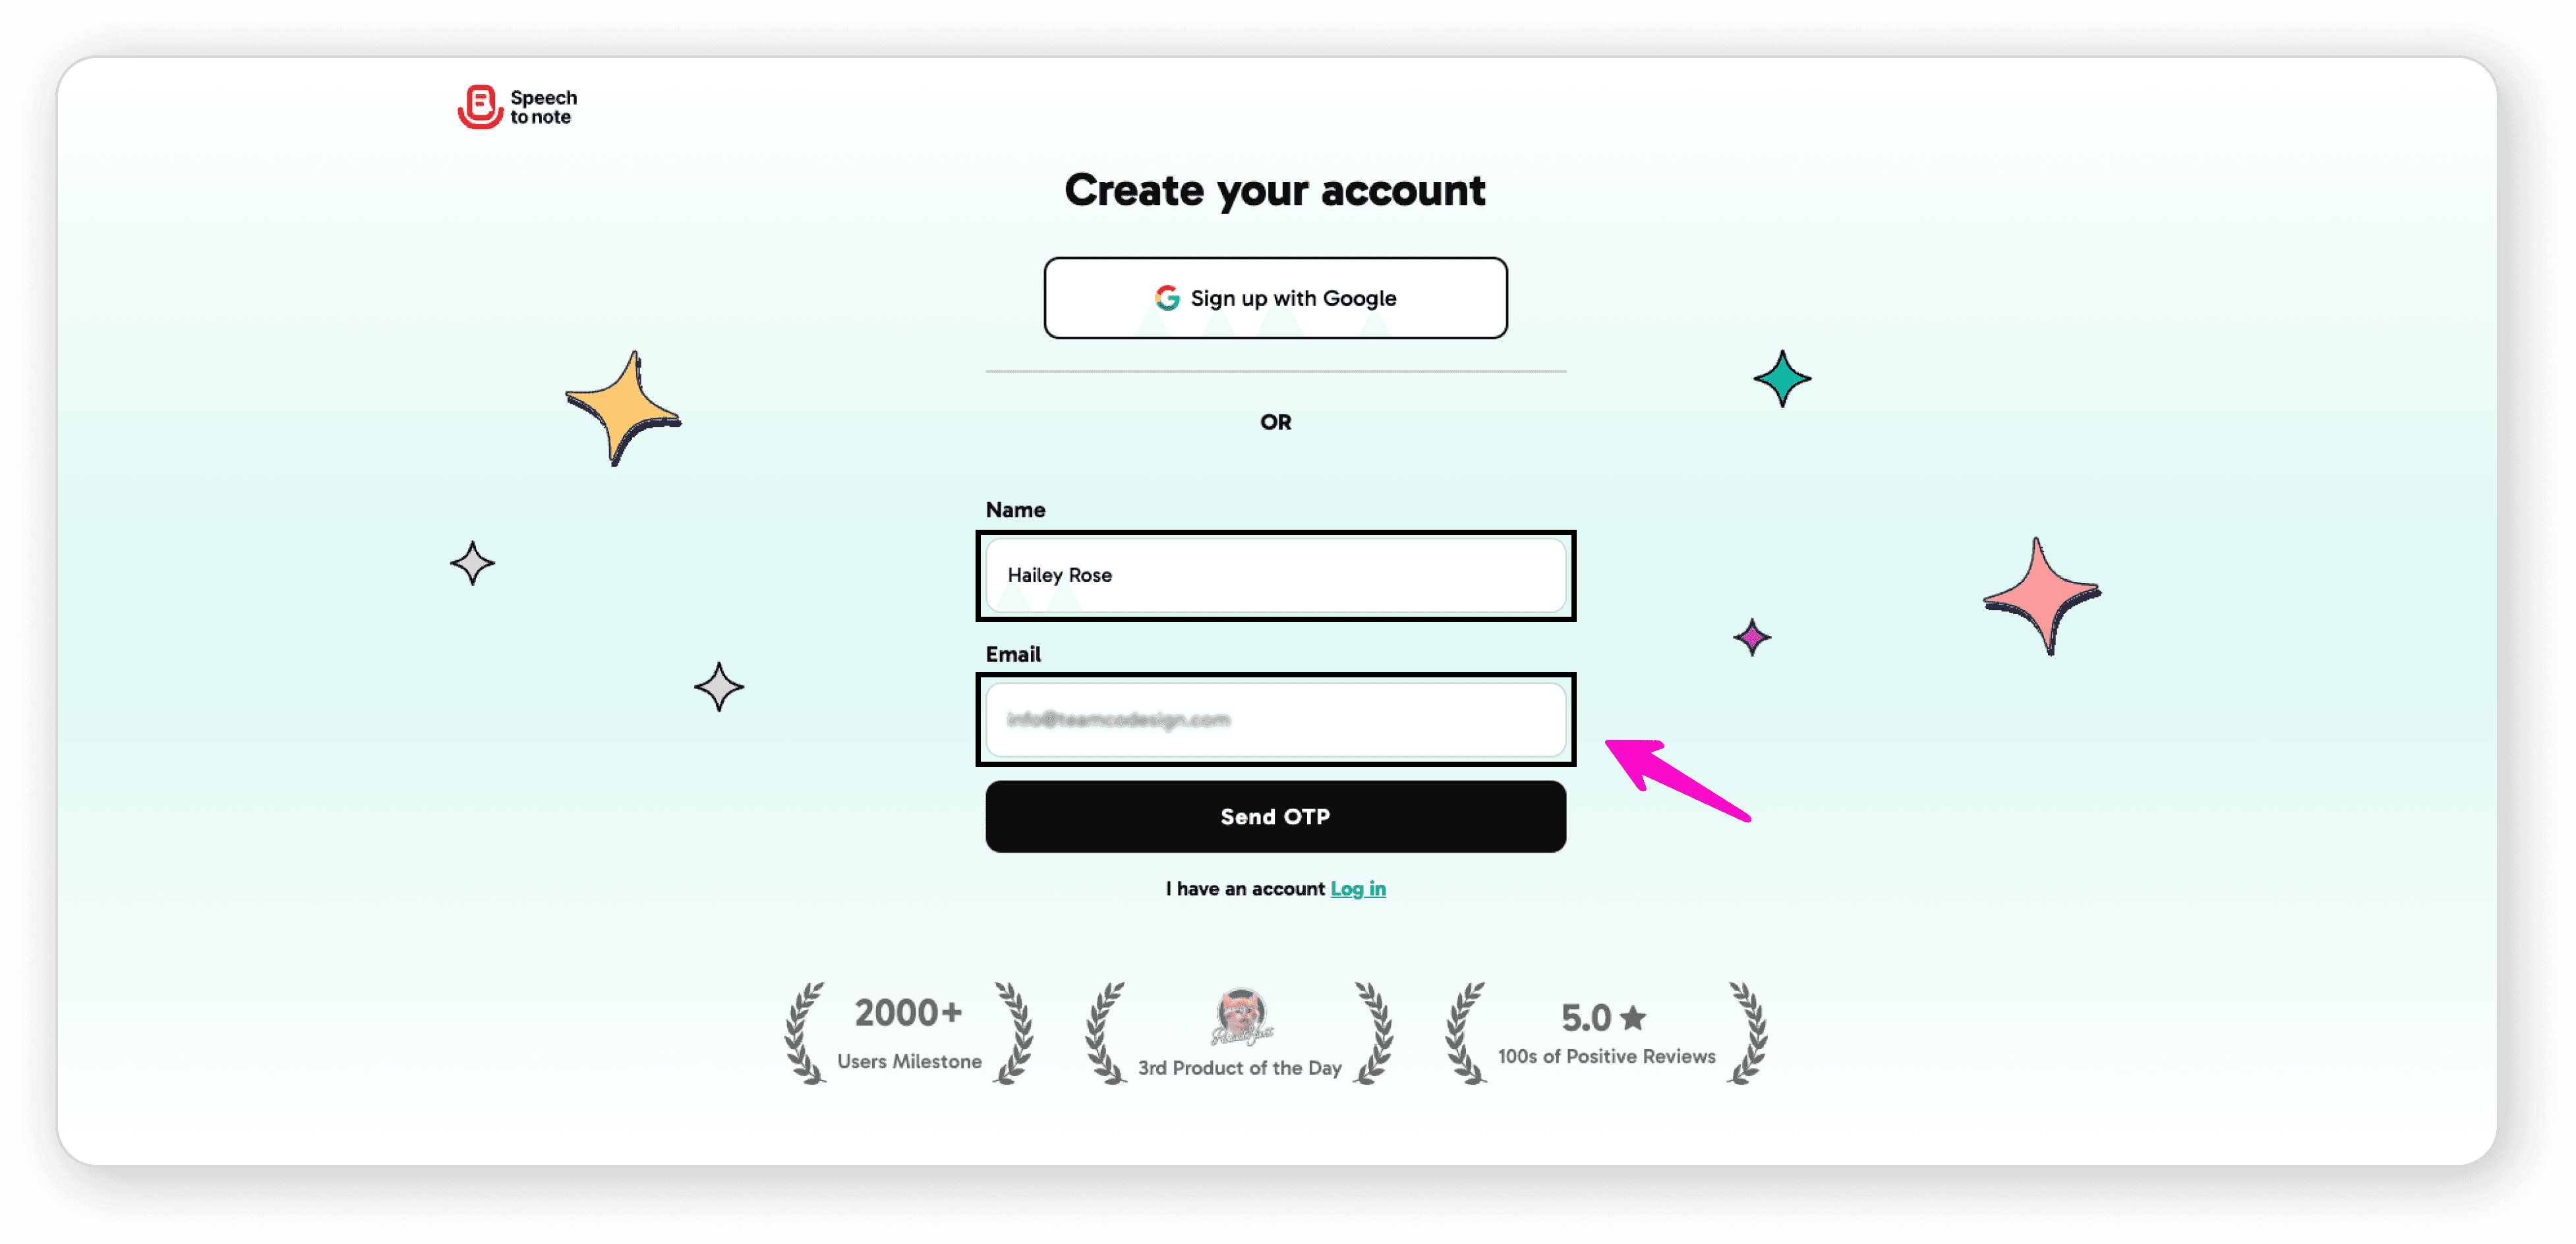
Click "Send OTP"
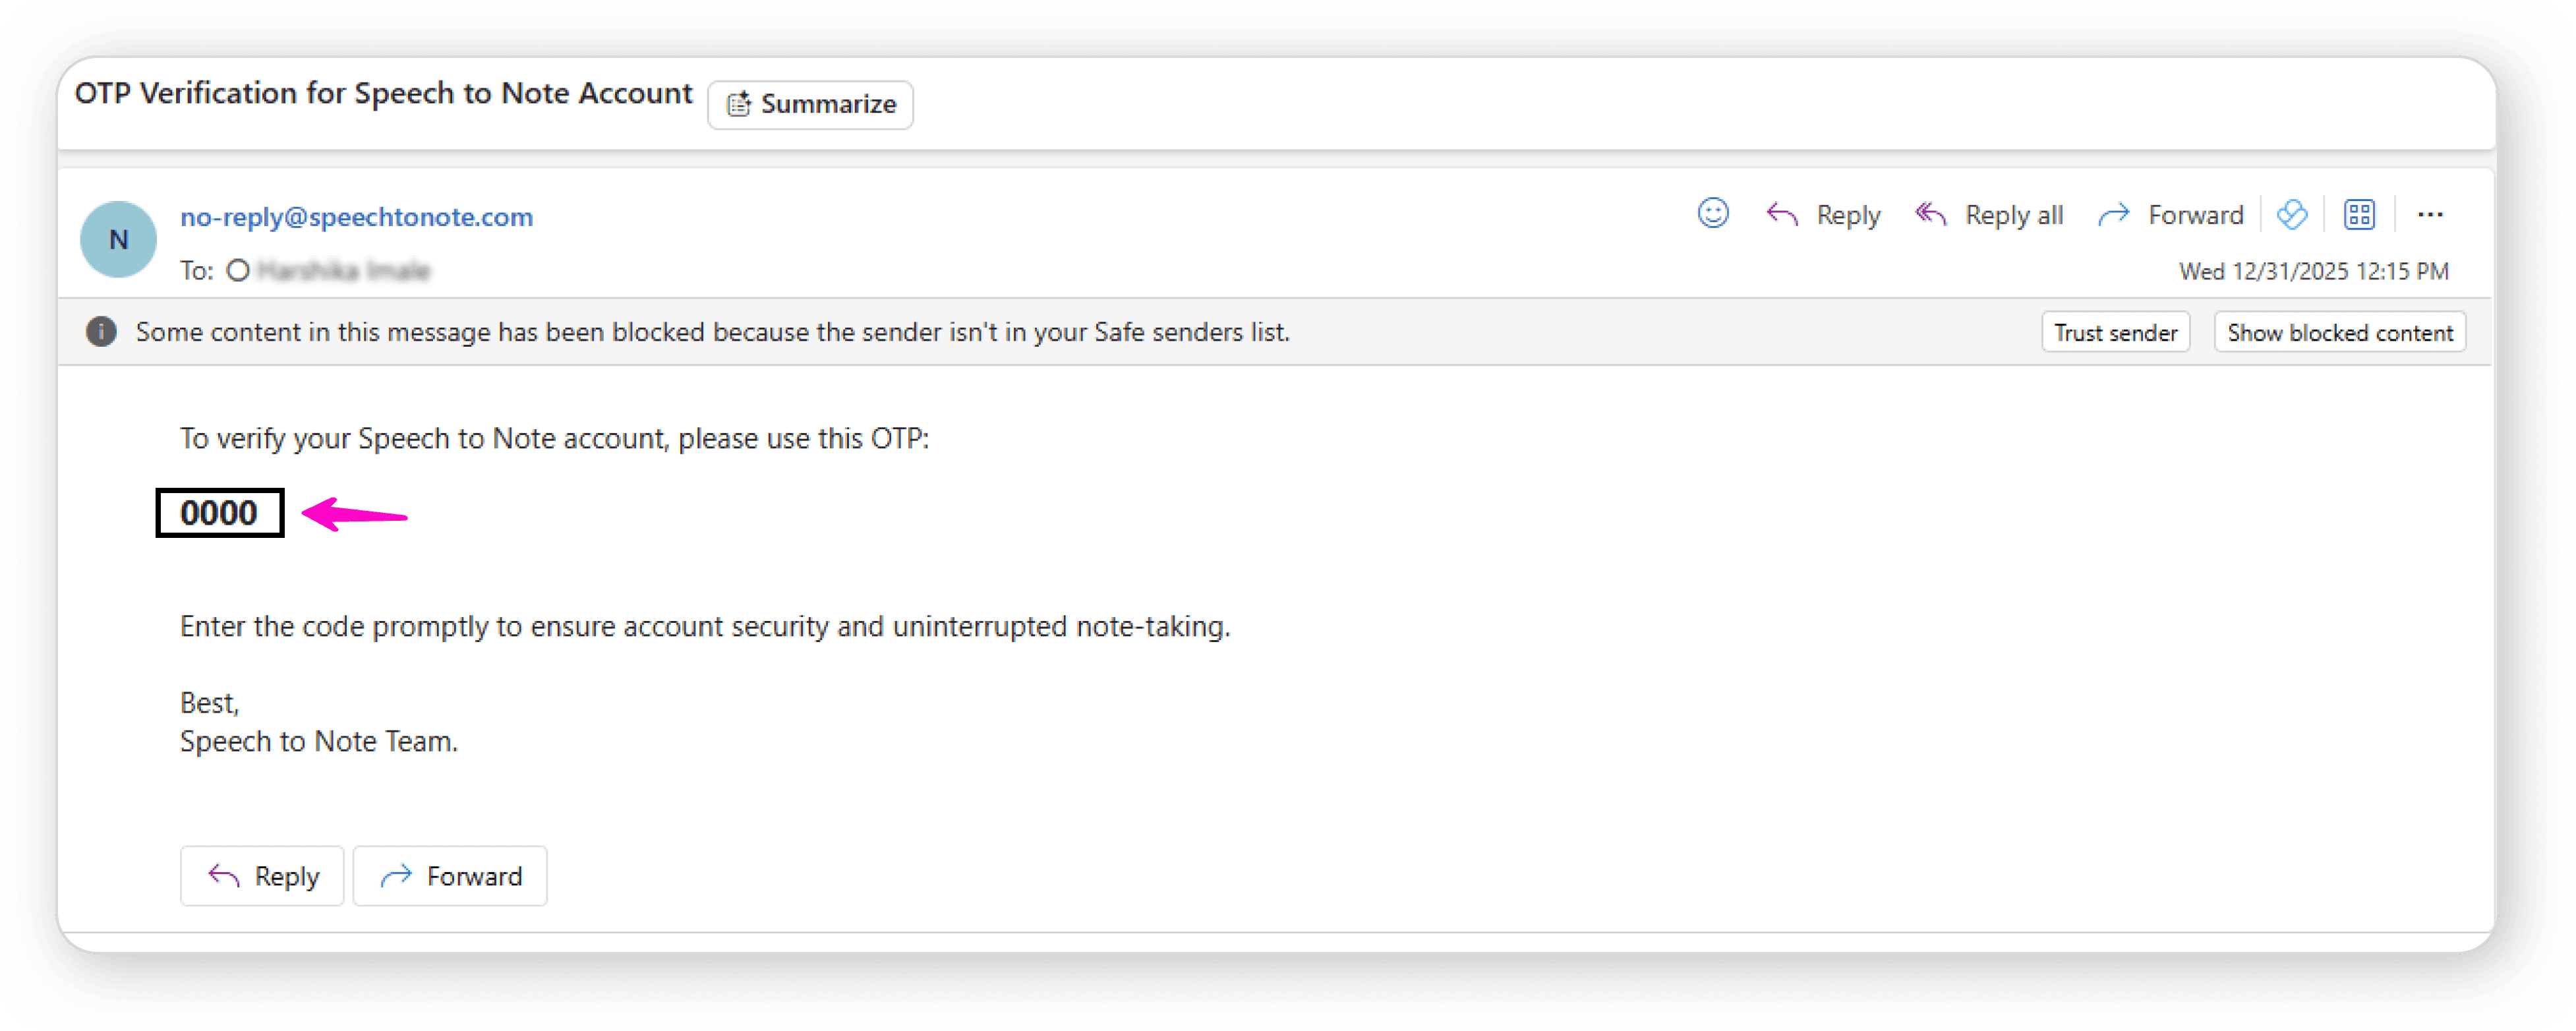
Check your email and copy the verification code
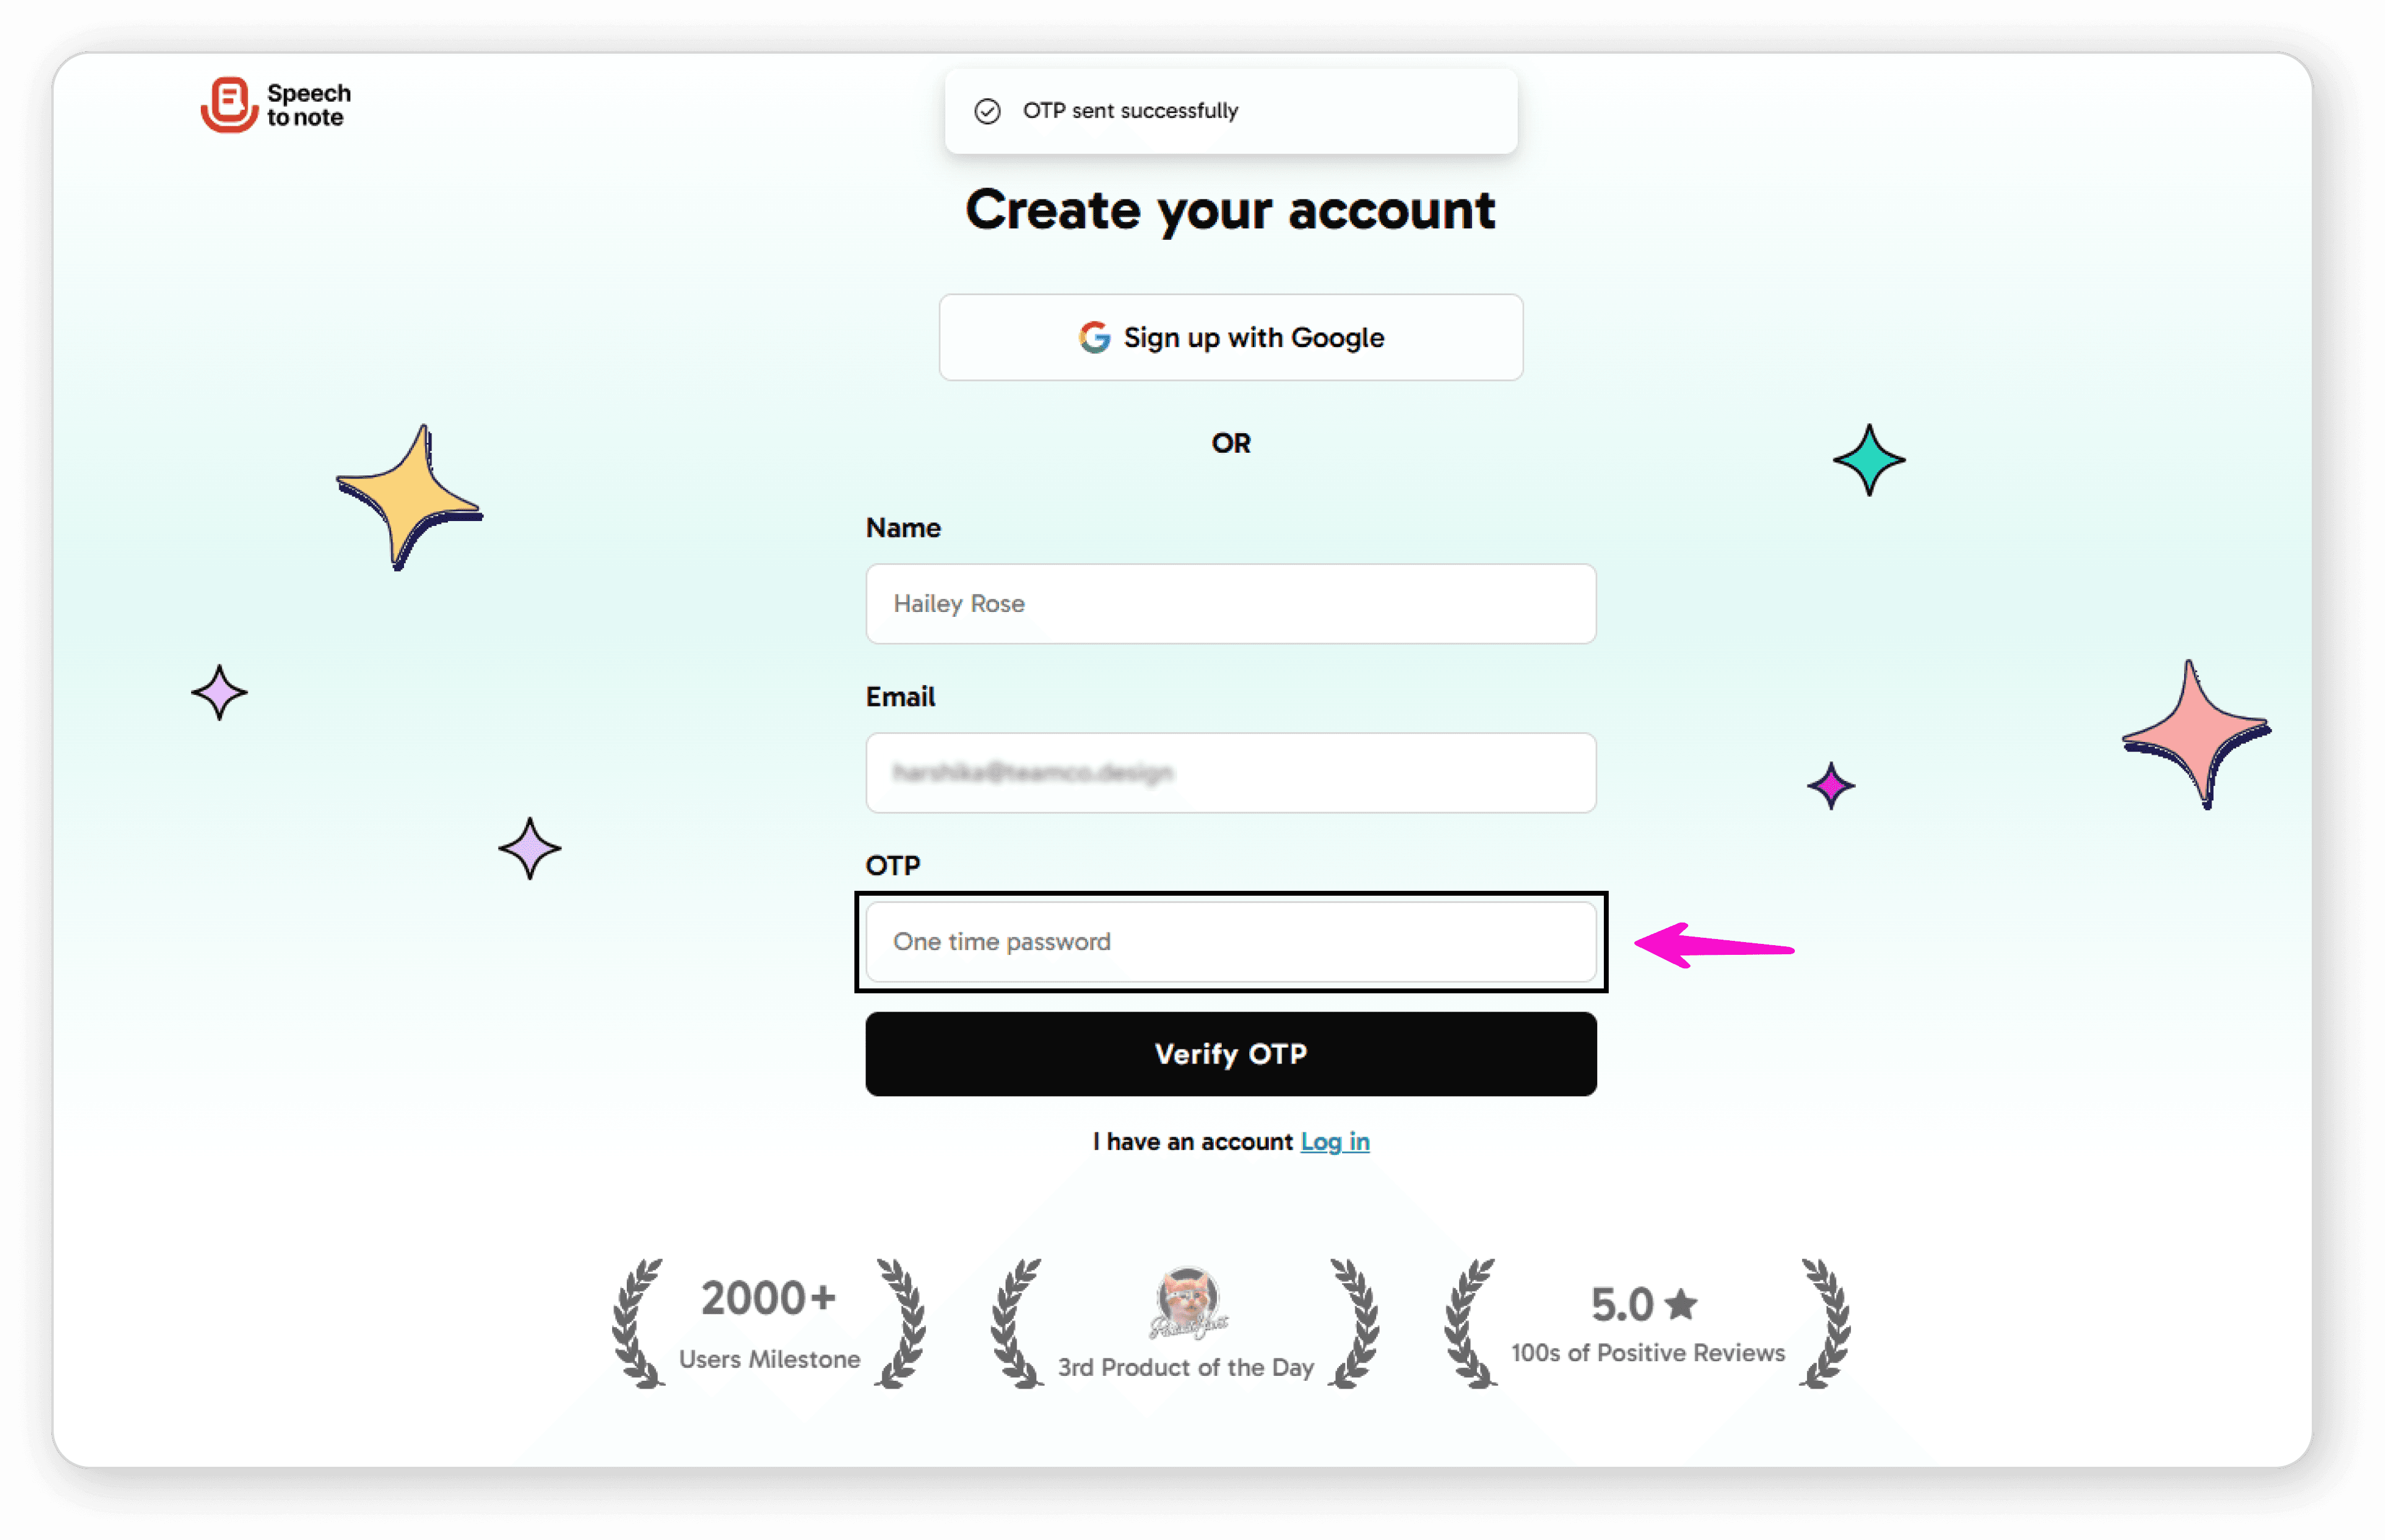
Paste the code into the application
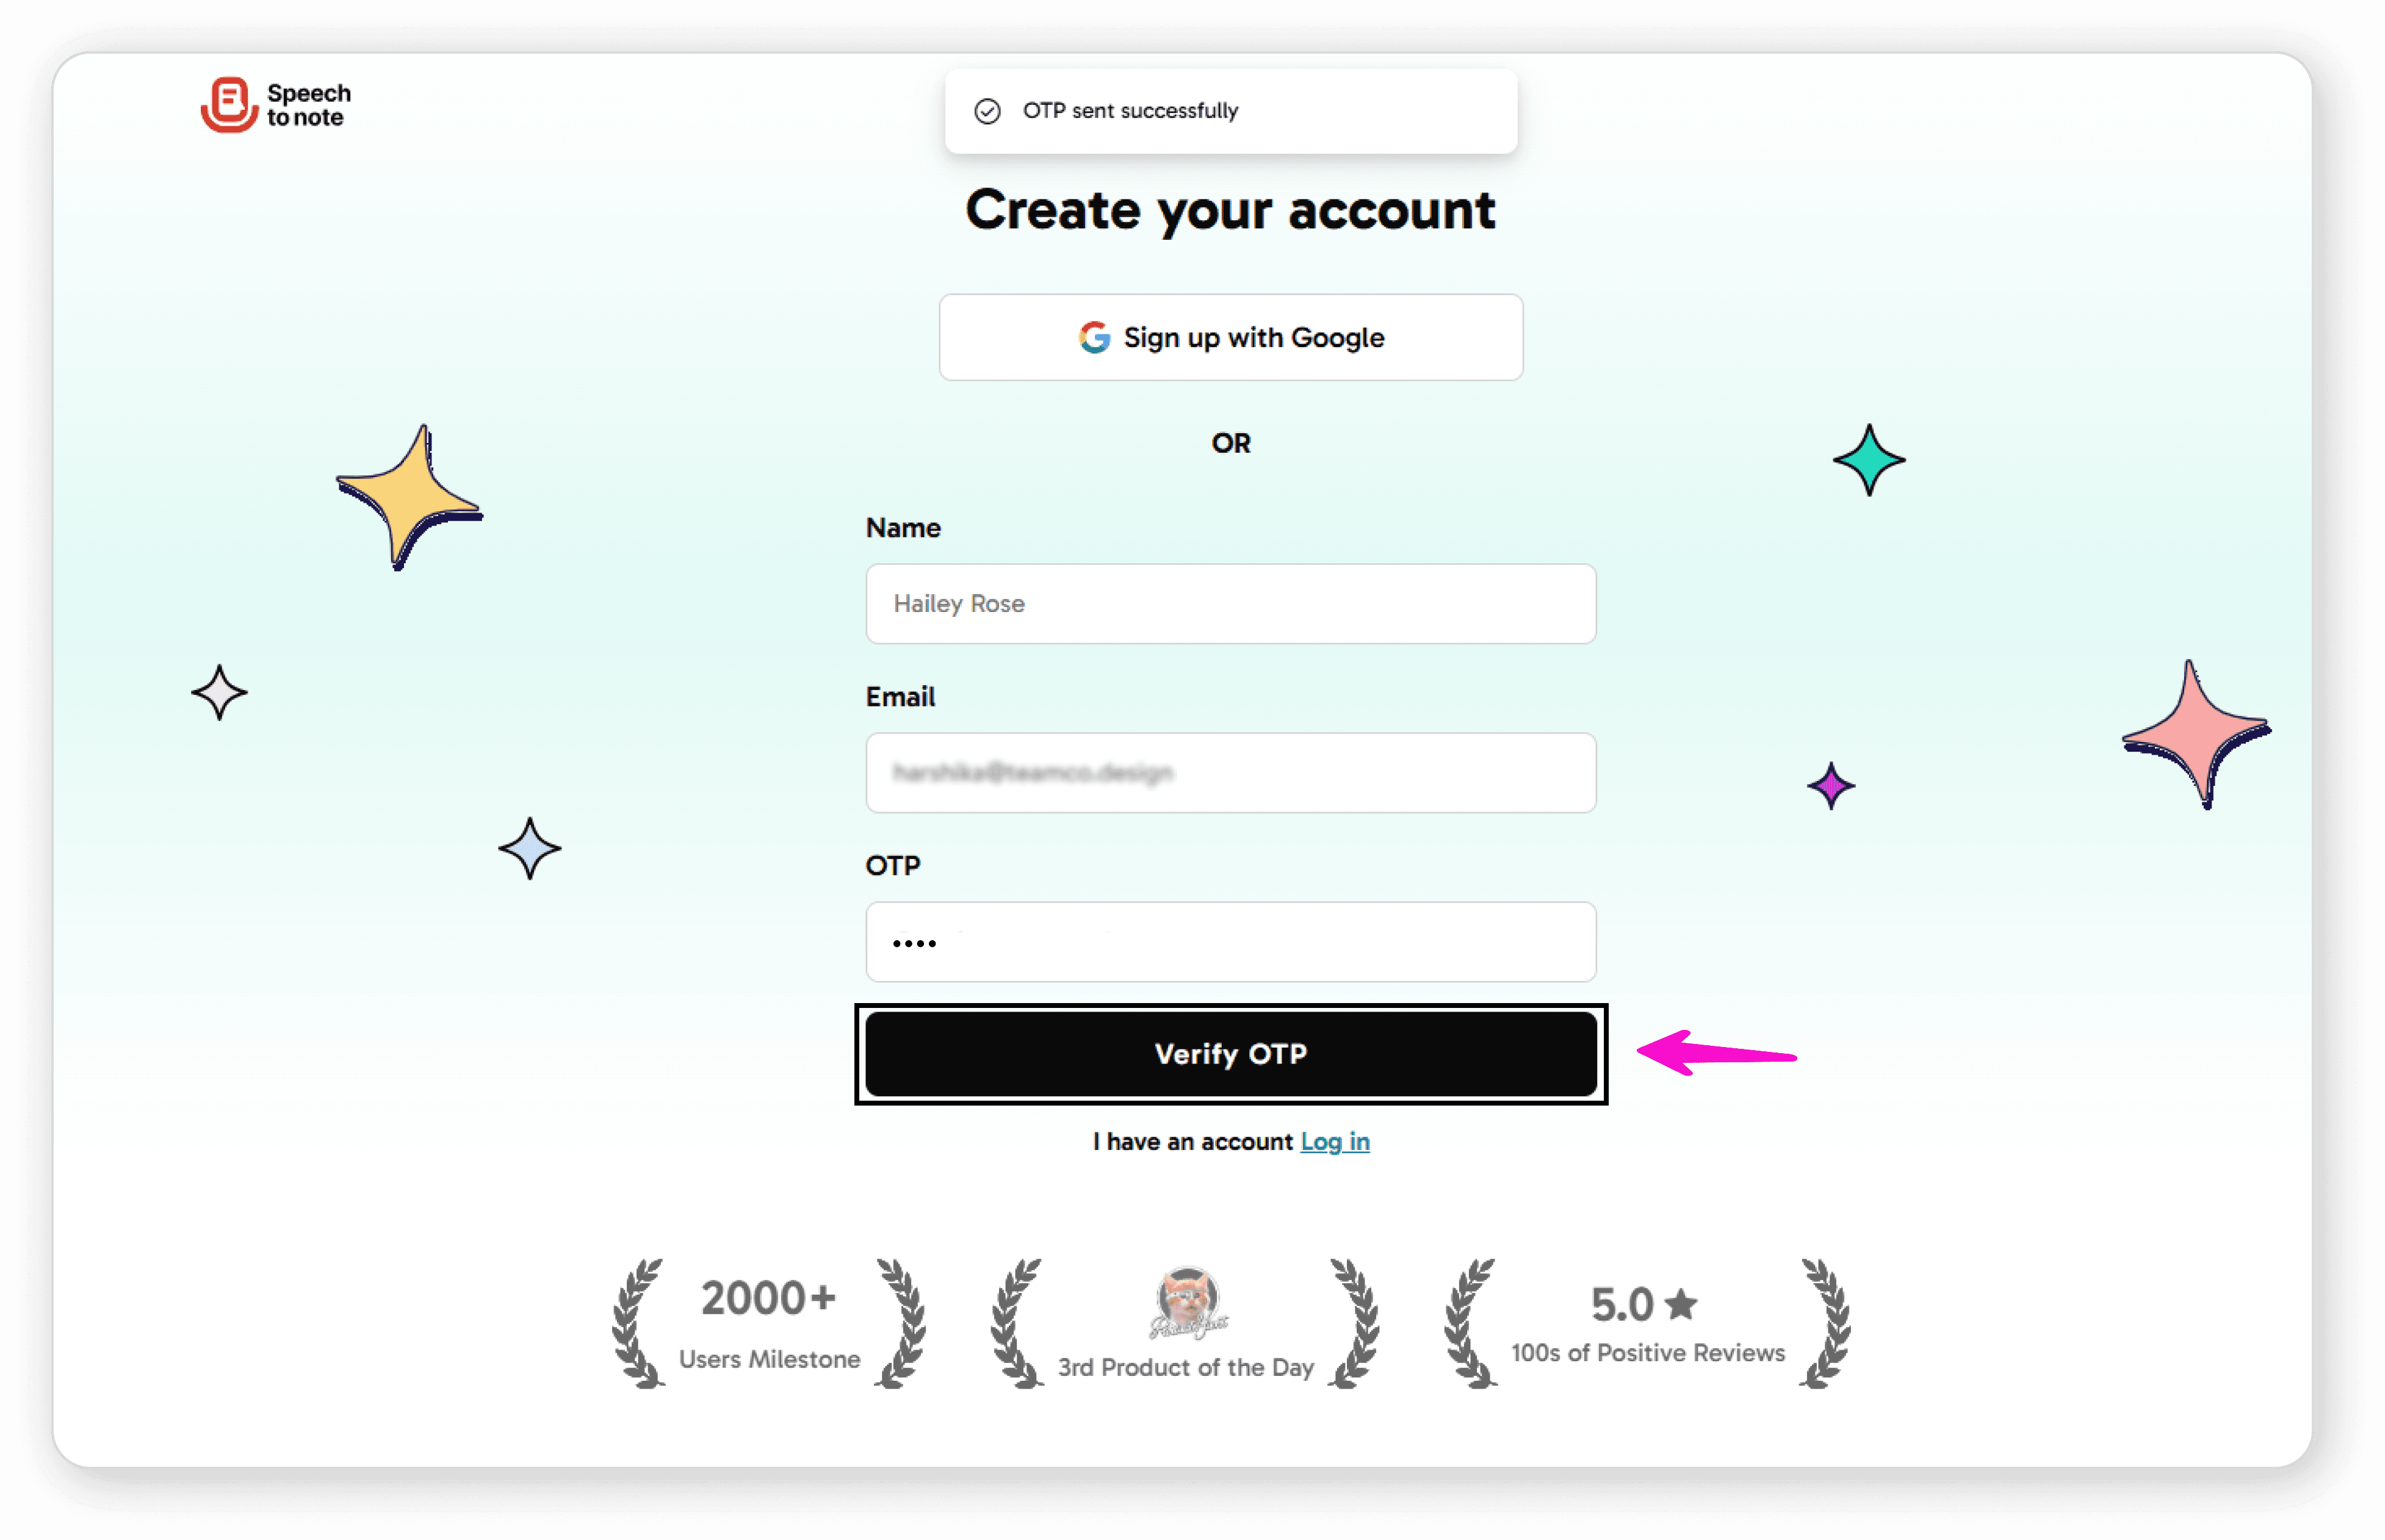
Click "Verify Code"
Enter your password and confirm it

Click "Sign Up" to complete registration
How to Reset Your Forgotten Password
If you've forgotten your password, follow these steps to reset it:
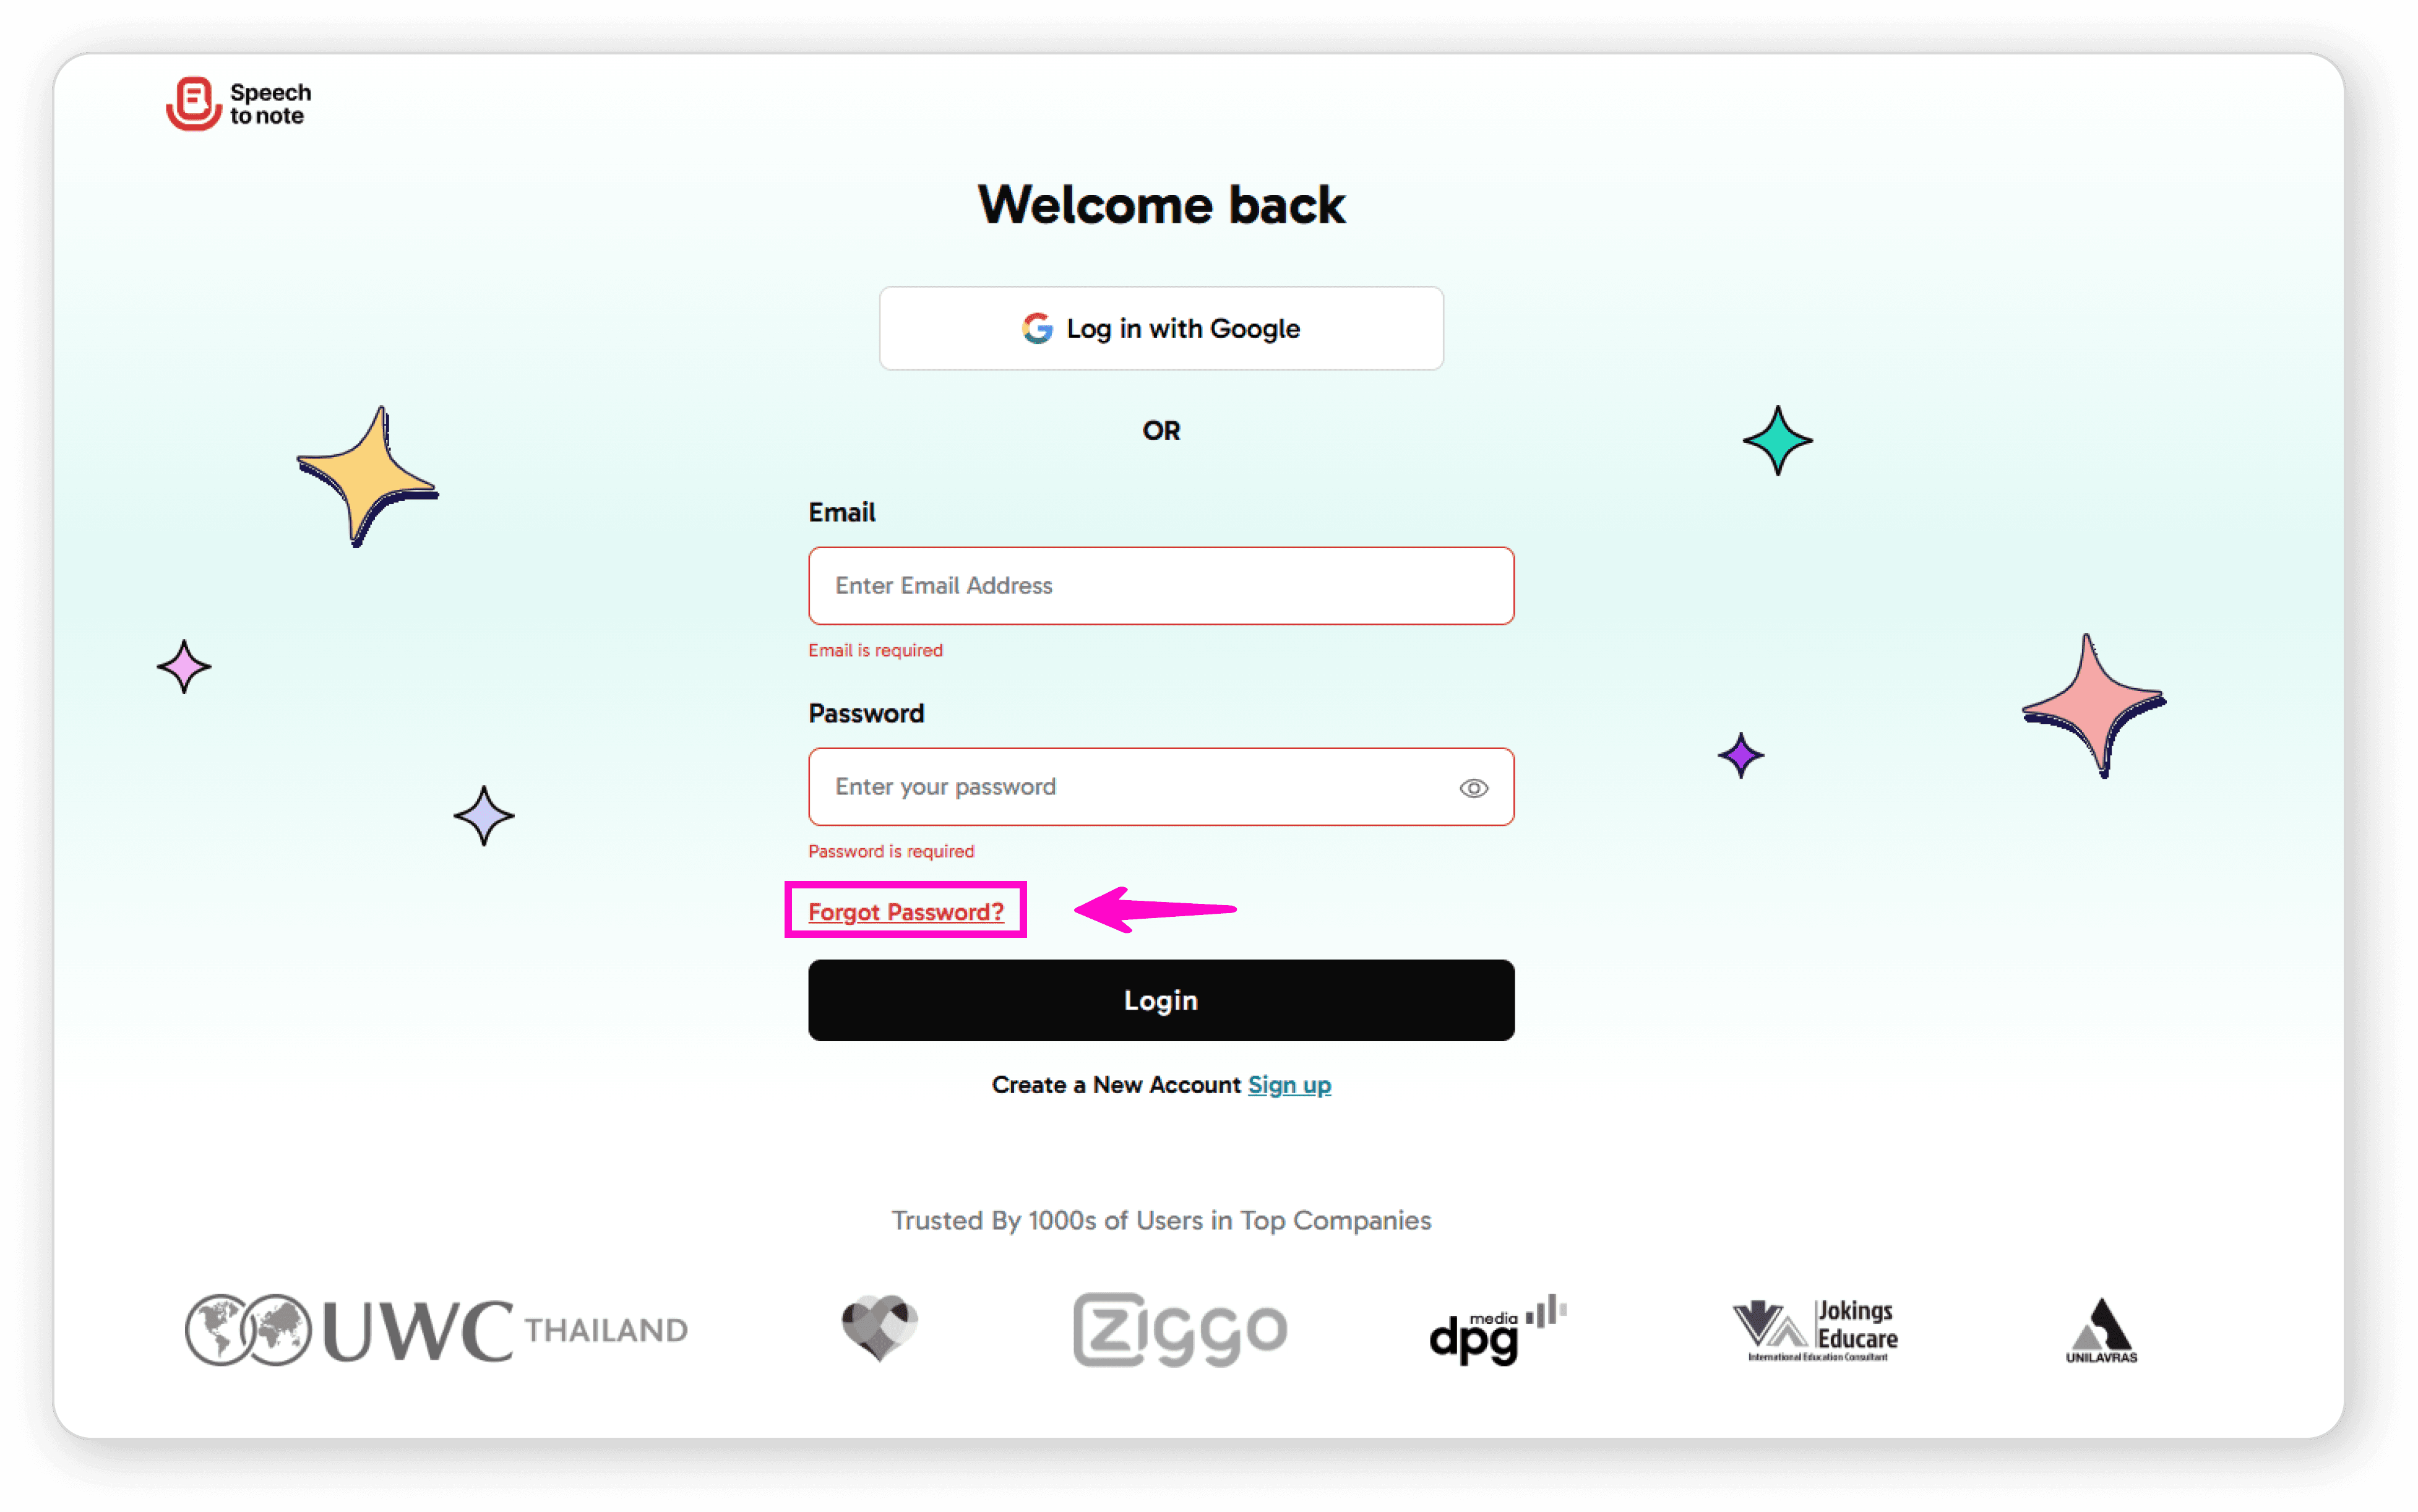
Click on "Forgot Password" on the login screen
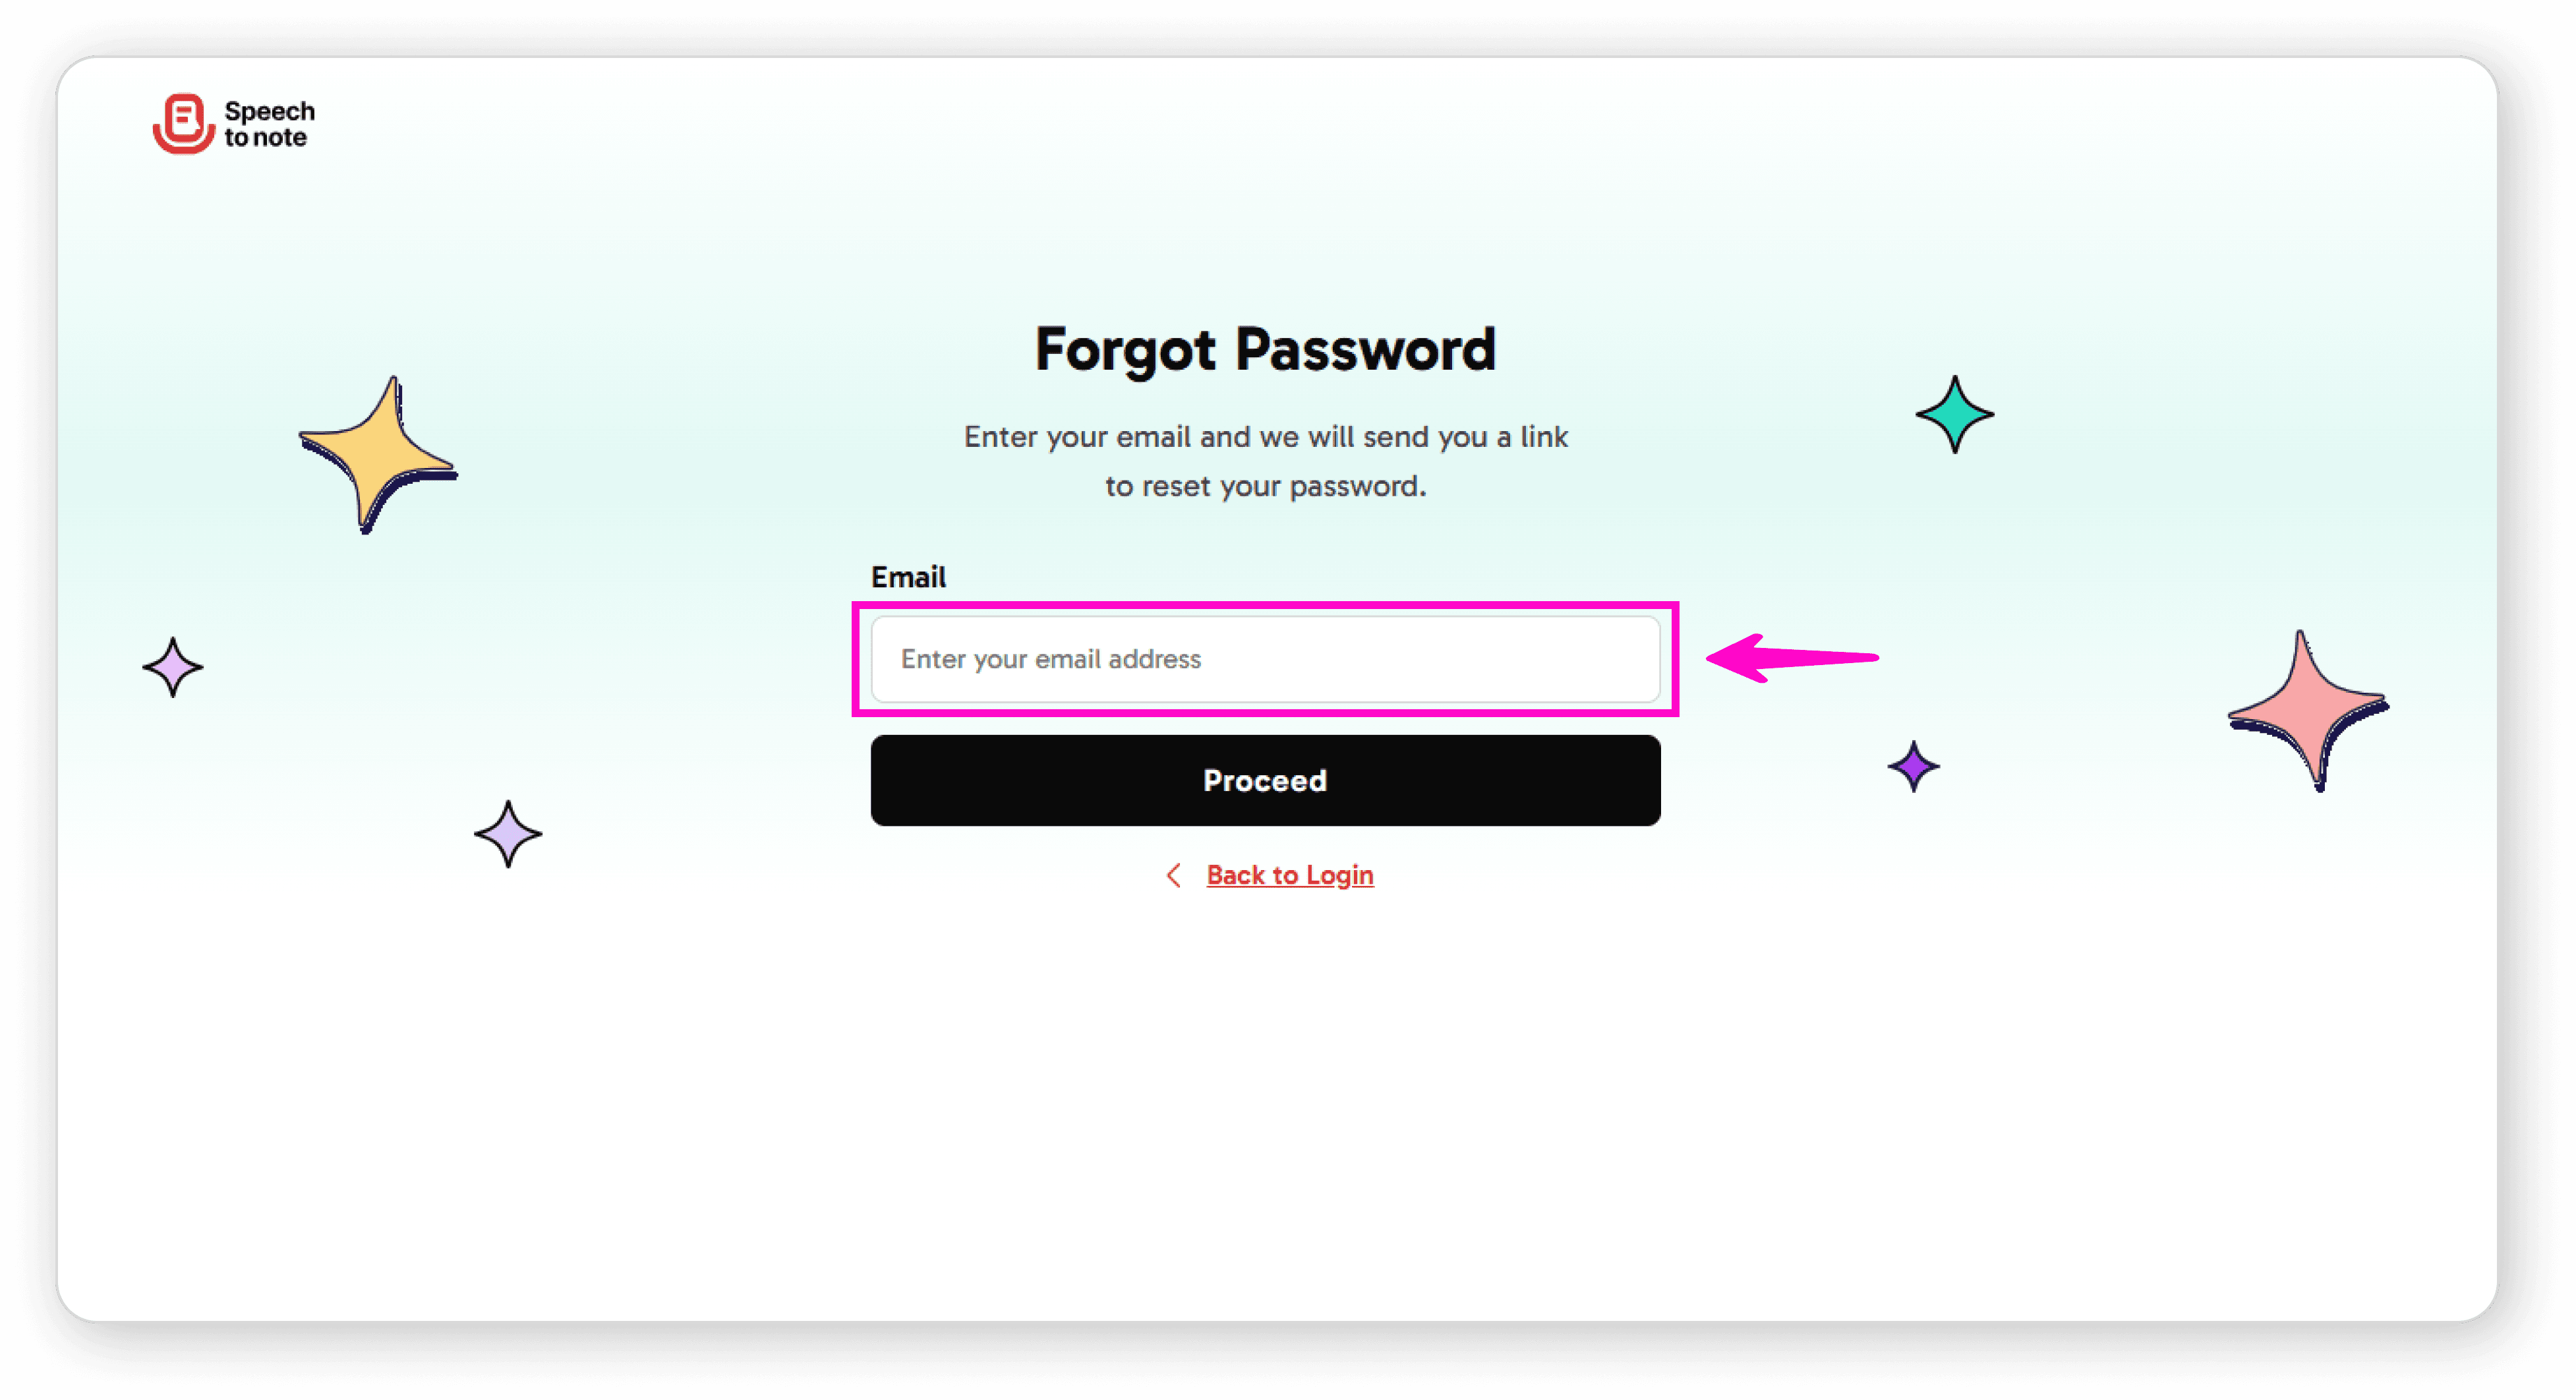
Enter your registered email address
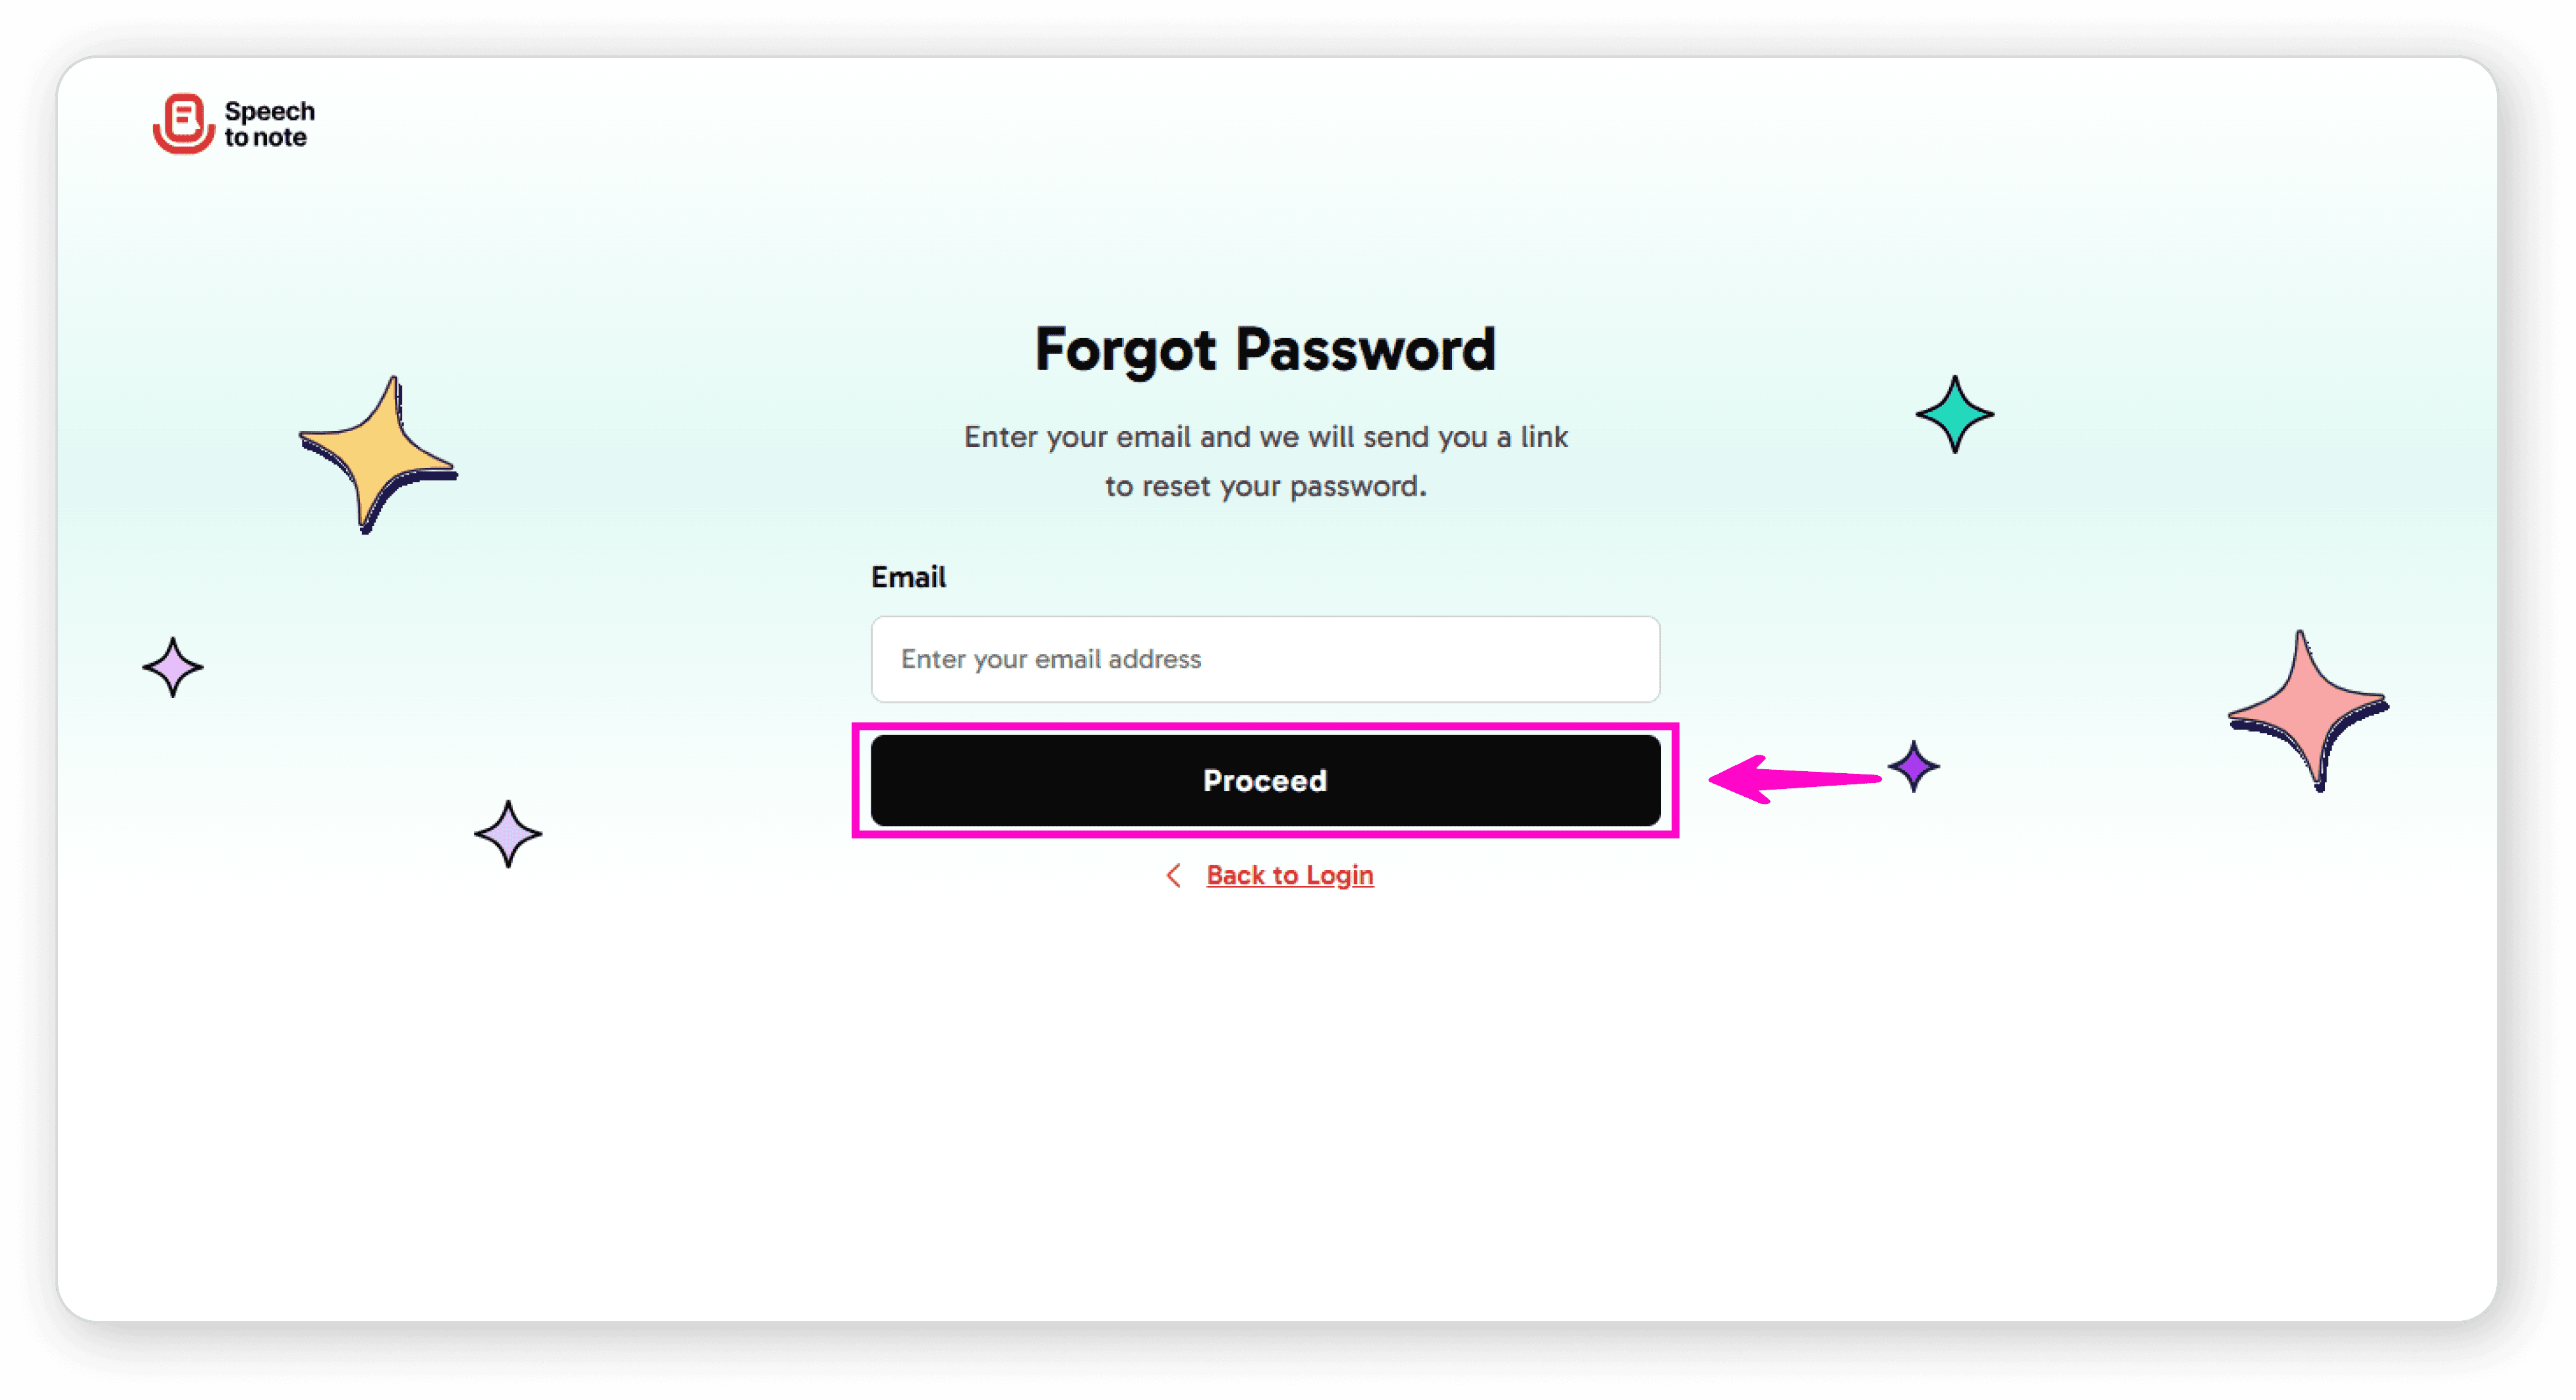
Click "Proceed"
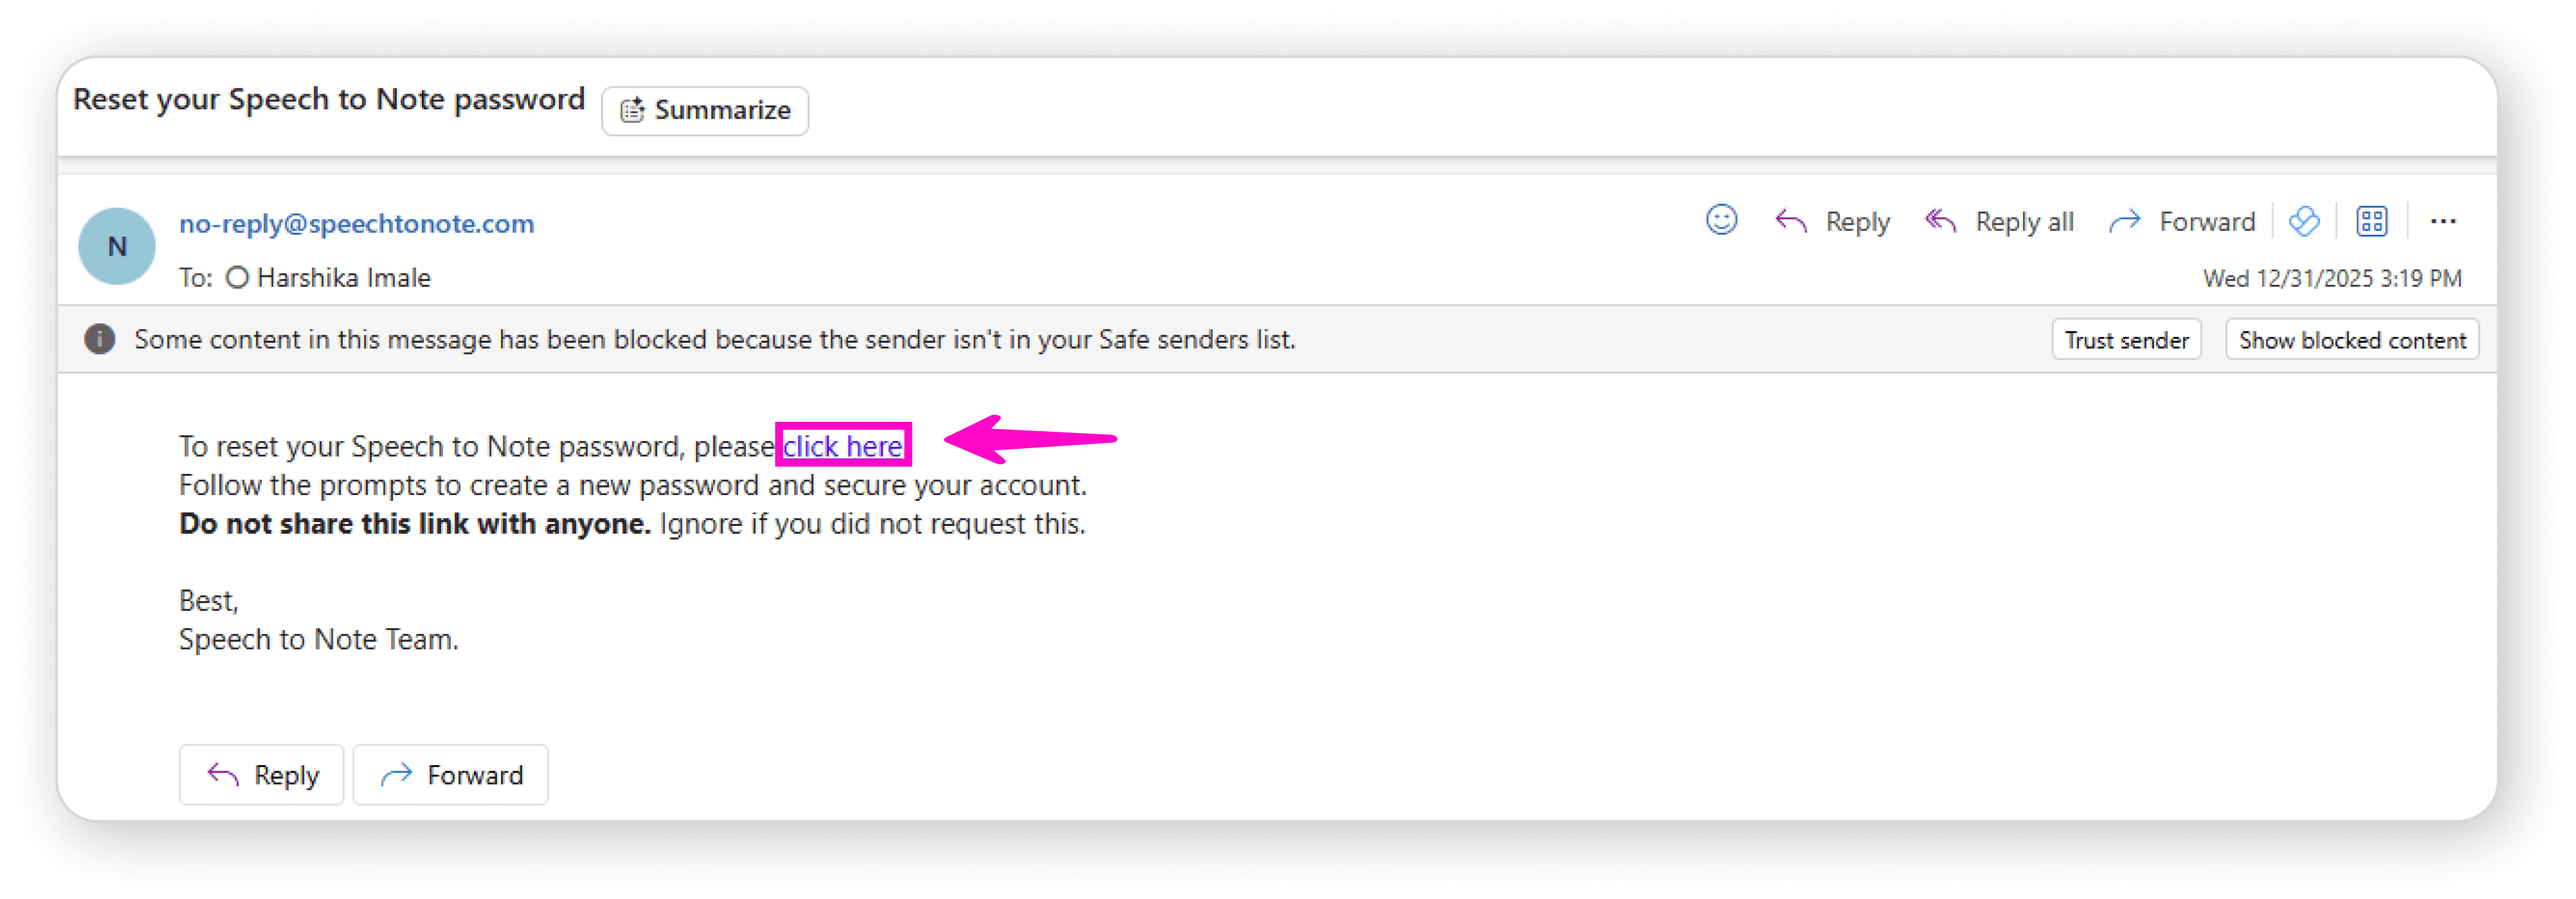
Open your email inbox and look for an email from Speech to Note
Click on the "Click Here" link in the email
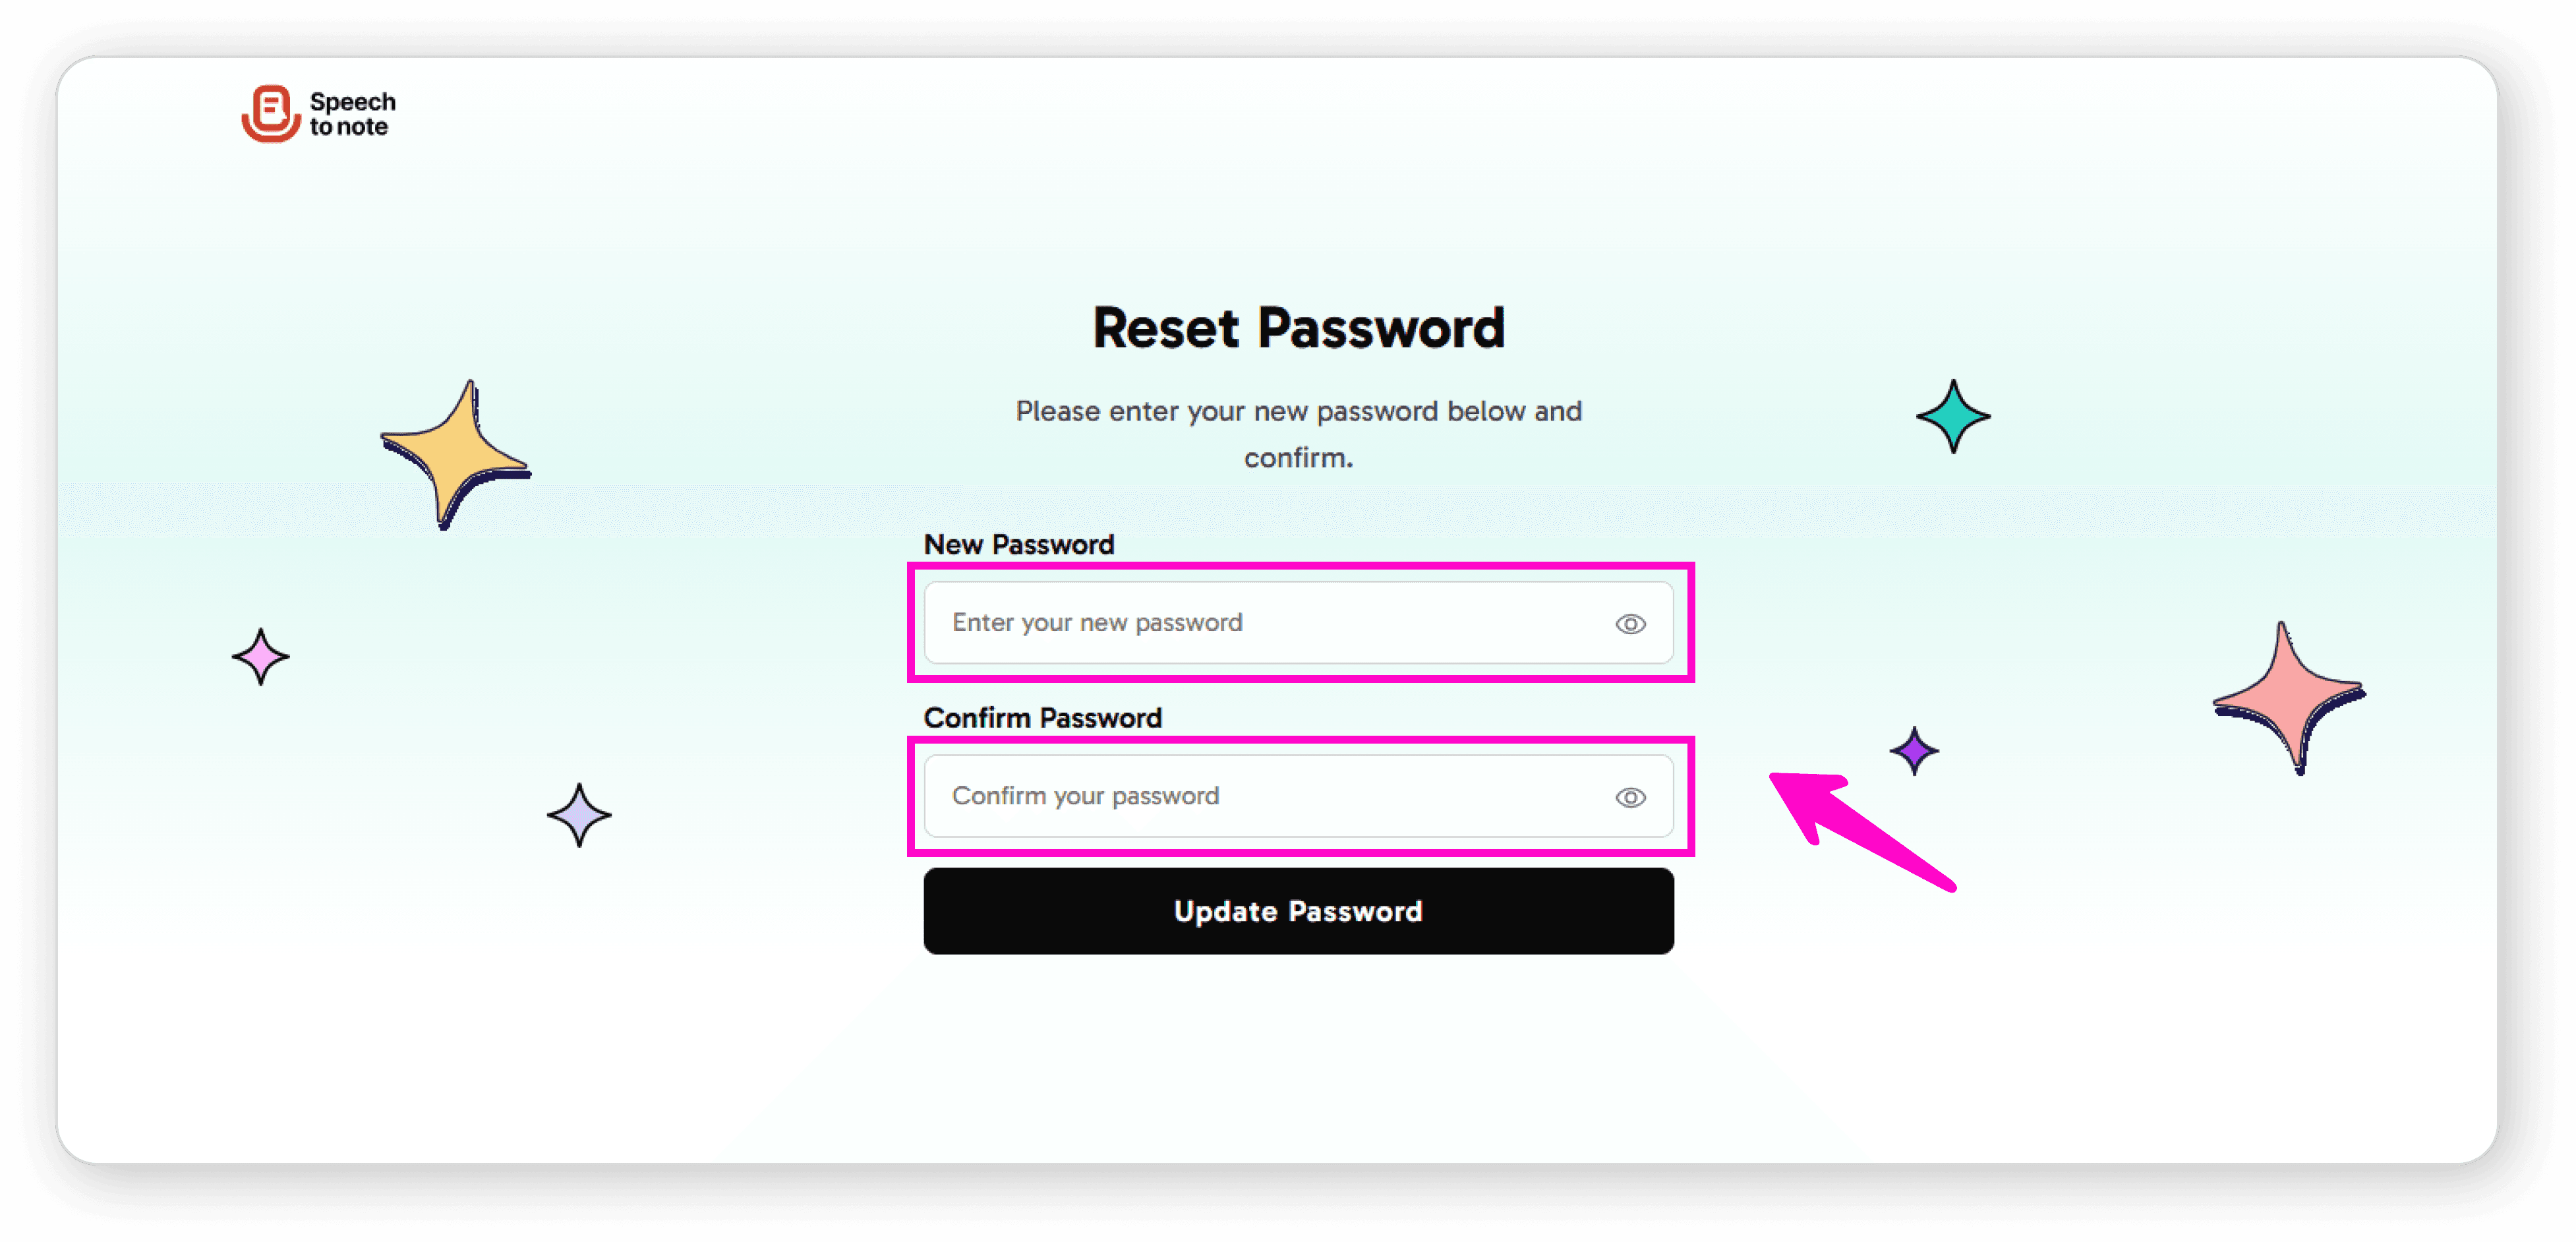
Enter your new password in both the "New Password" and "Confirm Password" fields
Click "Update Password"
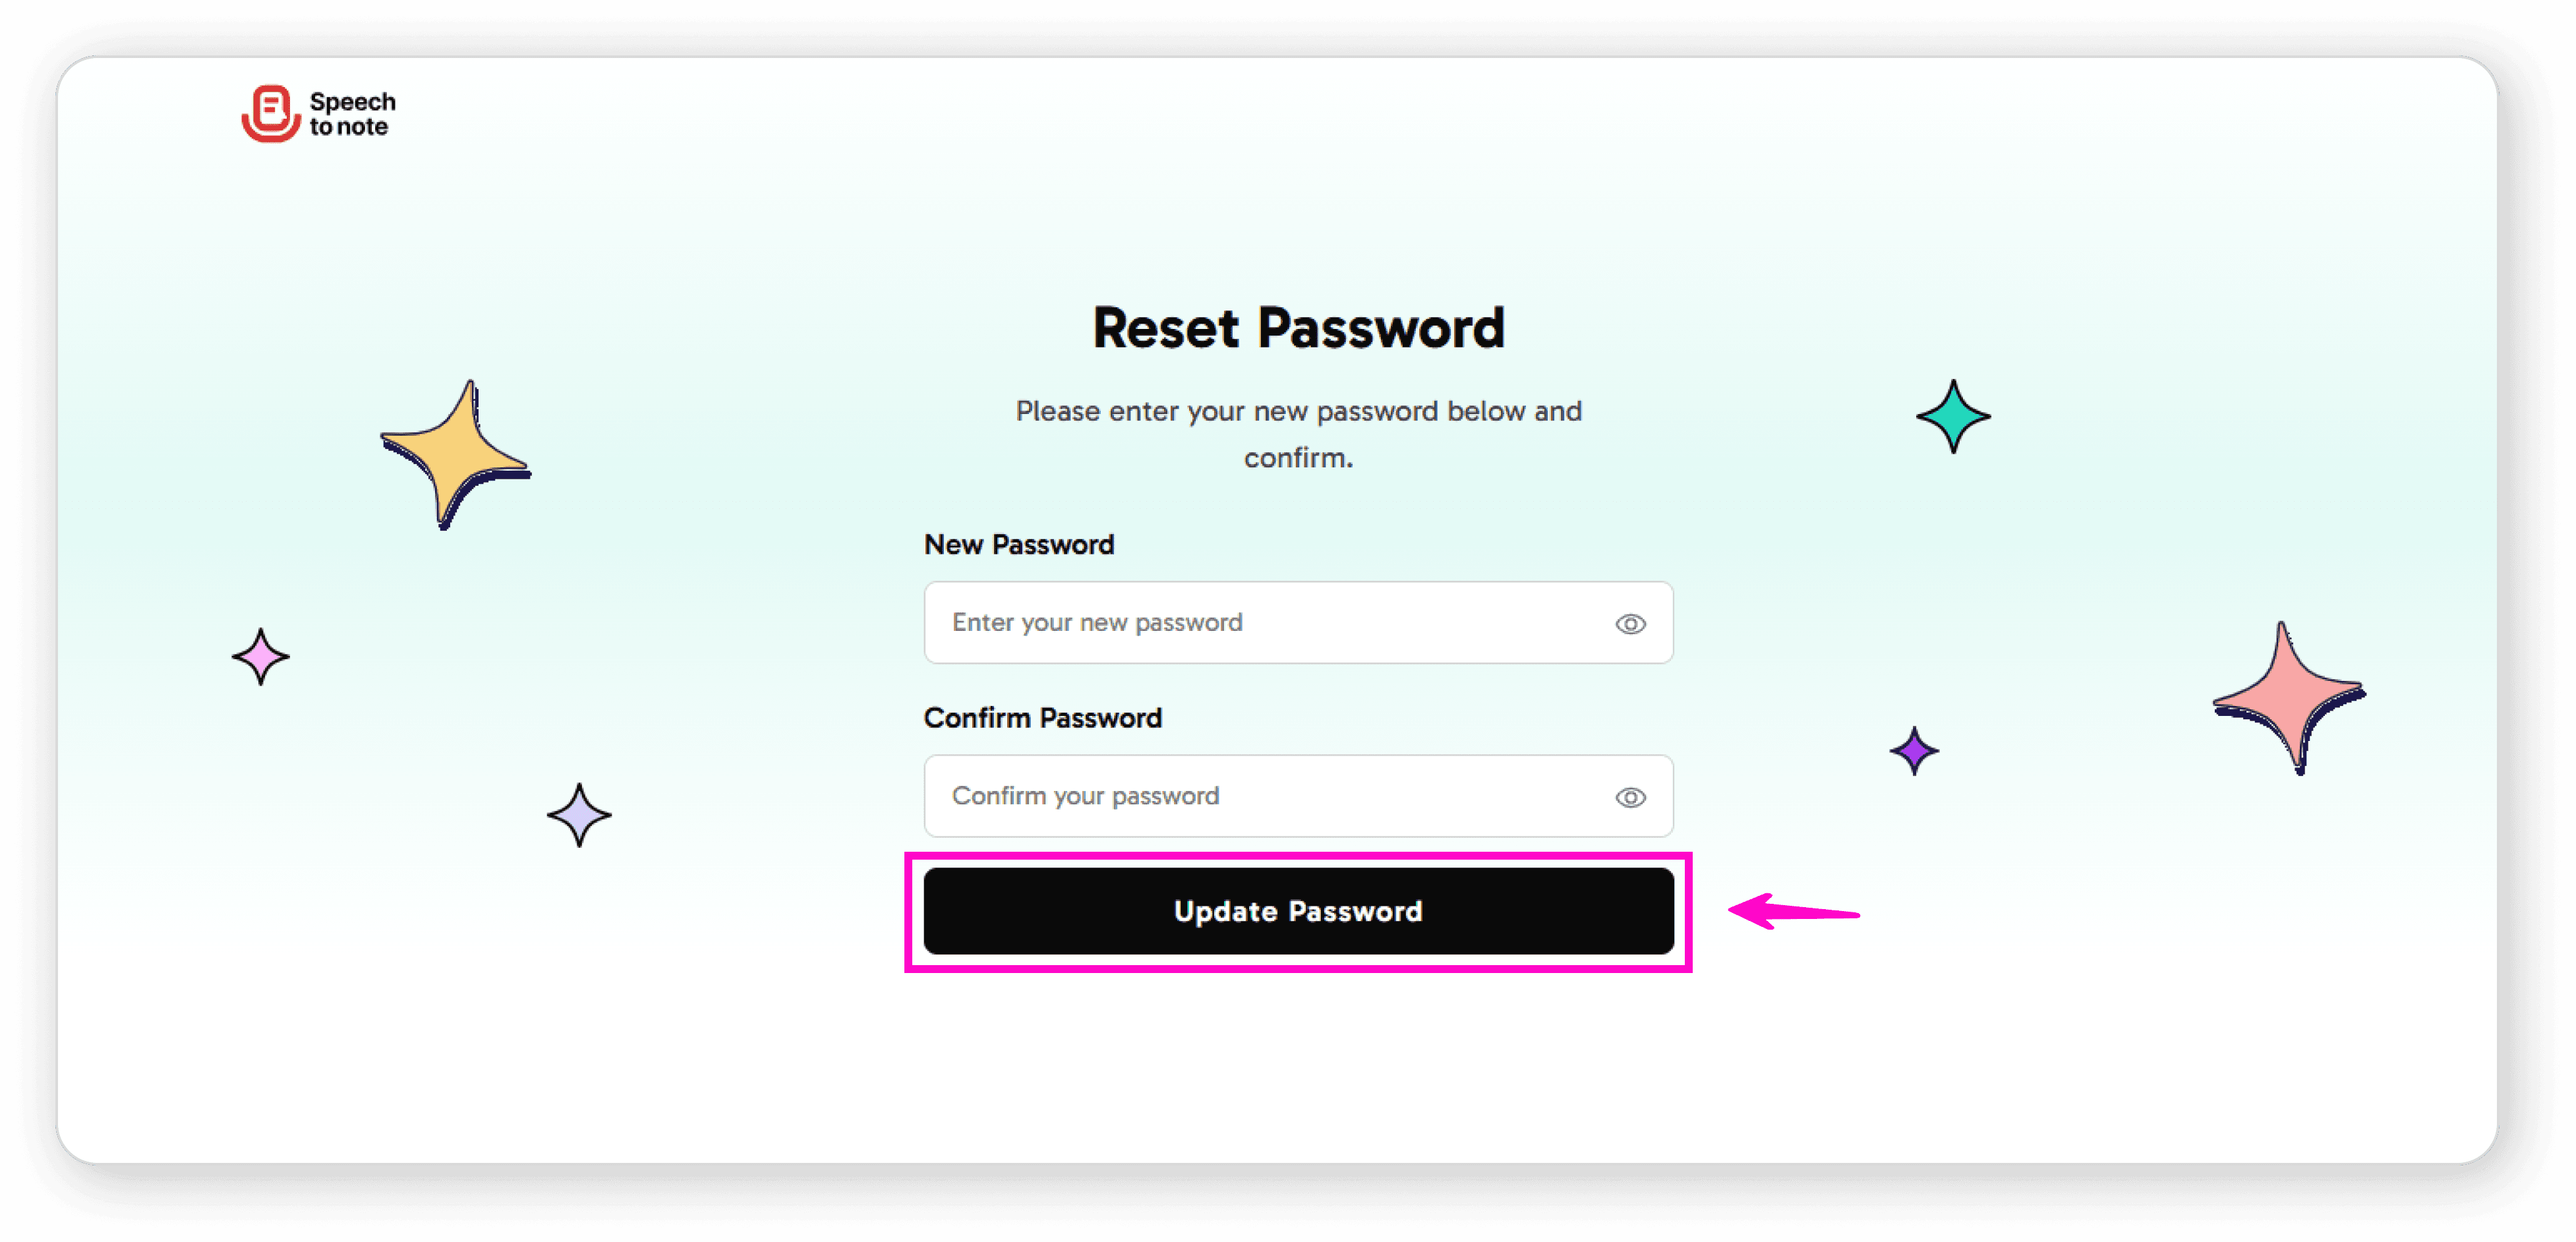
Return to the login page and sign in with your new password
The application will open automatically
Note: If you don't see the email, please check your spam or junk folder.
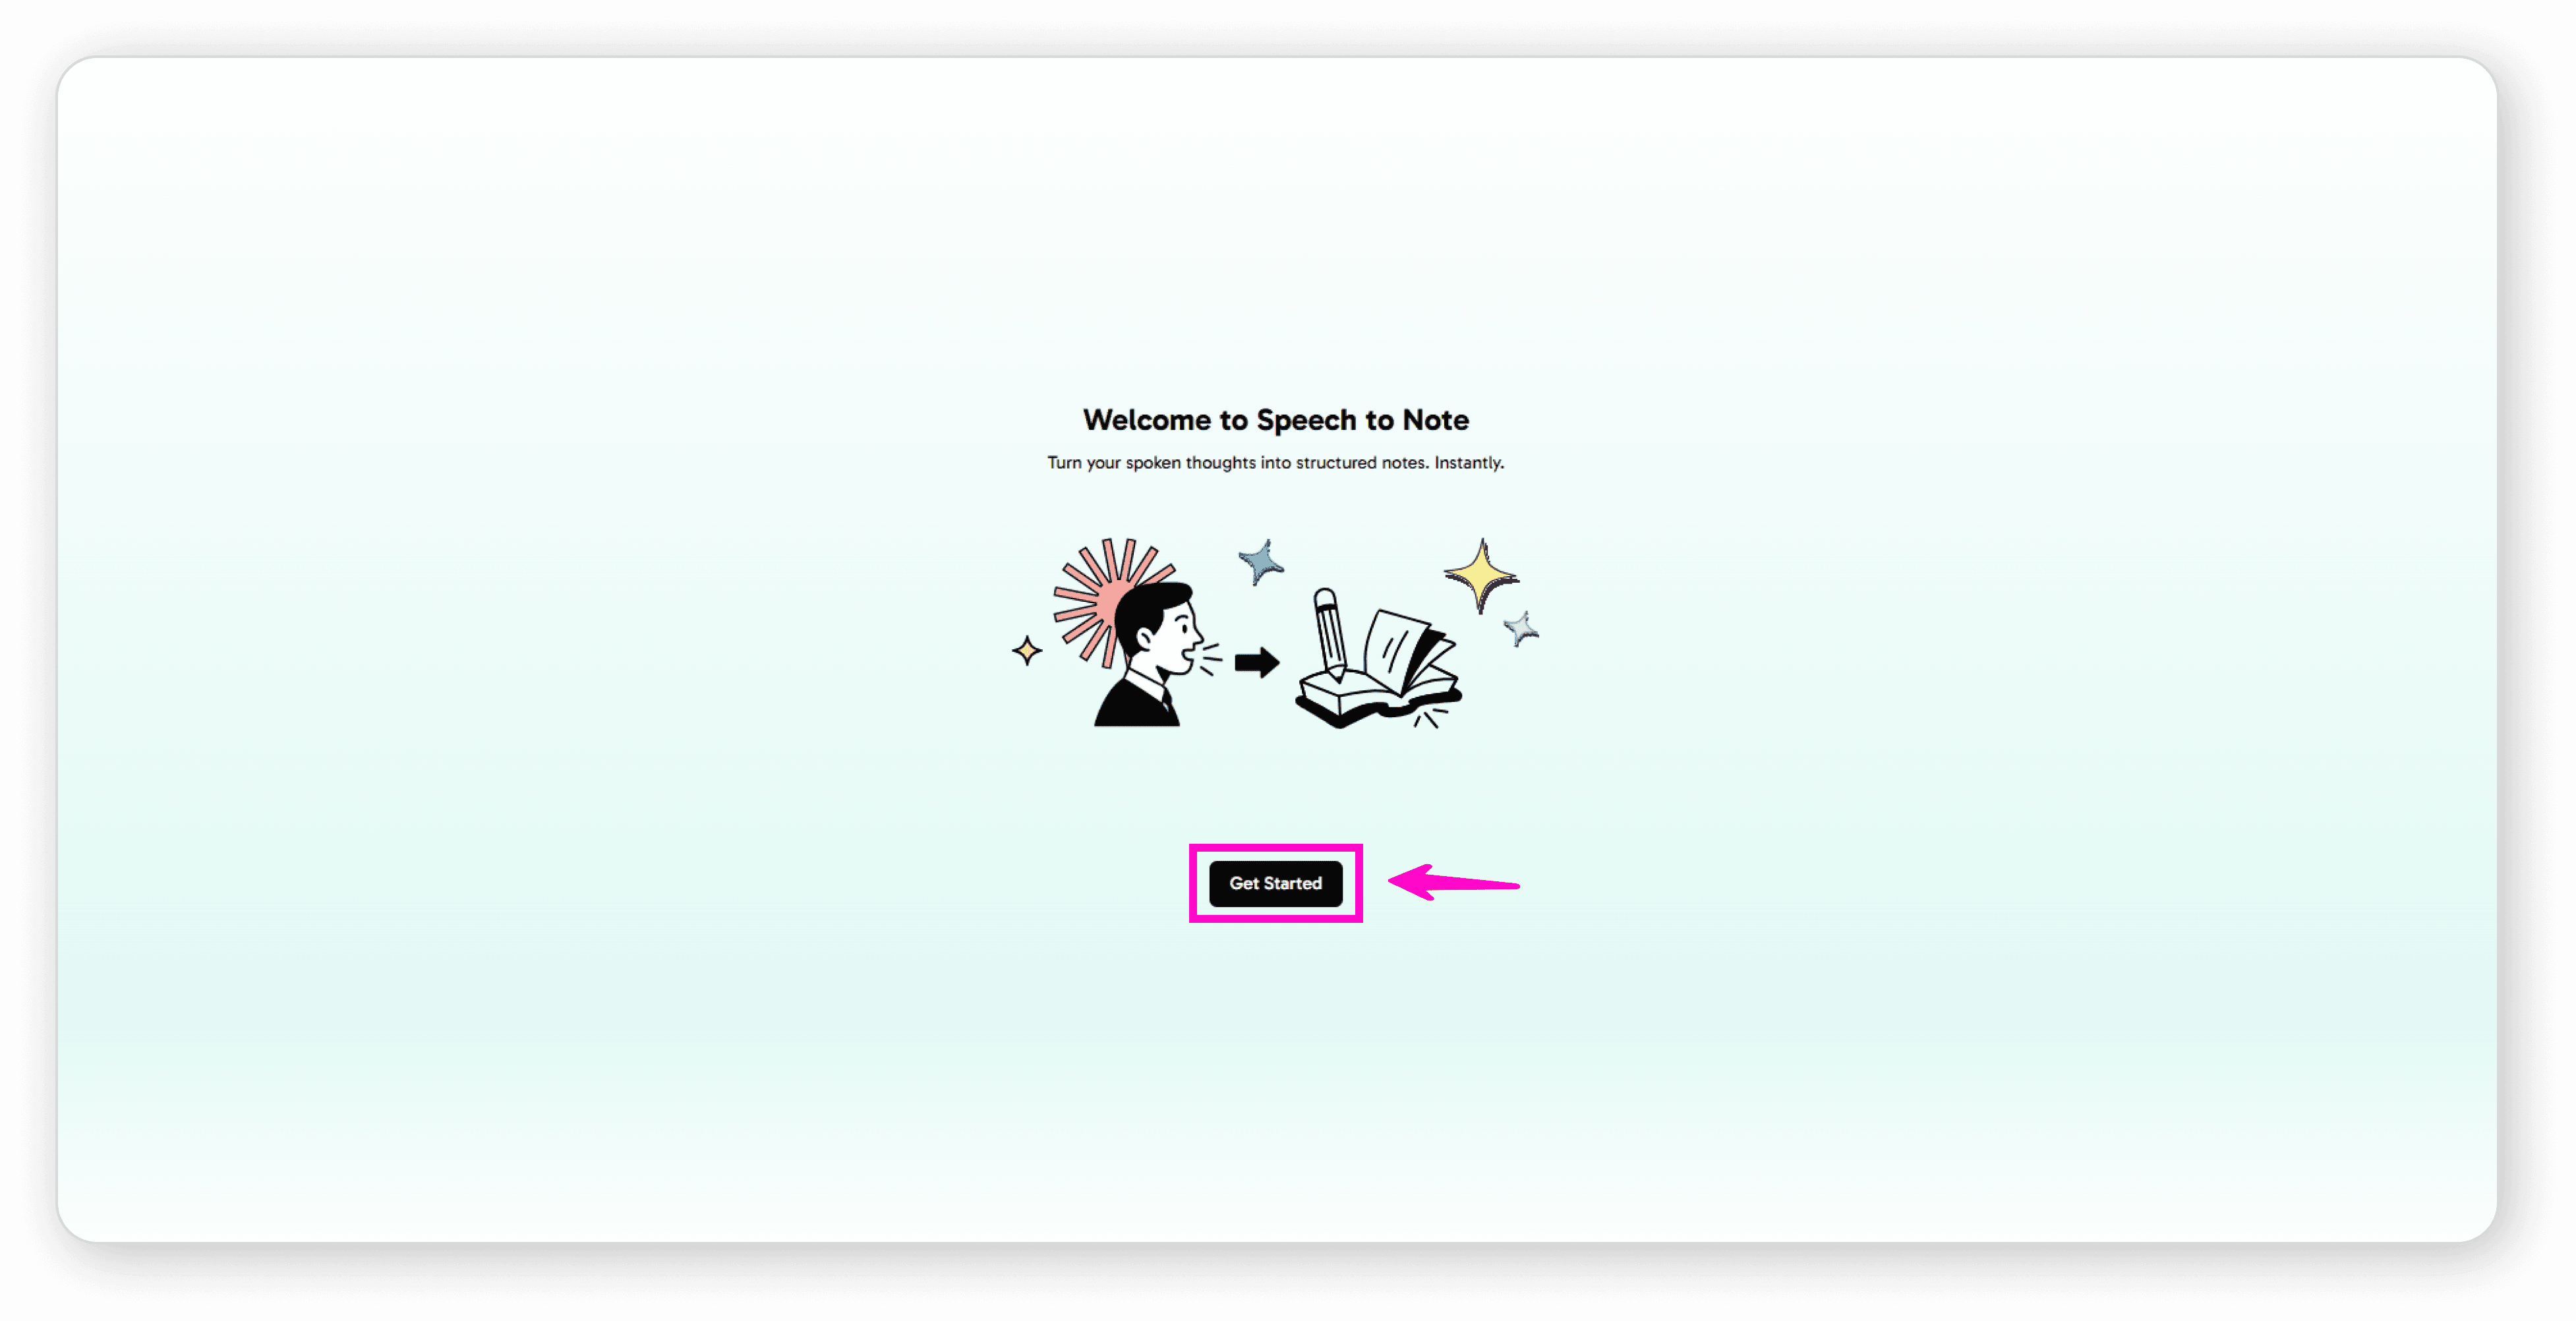
Initial Setup
After signing up, you'll be asked to:
Click on Get Started
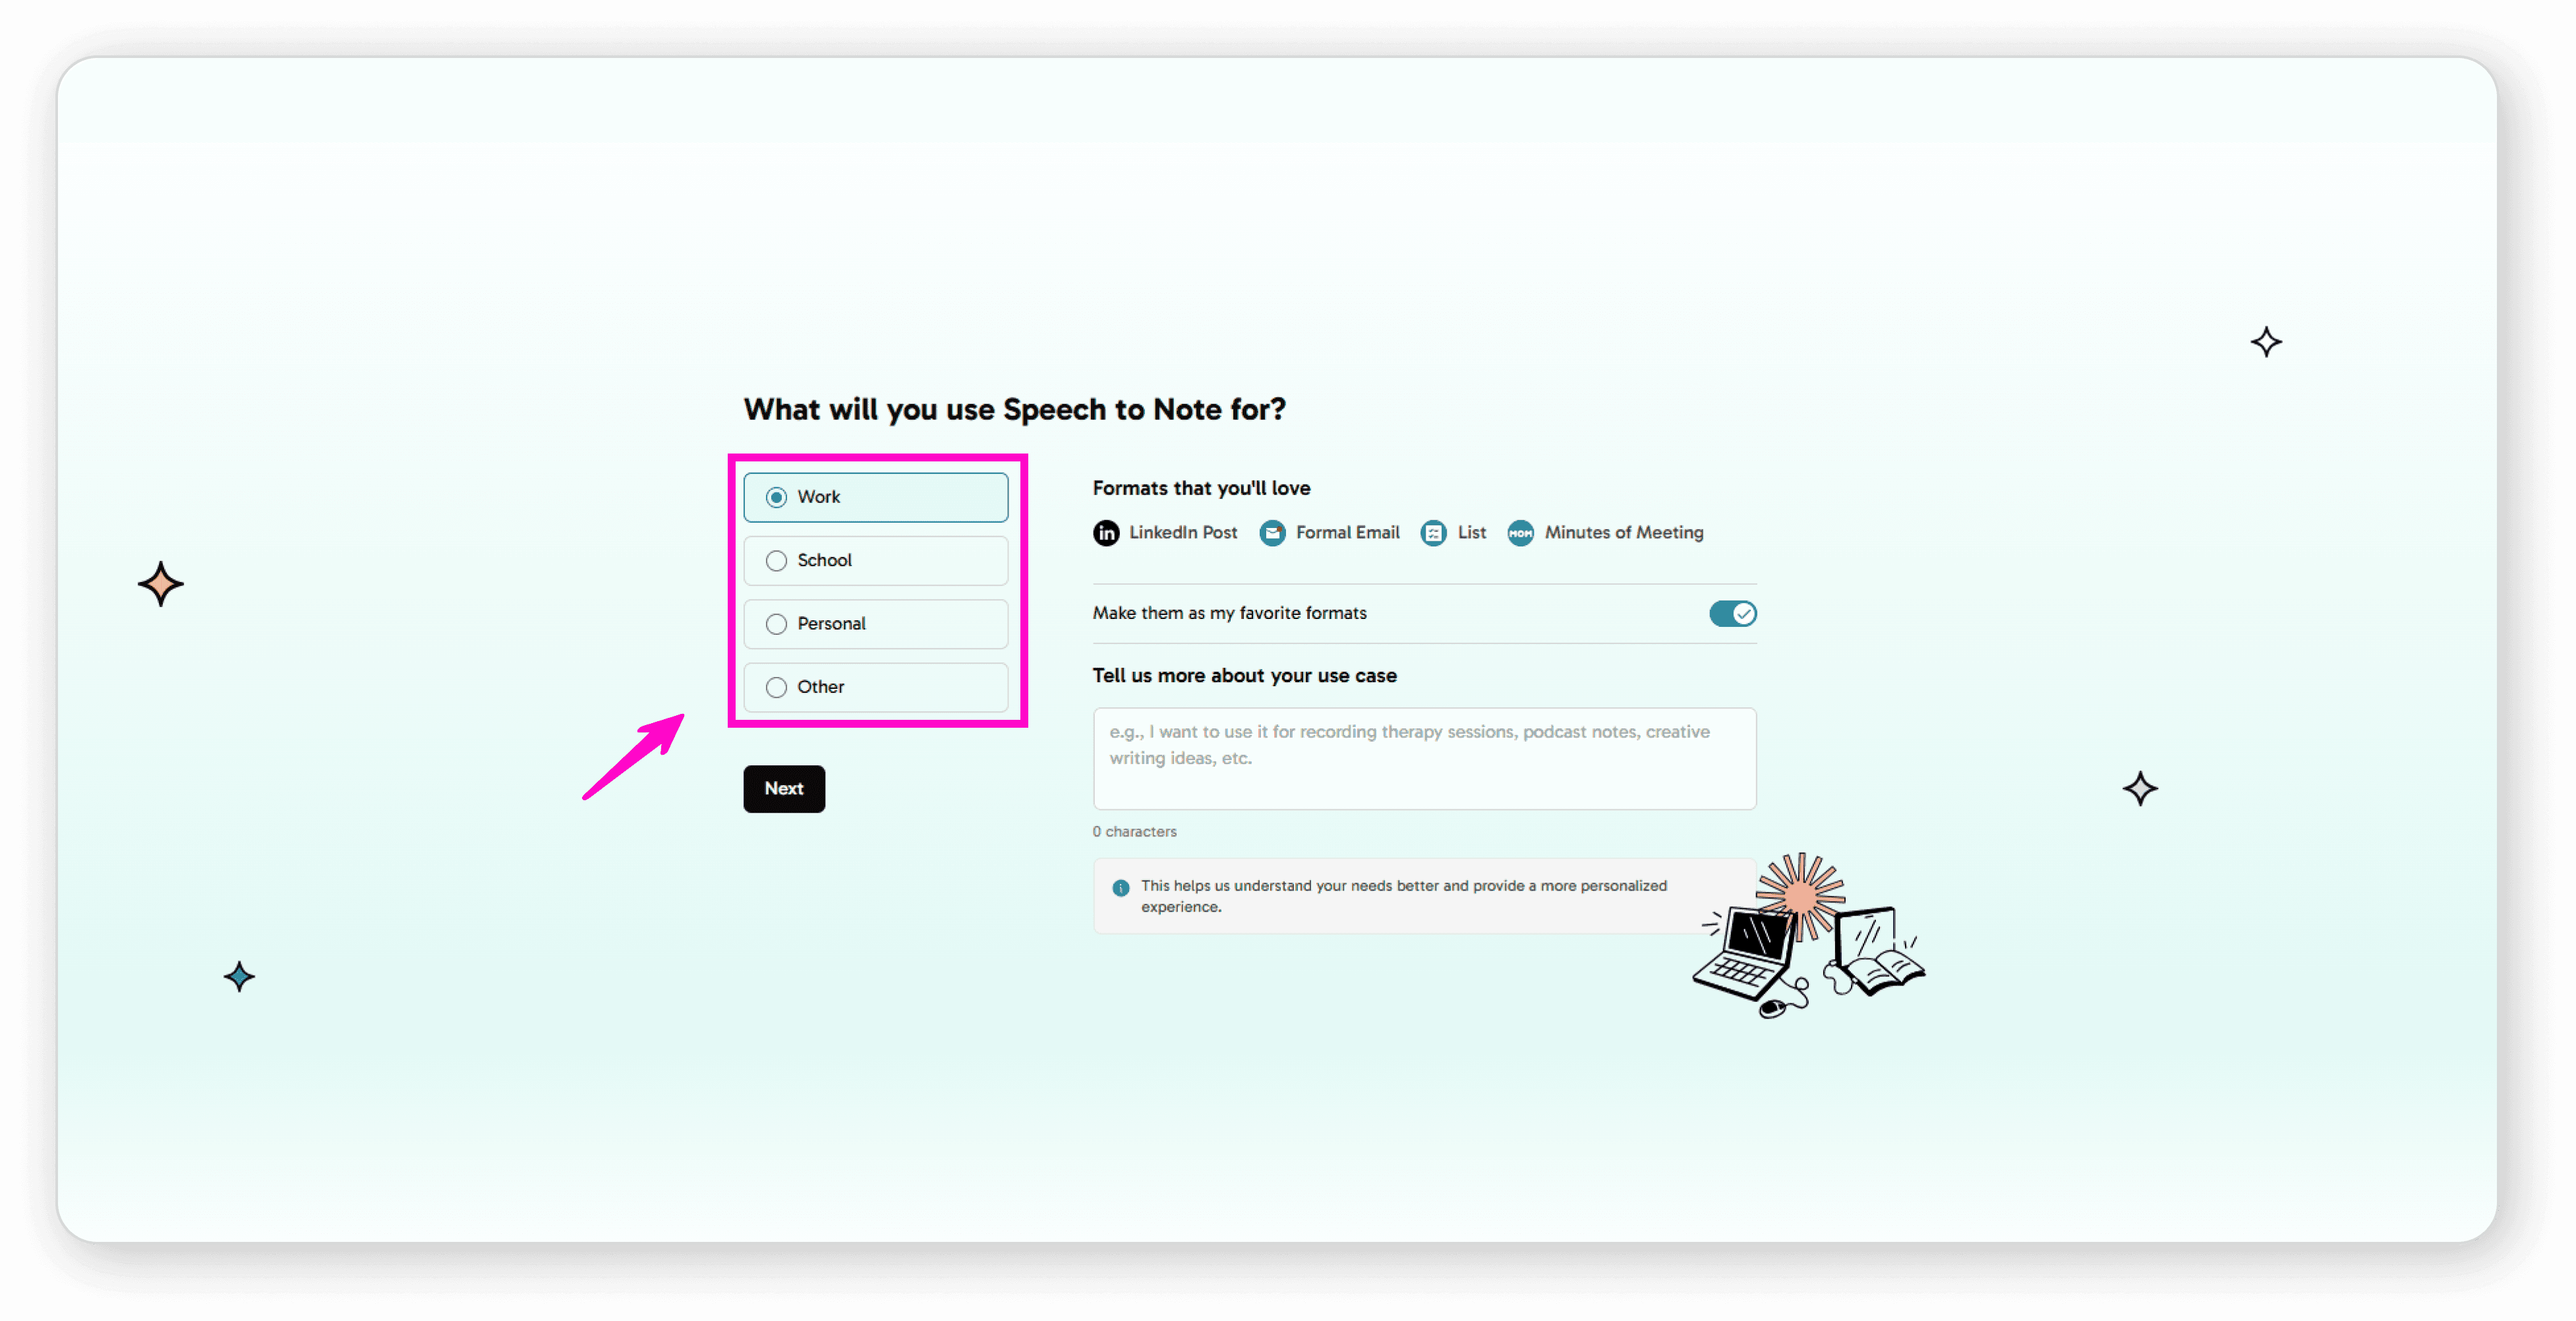
Select what you'll use Speech to Note for
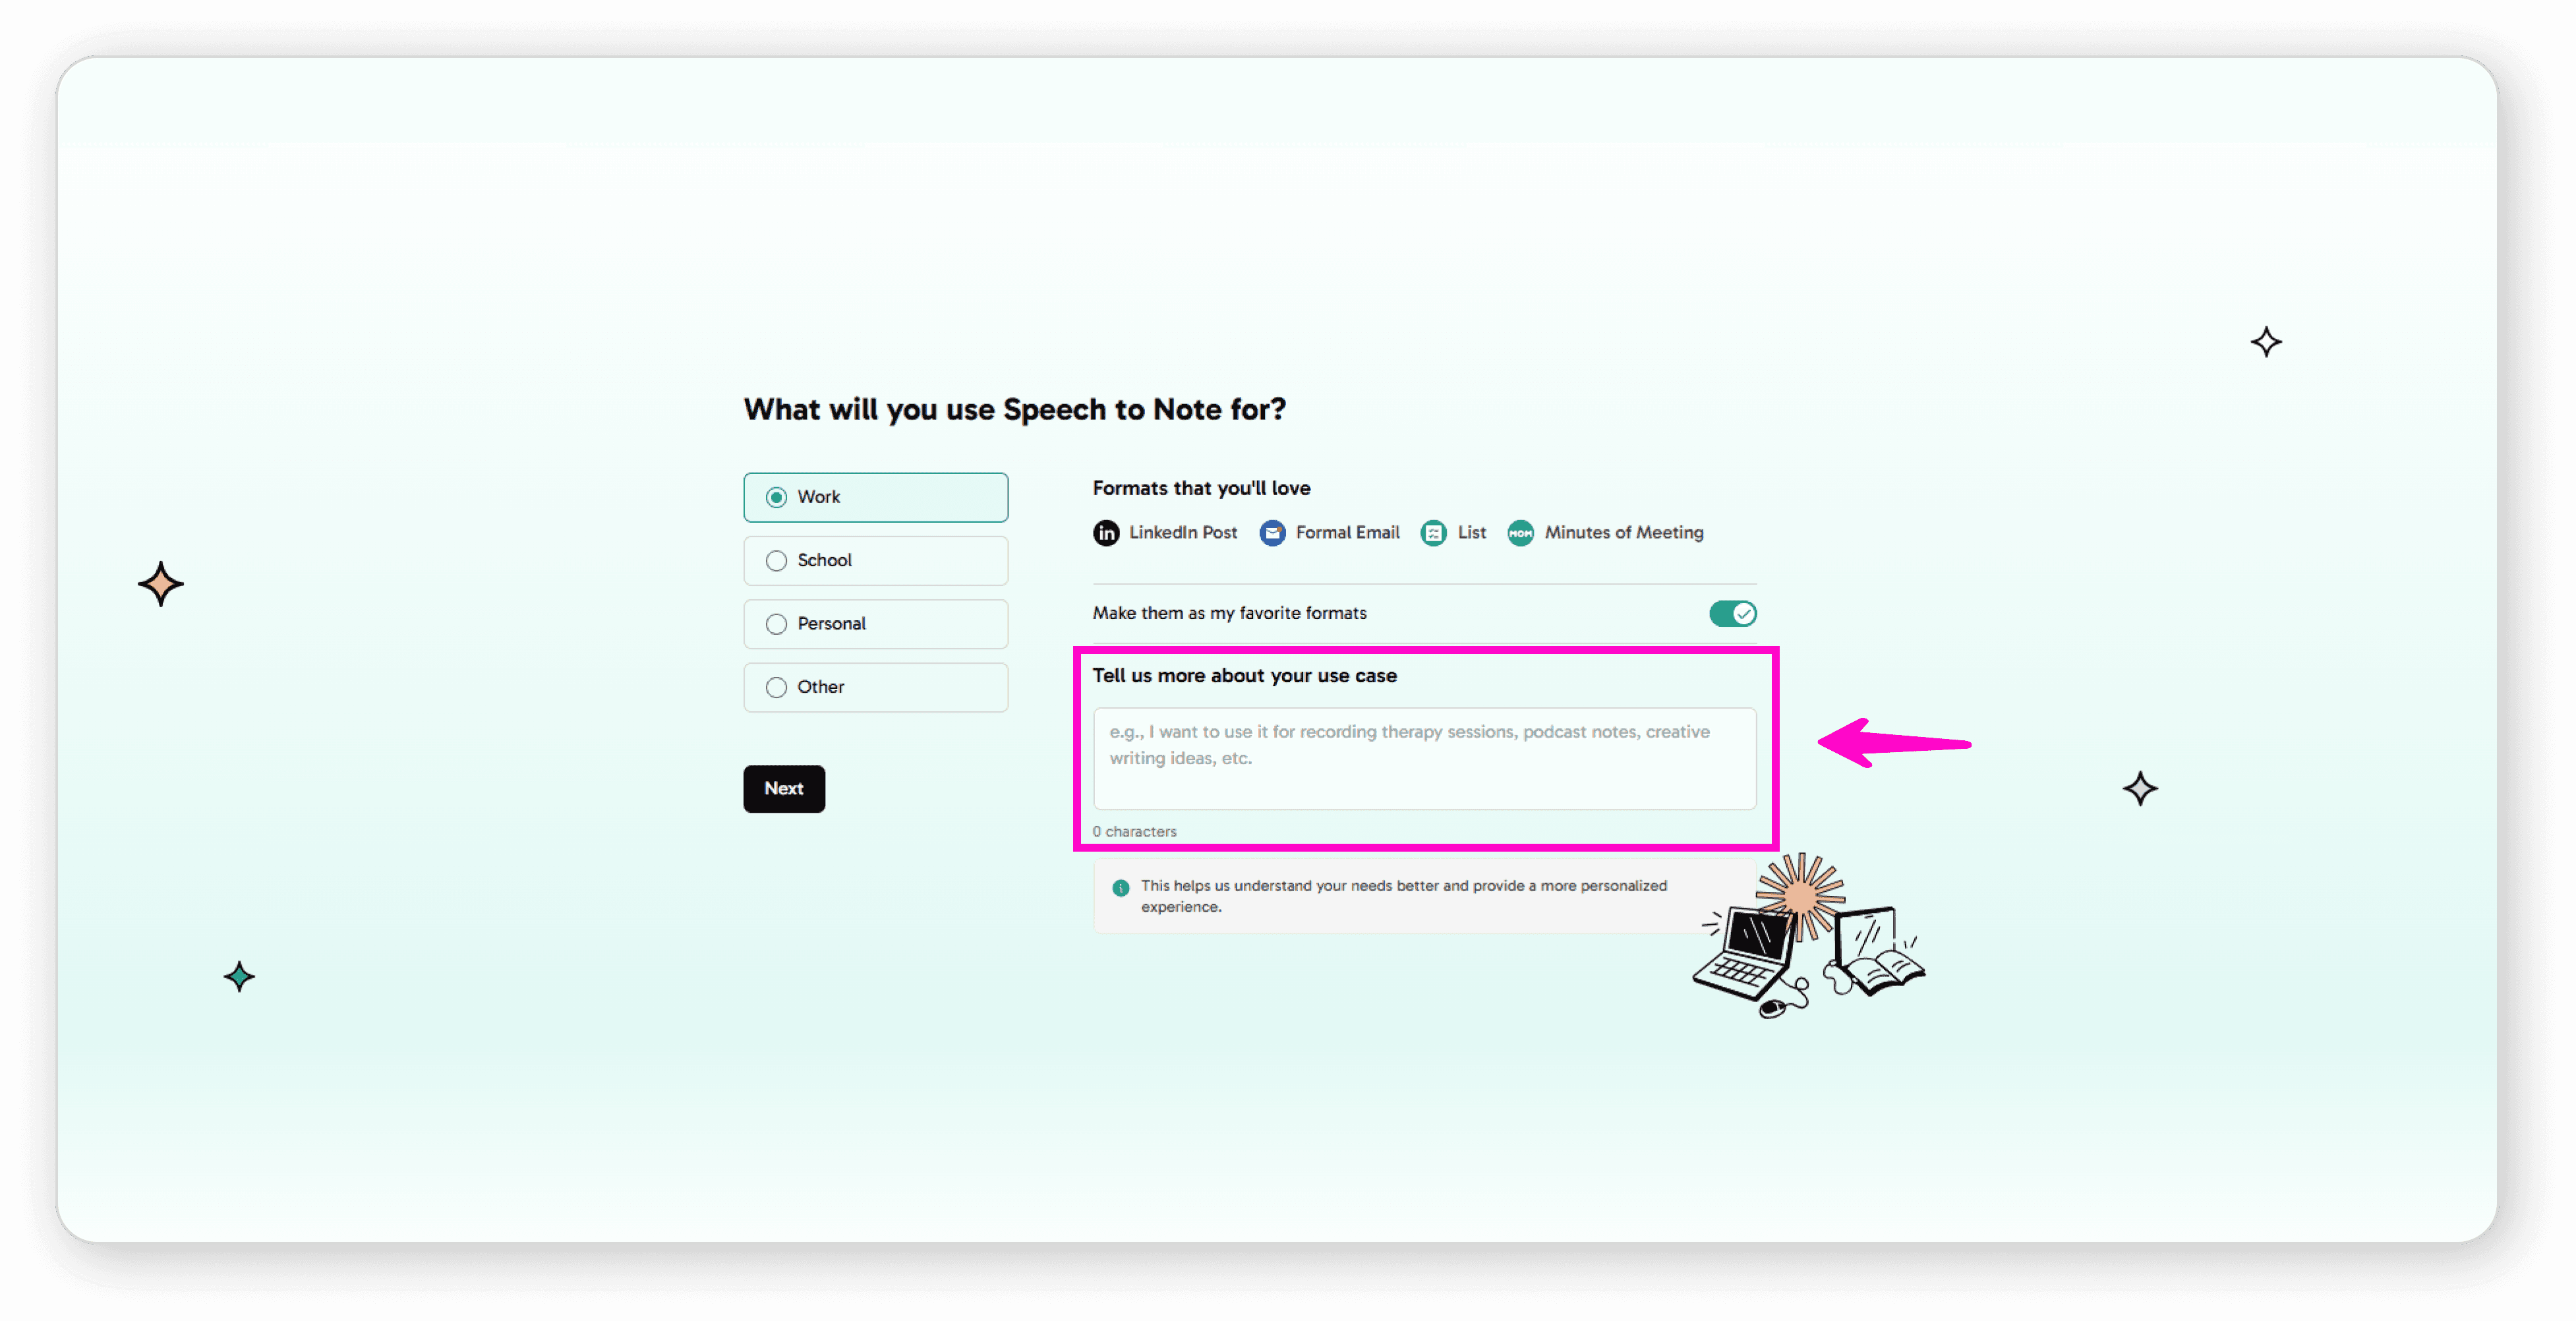
Tell us more about your use case
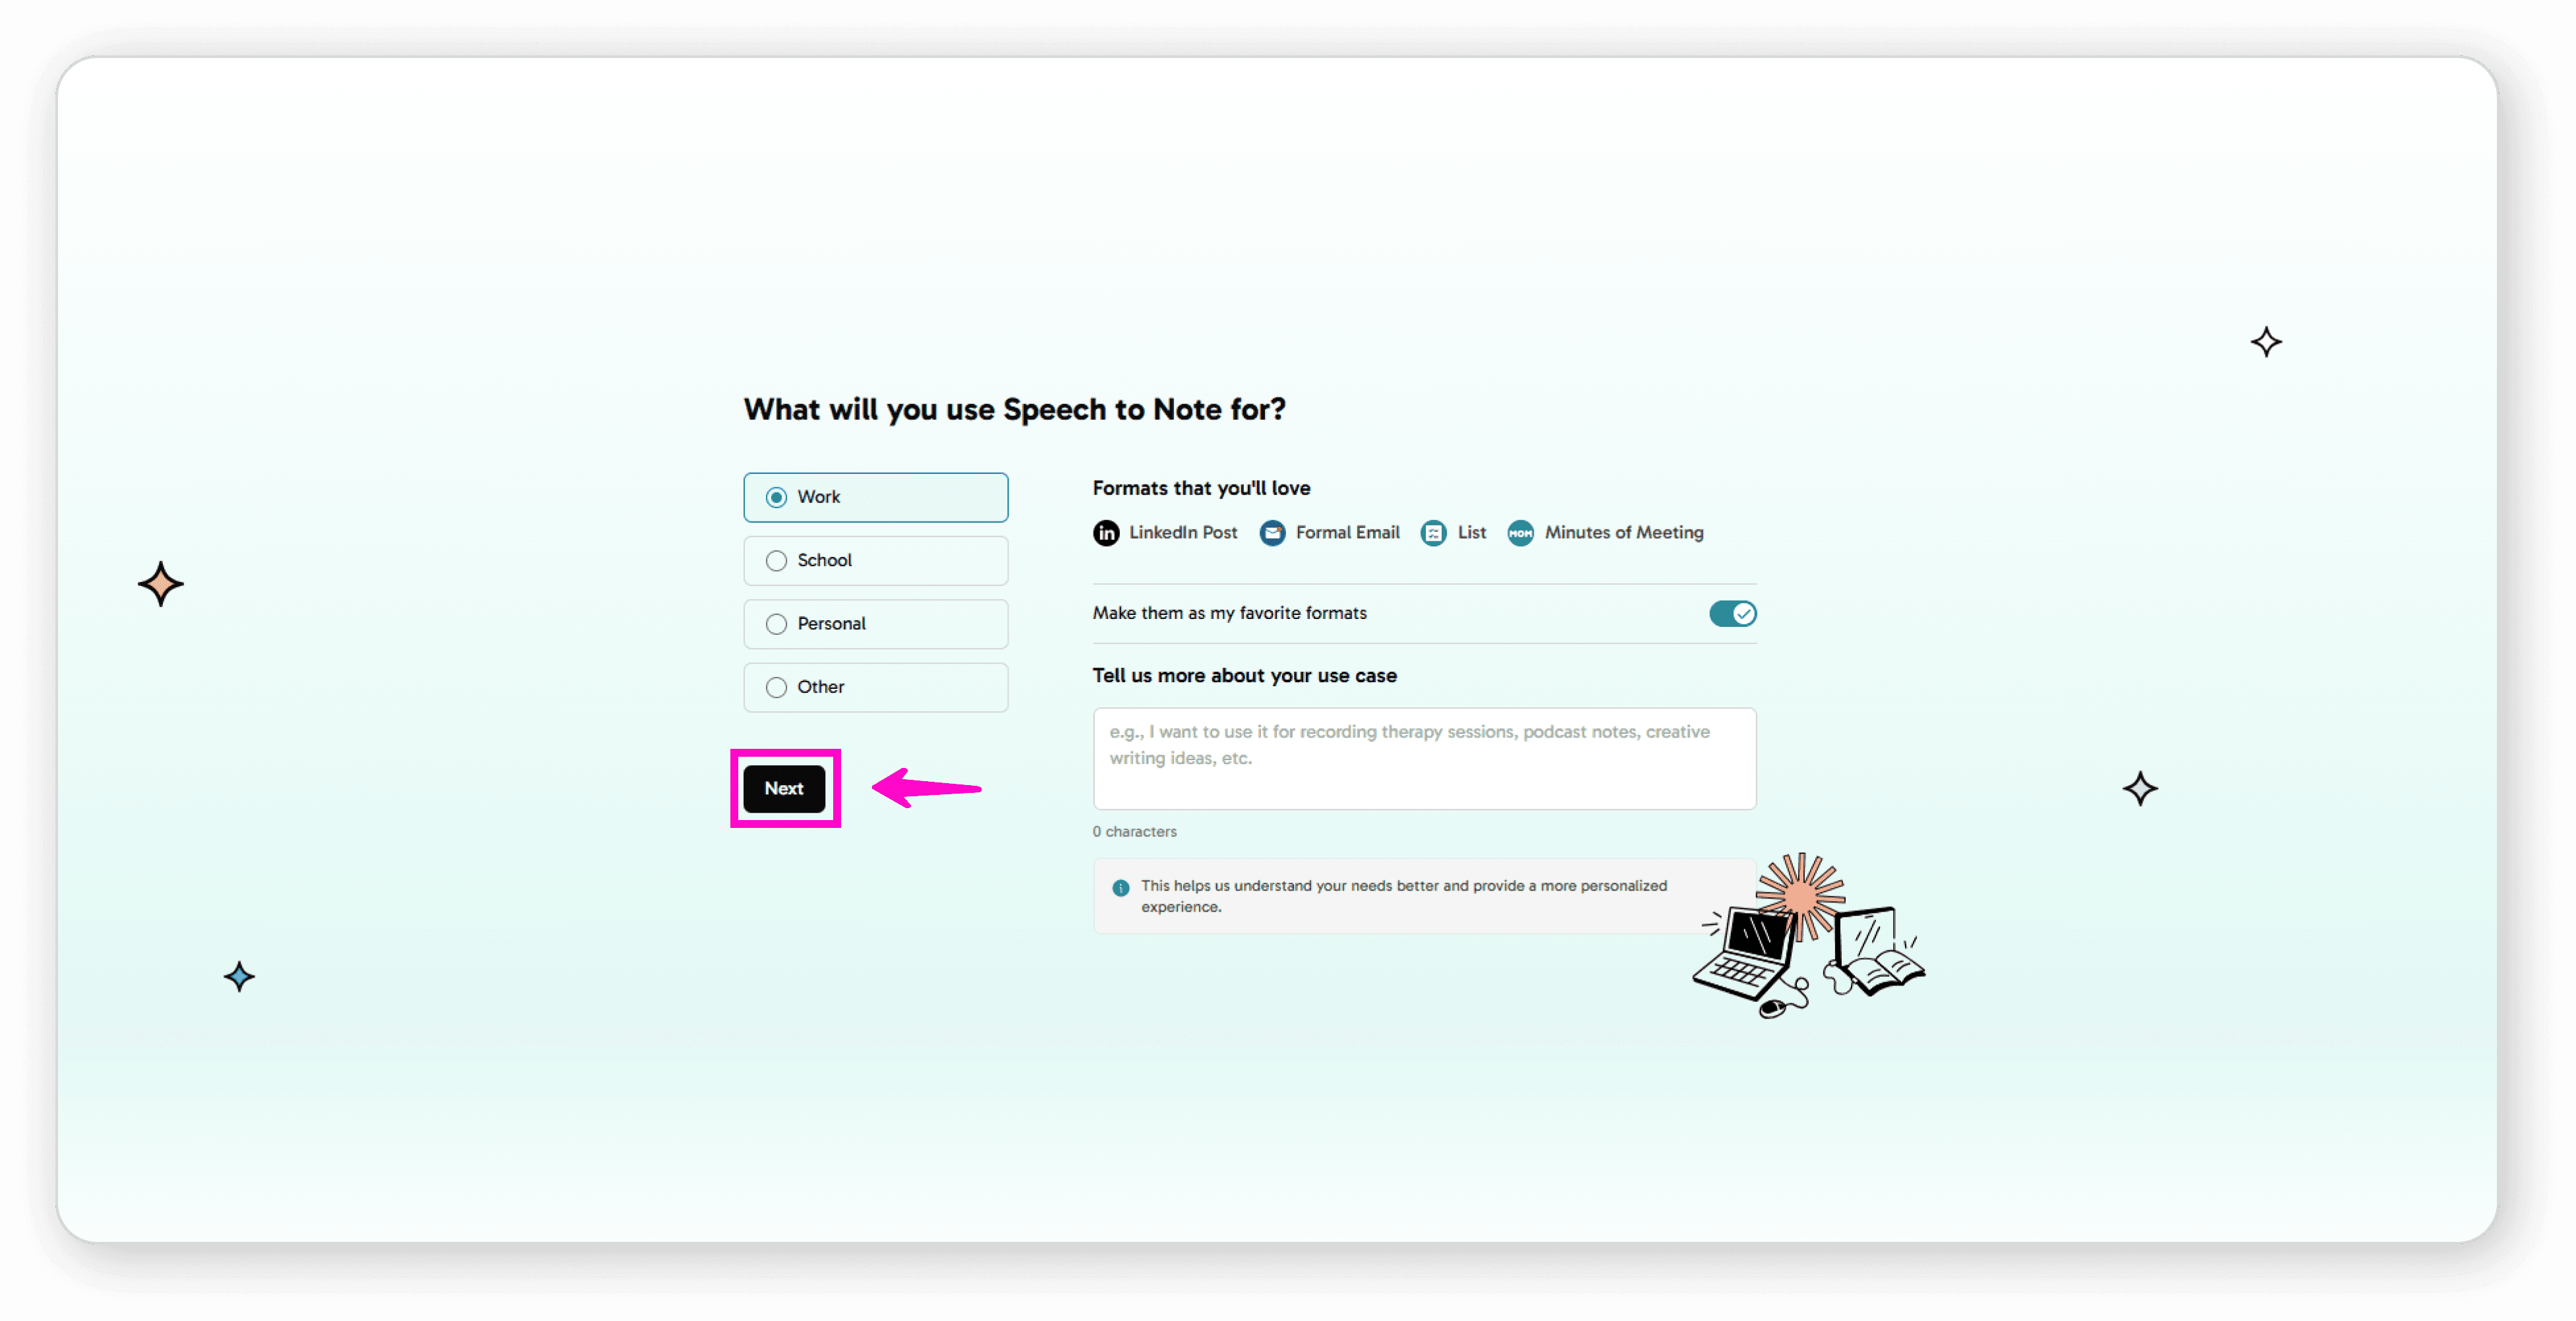
Click "Next" to continue
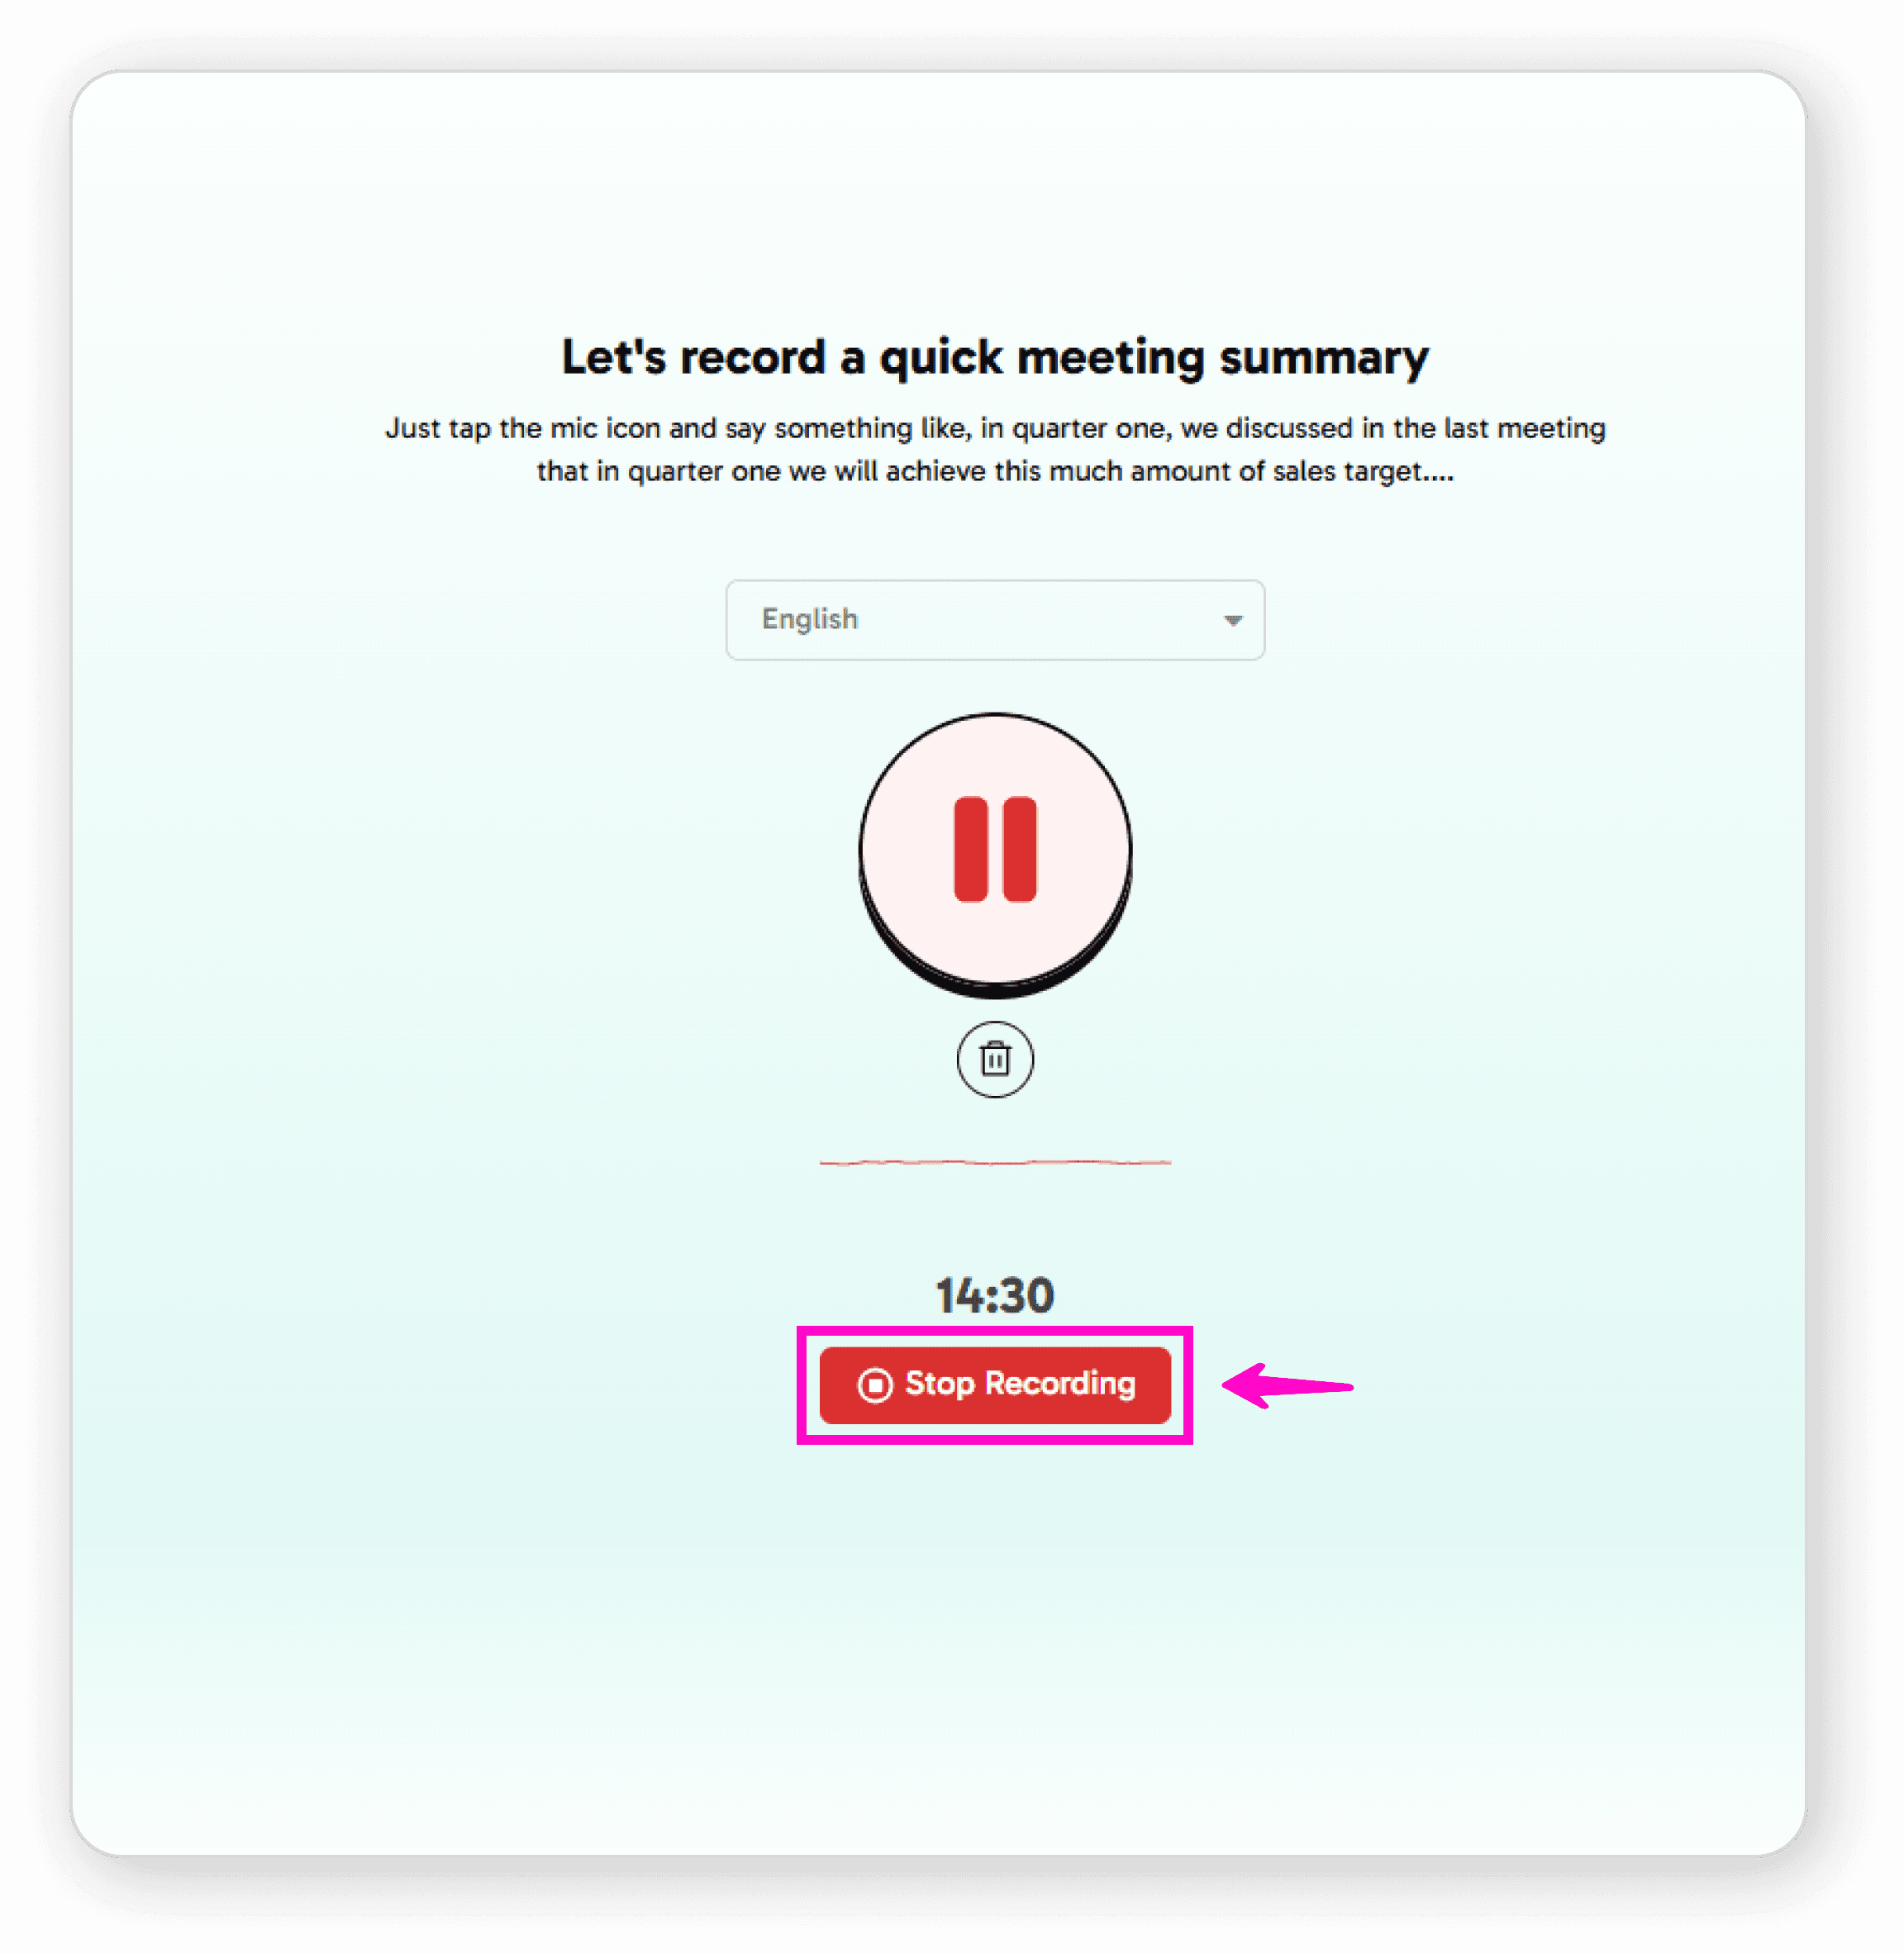
Recording Your First Note
Once you reach the record screen:
Select your preferred language from the dropdown
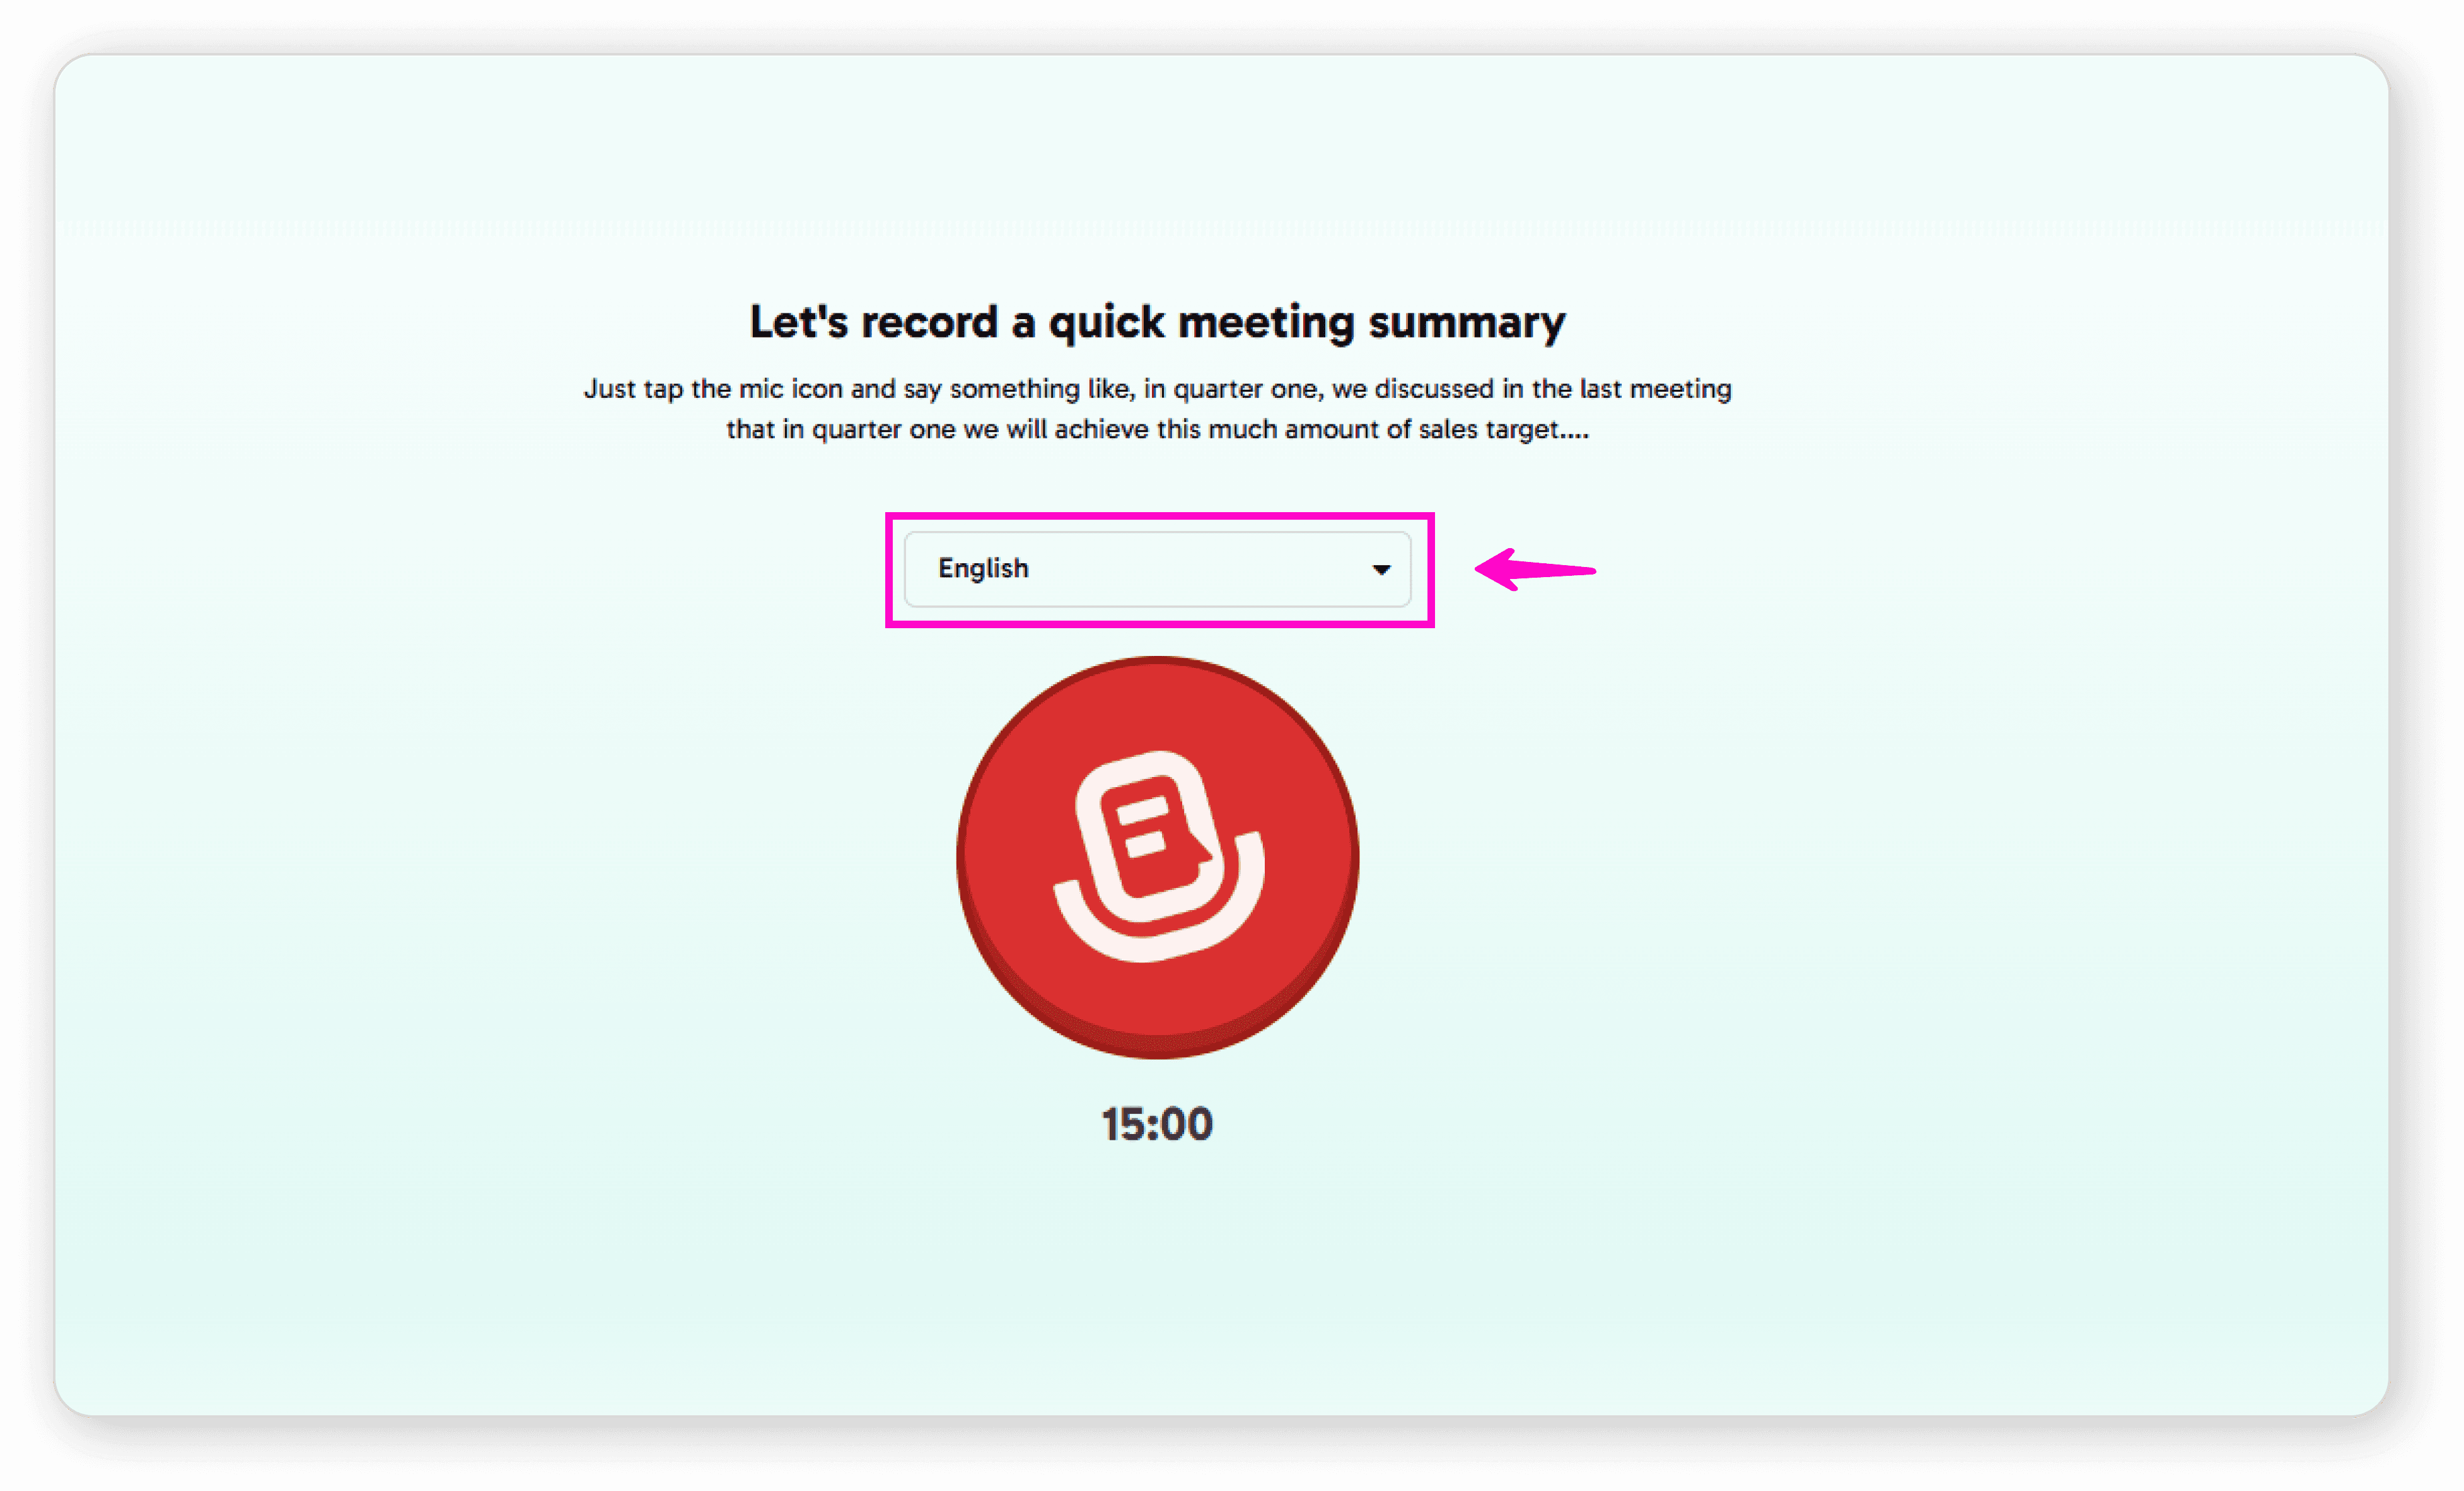
Check your available minutes (displayed below the mic icon)
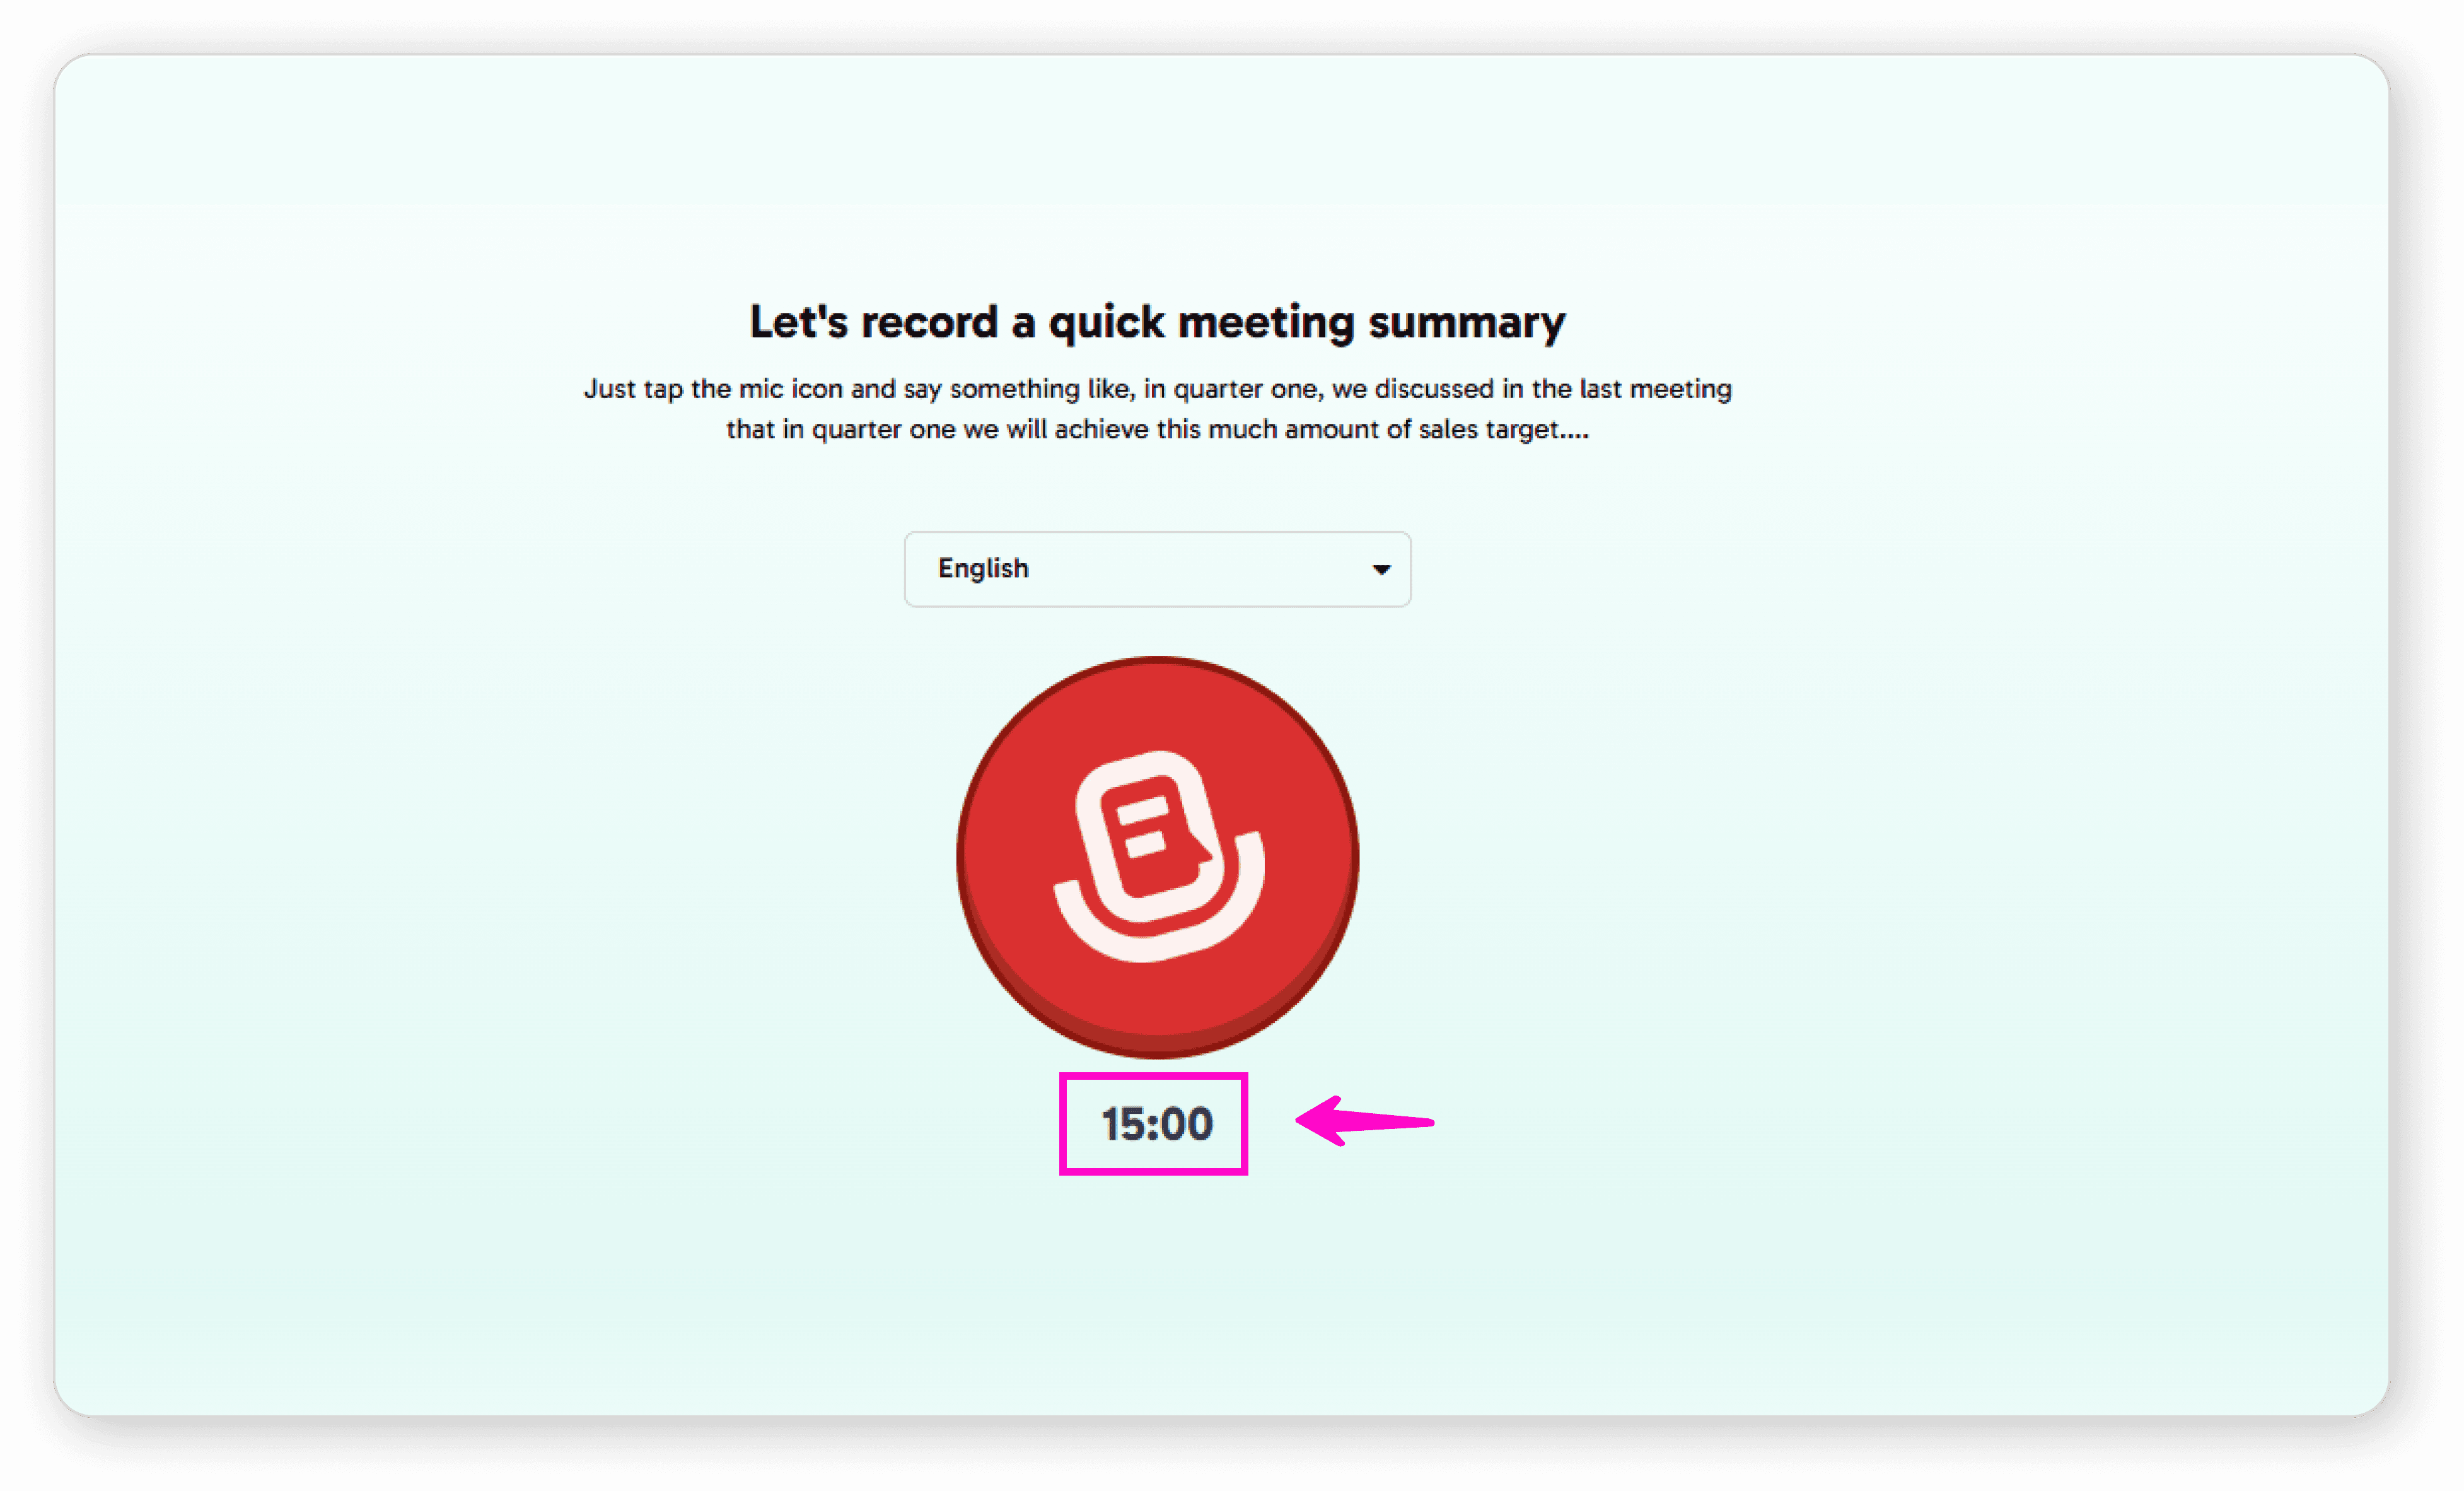
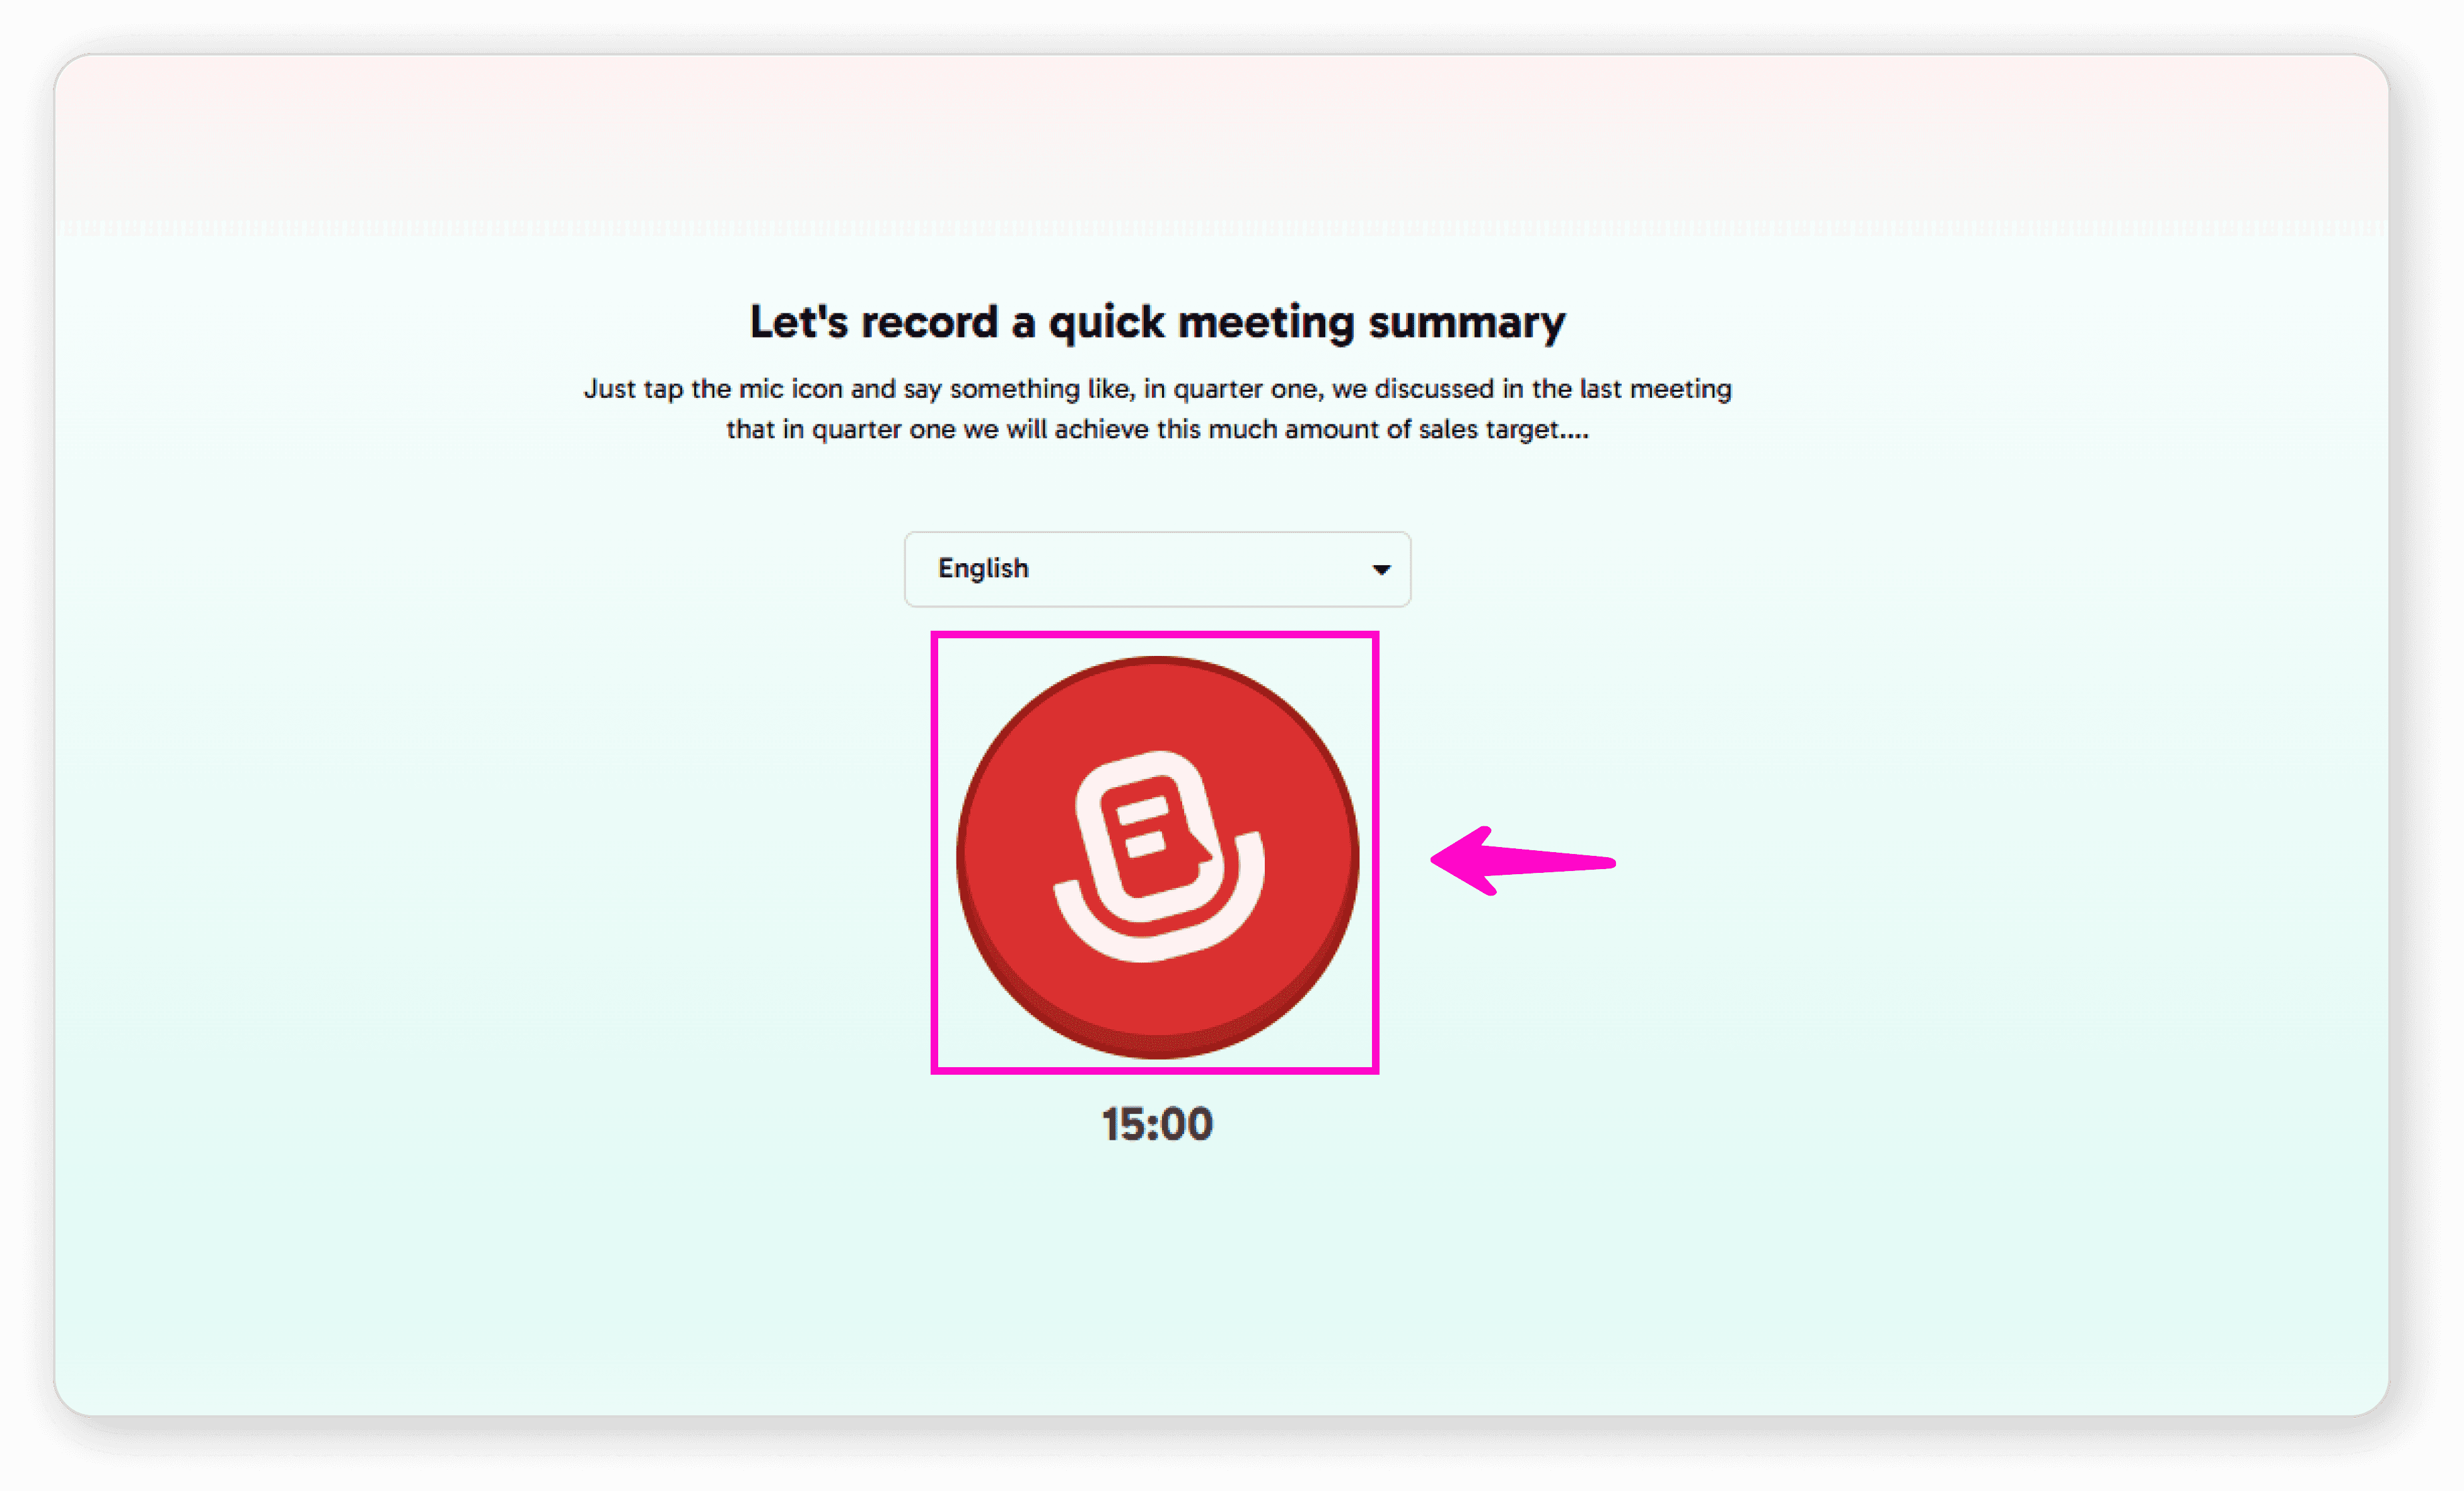
Tap the microphone icon and start speaking
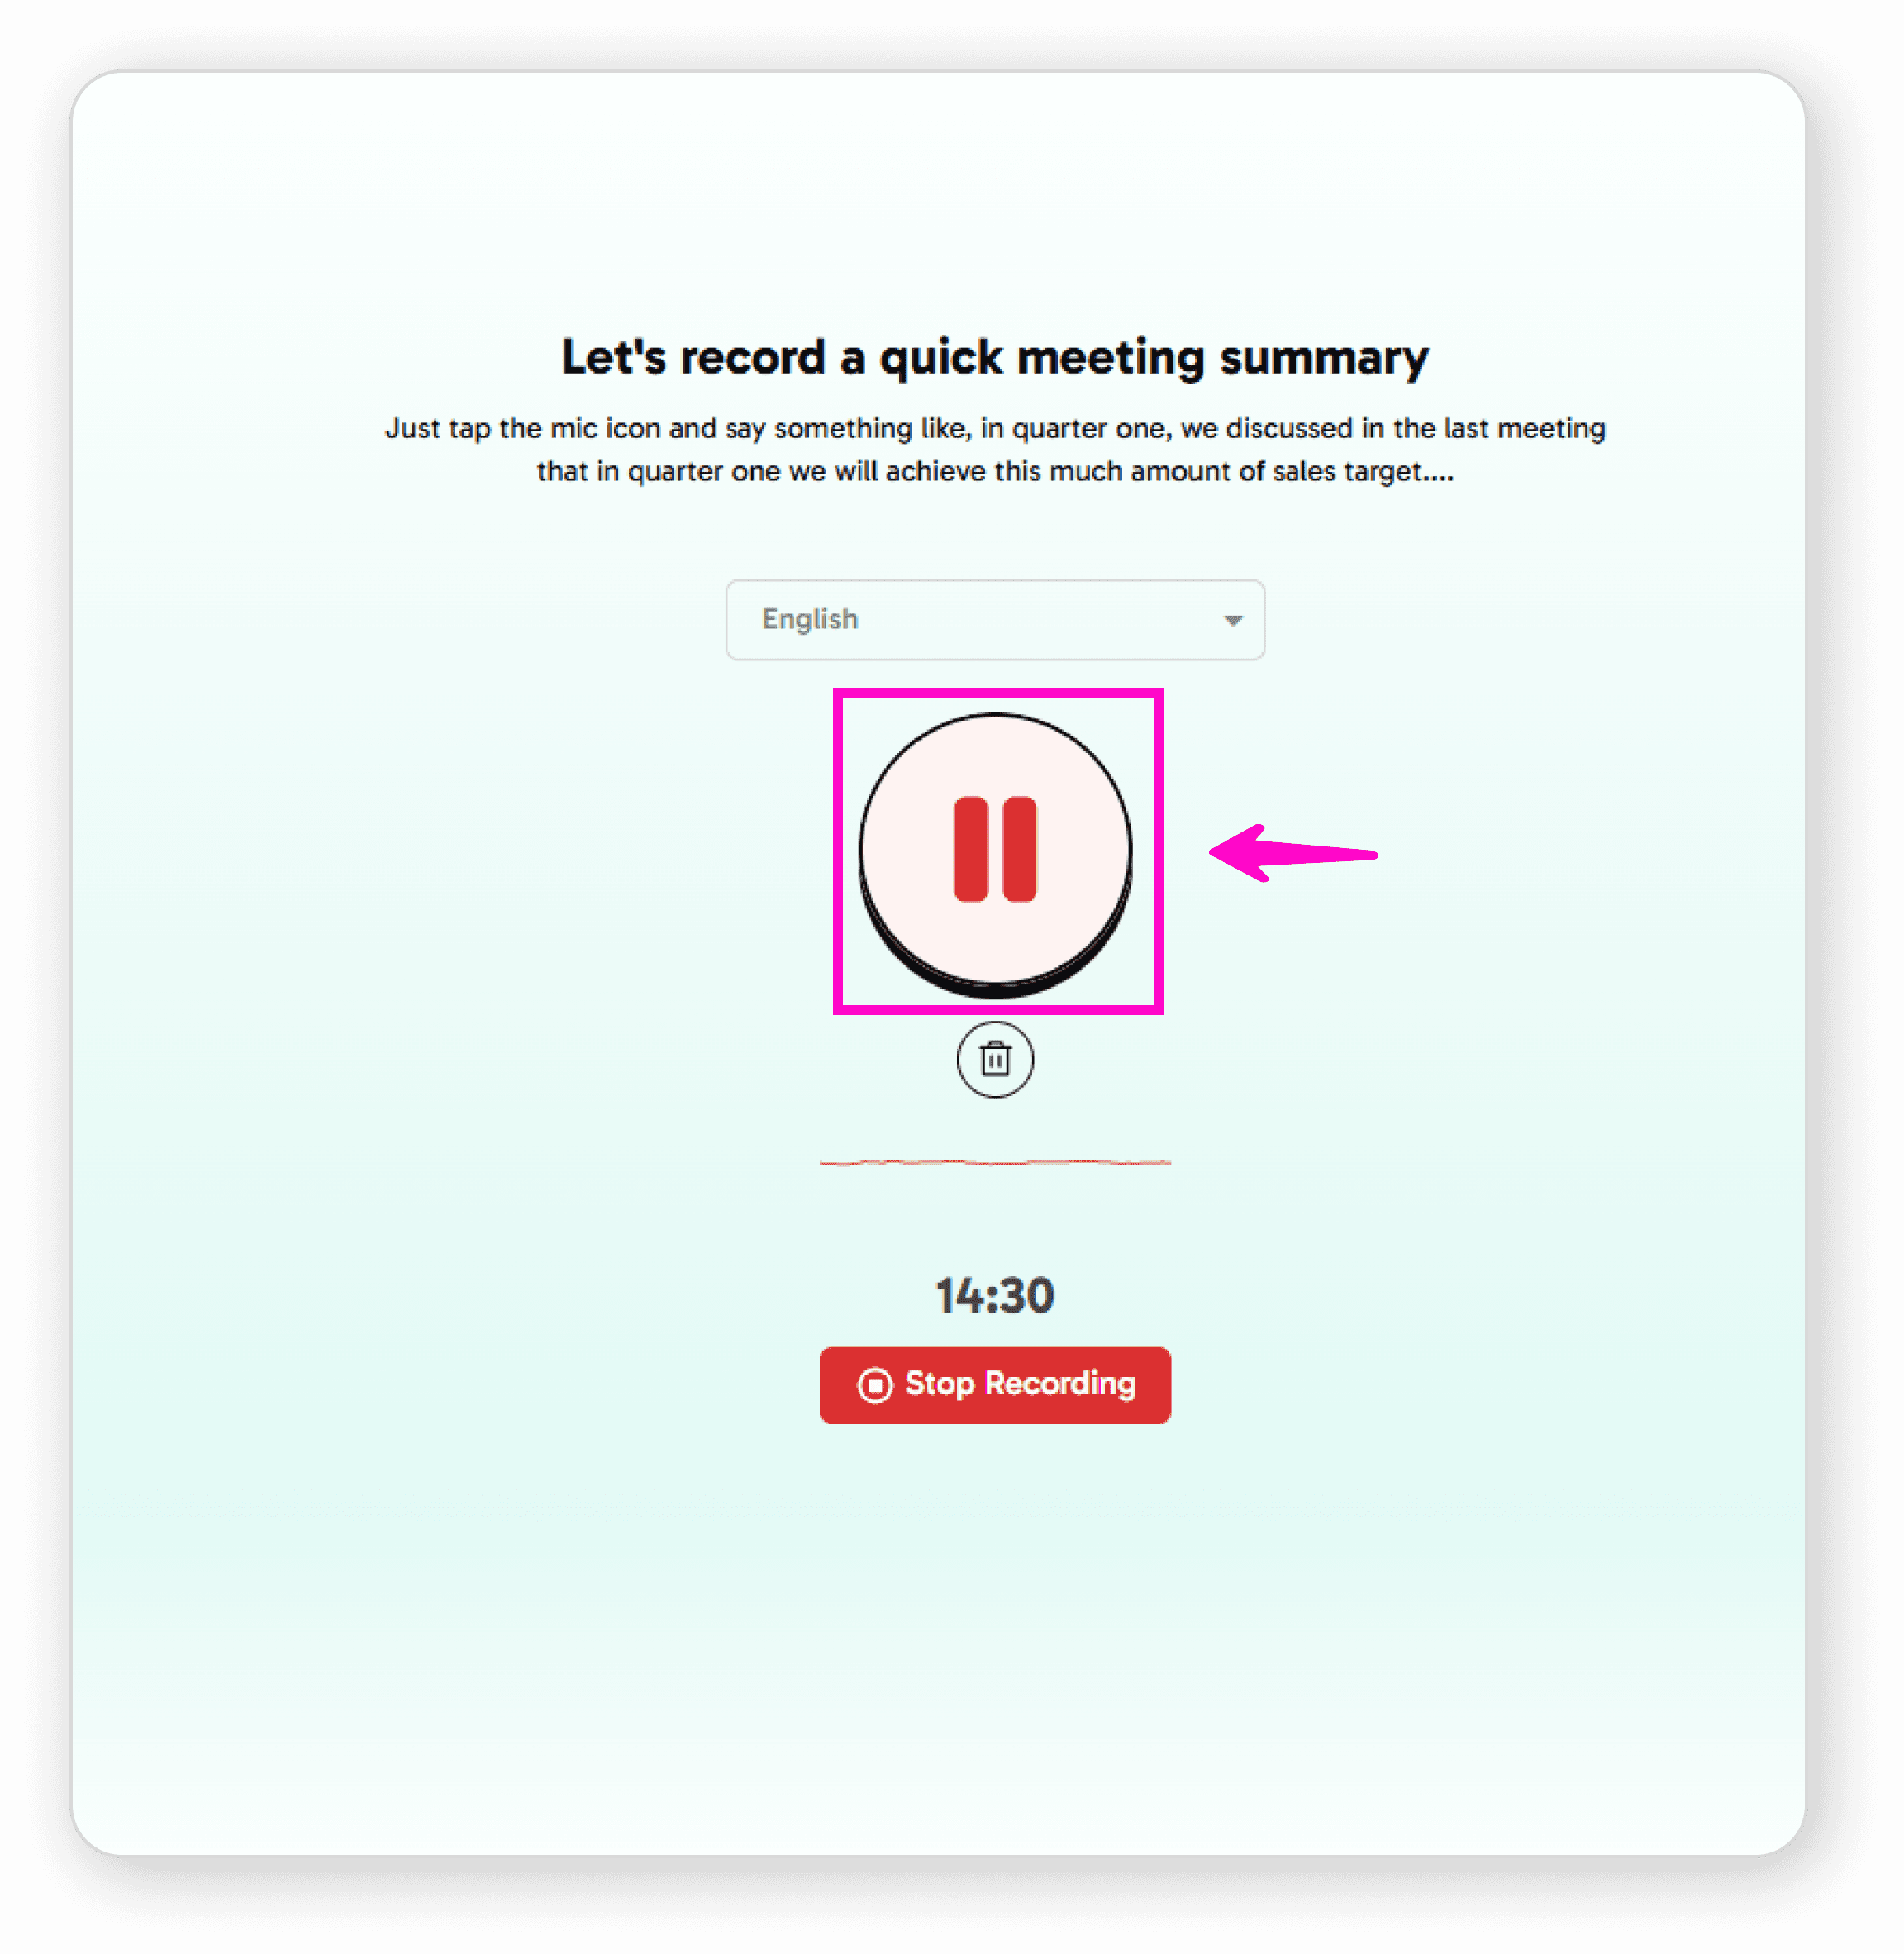
During Recording:
Use the pause button to pause or continue recording
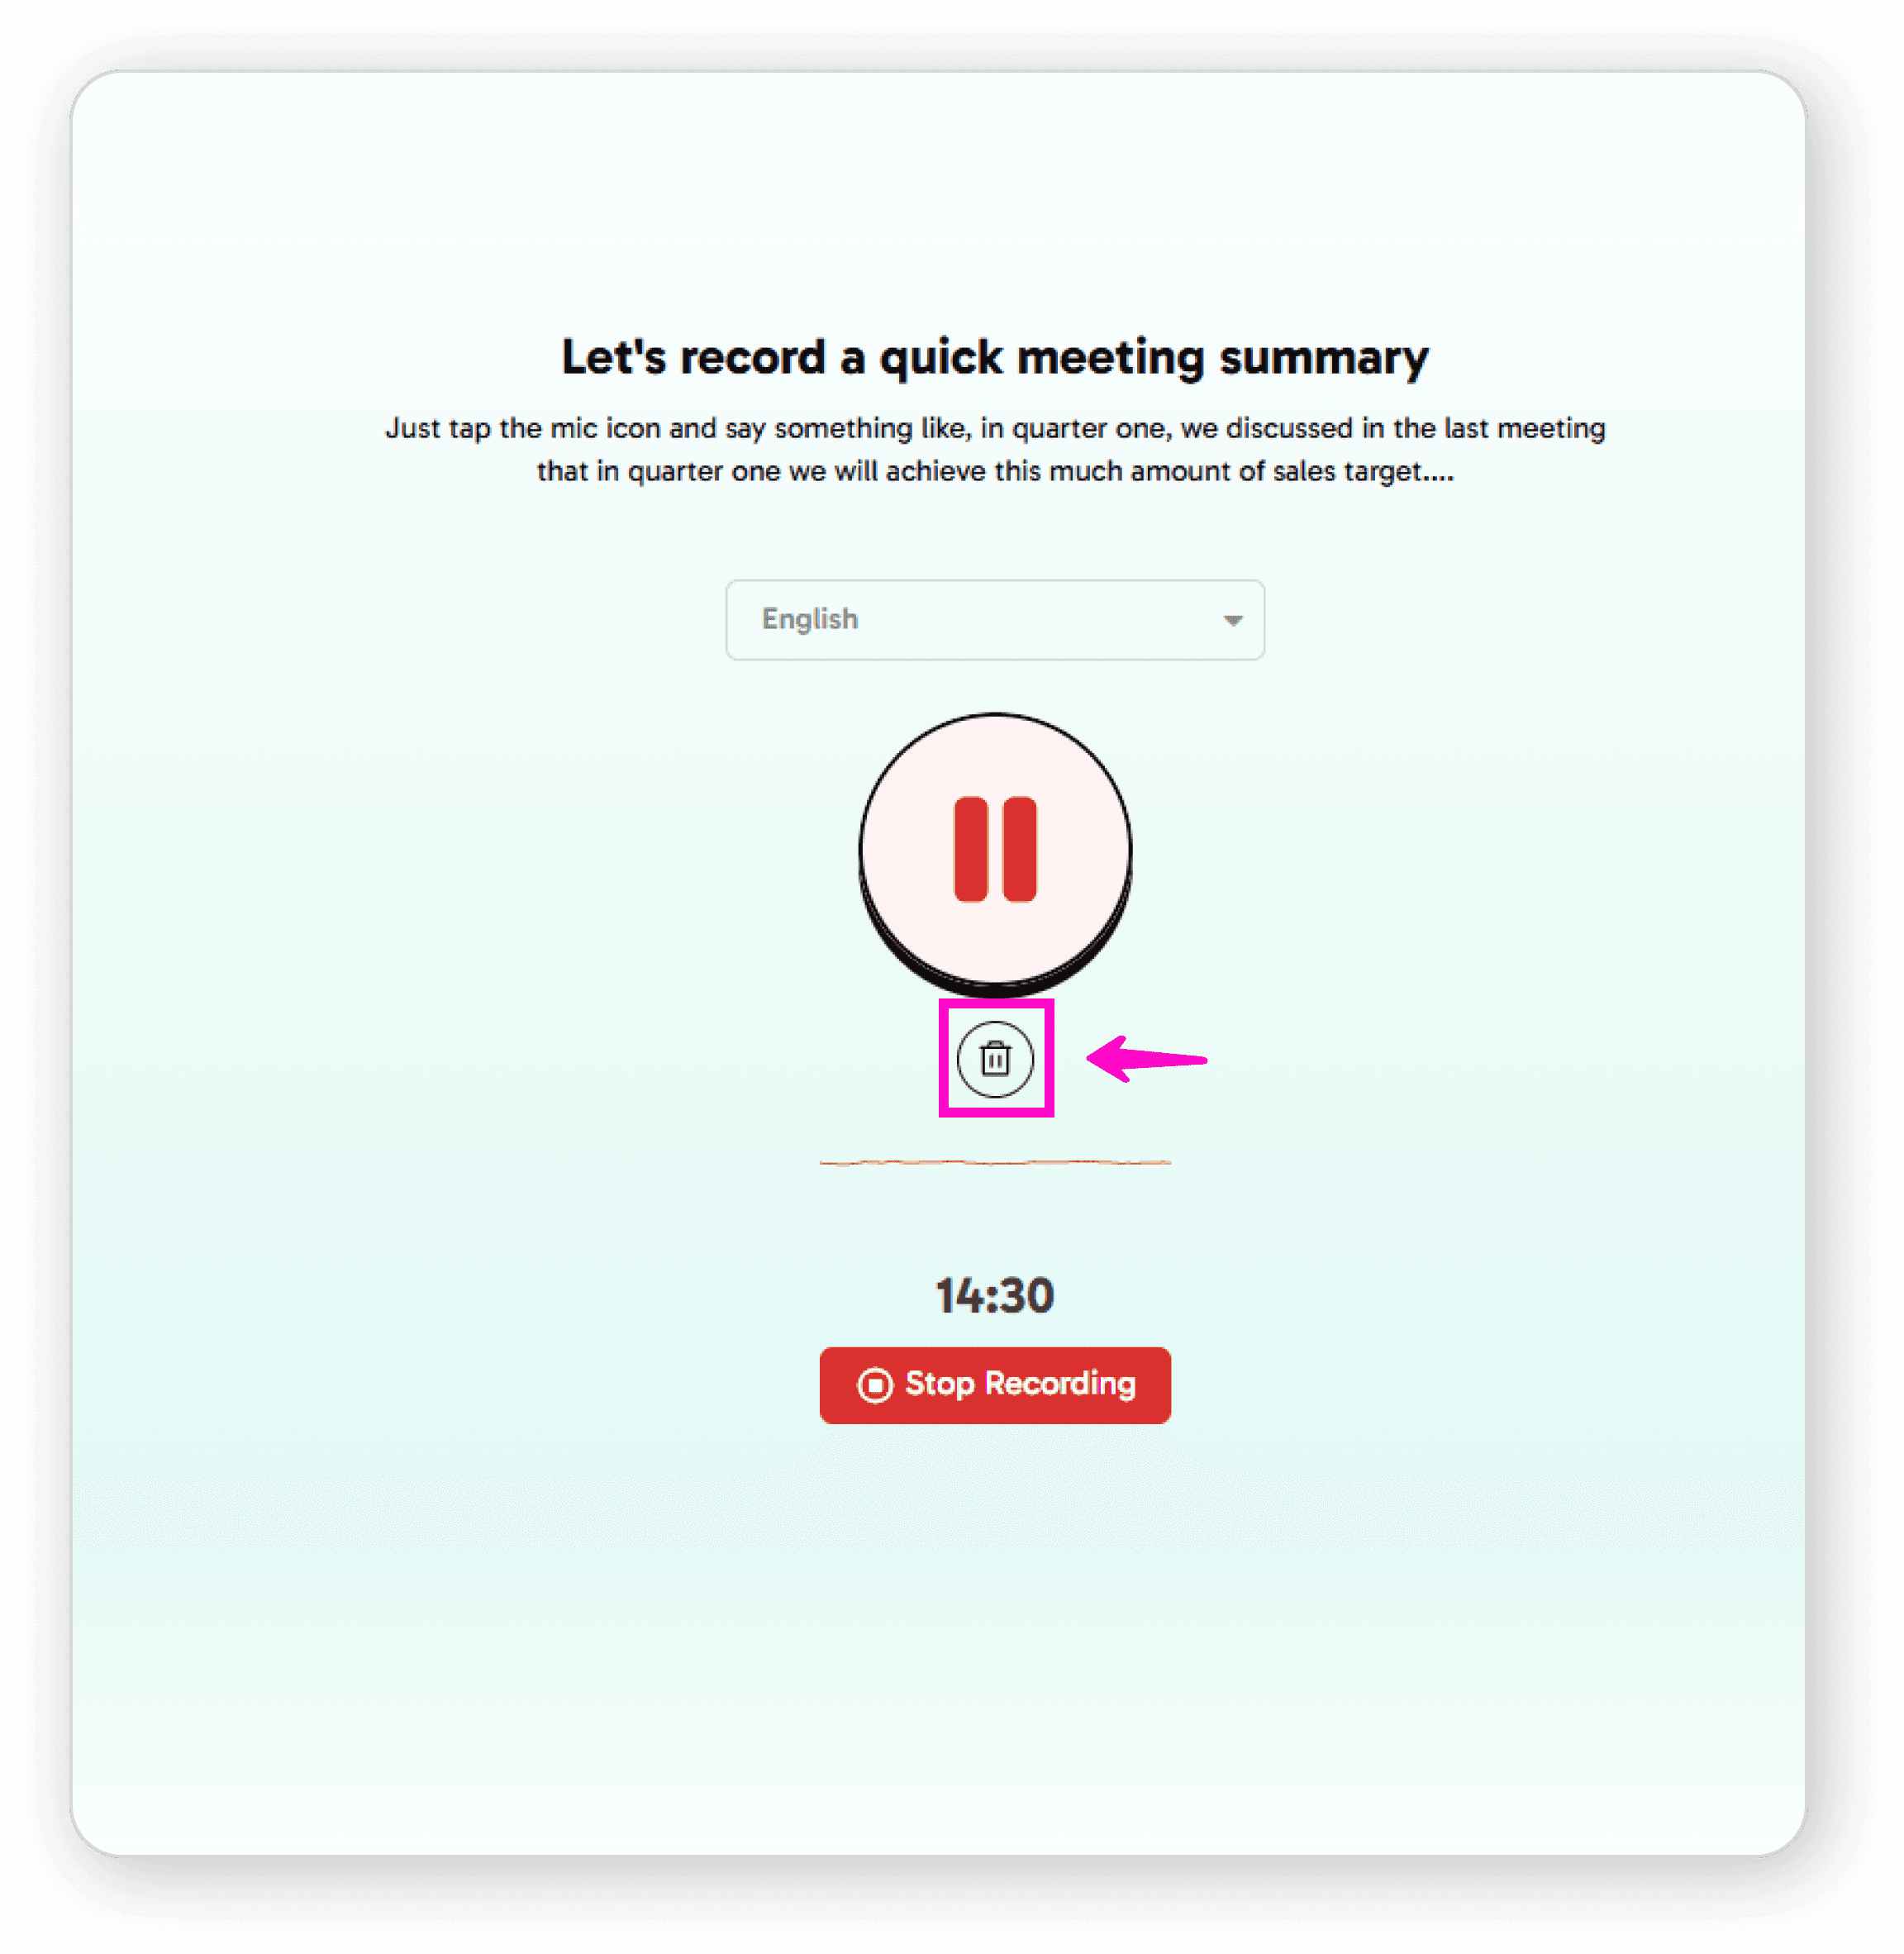
Use the delete button to discard the current recording
Press stop when you're finished
After Recording
After stopping your recording:
You'll see your audio converted to text format on the record screen
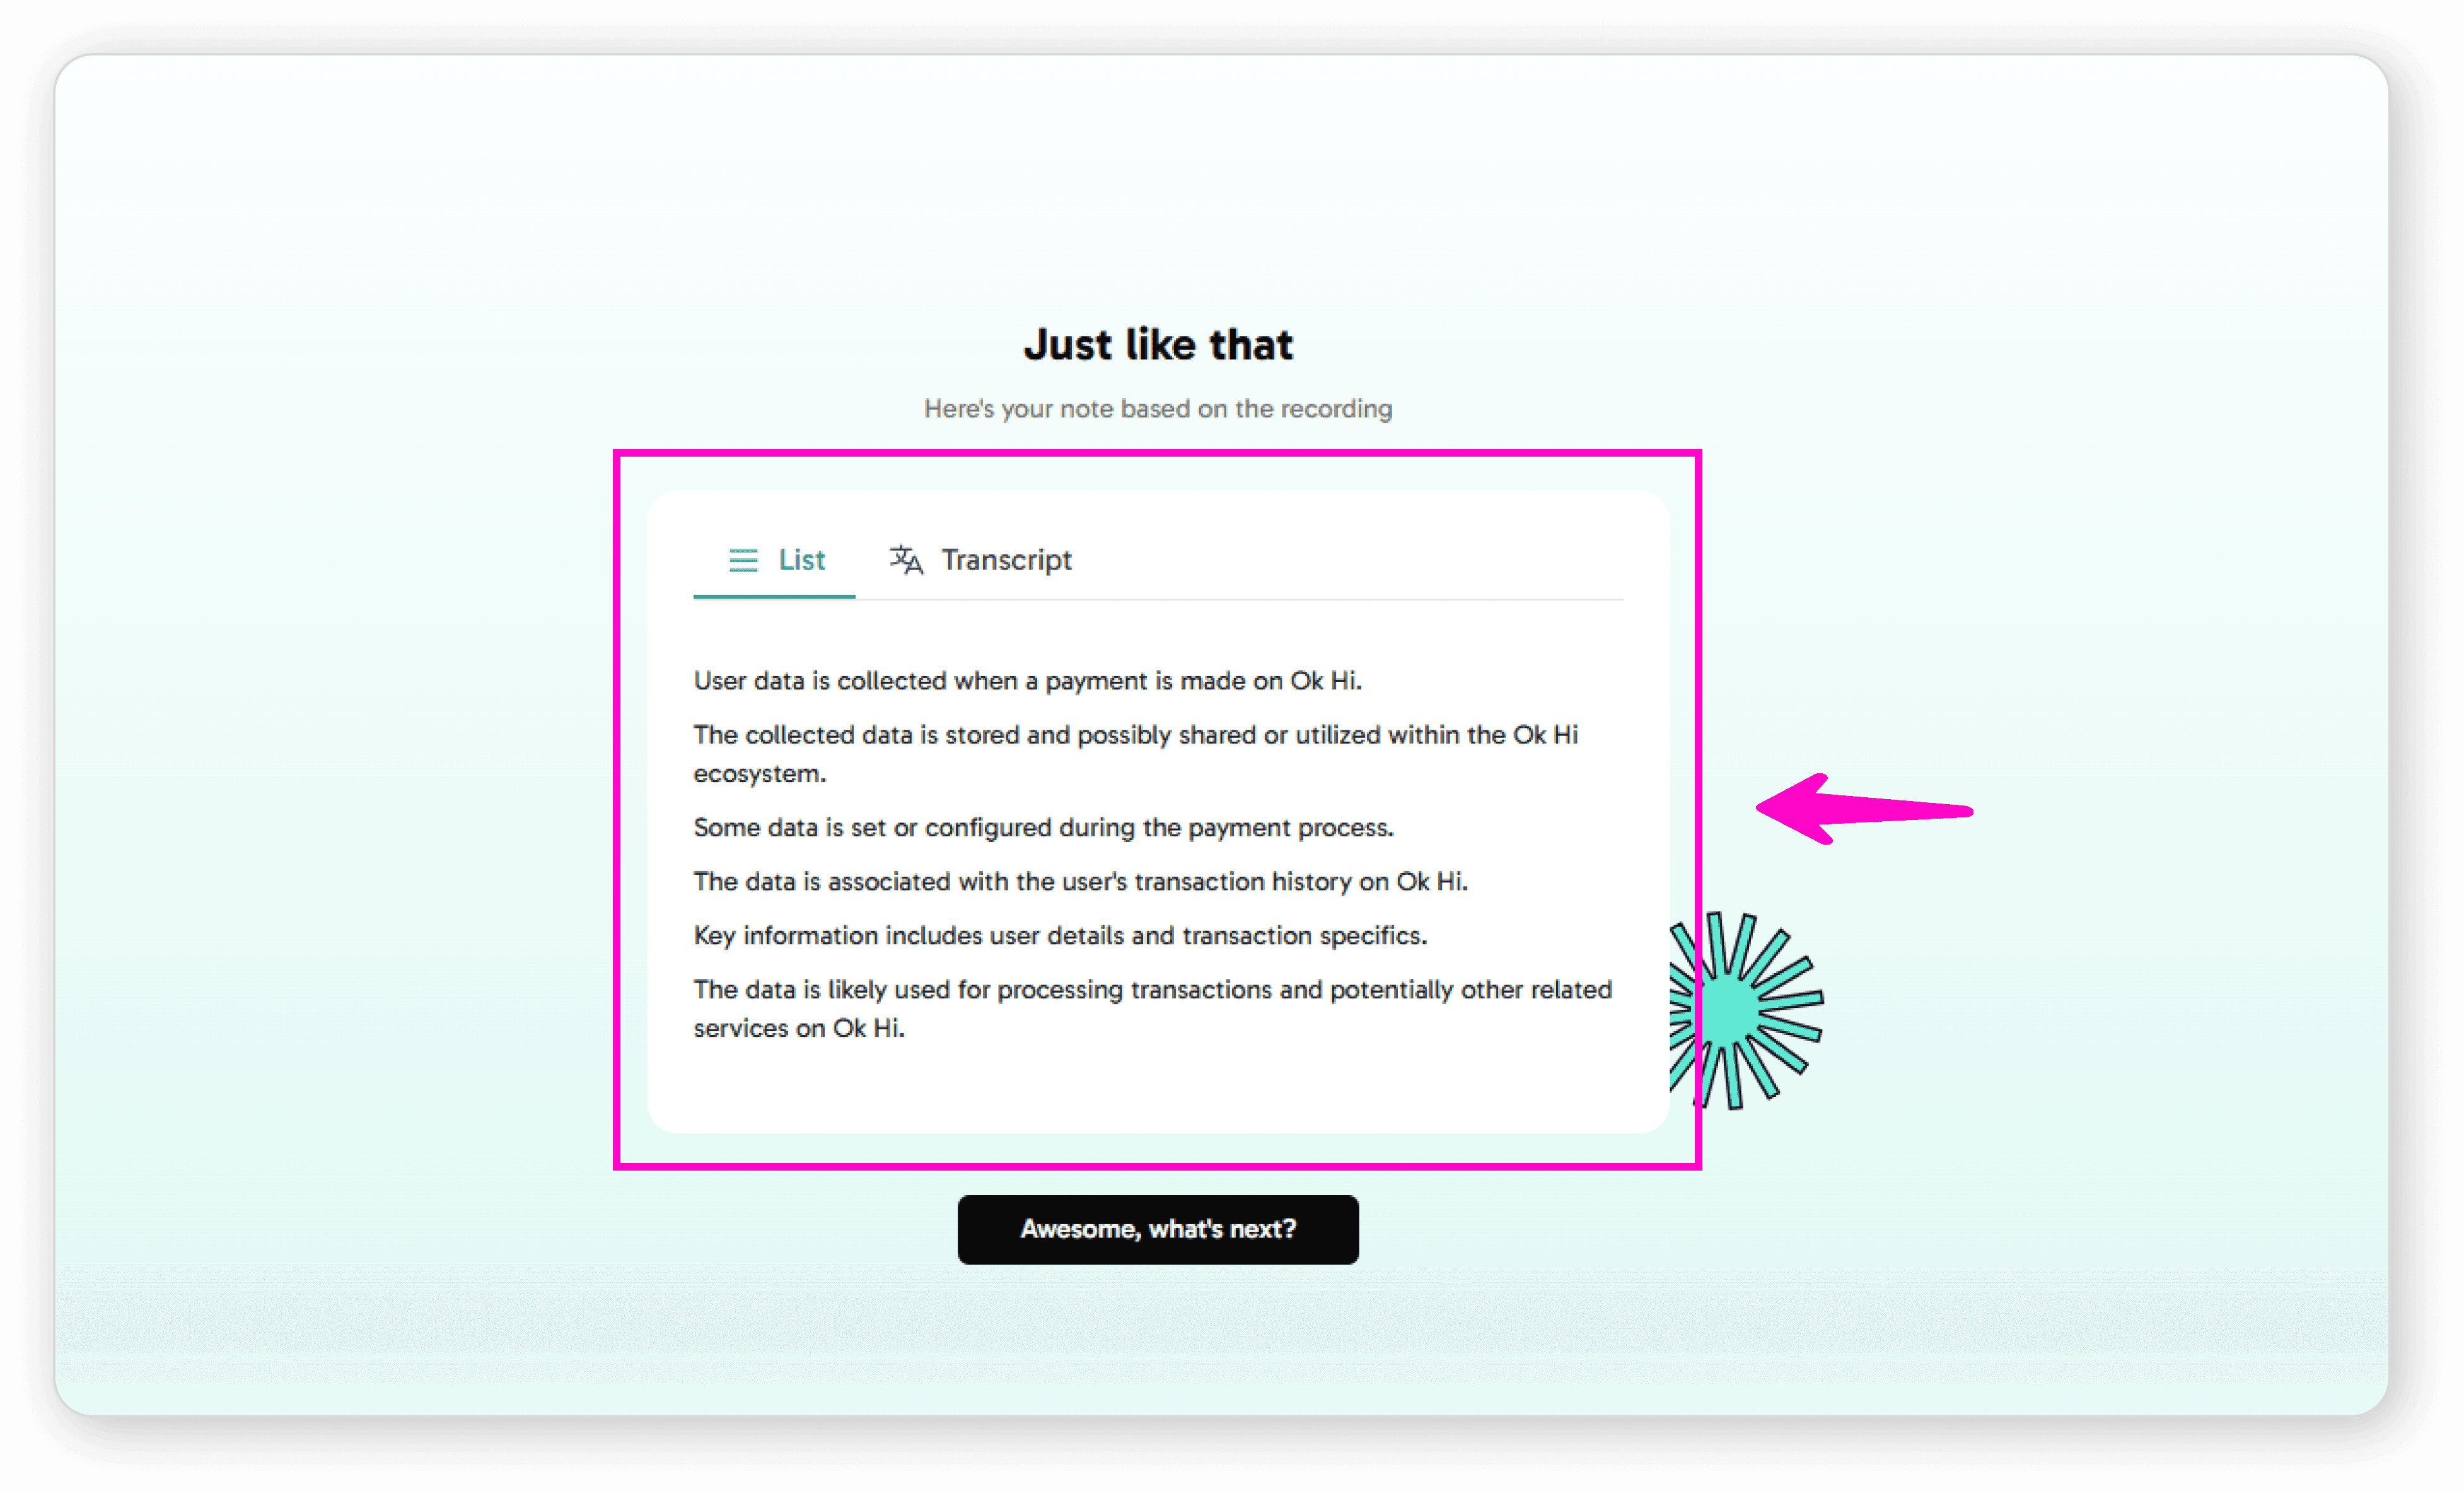
Click "Awesome, what's next?"
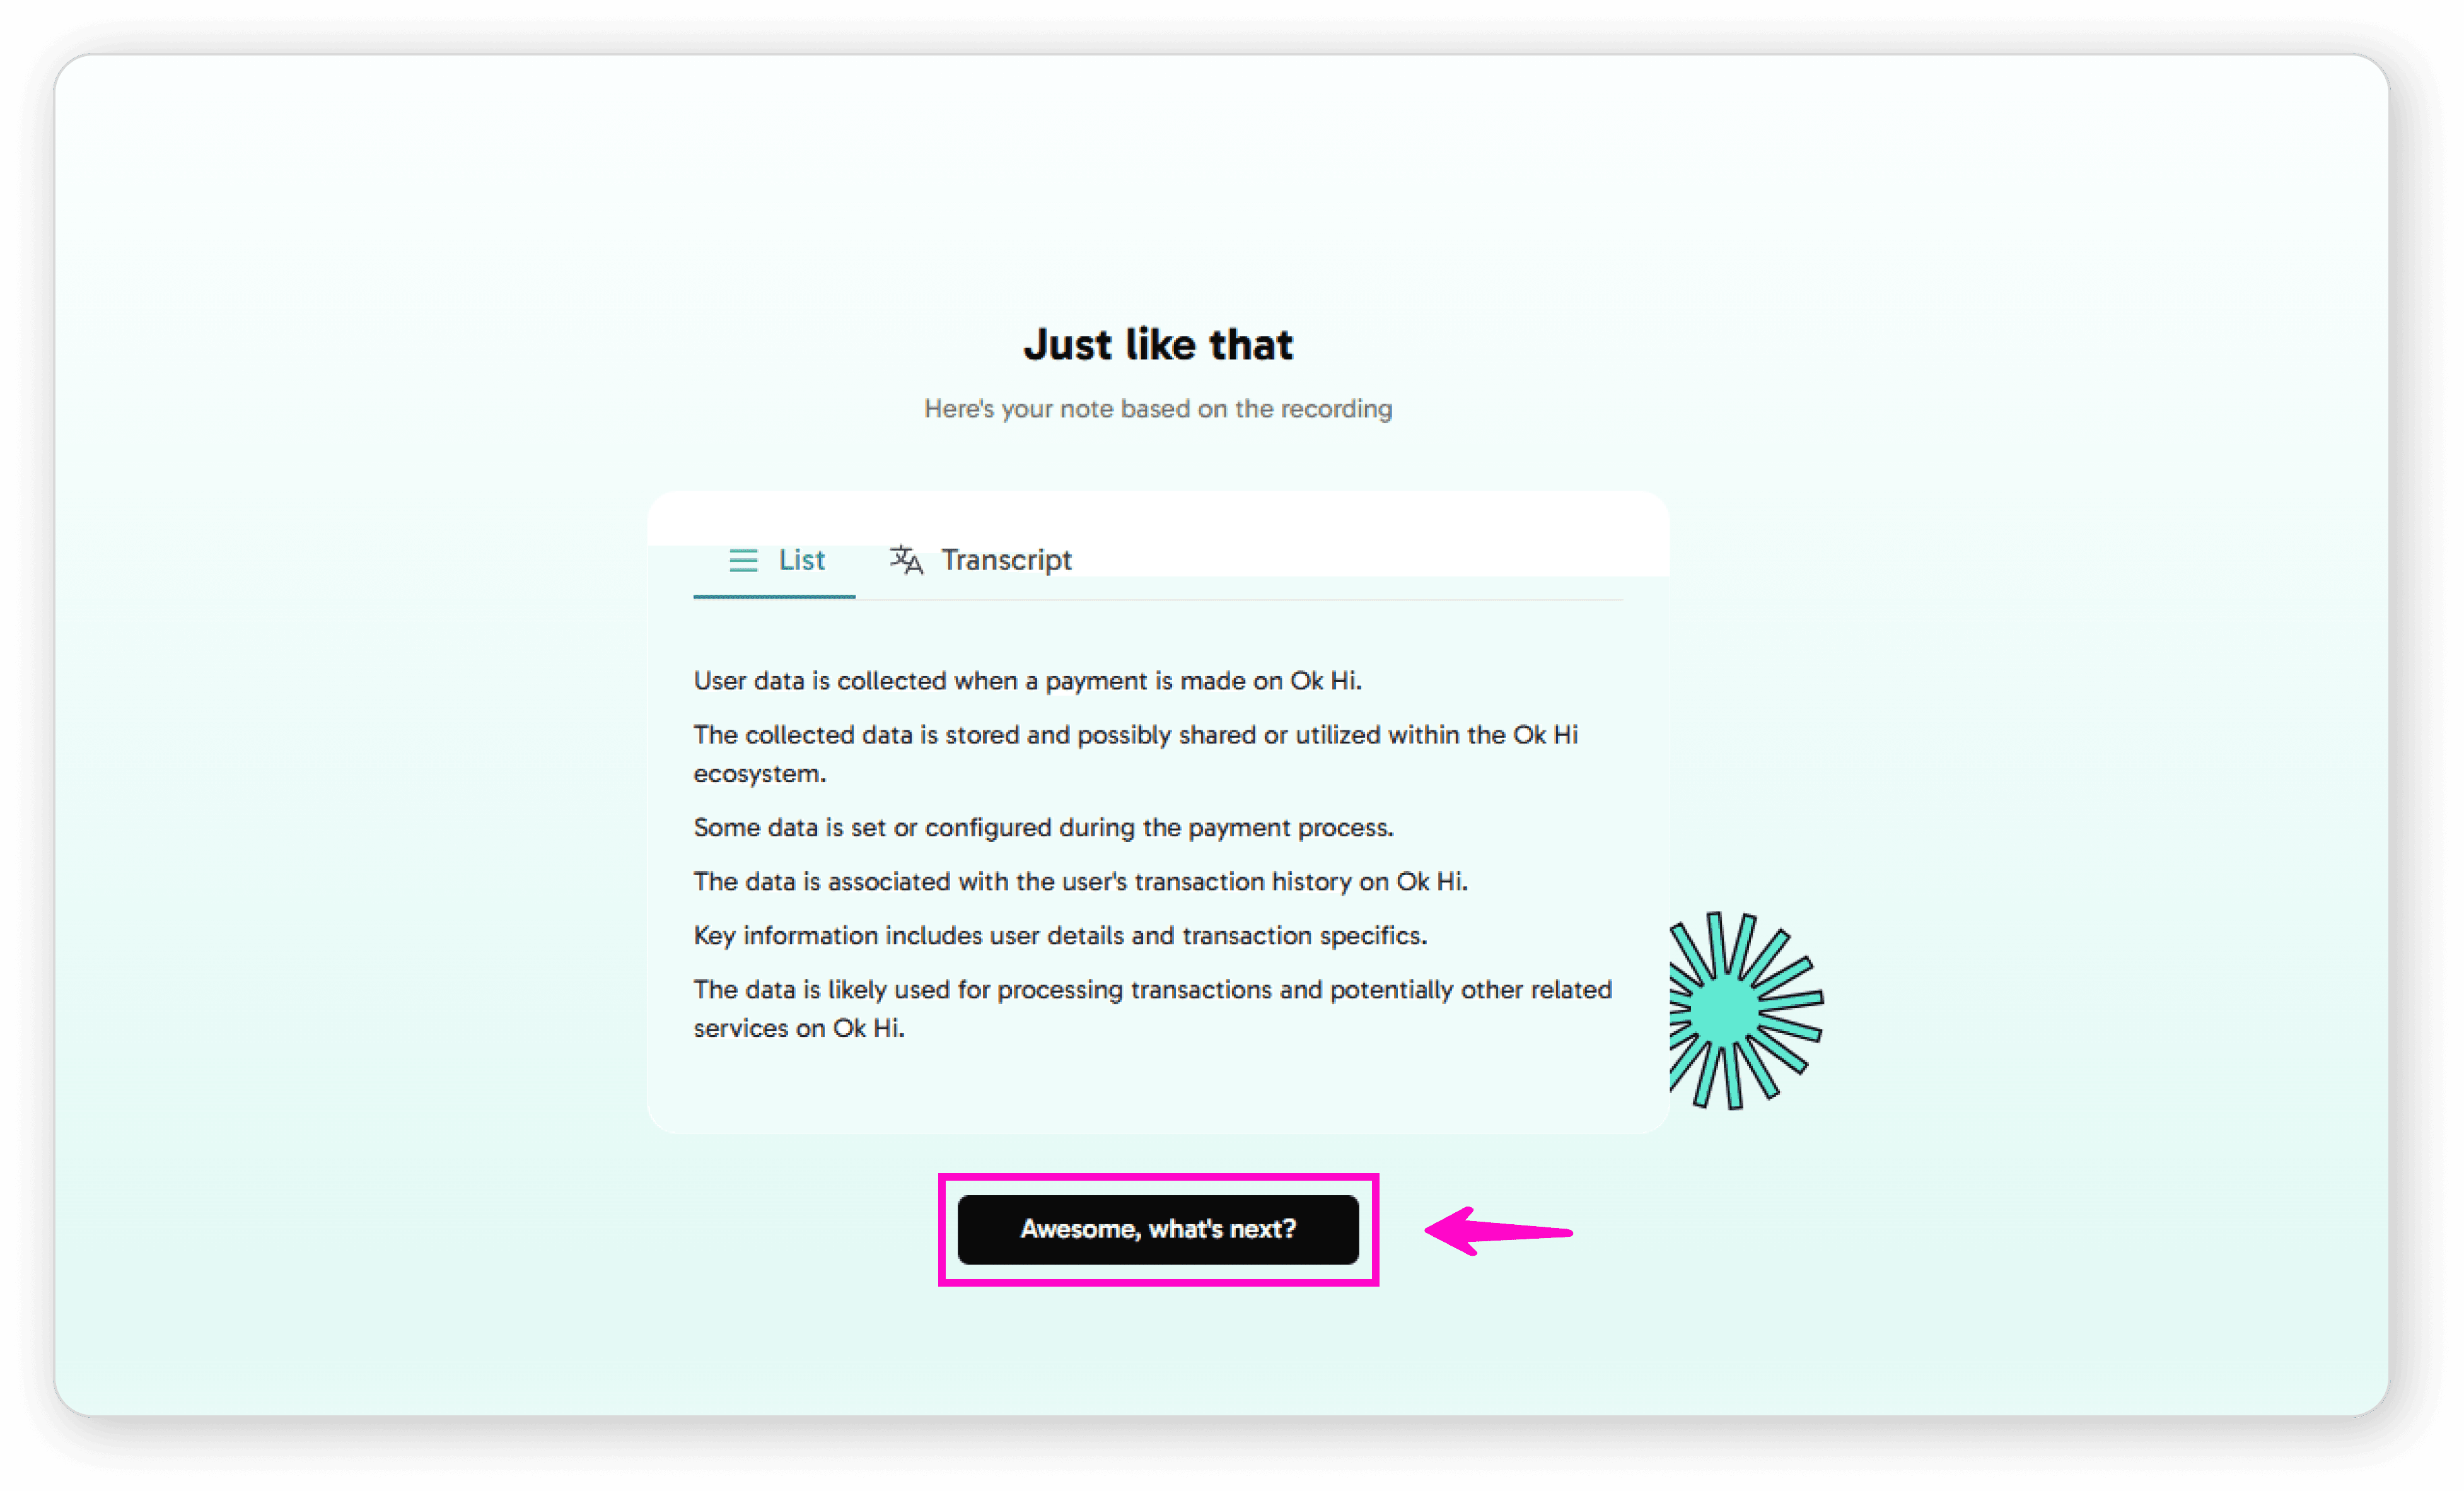
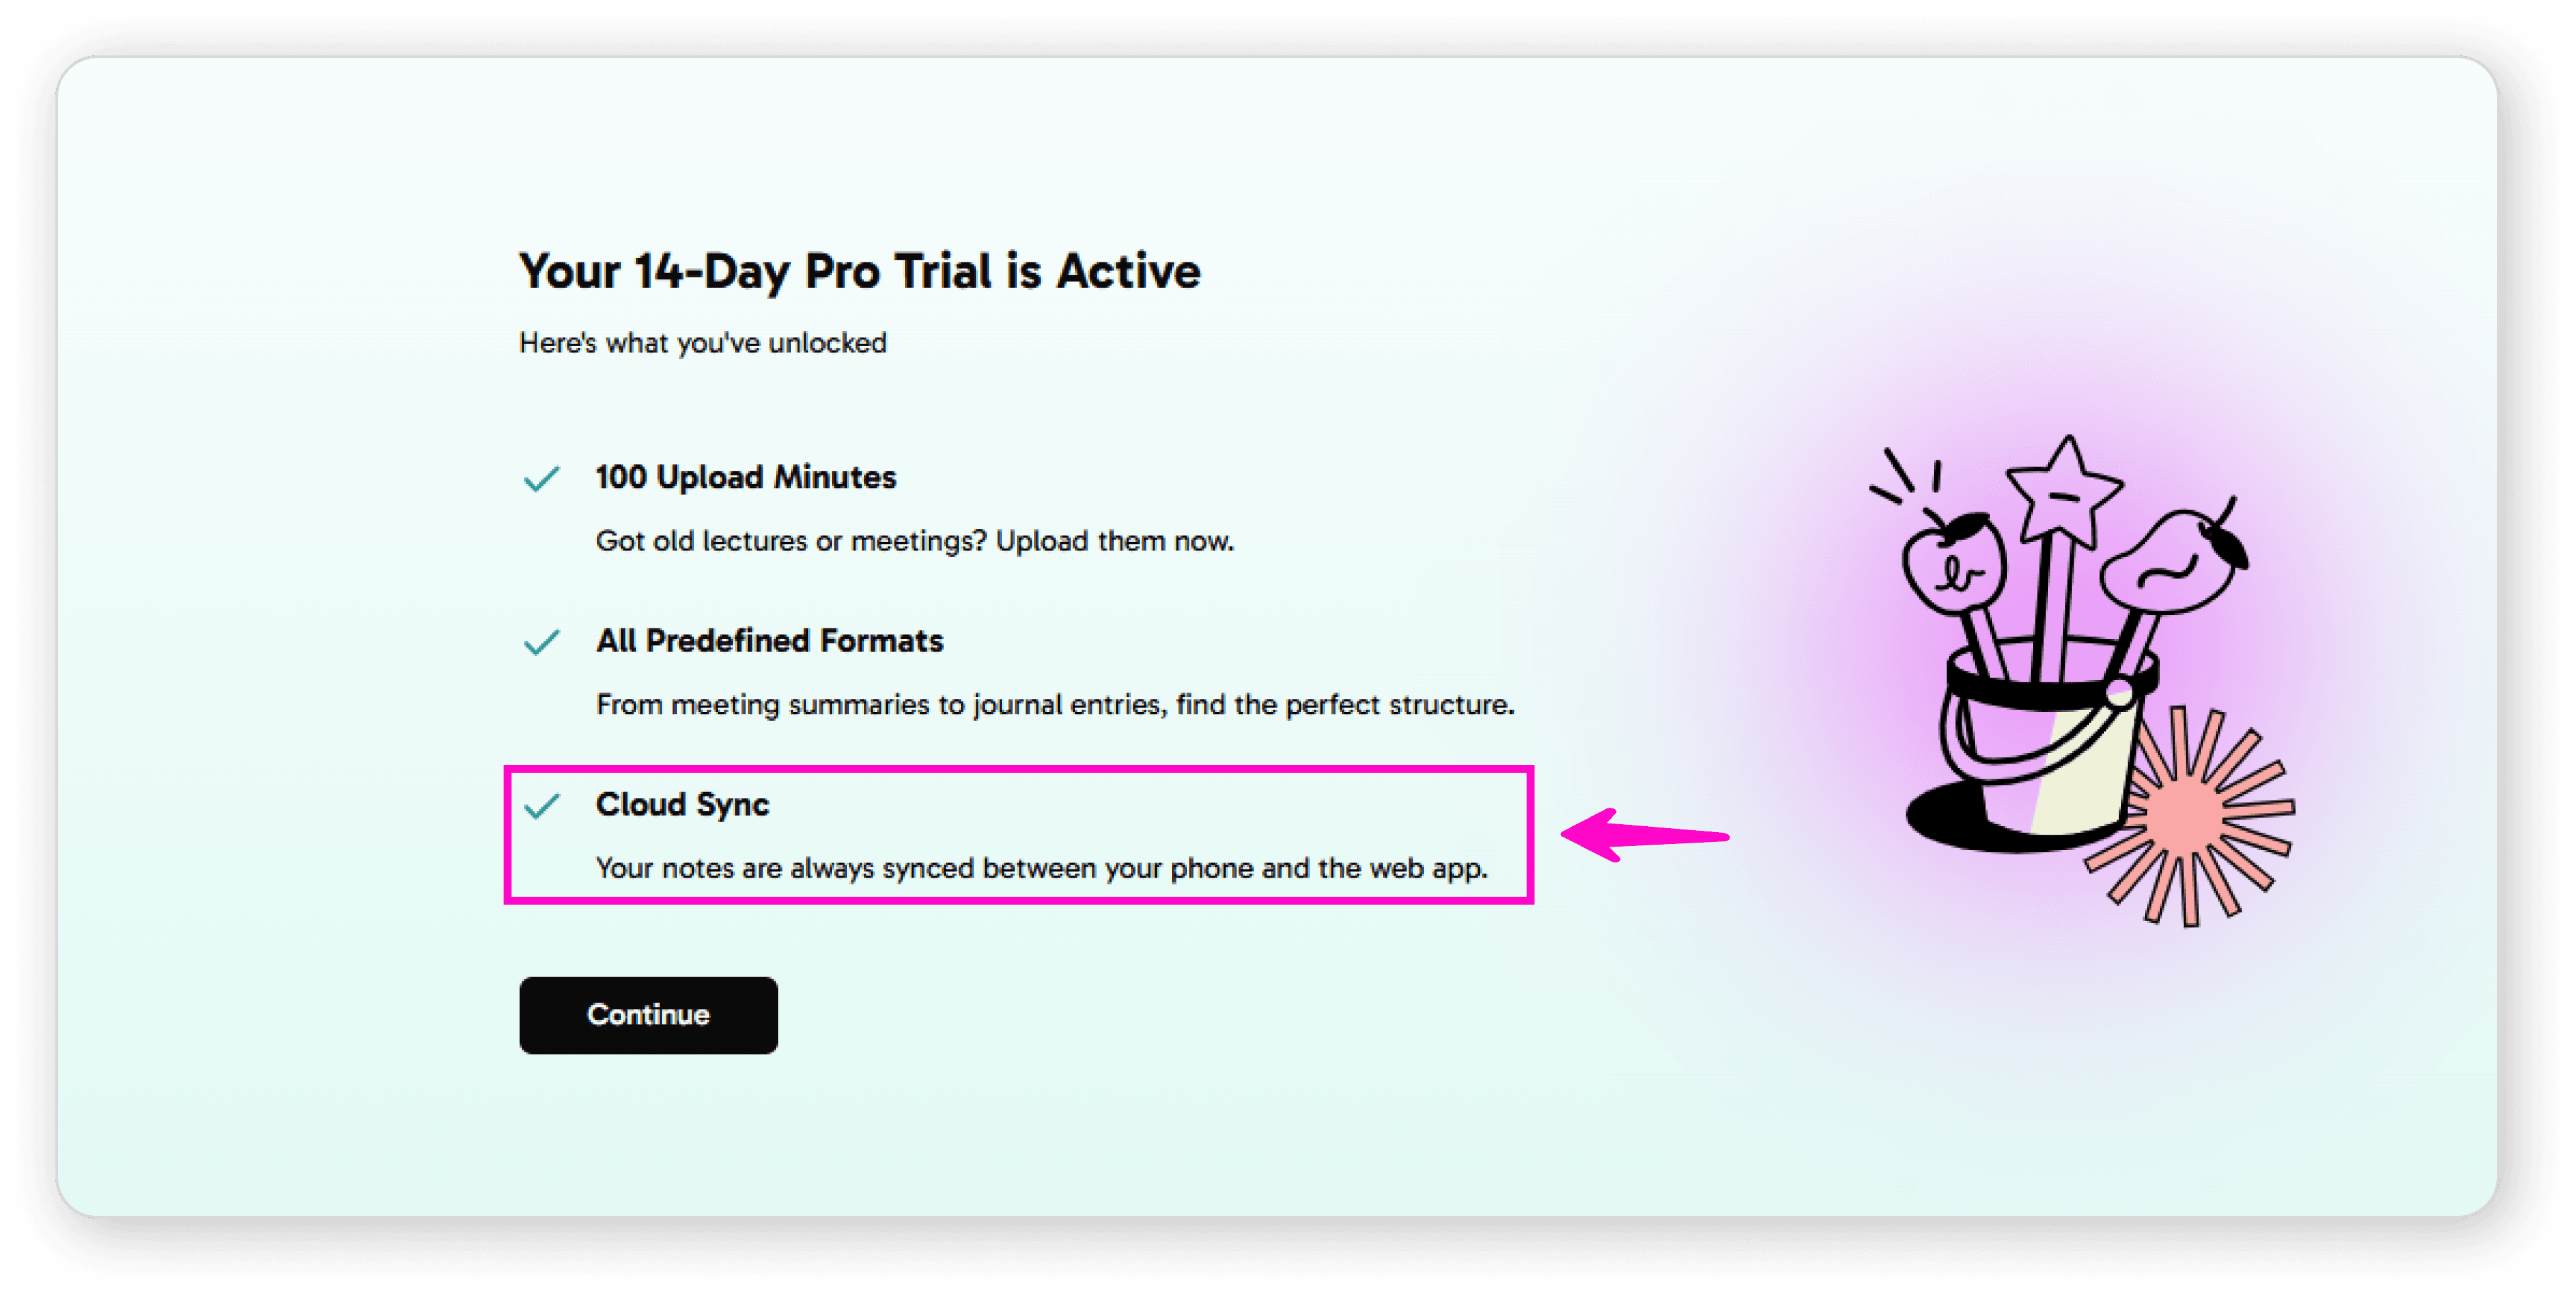
Review your benefits and unlocked features
Your 14-Day Pro Trial Includes:
100 upload minutes (upload old lectures or meetings)
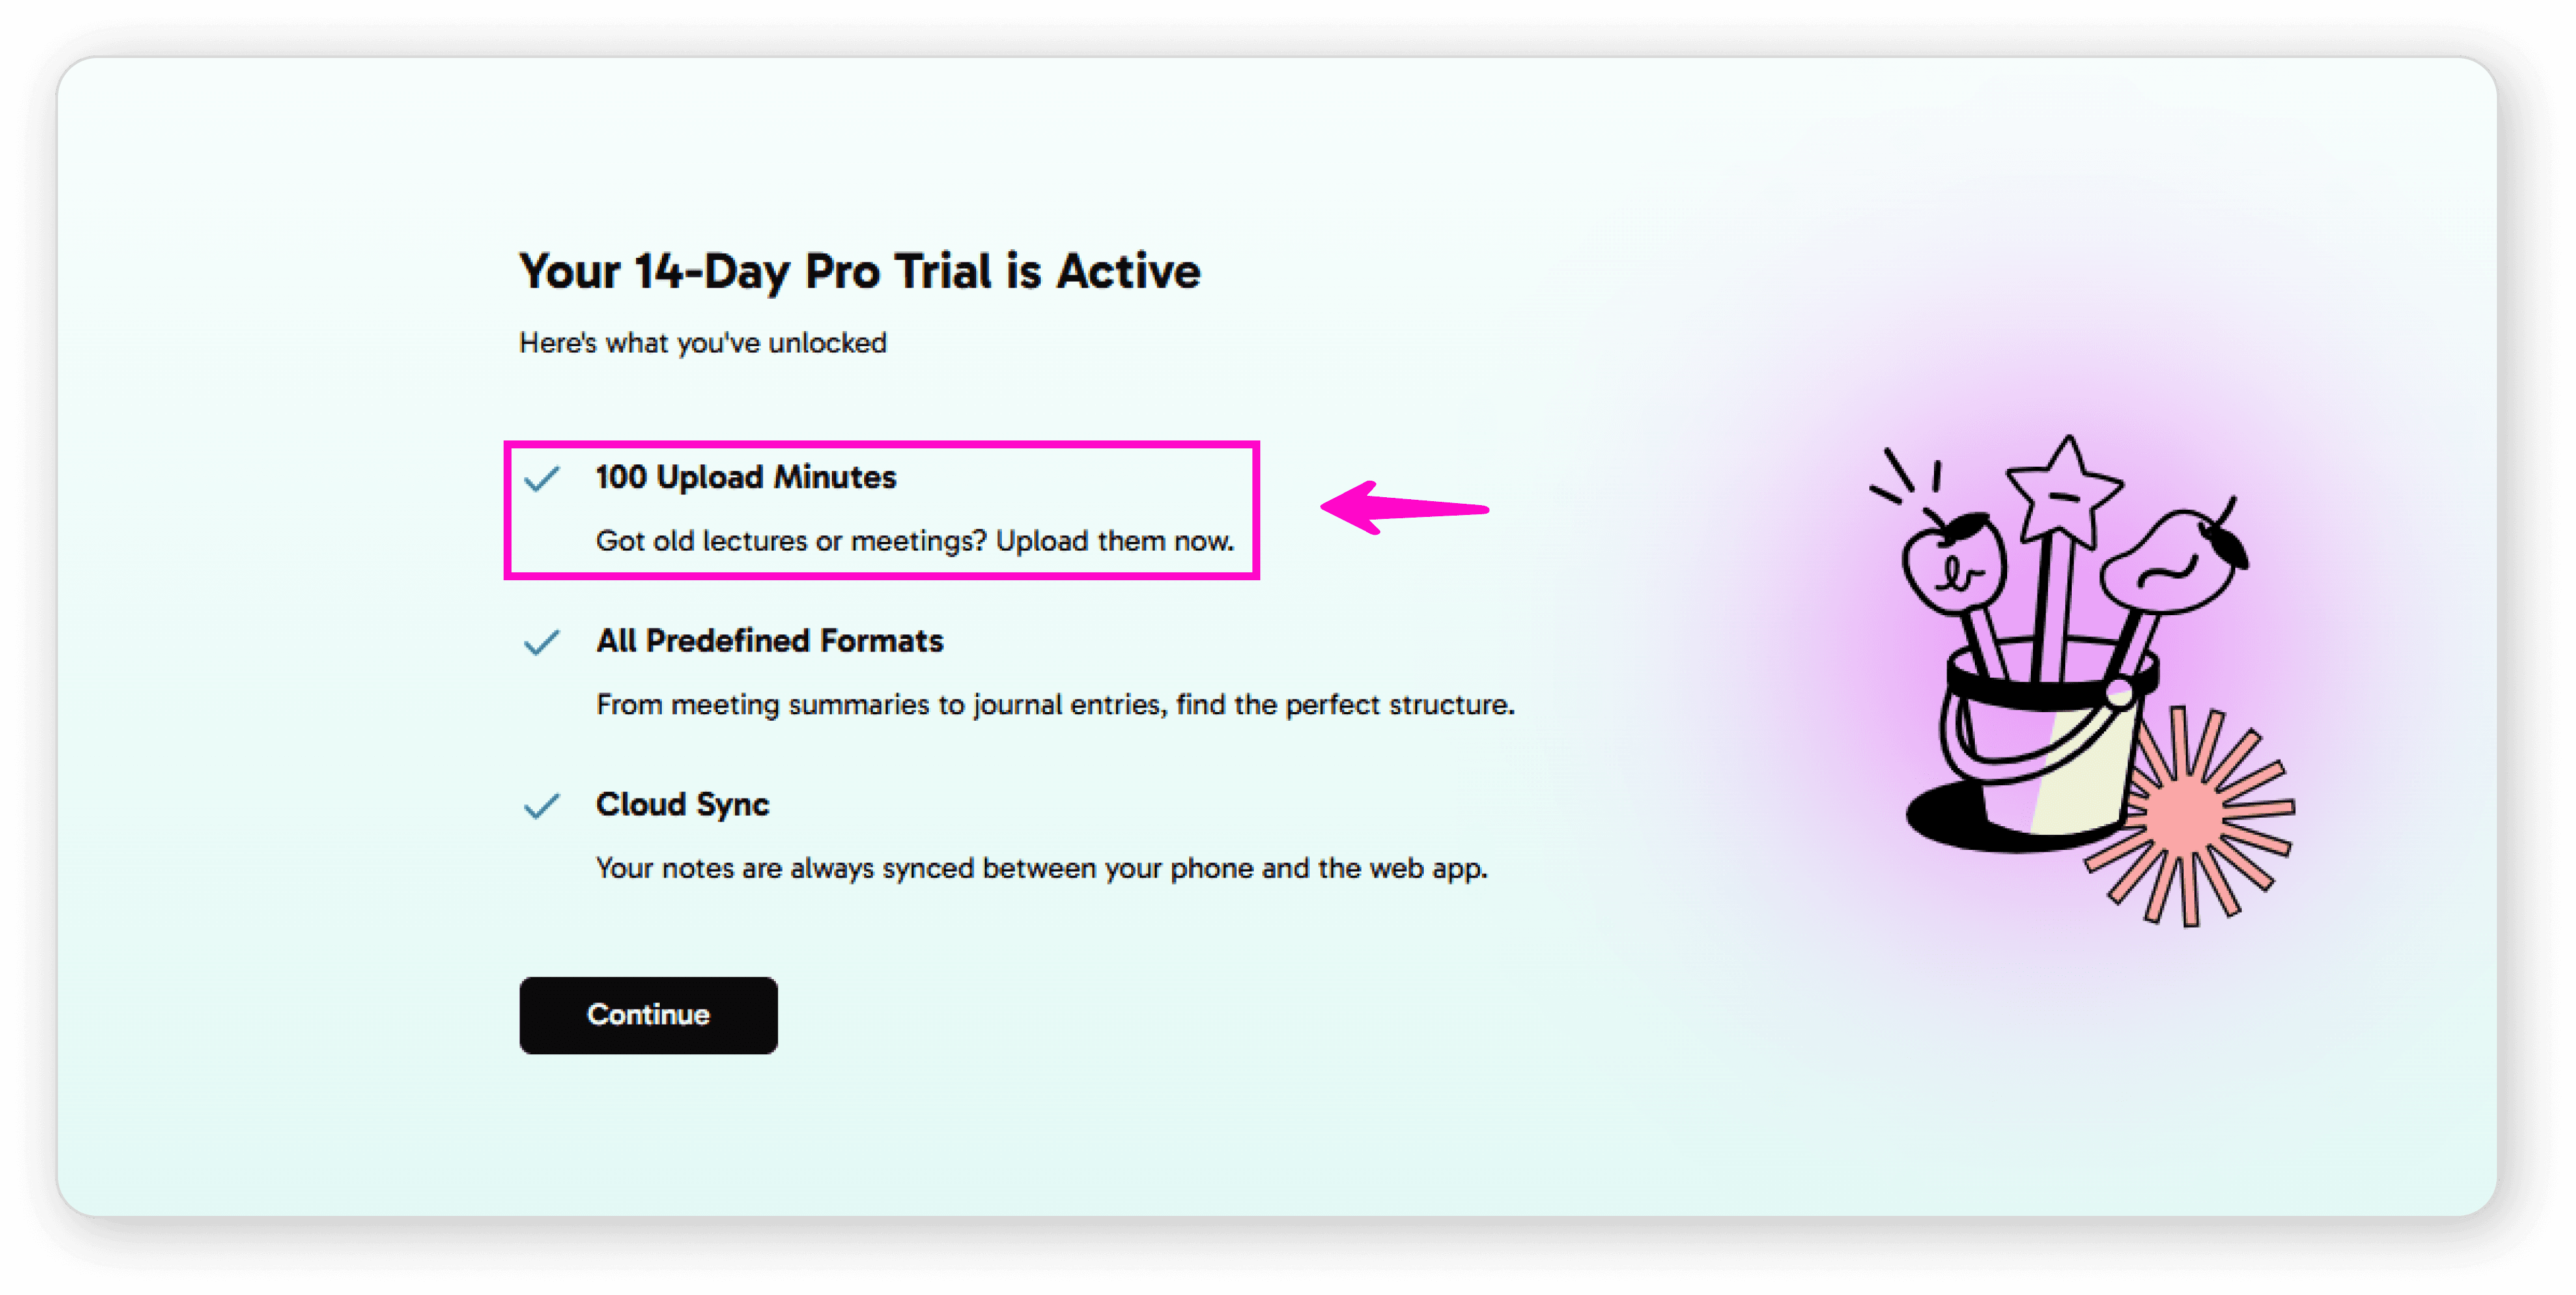
All predefined formats (meeting summaries, journal entries, and more)
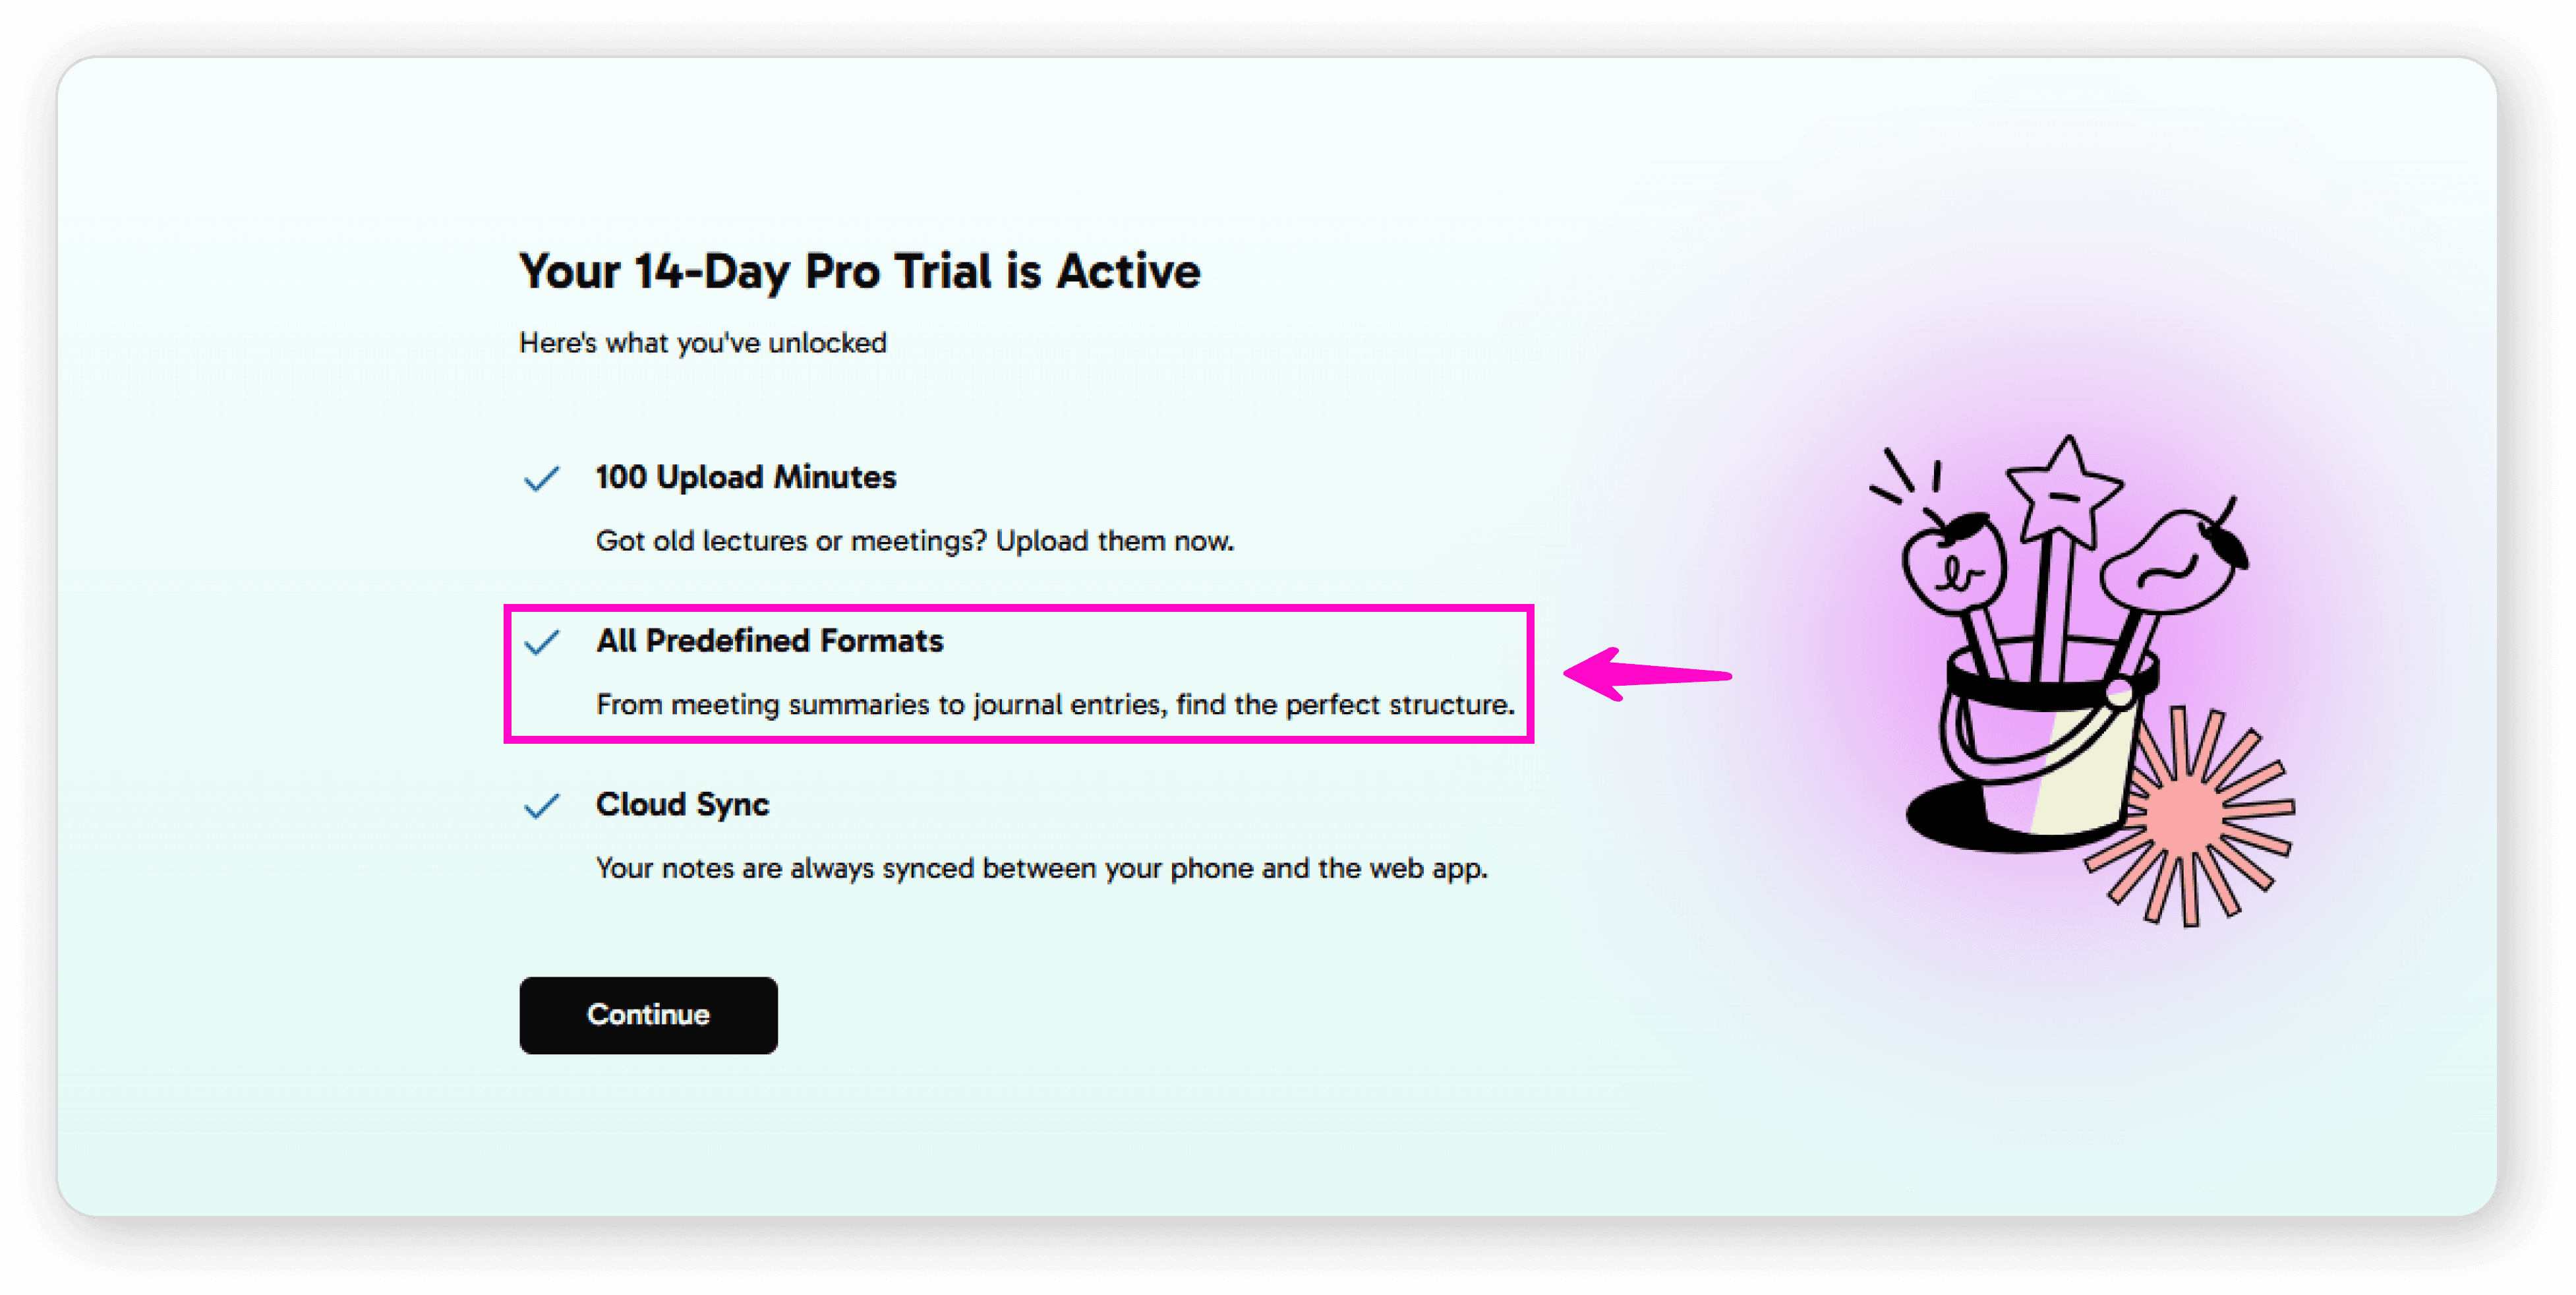
Cloud sync (notes synced between phone and web app)
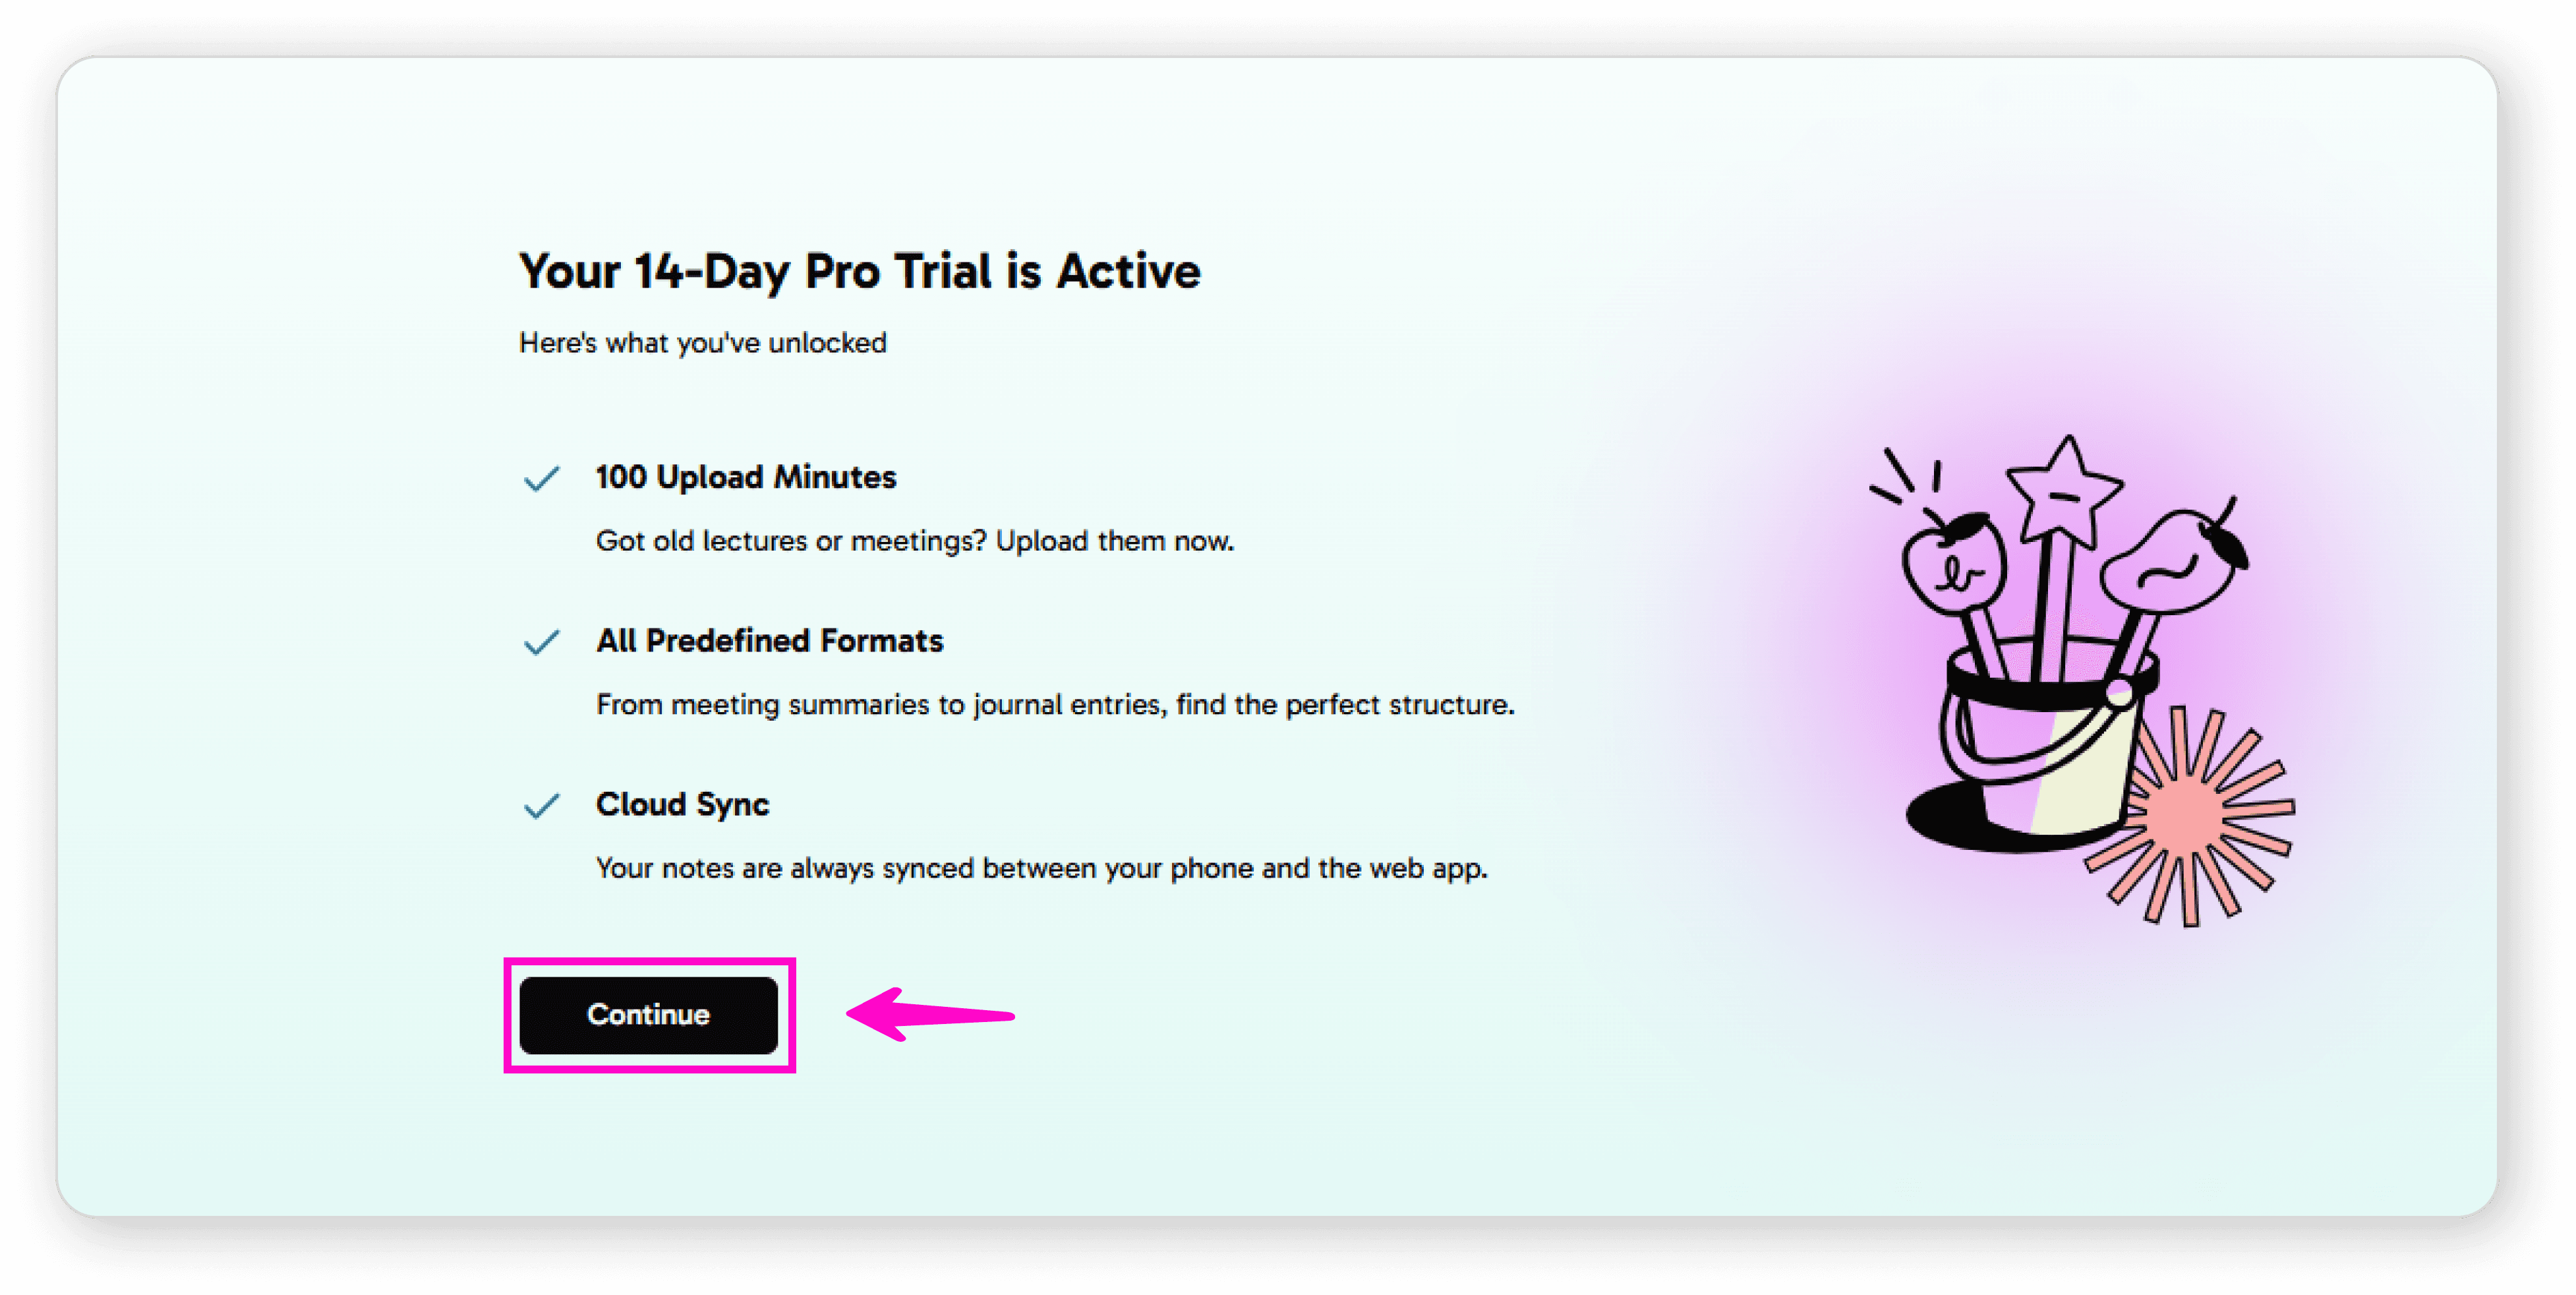
Desktop Access
To get the desktop:
Click "Continue"
Click "Email me the download link"
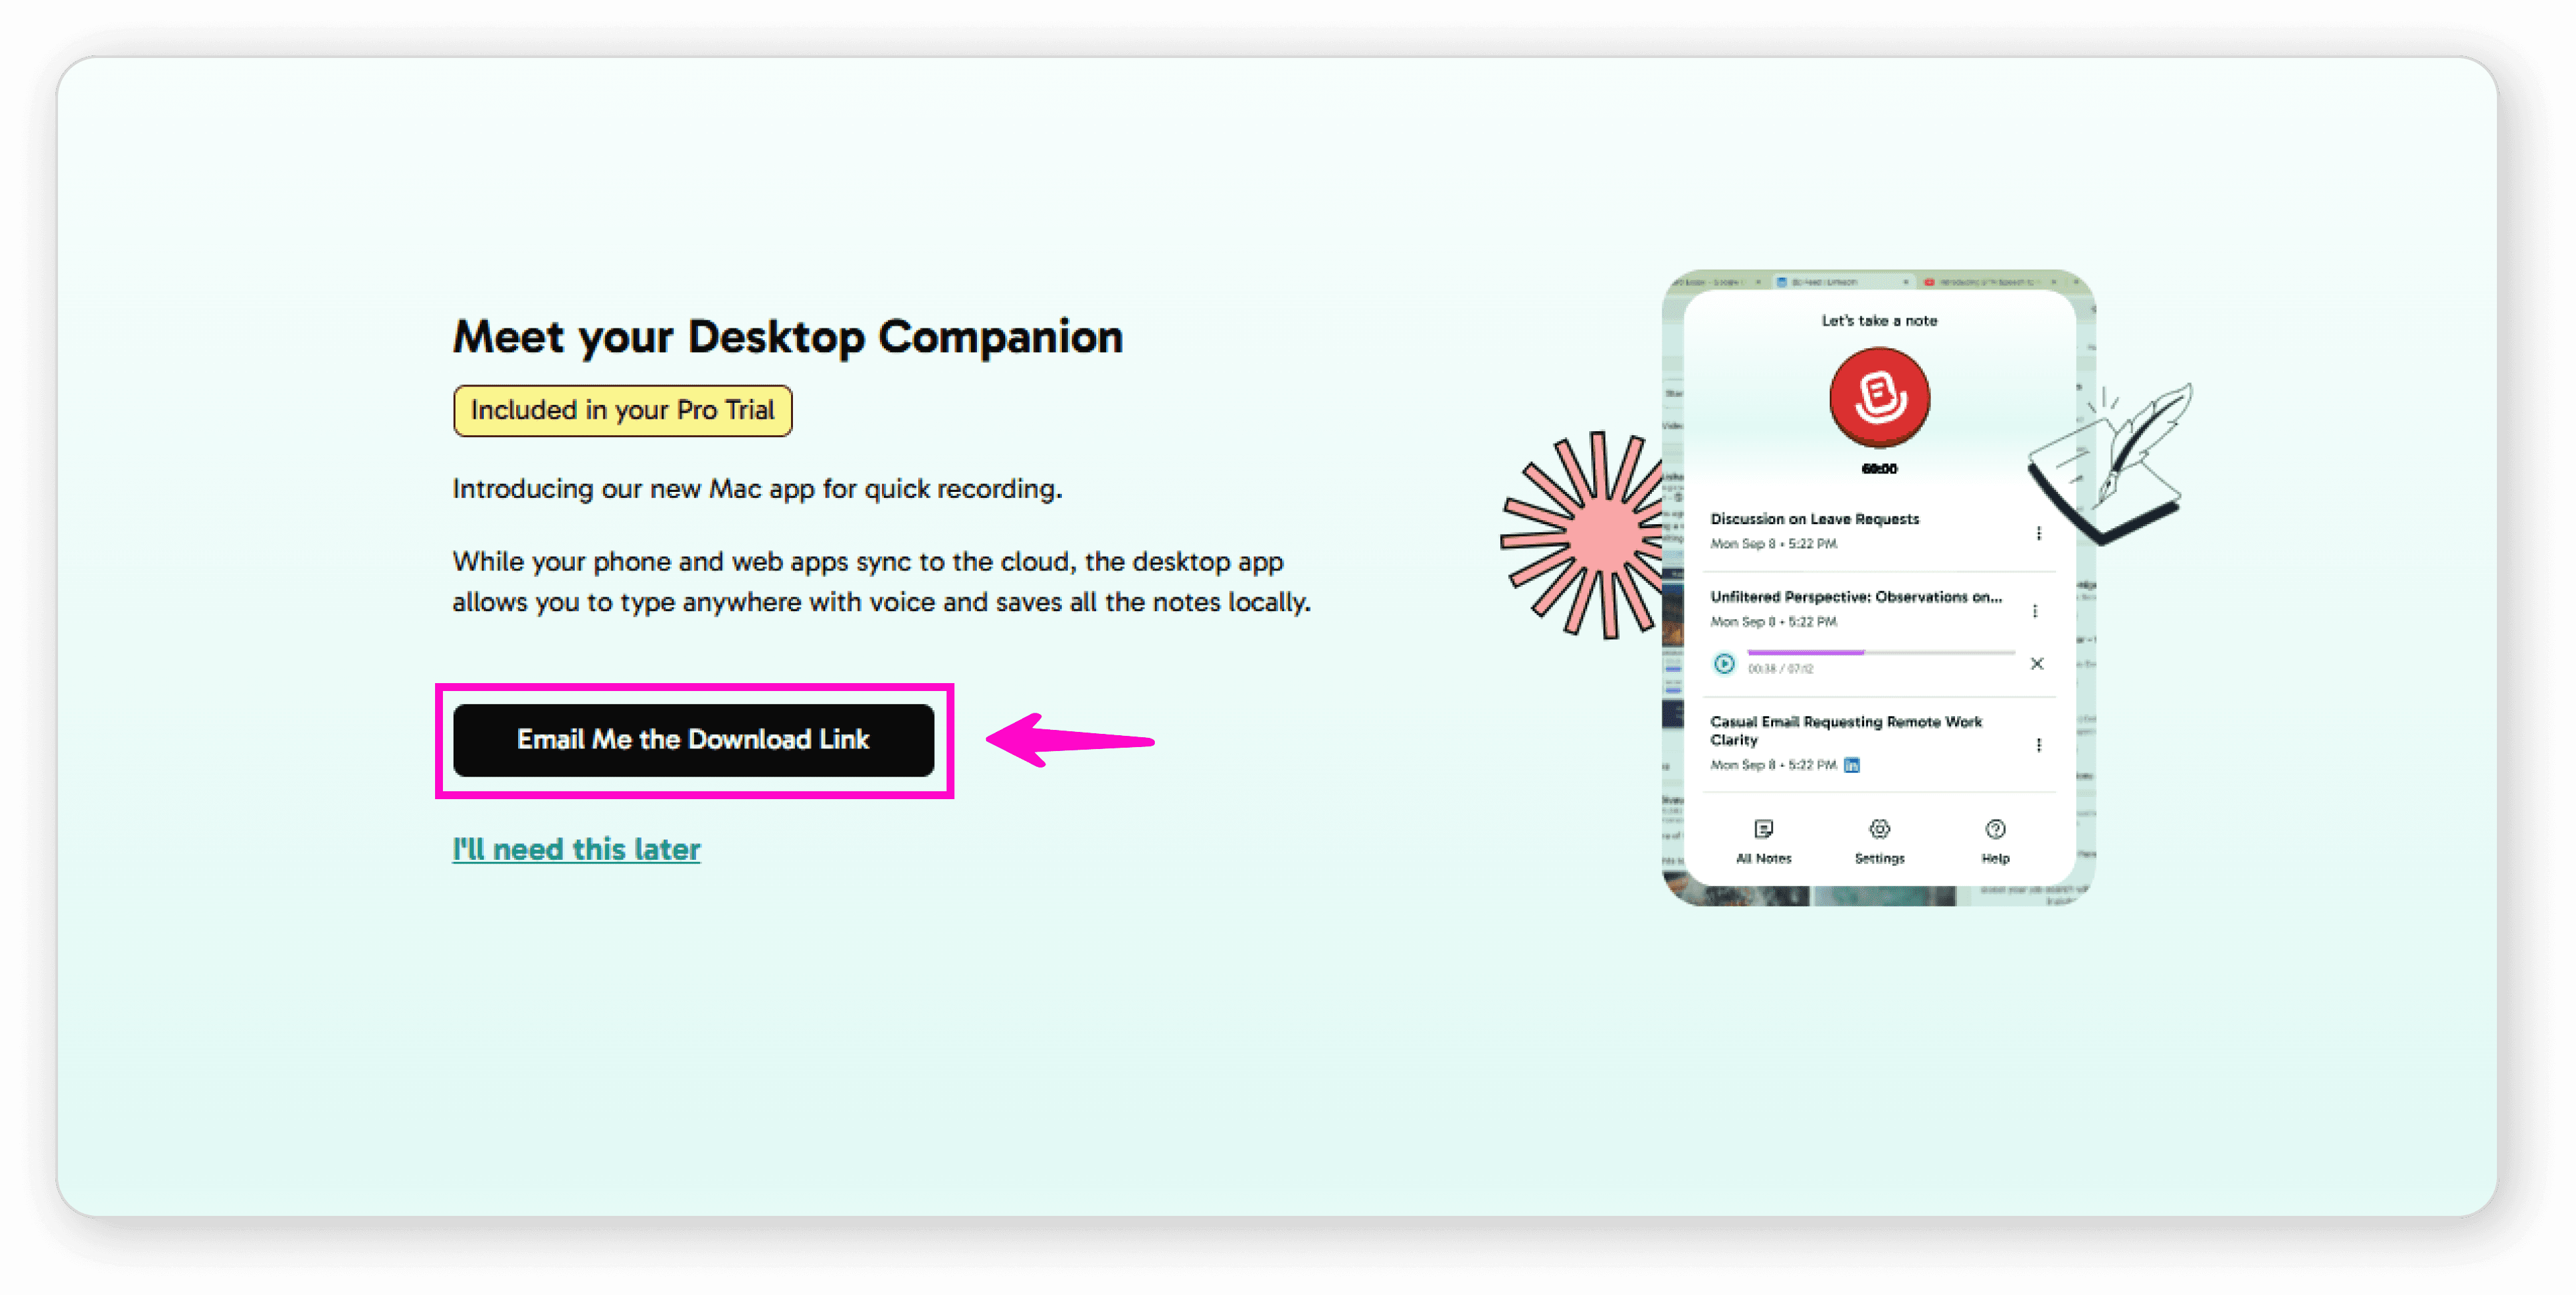
Check your email for the download link
(Pending…….)
How to Record Audio: Step-by-Step Guide
Open the Recorder
Navigate to your Dashboard
Click on the Mic Button

You'll arrive at the Recorder Screen
Understanding Your Limits
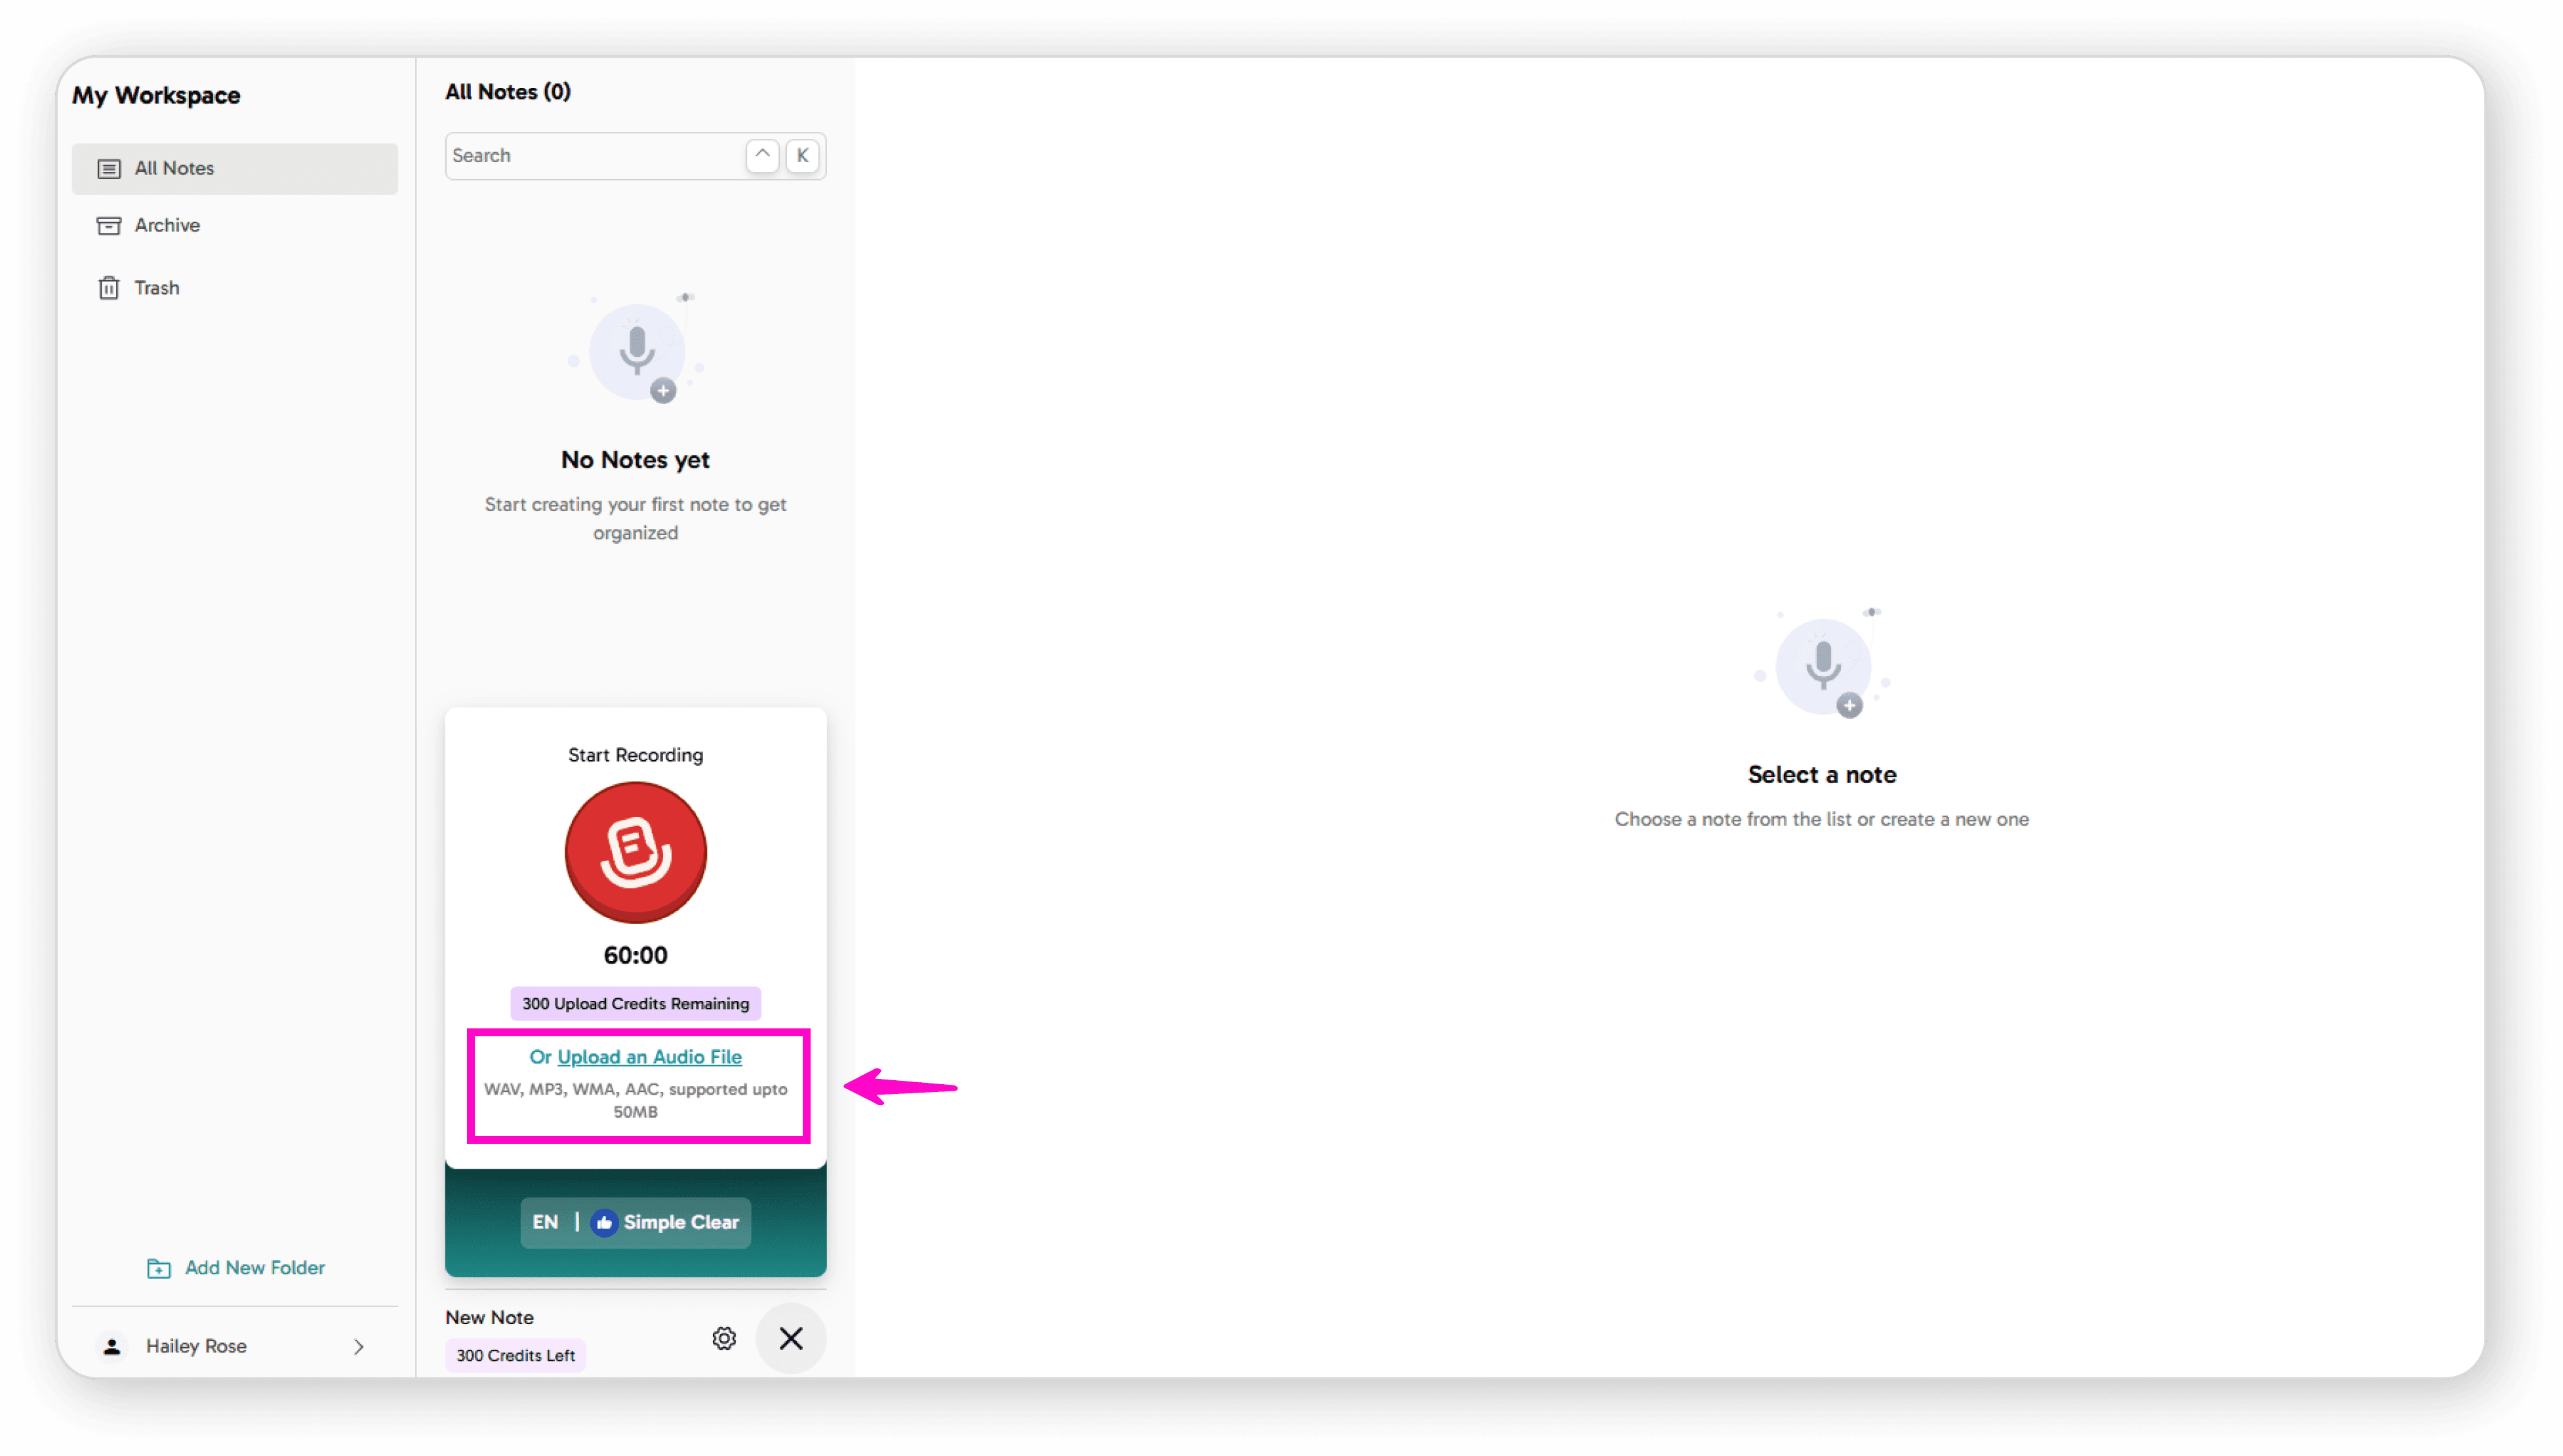
Credits: Shows the total minutes available for uploading external audio files (supports MP3, WAV, WMA, AAC up to 50MB)
Recording Duration: Maximum recording time varies by plan:
Free Plan: 1 minute
Pro Plan: 15 minutes
Pro+ Plan: 60 minutes
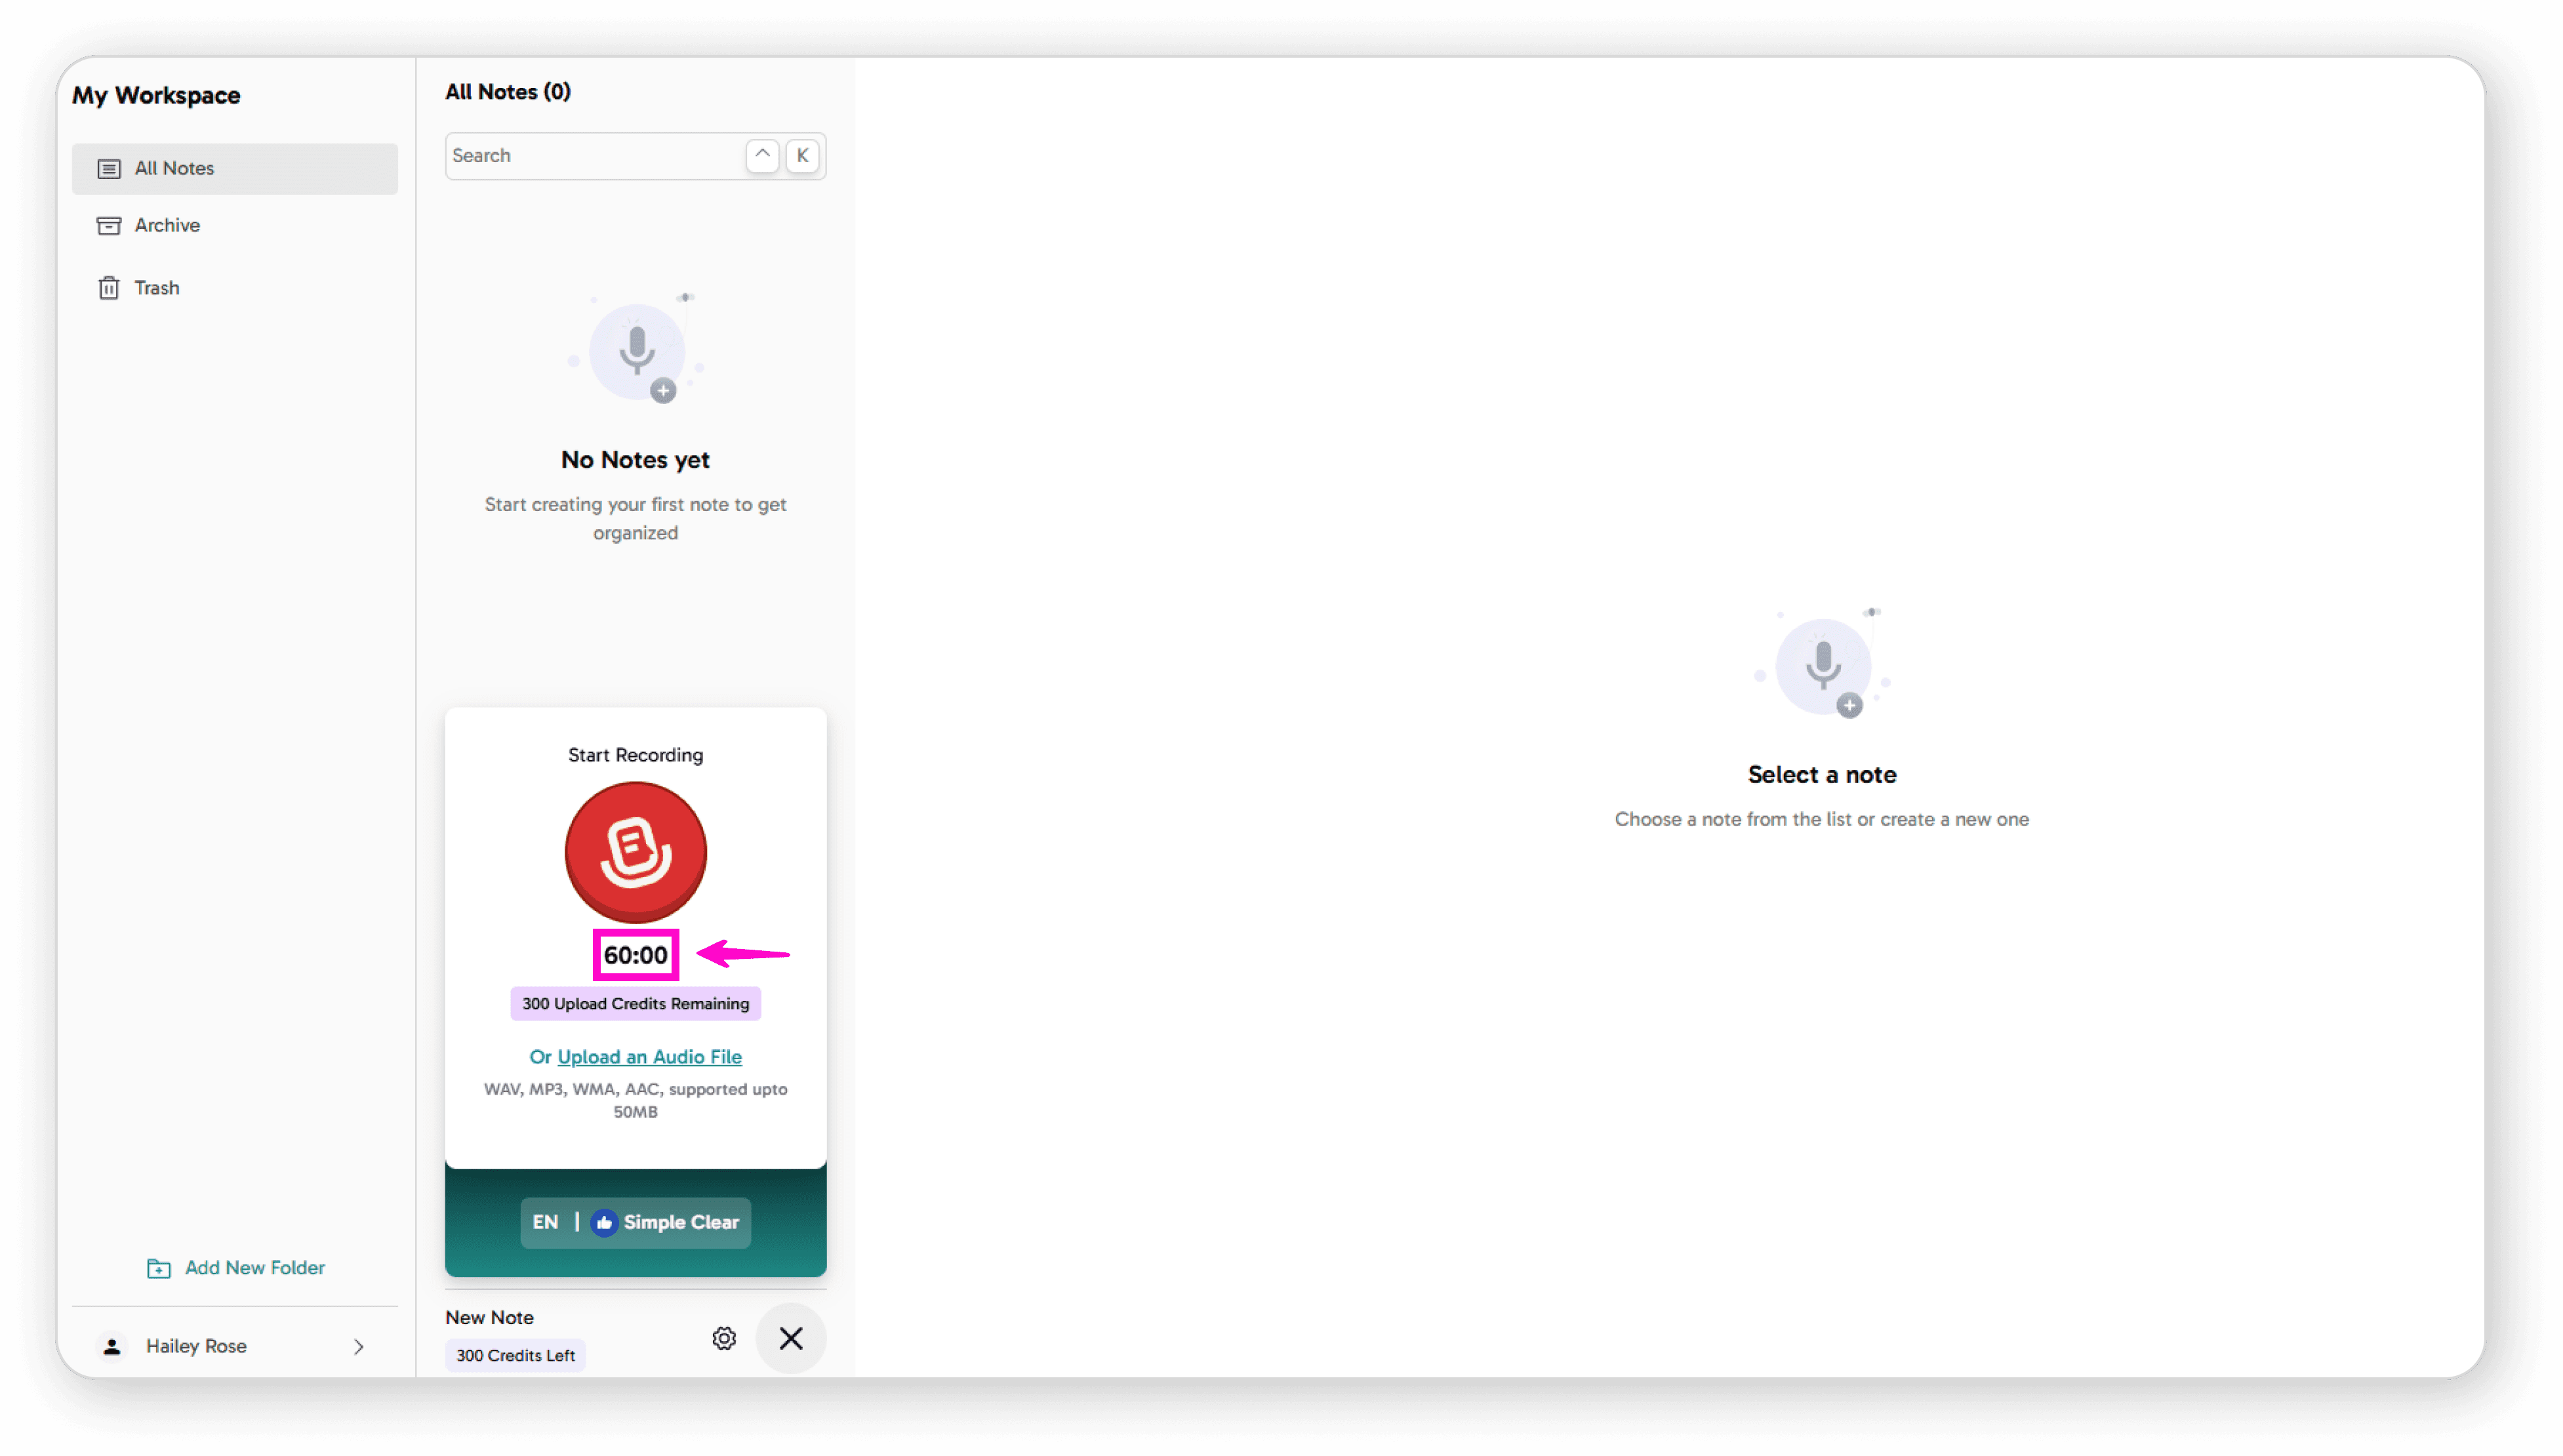
Check your remaining recording minutes anytime
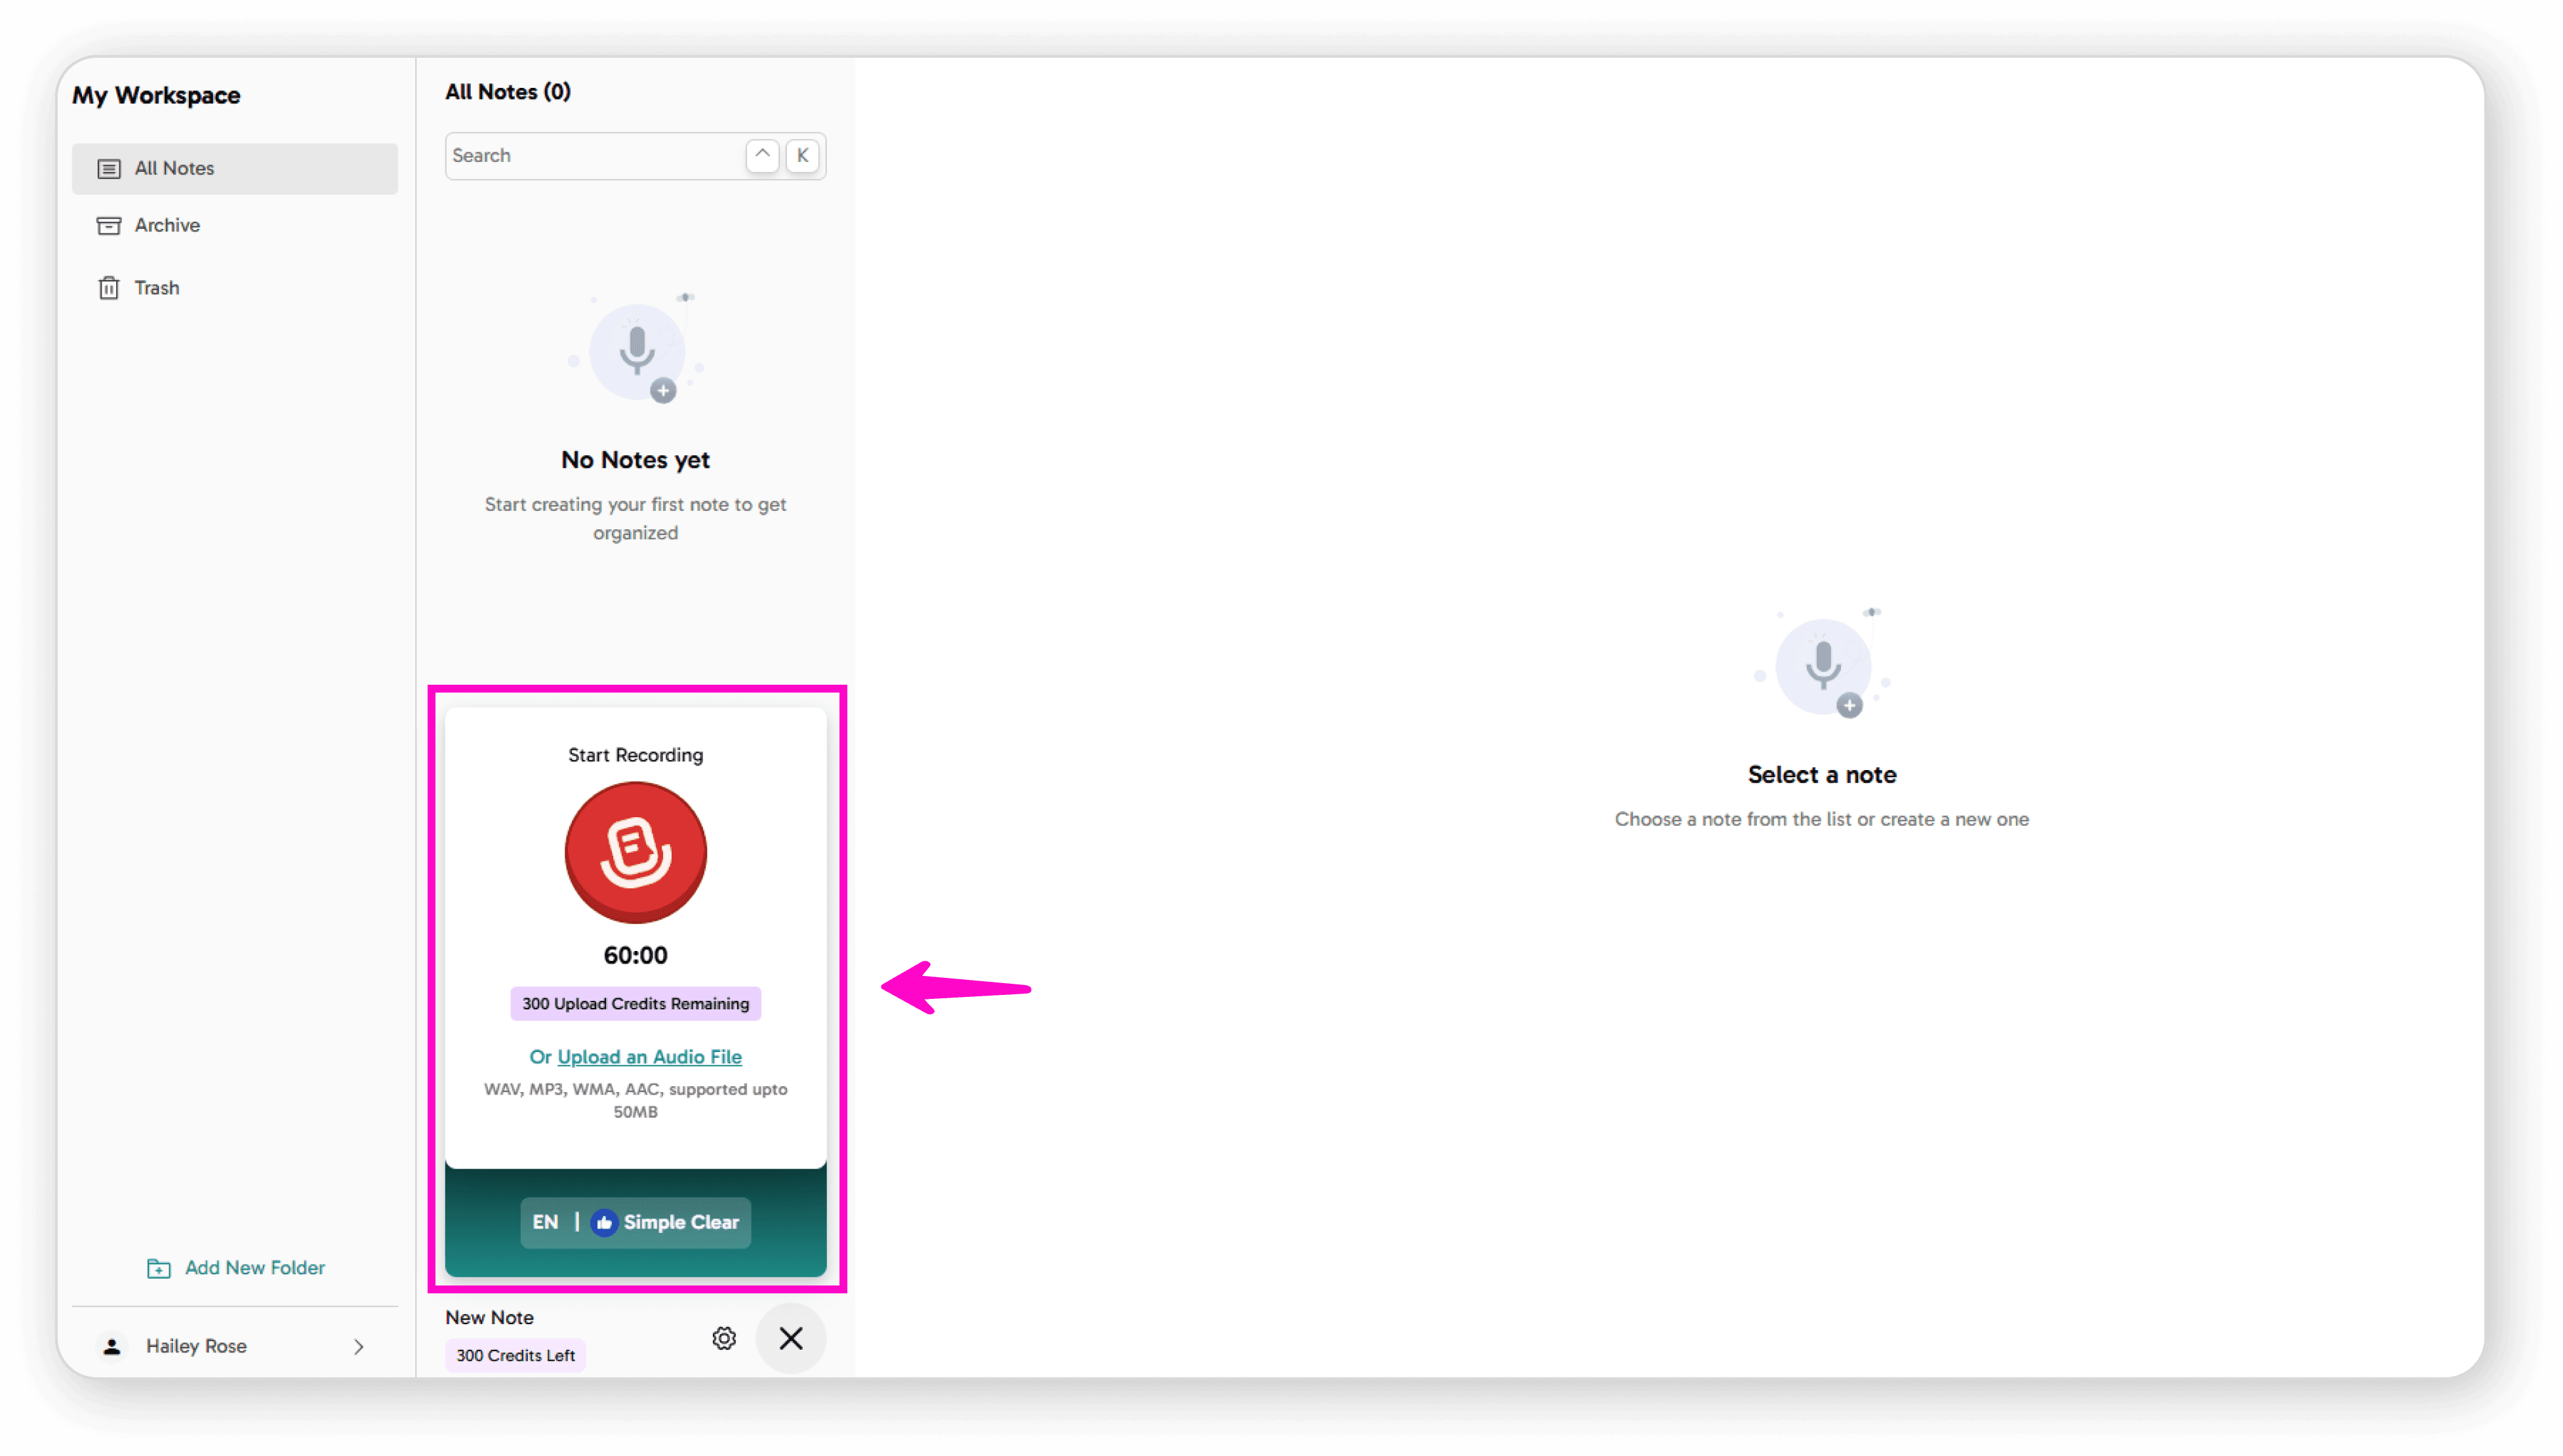
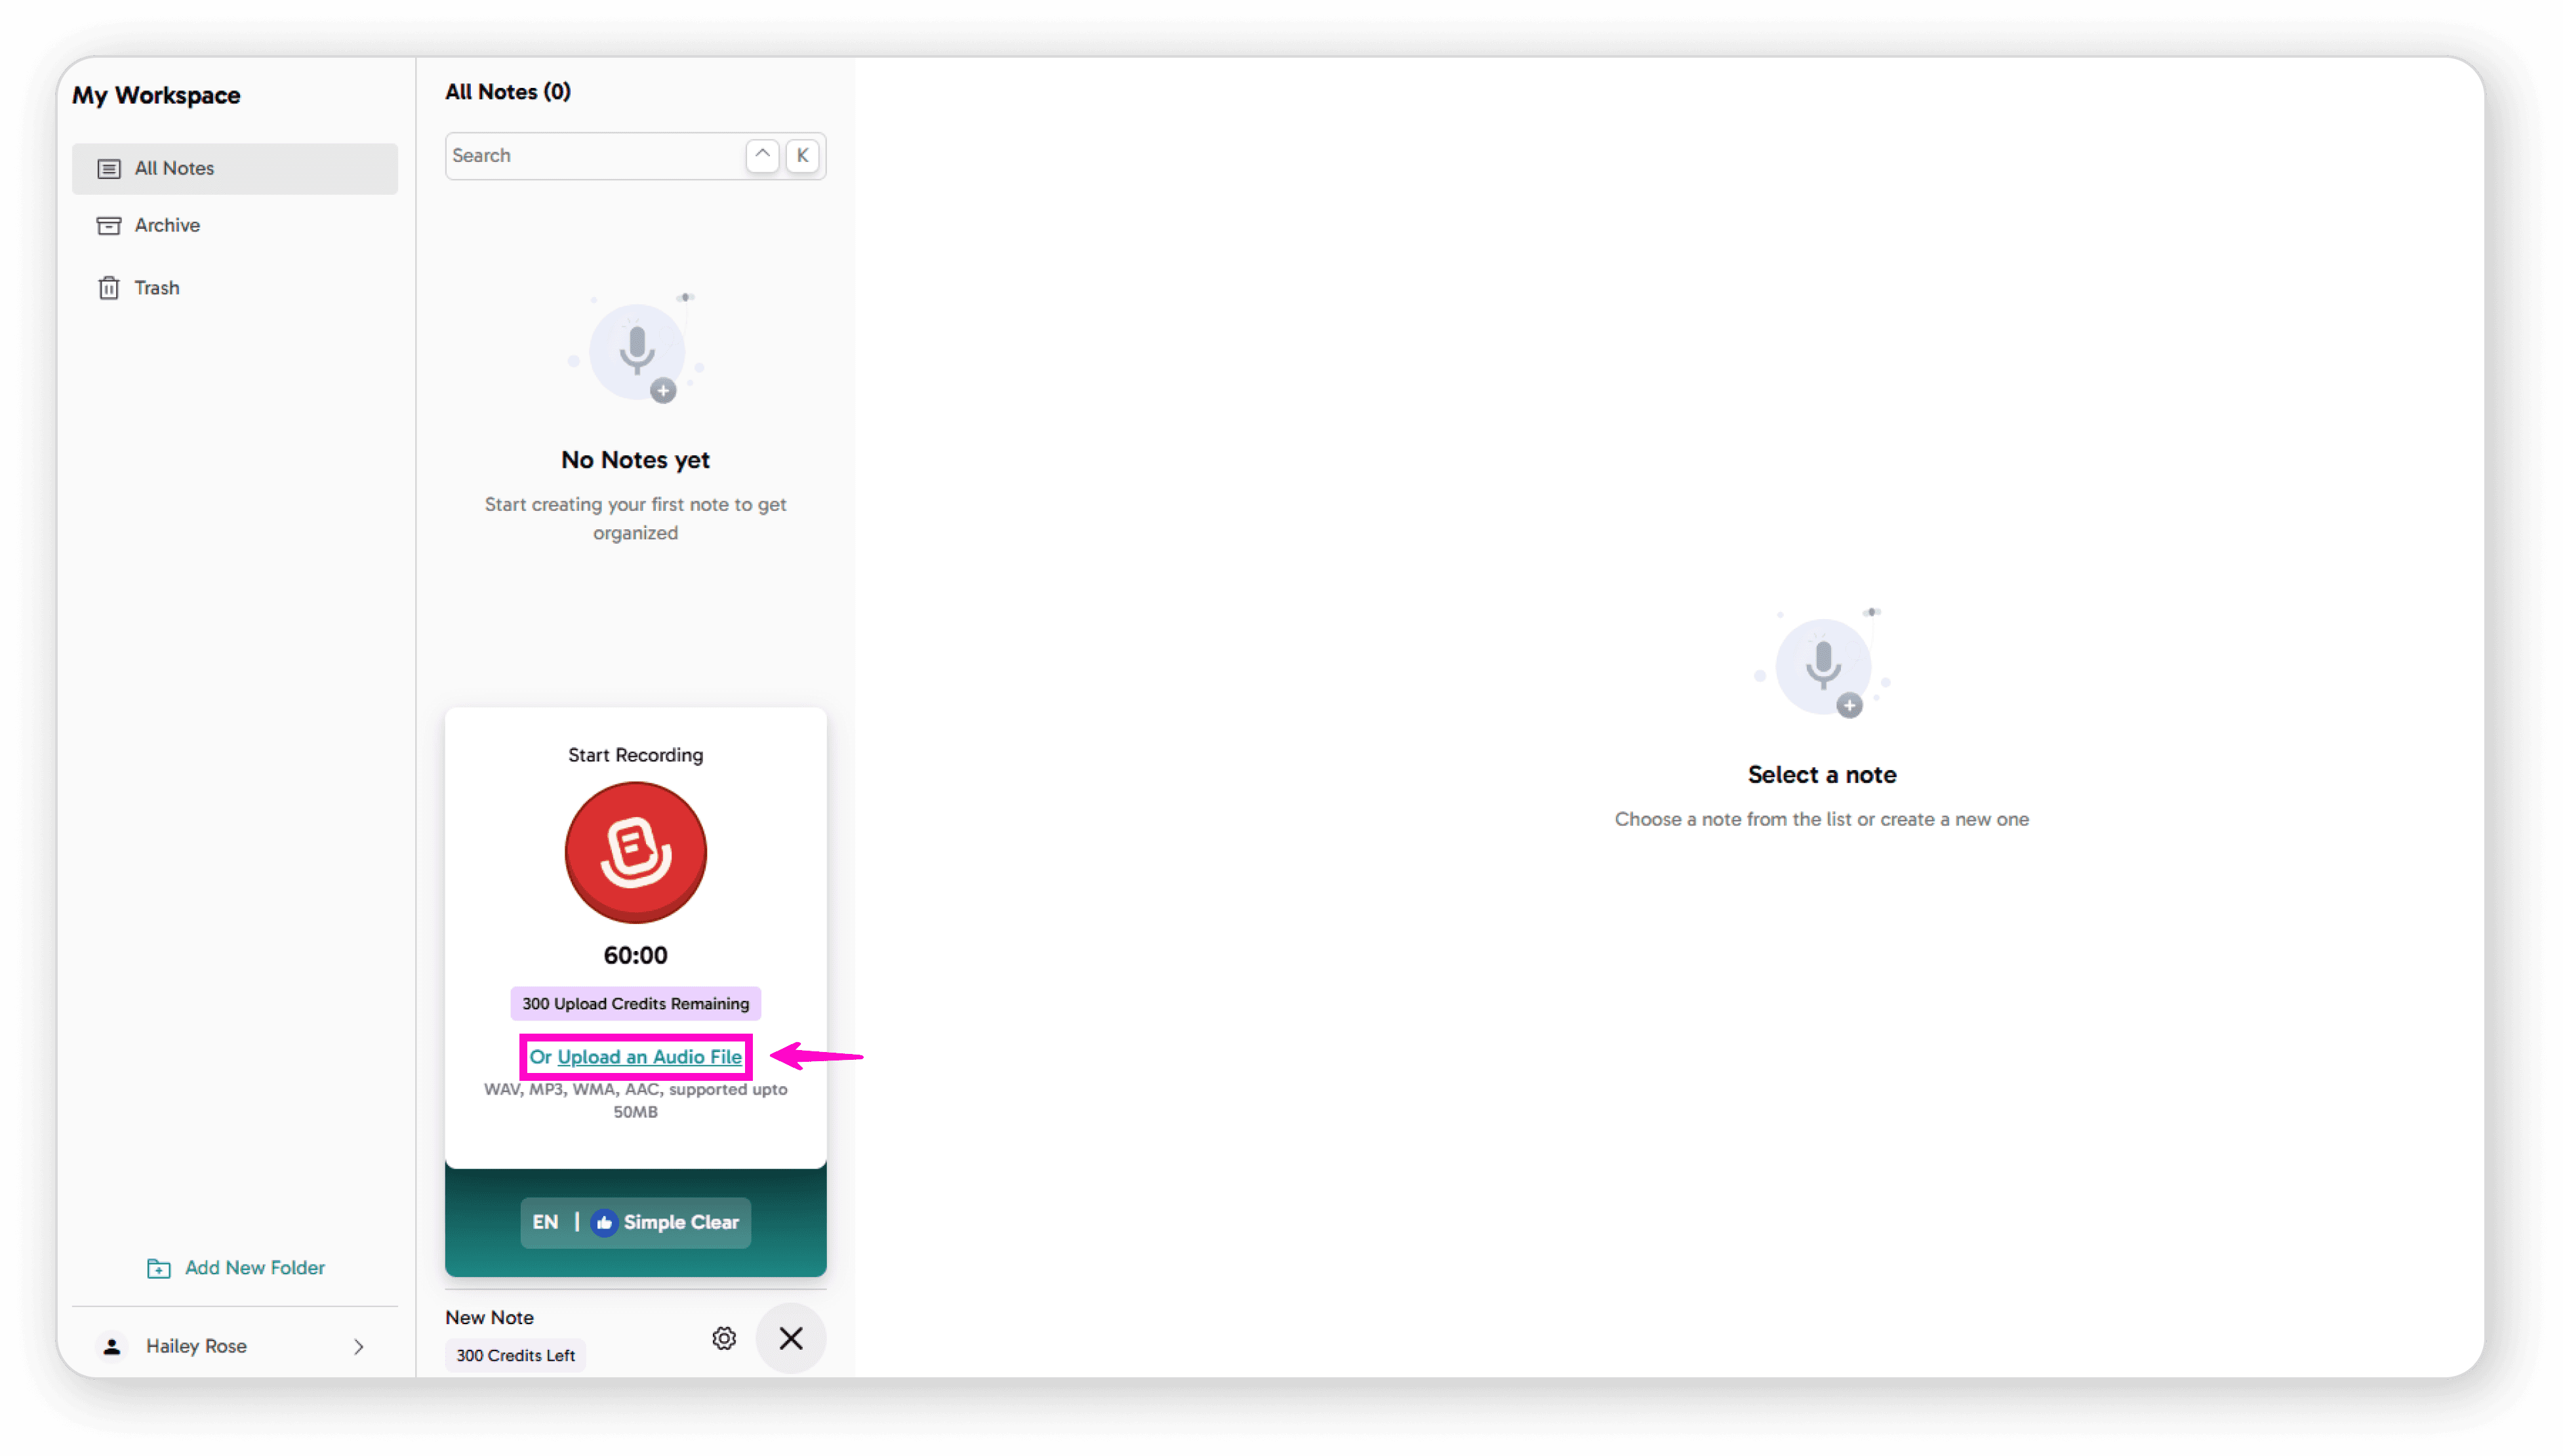
Choose Your Input Method
Record live audio using your microphone, or
Upload an existing audio file
Configure Settings
Use the Format Language Toggle to enable or disable "Generate Summary"
If Generate Summary is enabled, you can:
Refine transcript
Select summary generation
Choose language
Set note format
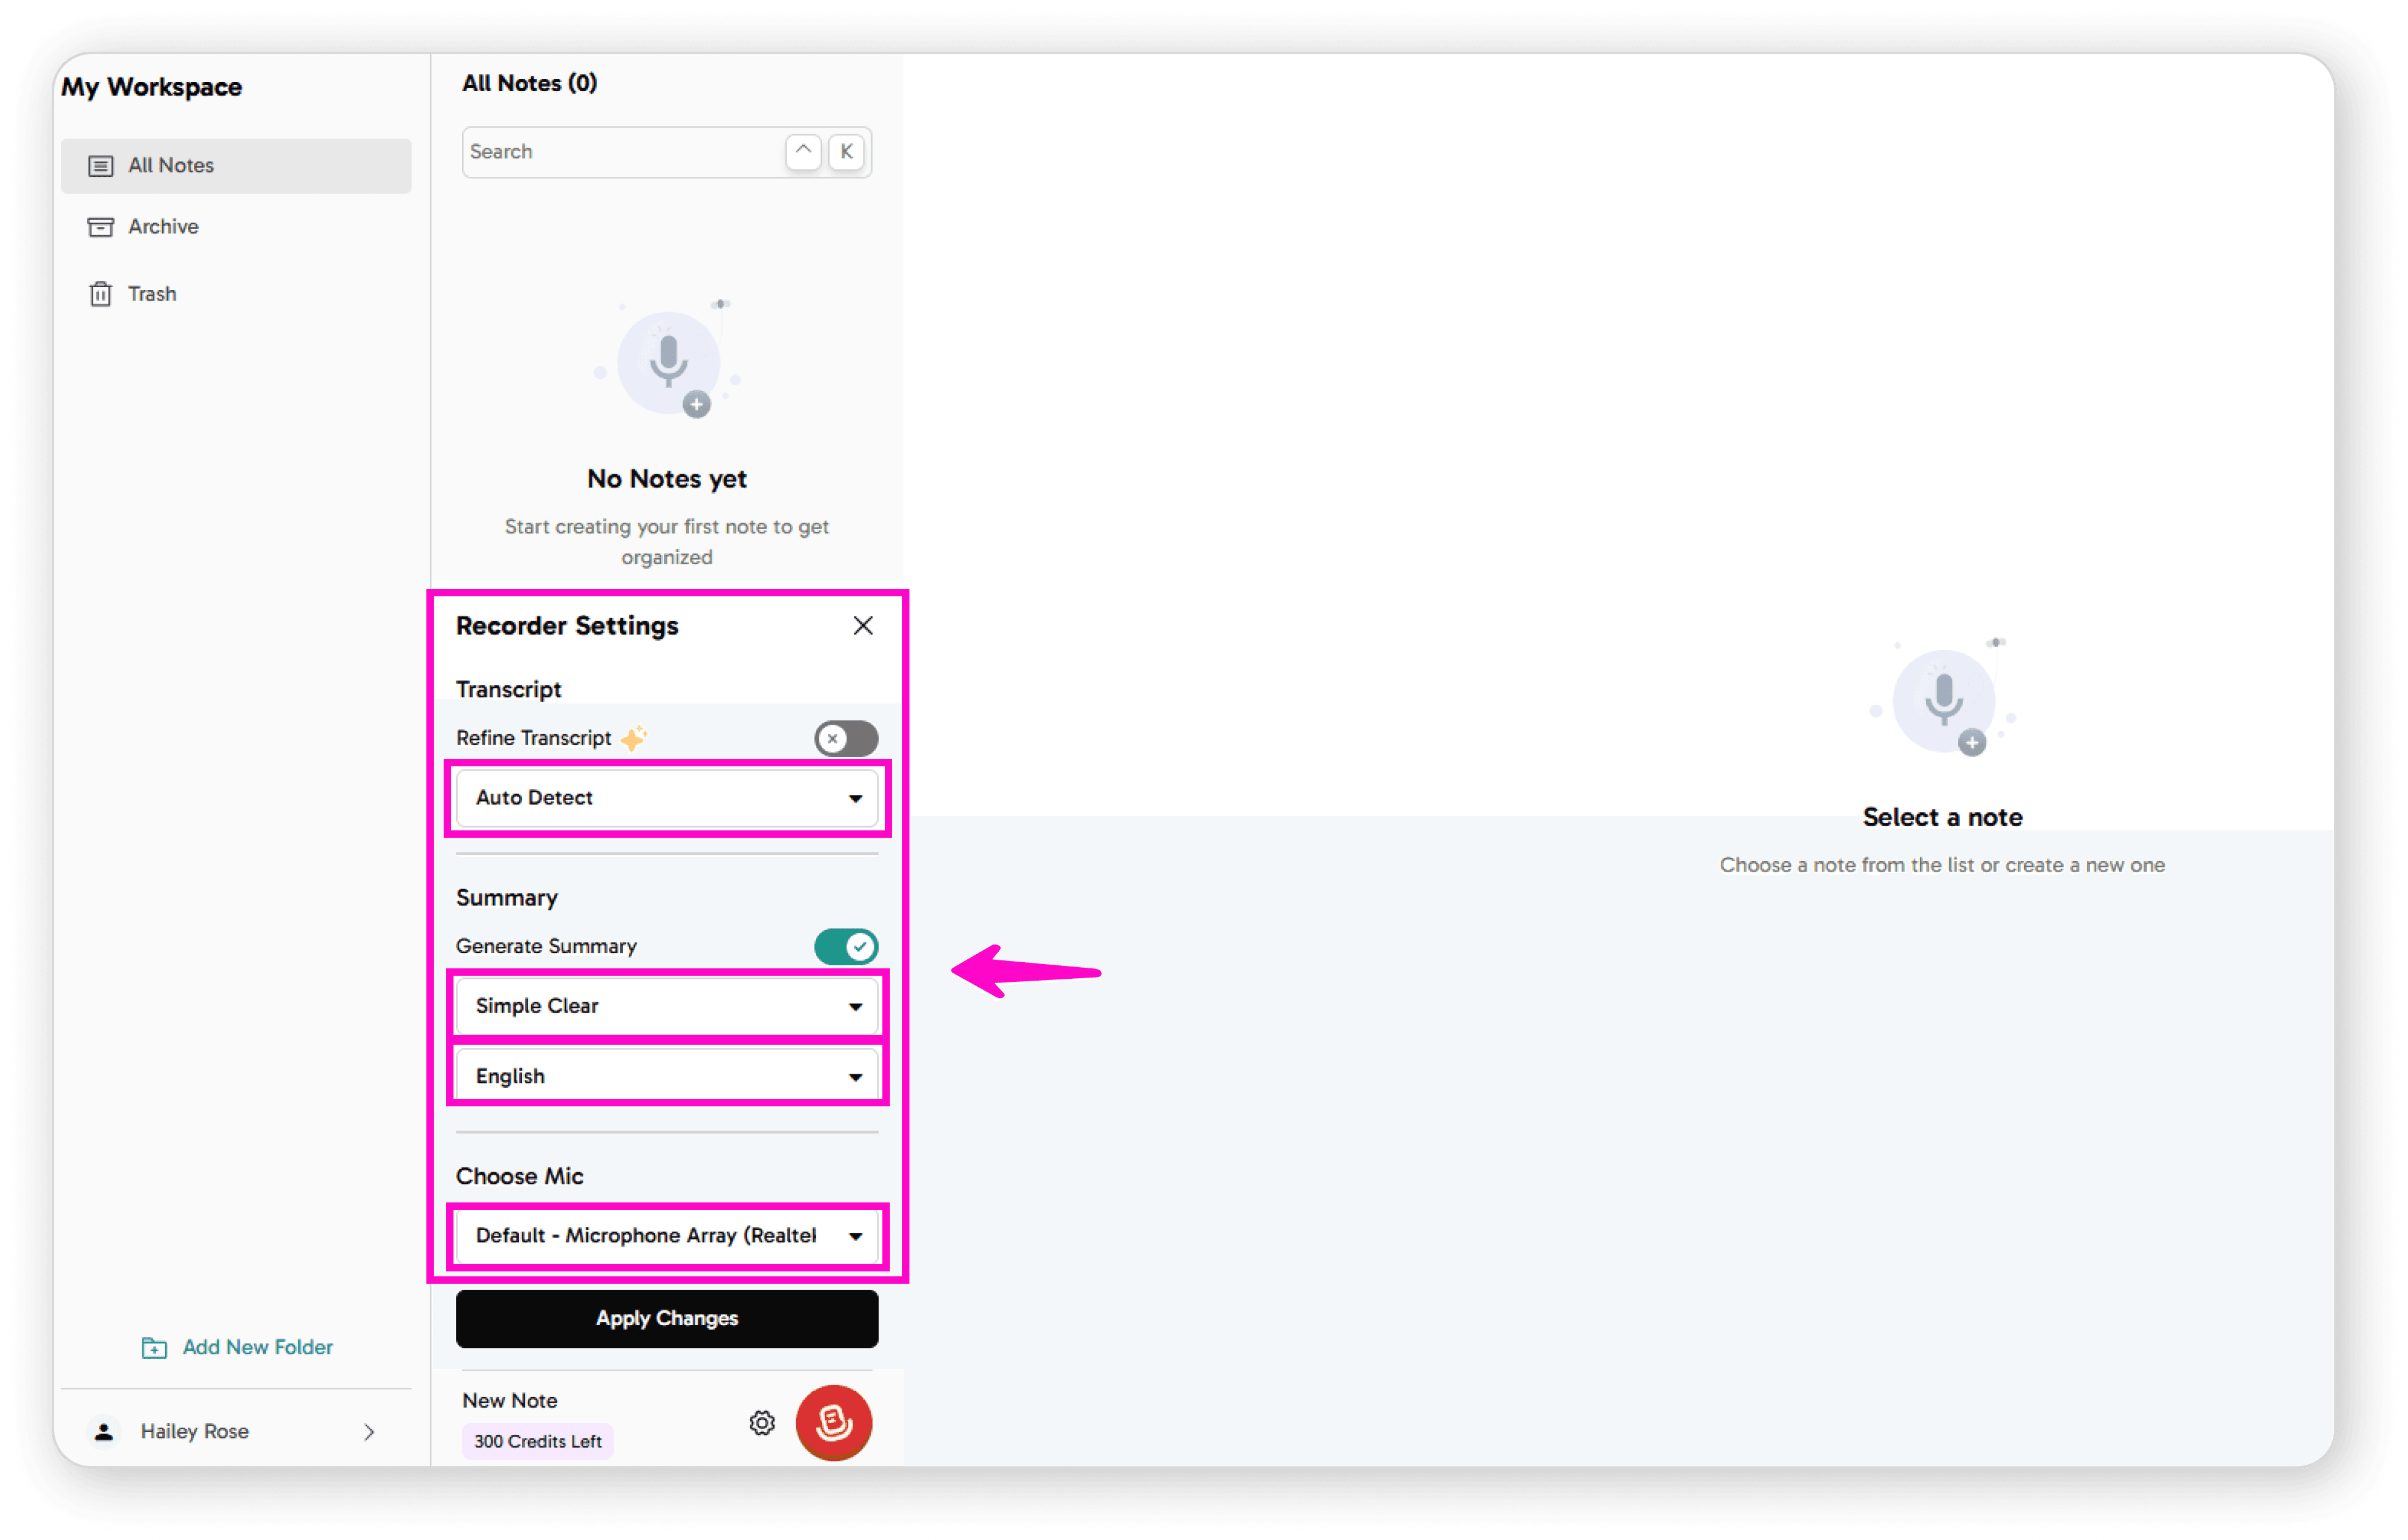
Select your preferred microphone
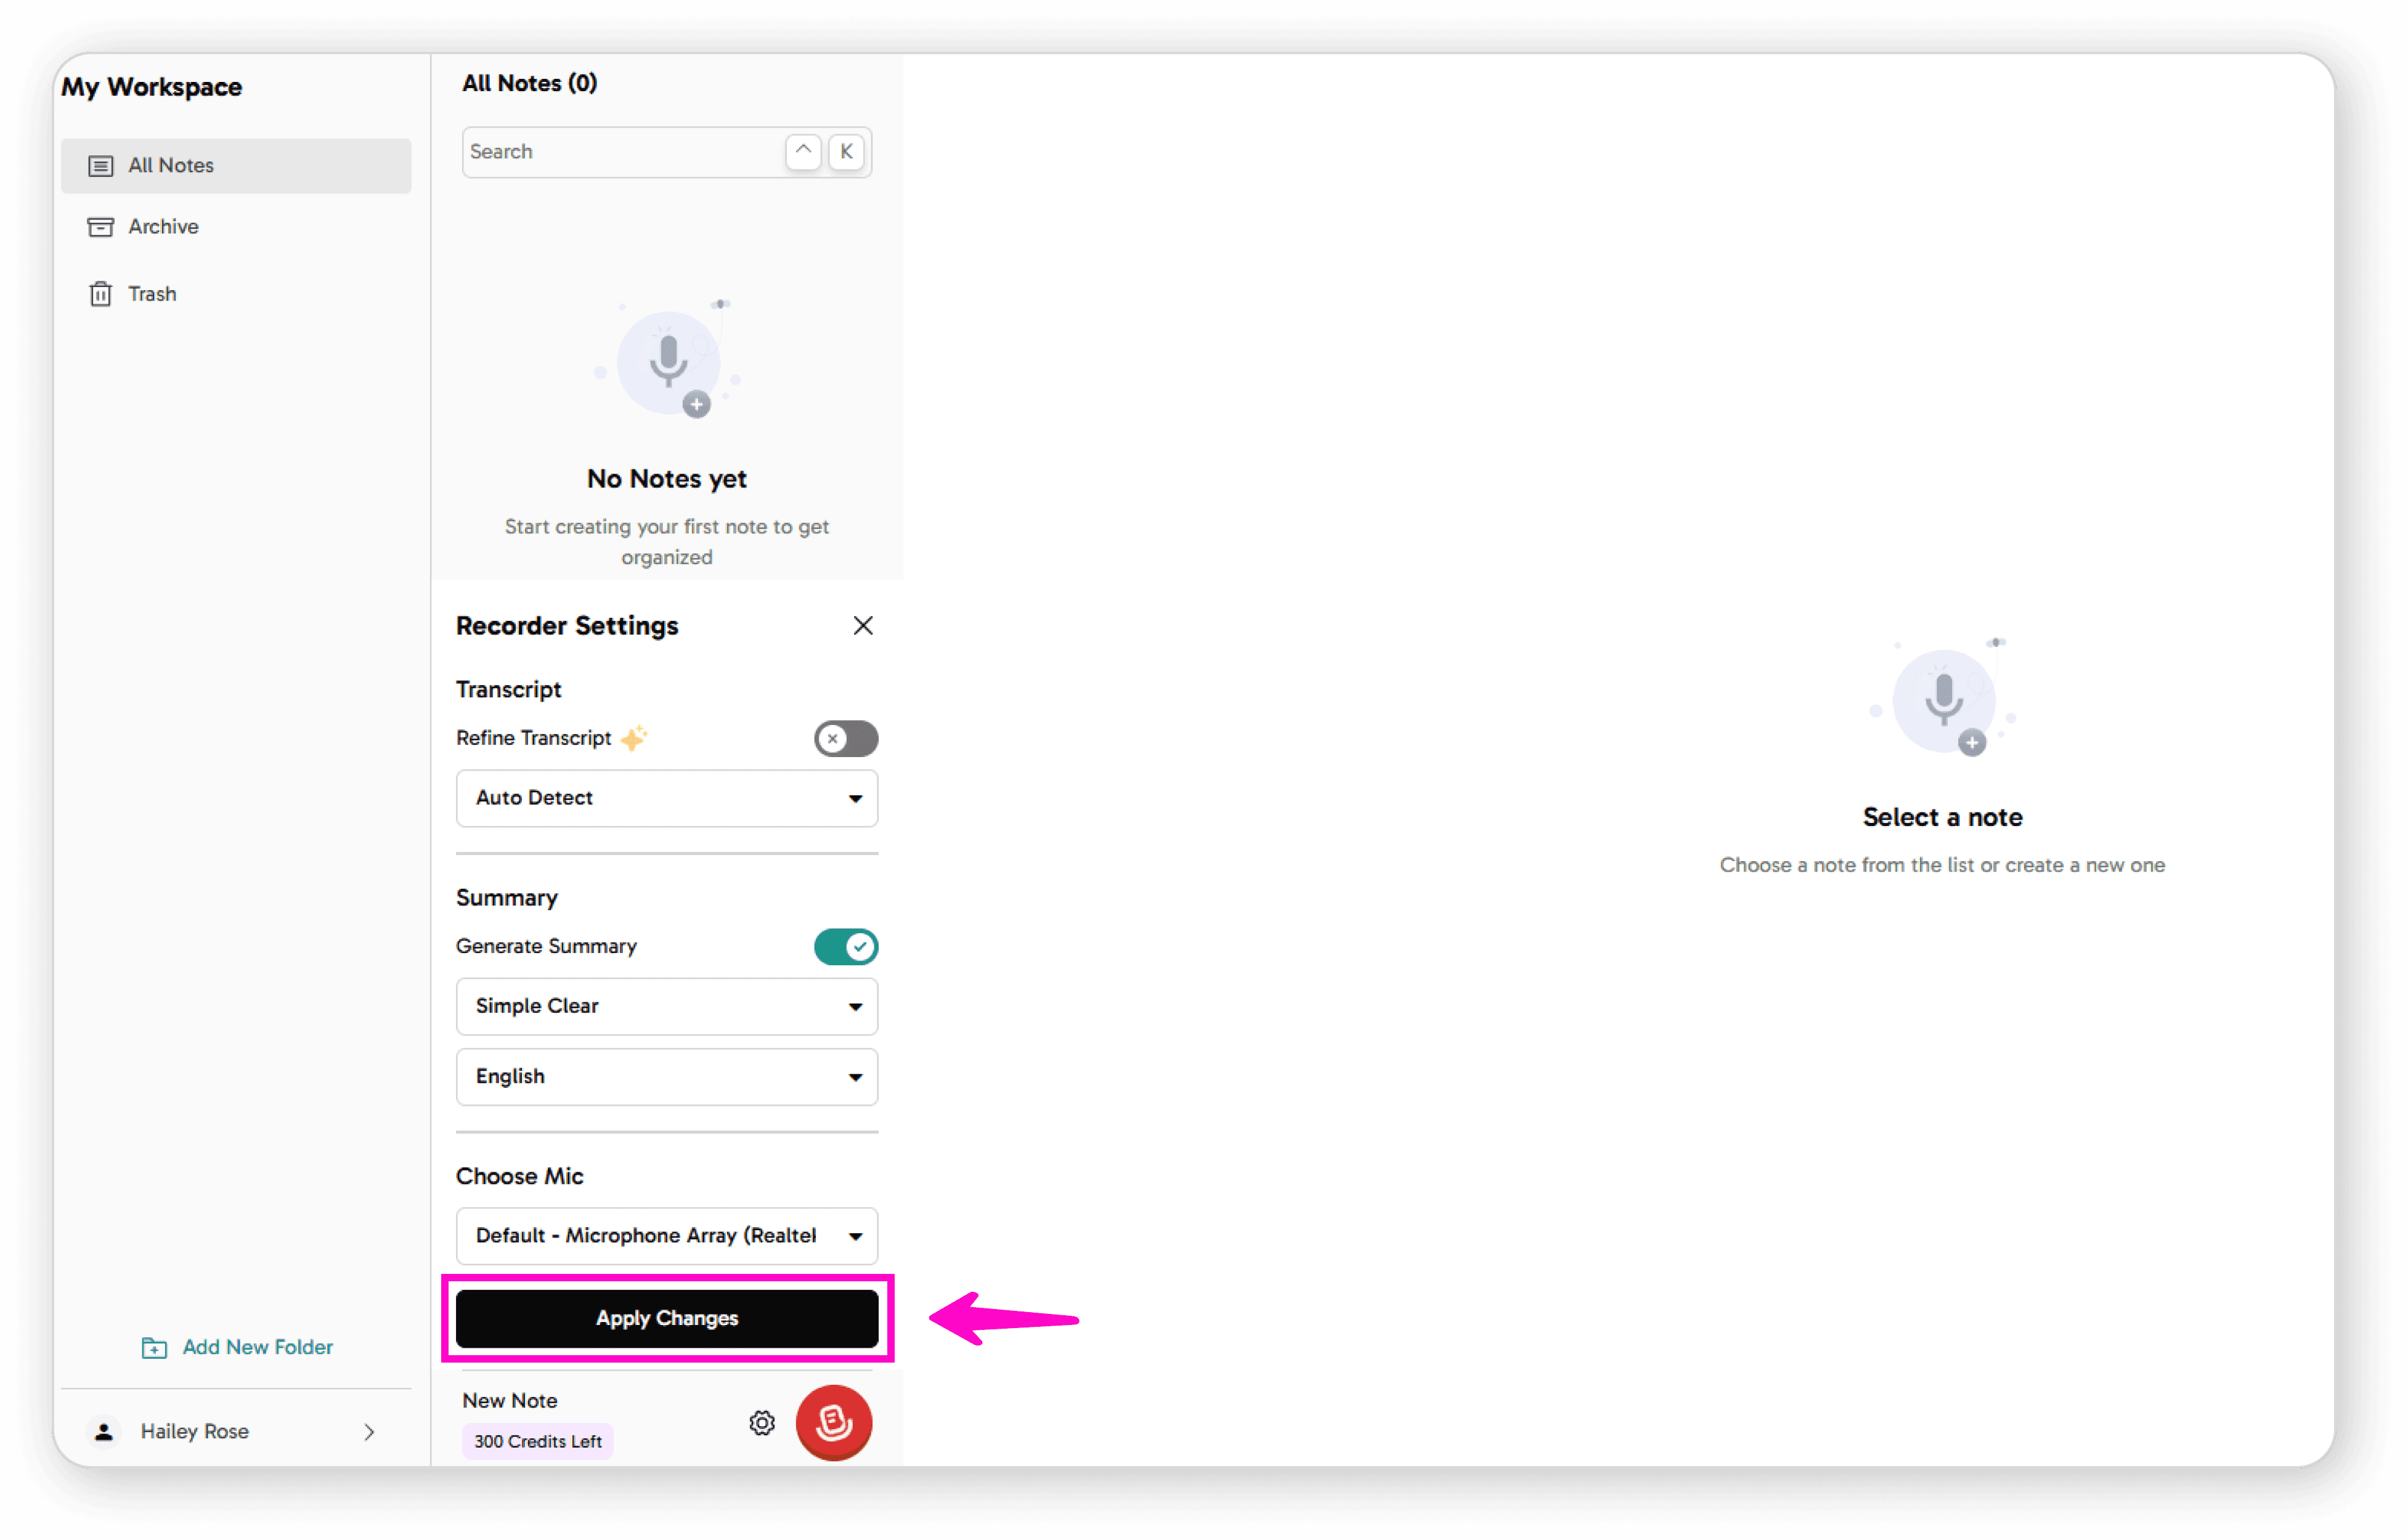
Click Apply Changes
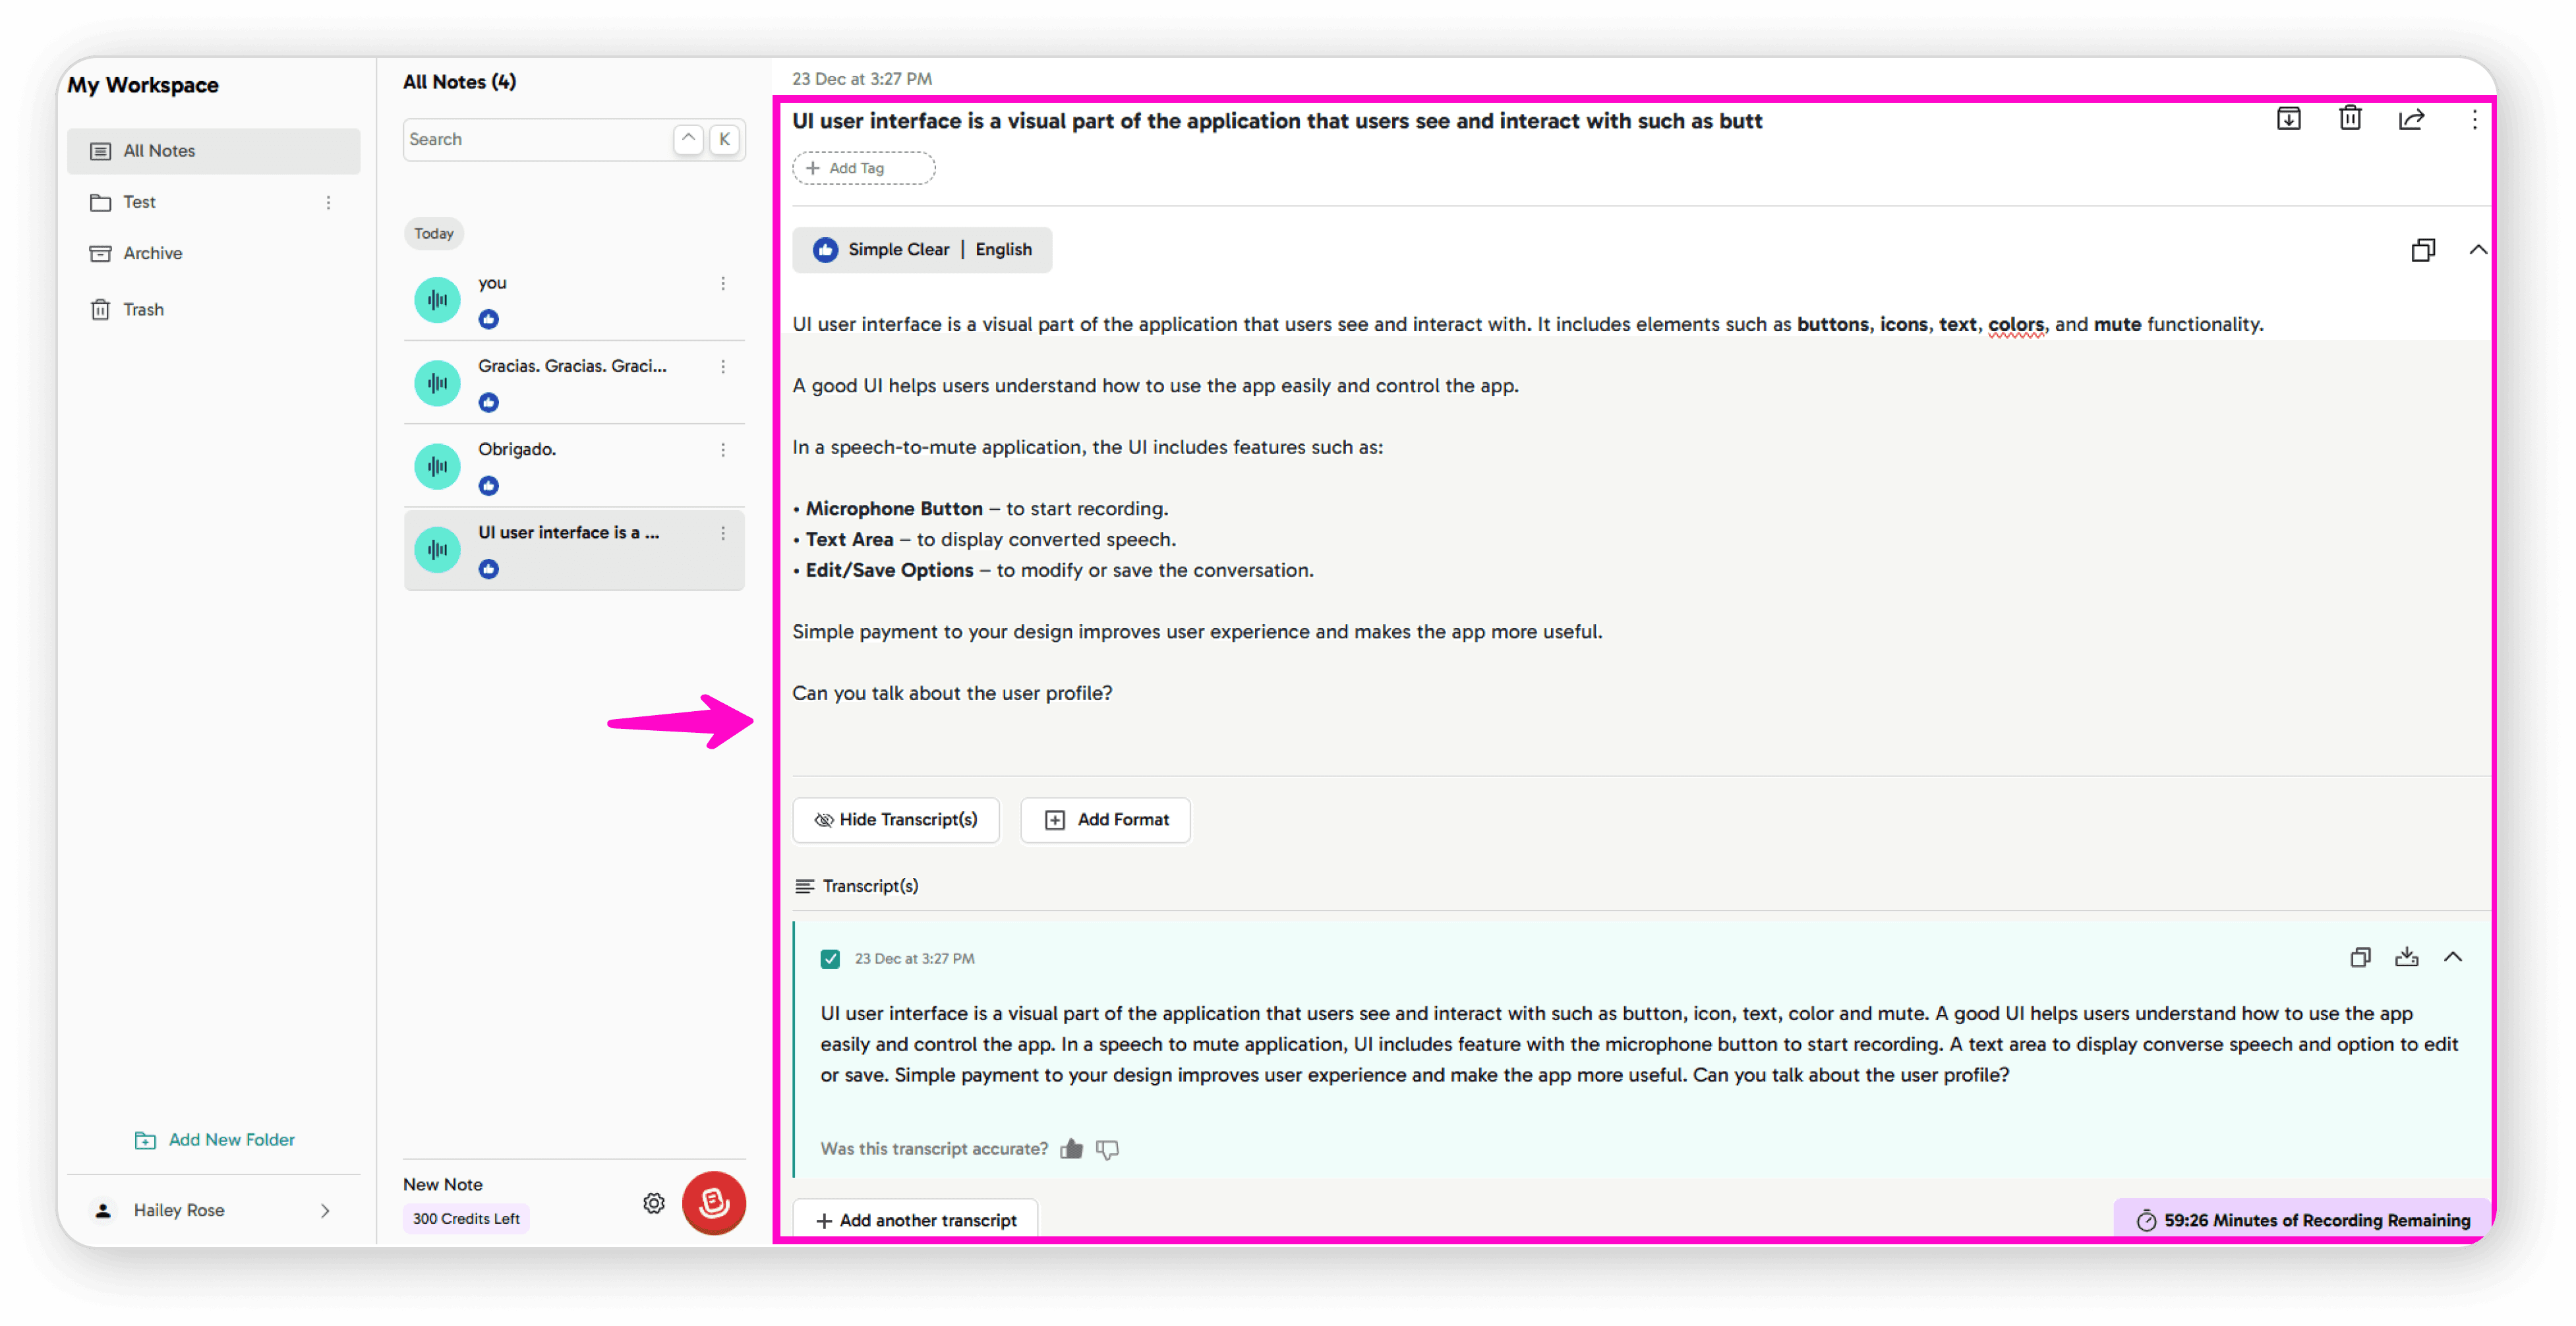
Managing Your Notes
Viewing Notes
Access all your saved notes in one place
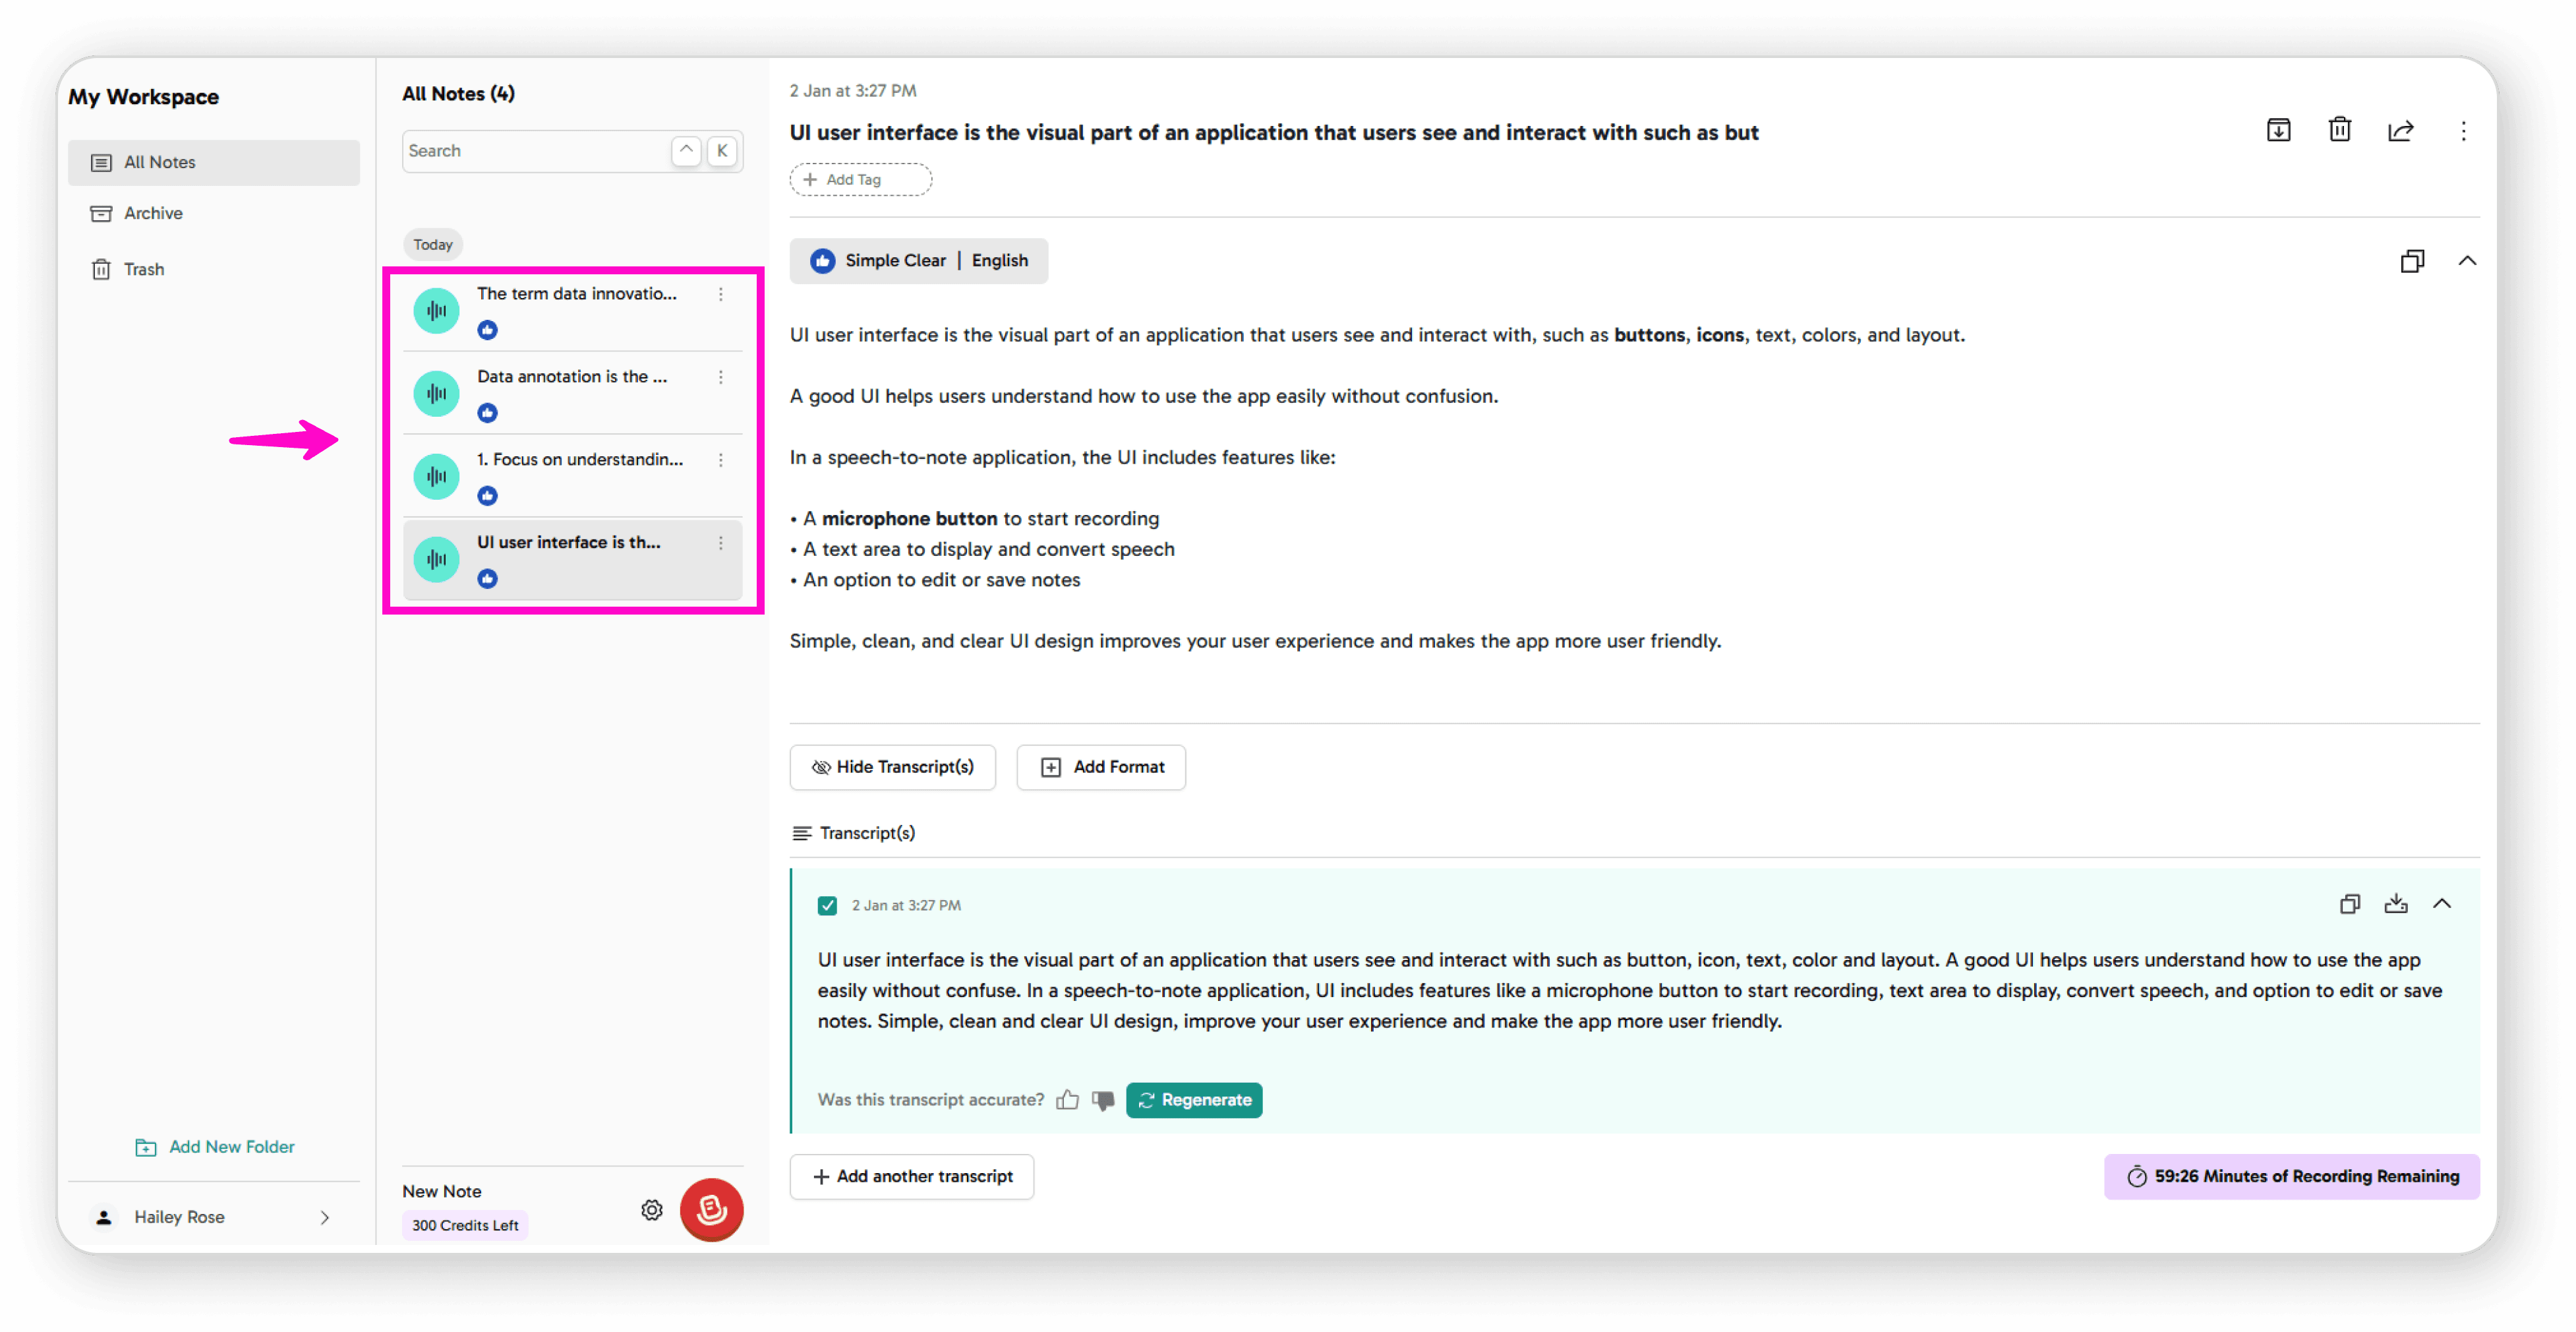
Click any note to open and view its full content
Editing Options
Click any text to modify note
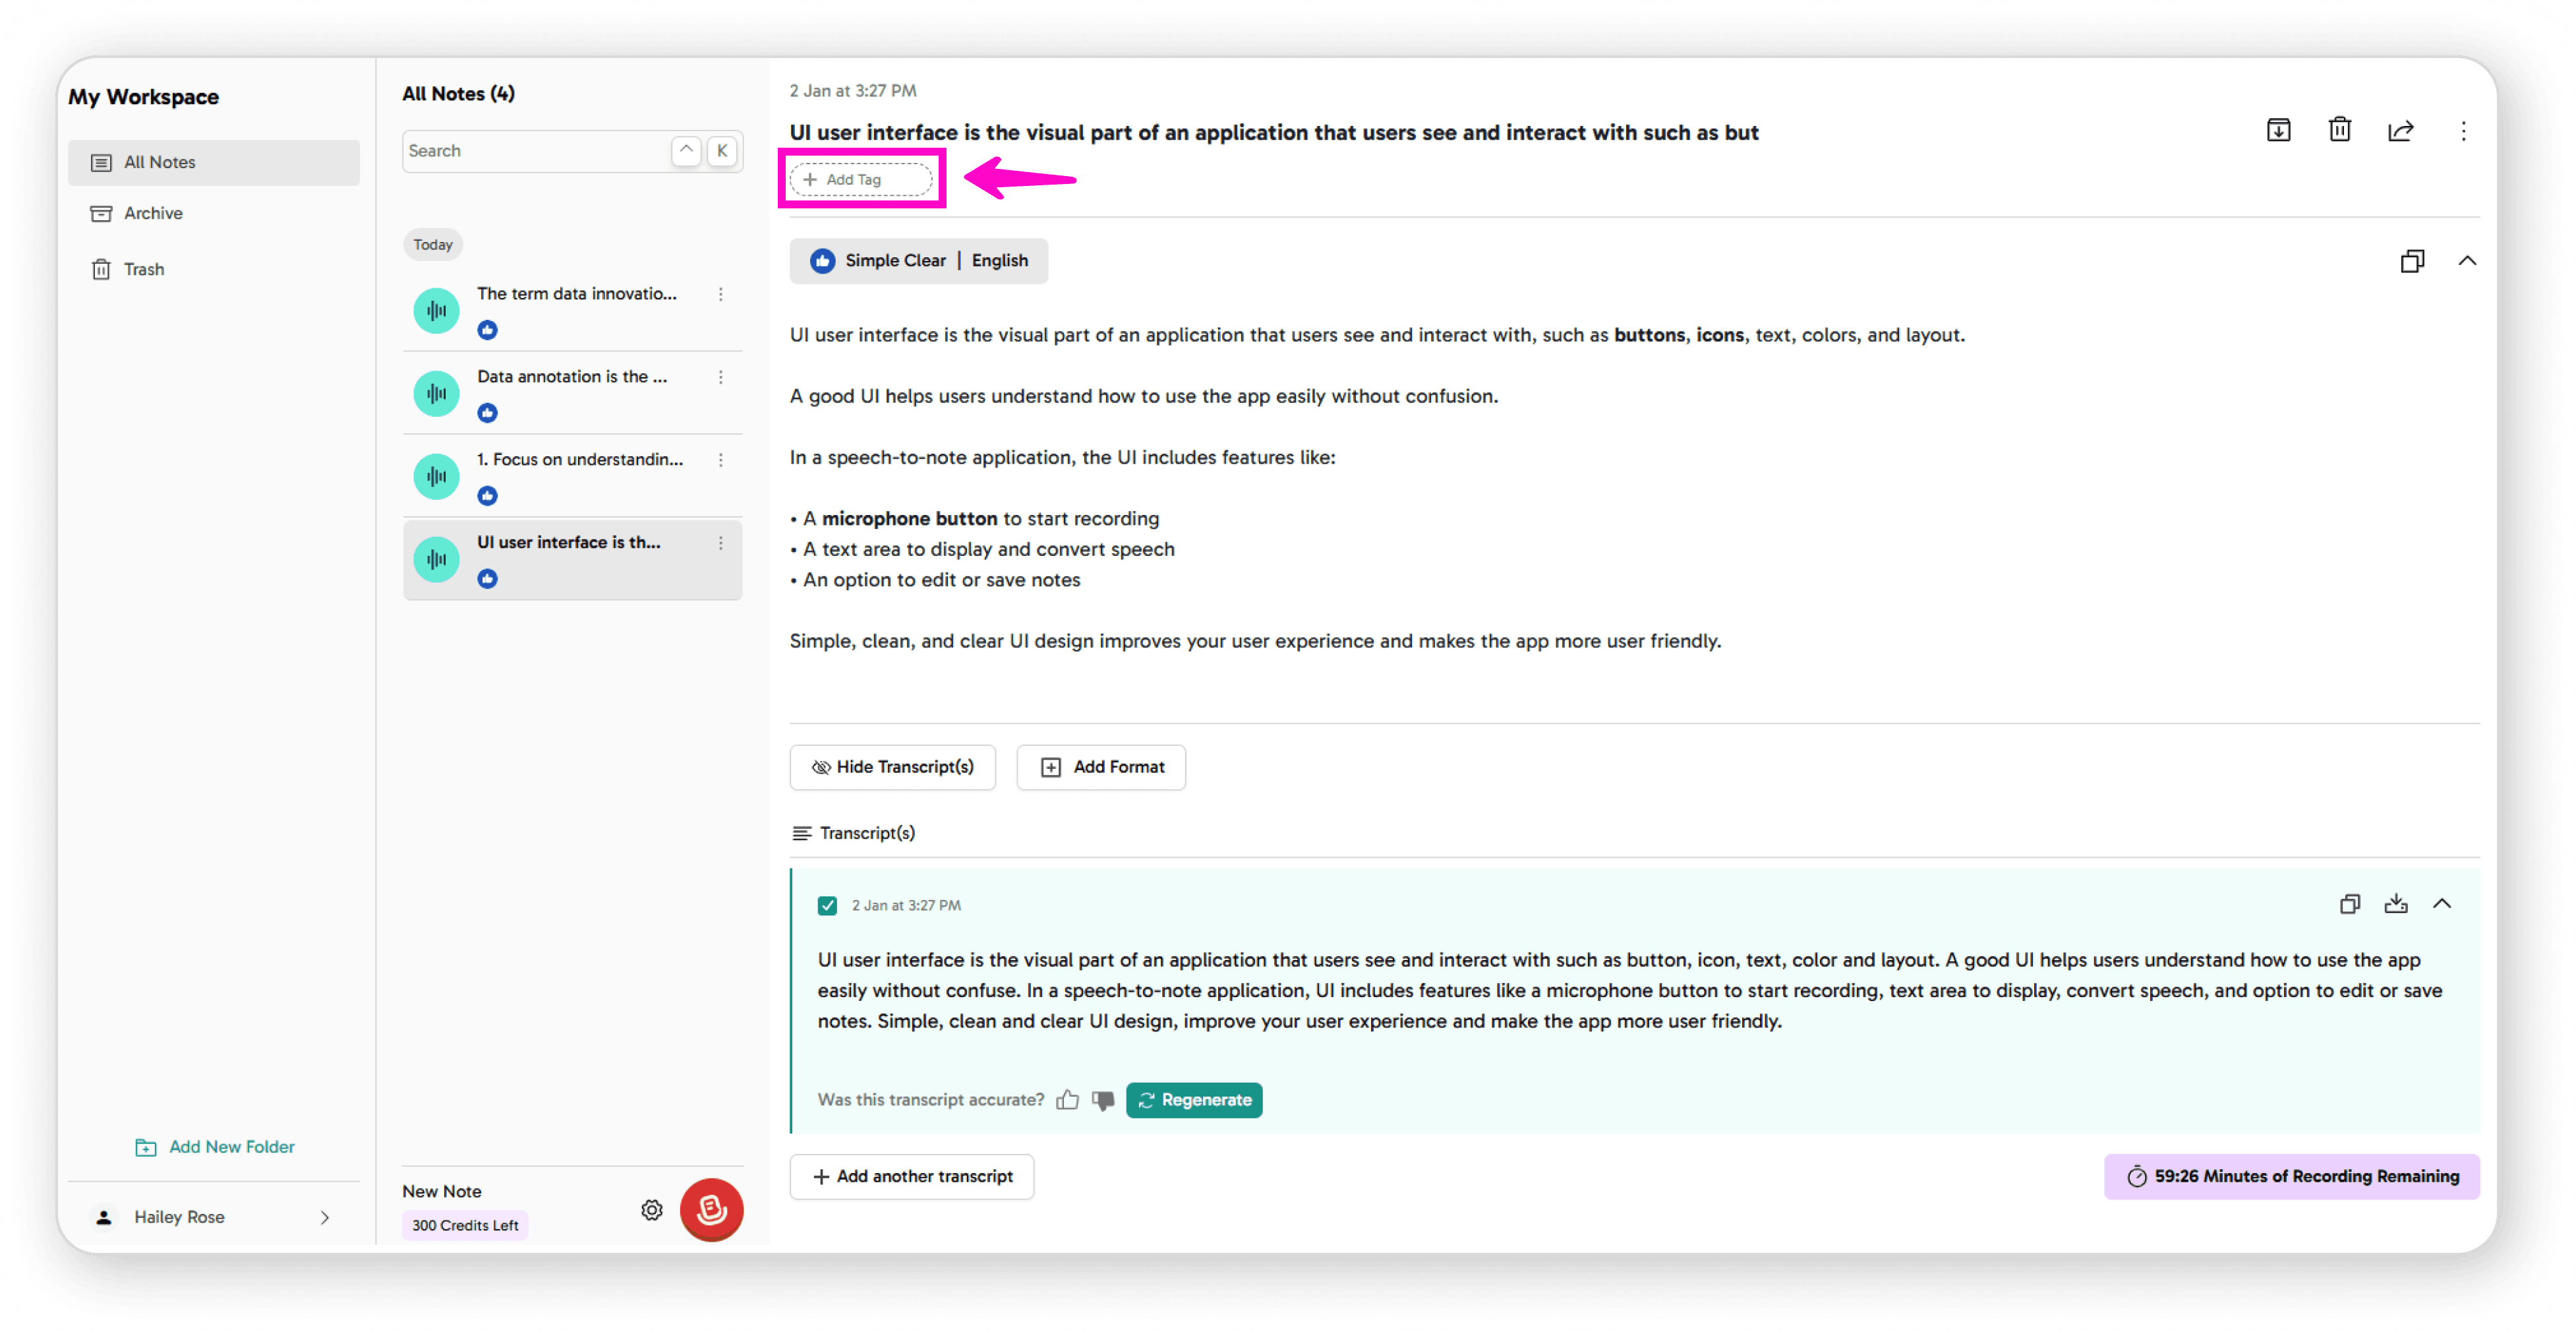
Add tags for organization
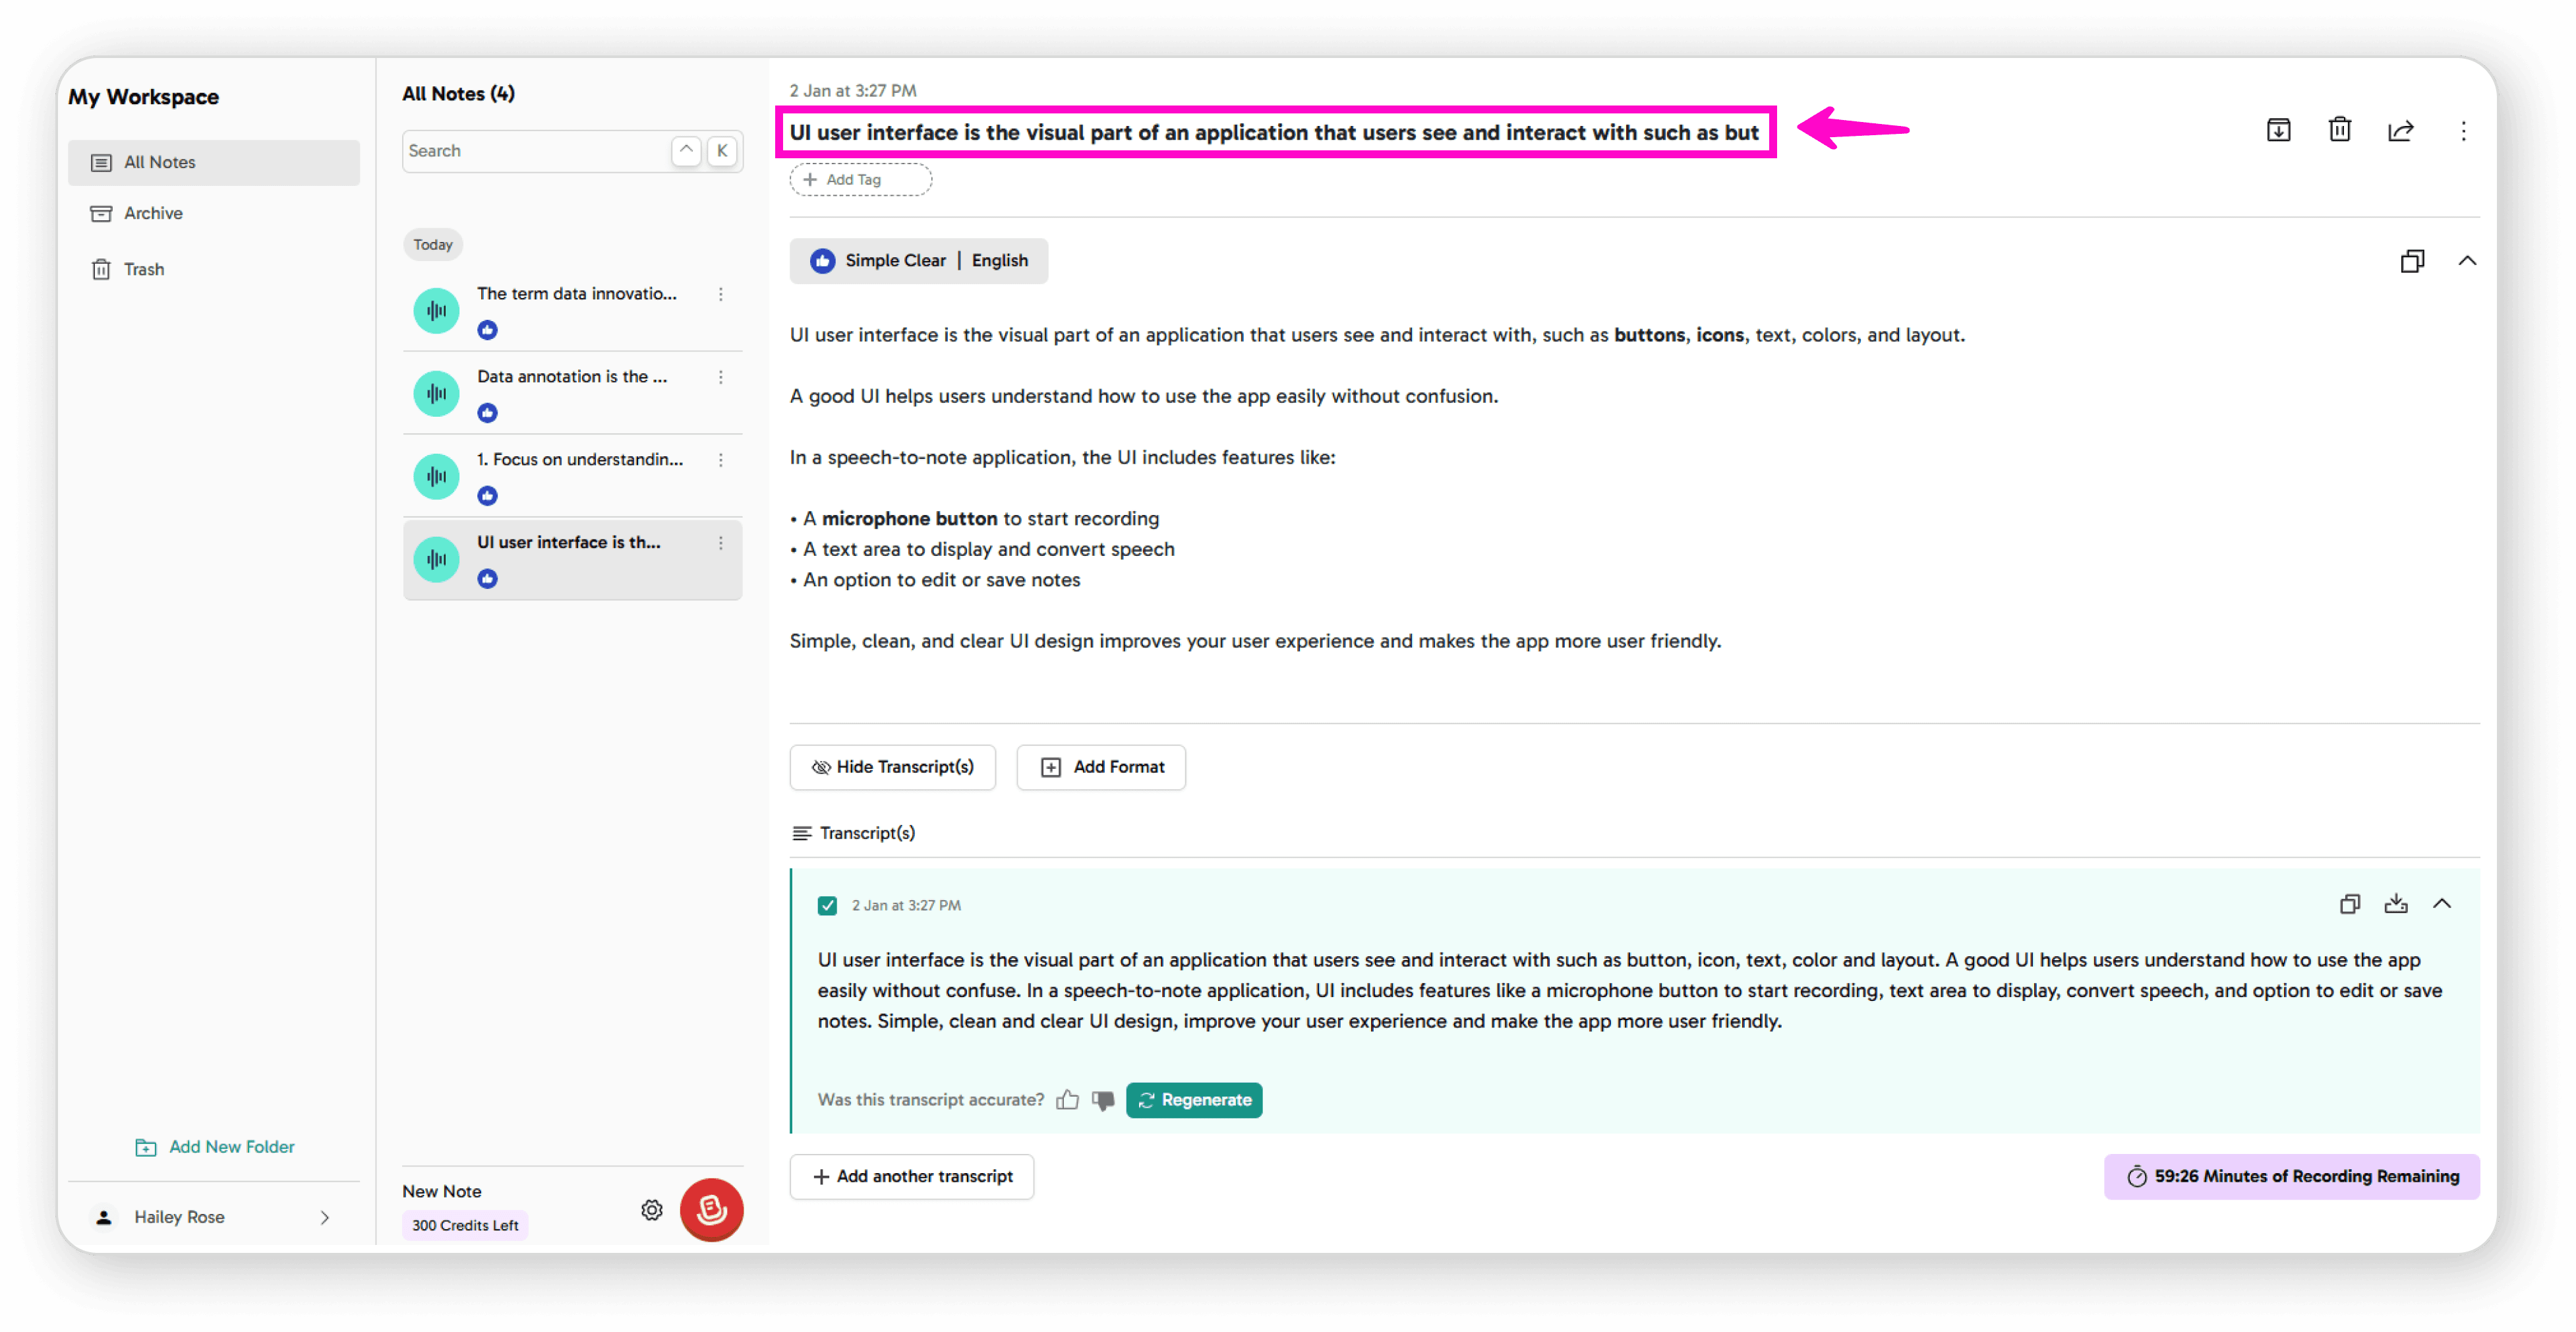
Rename your note
Copy text to clipboard
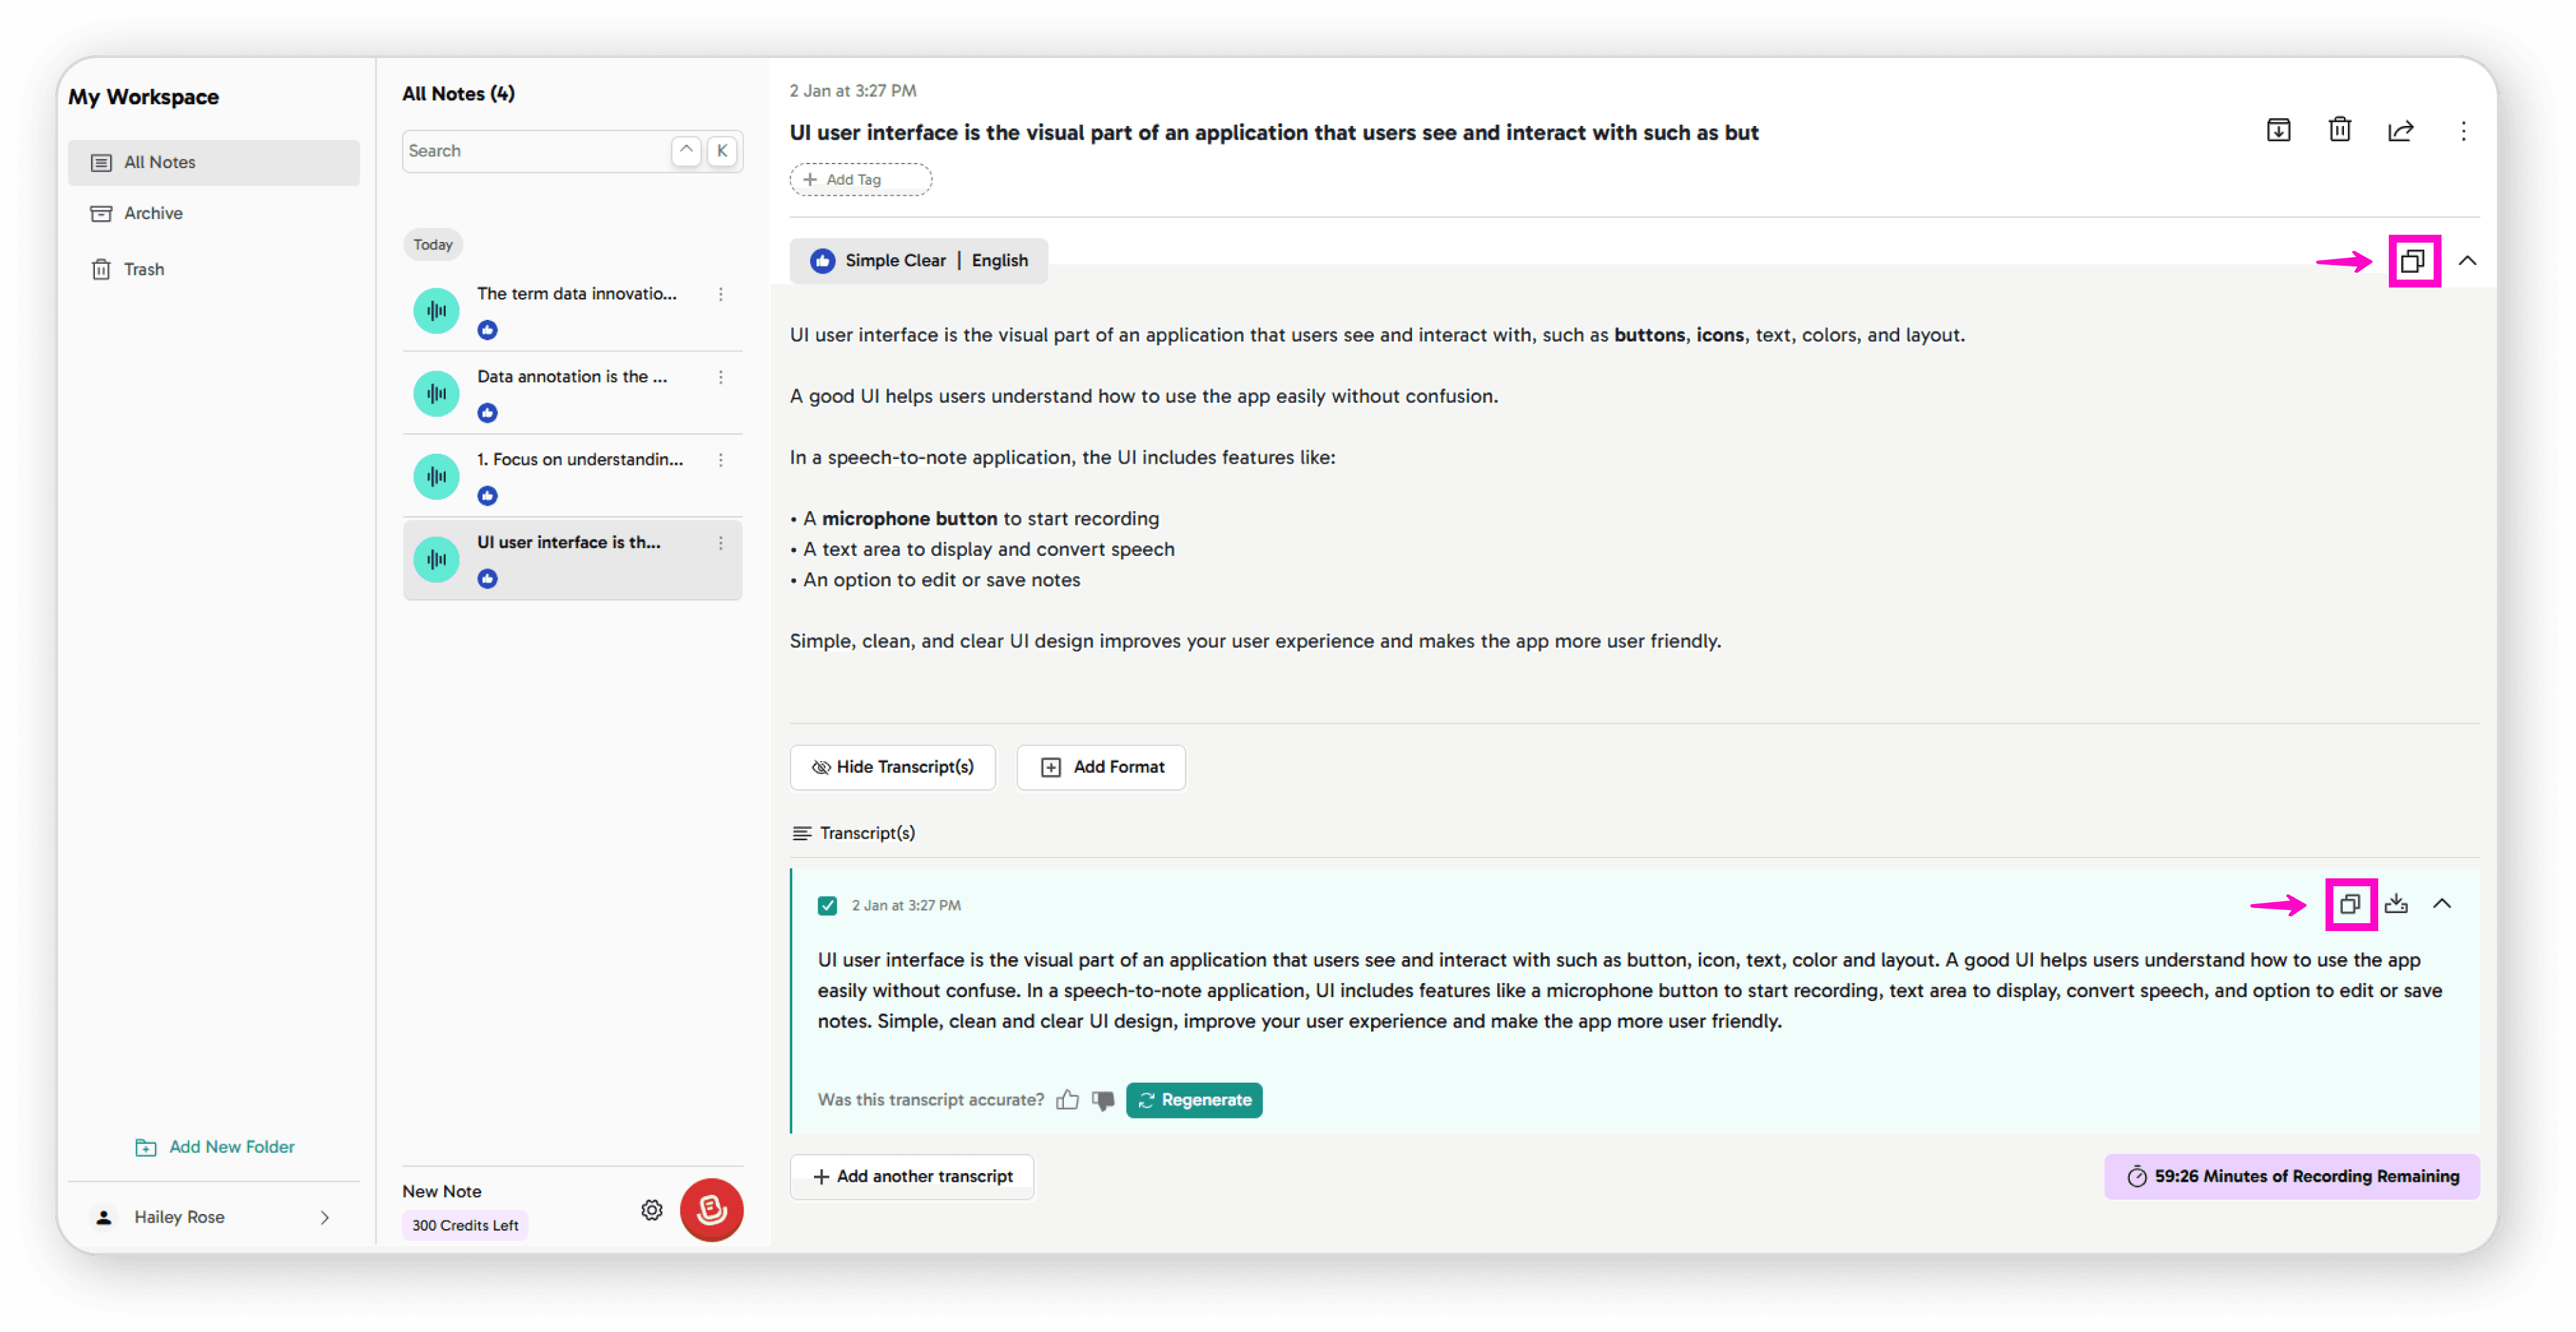
Collapse sections for easier navigation
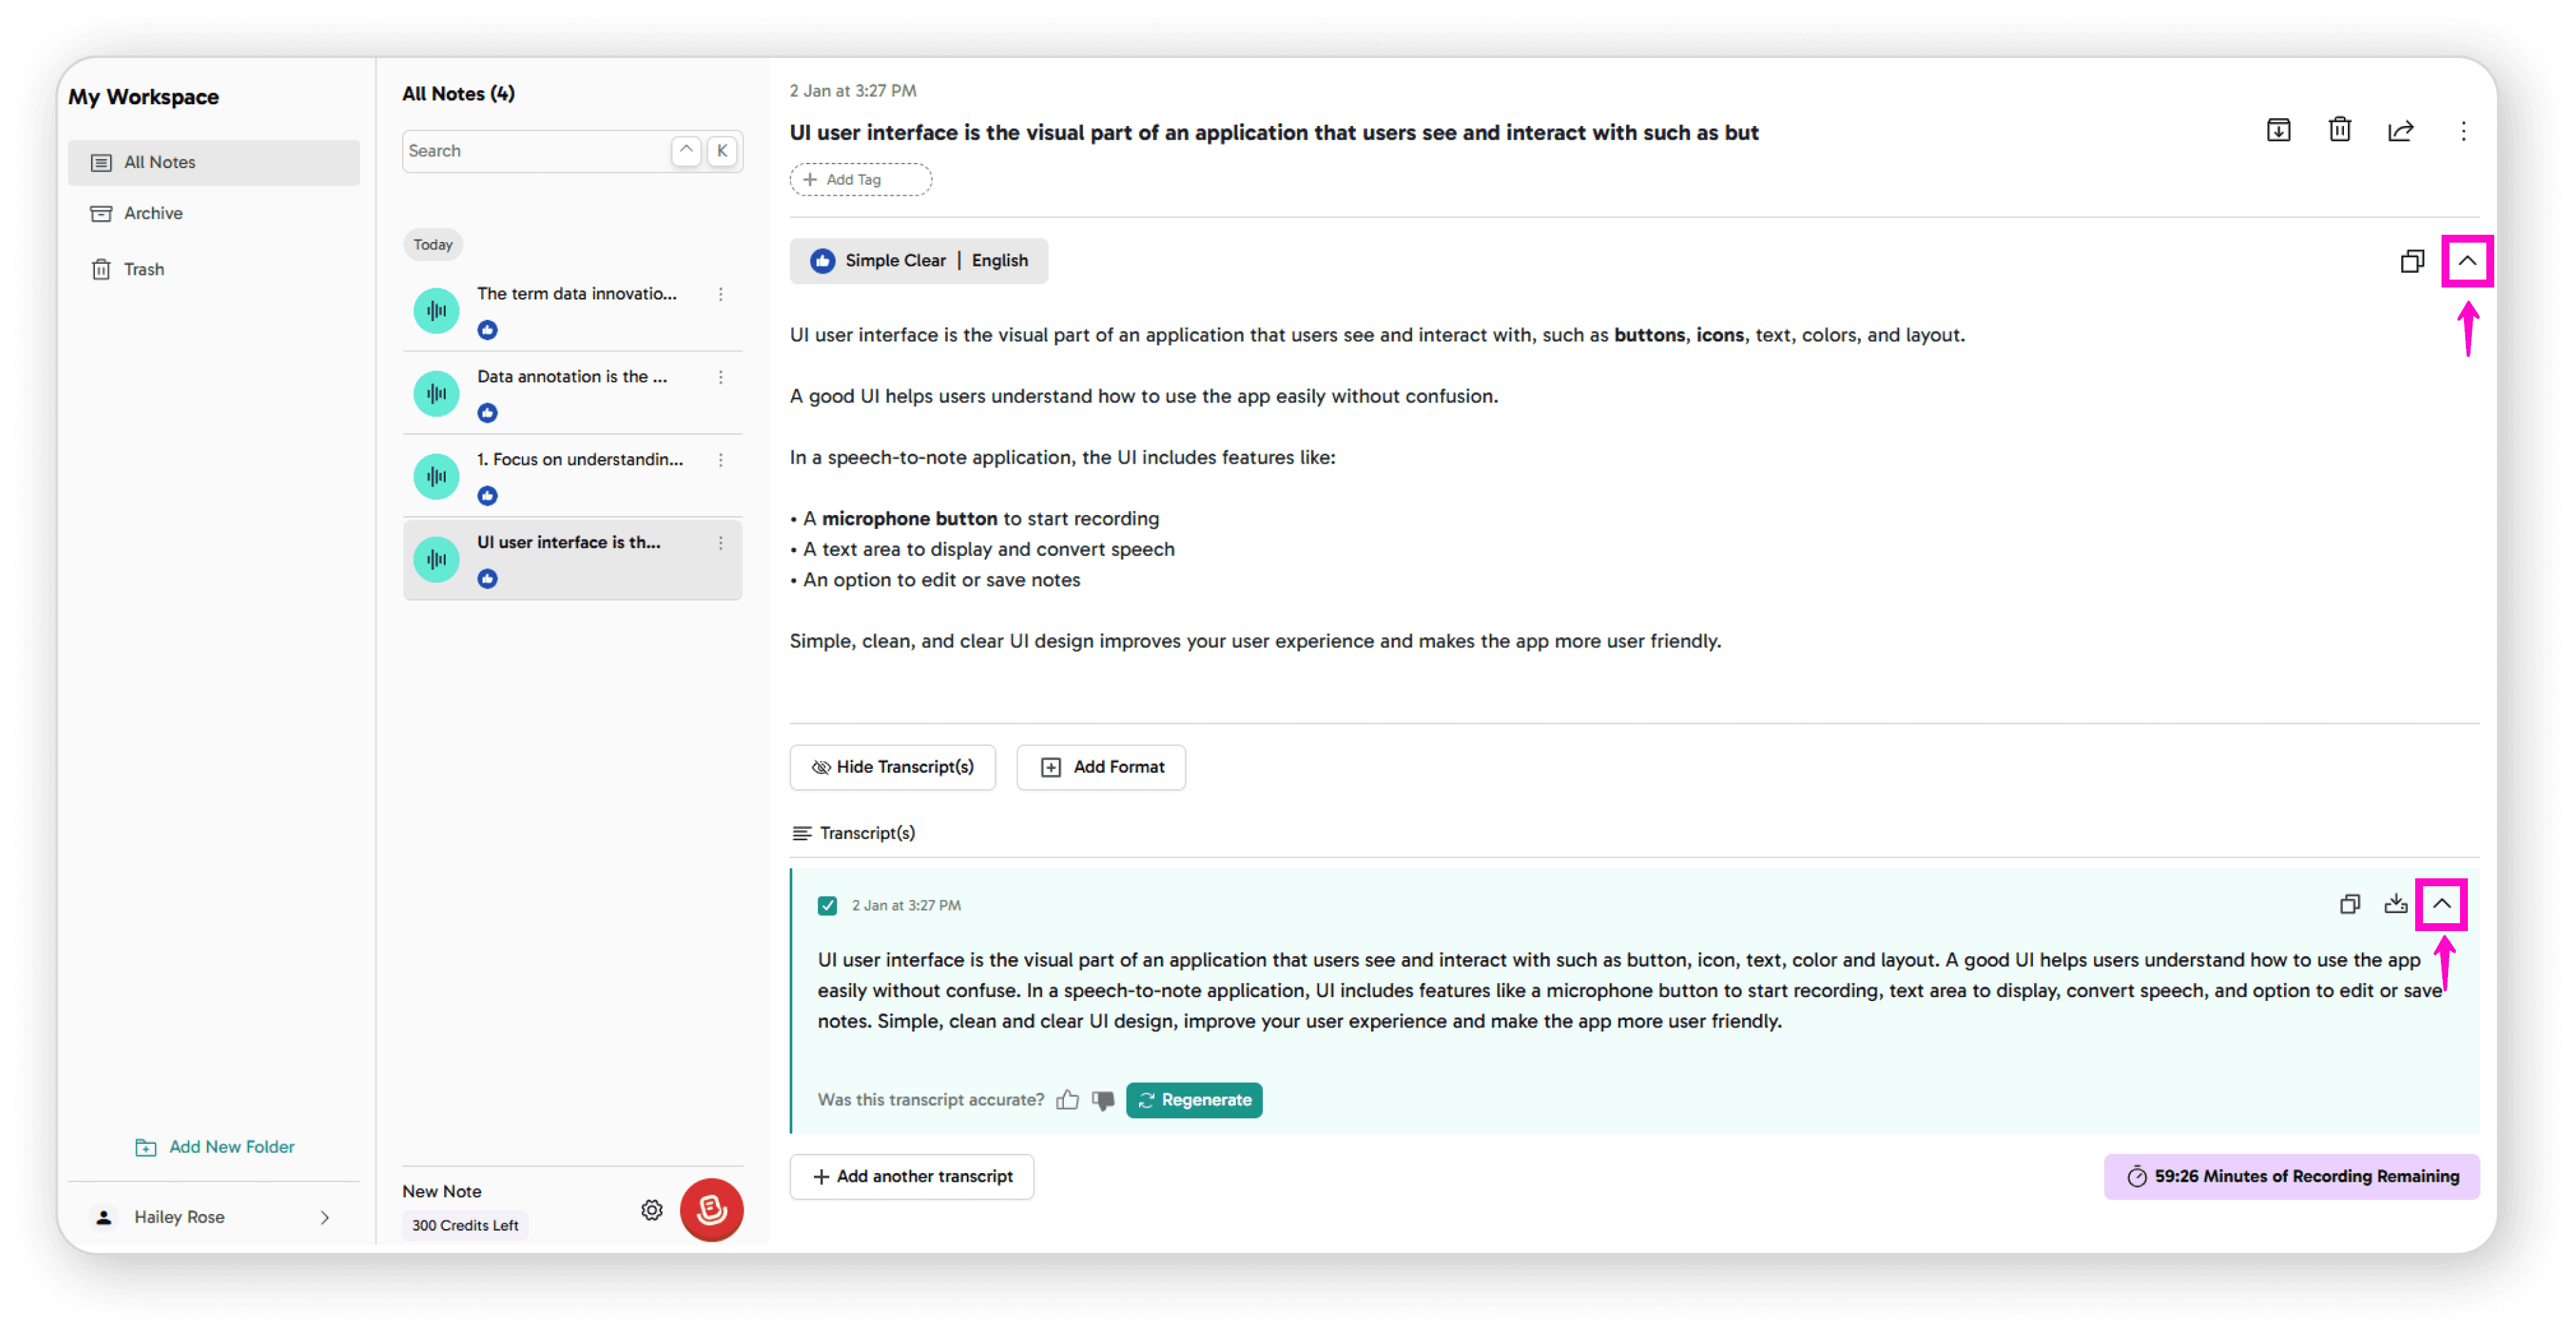
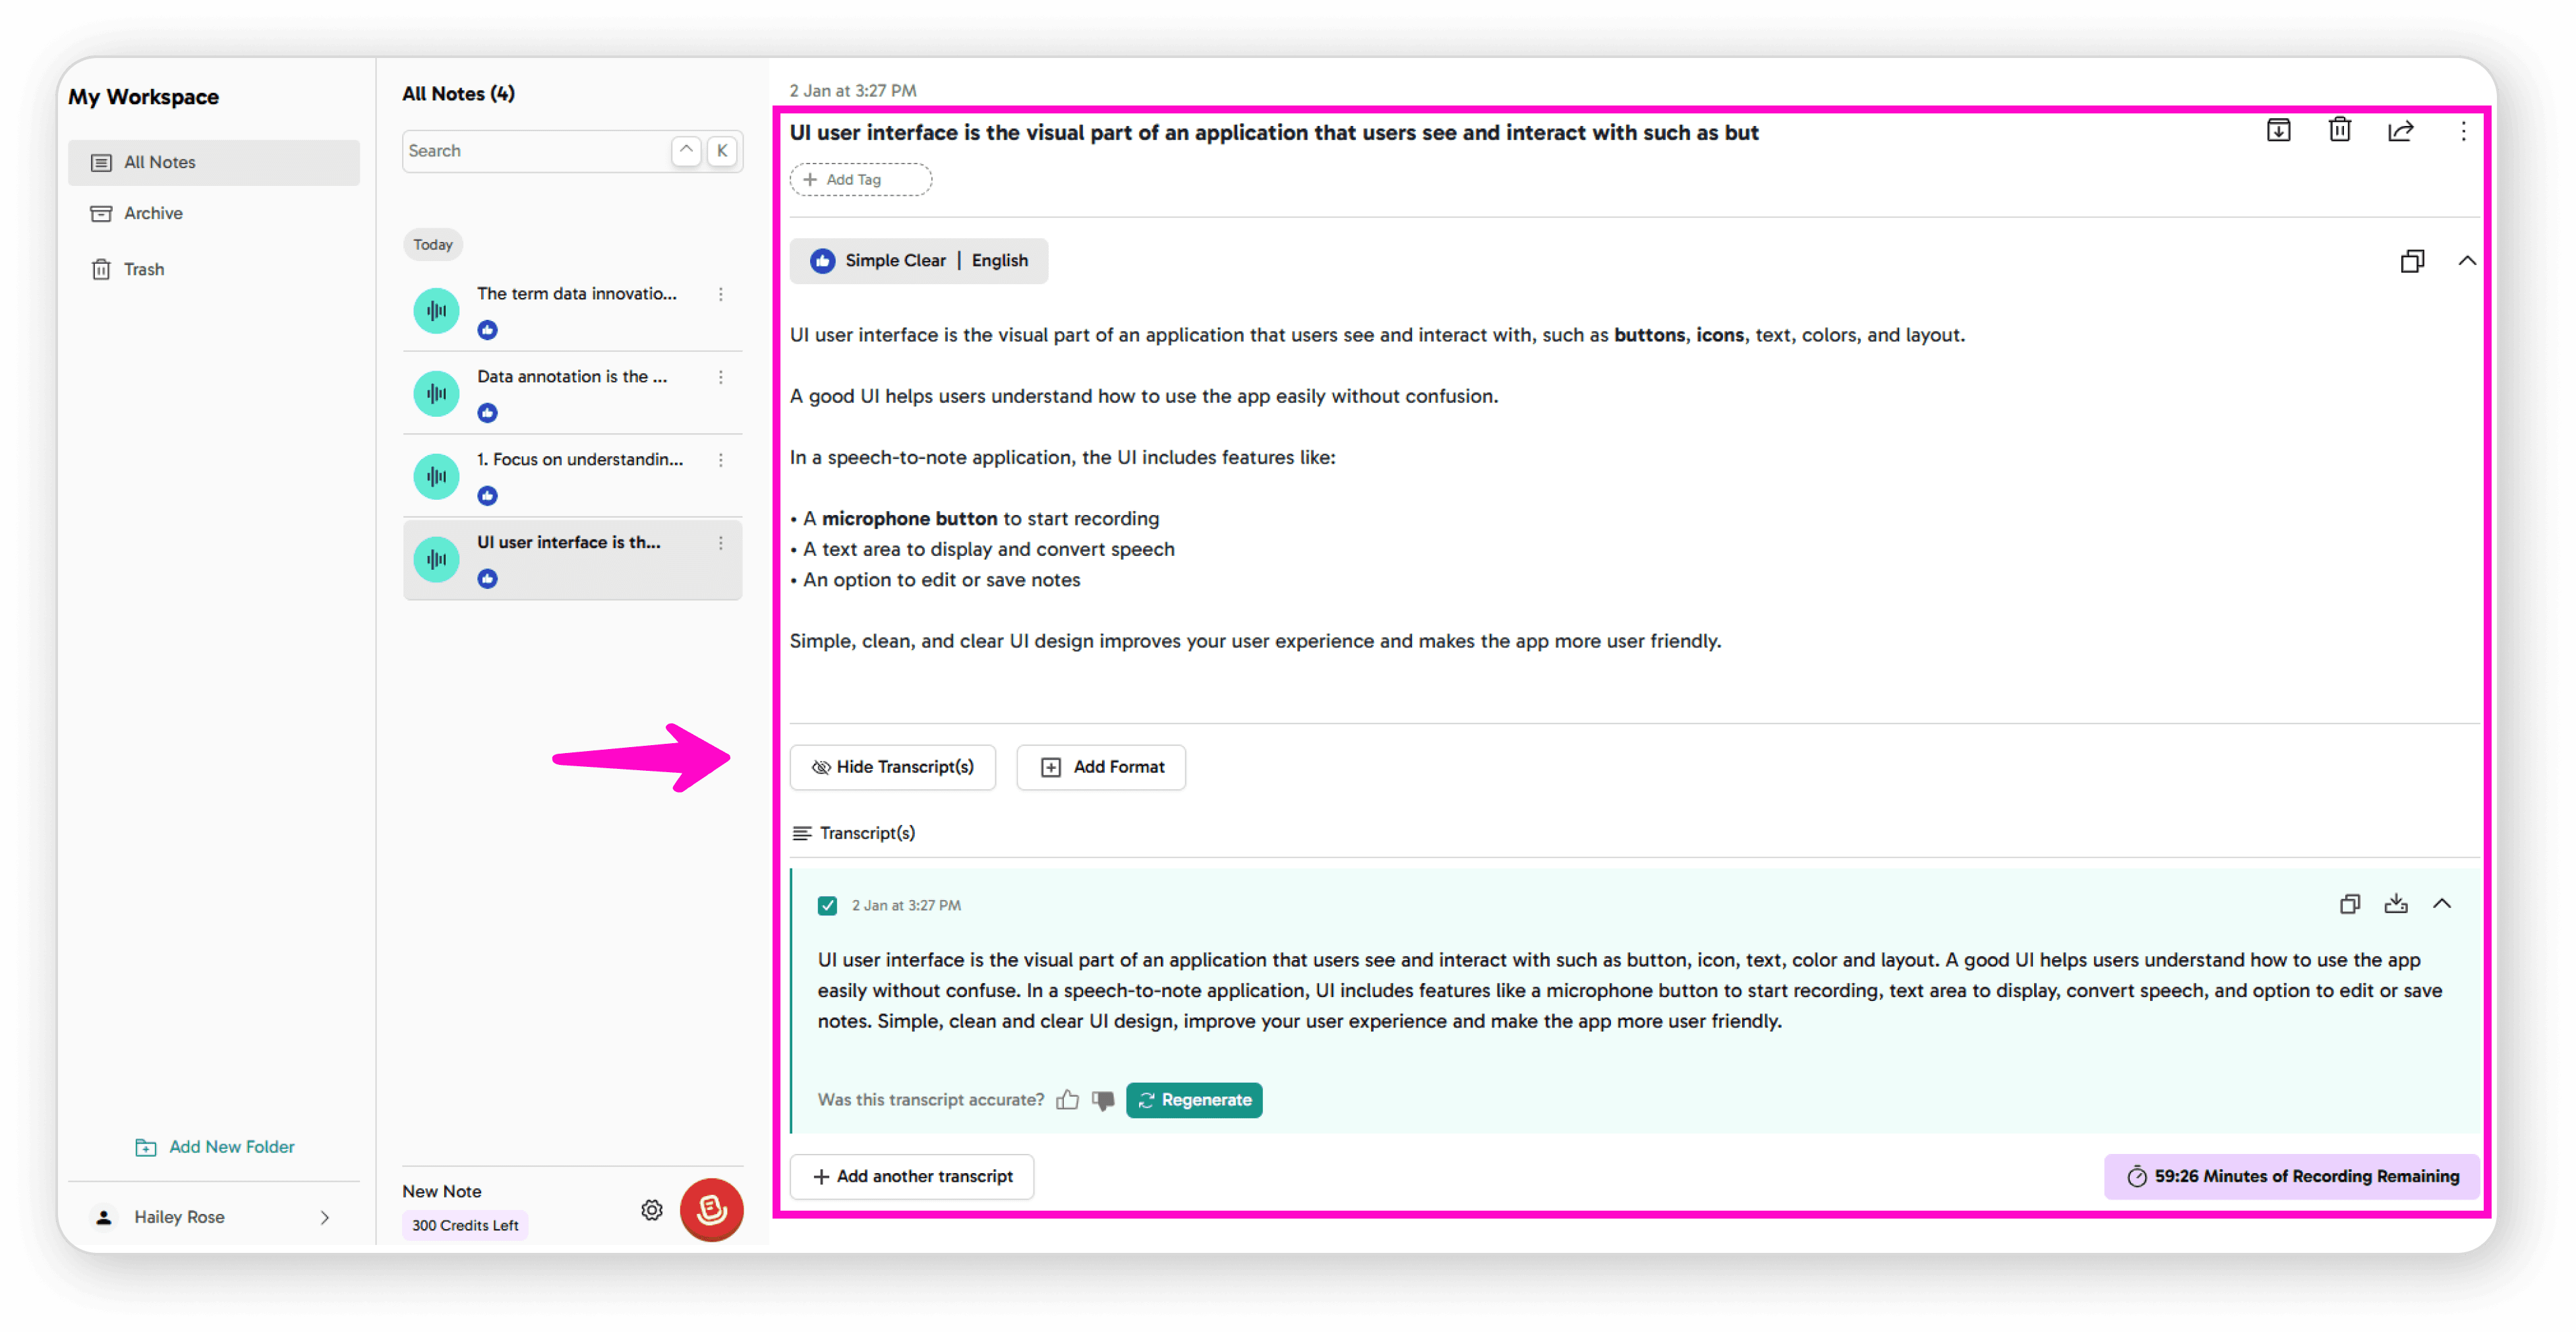
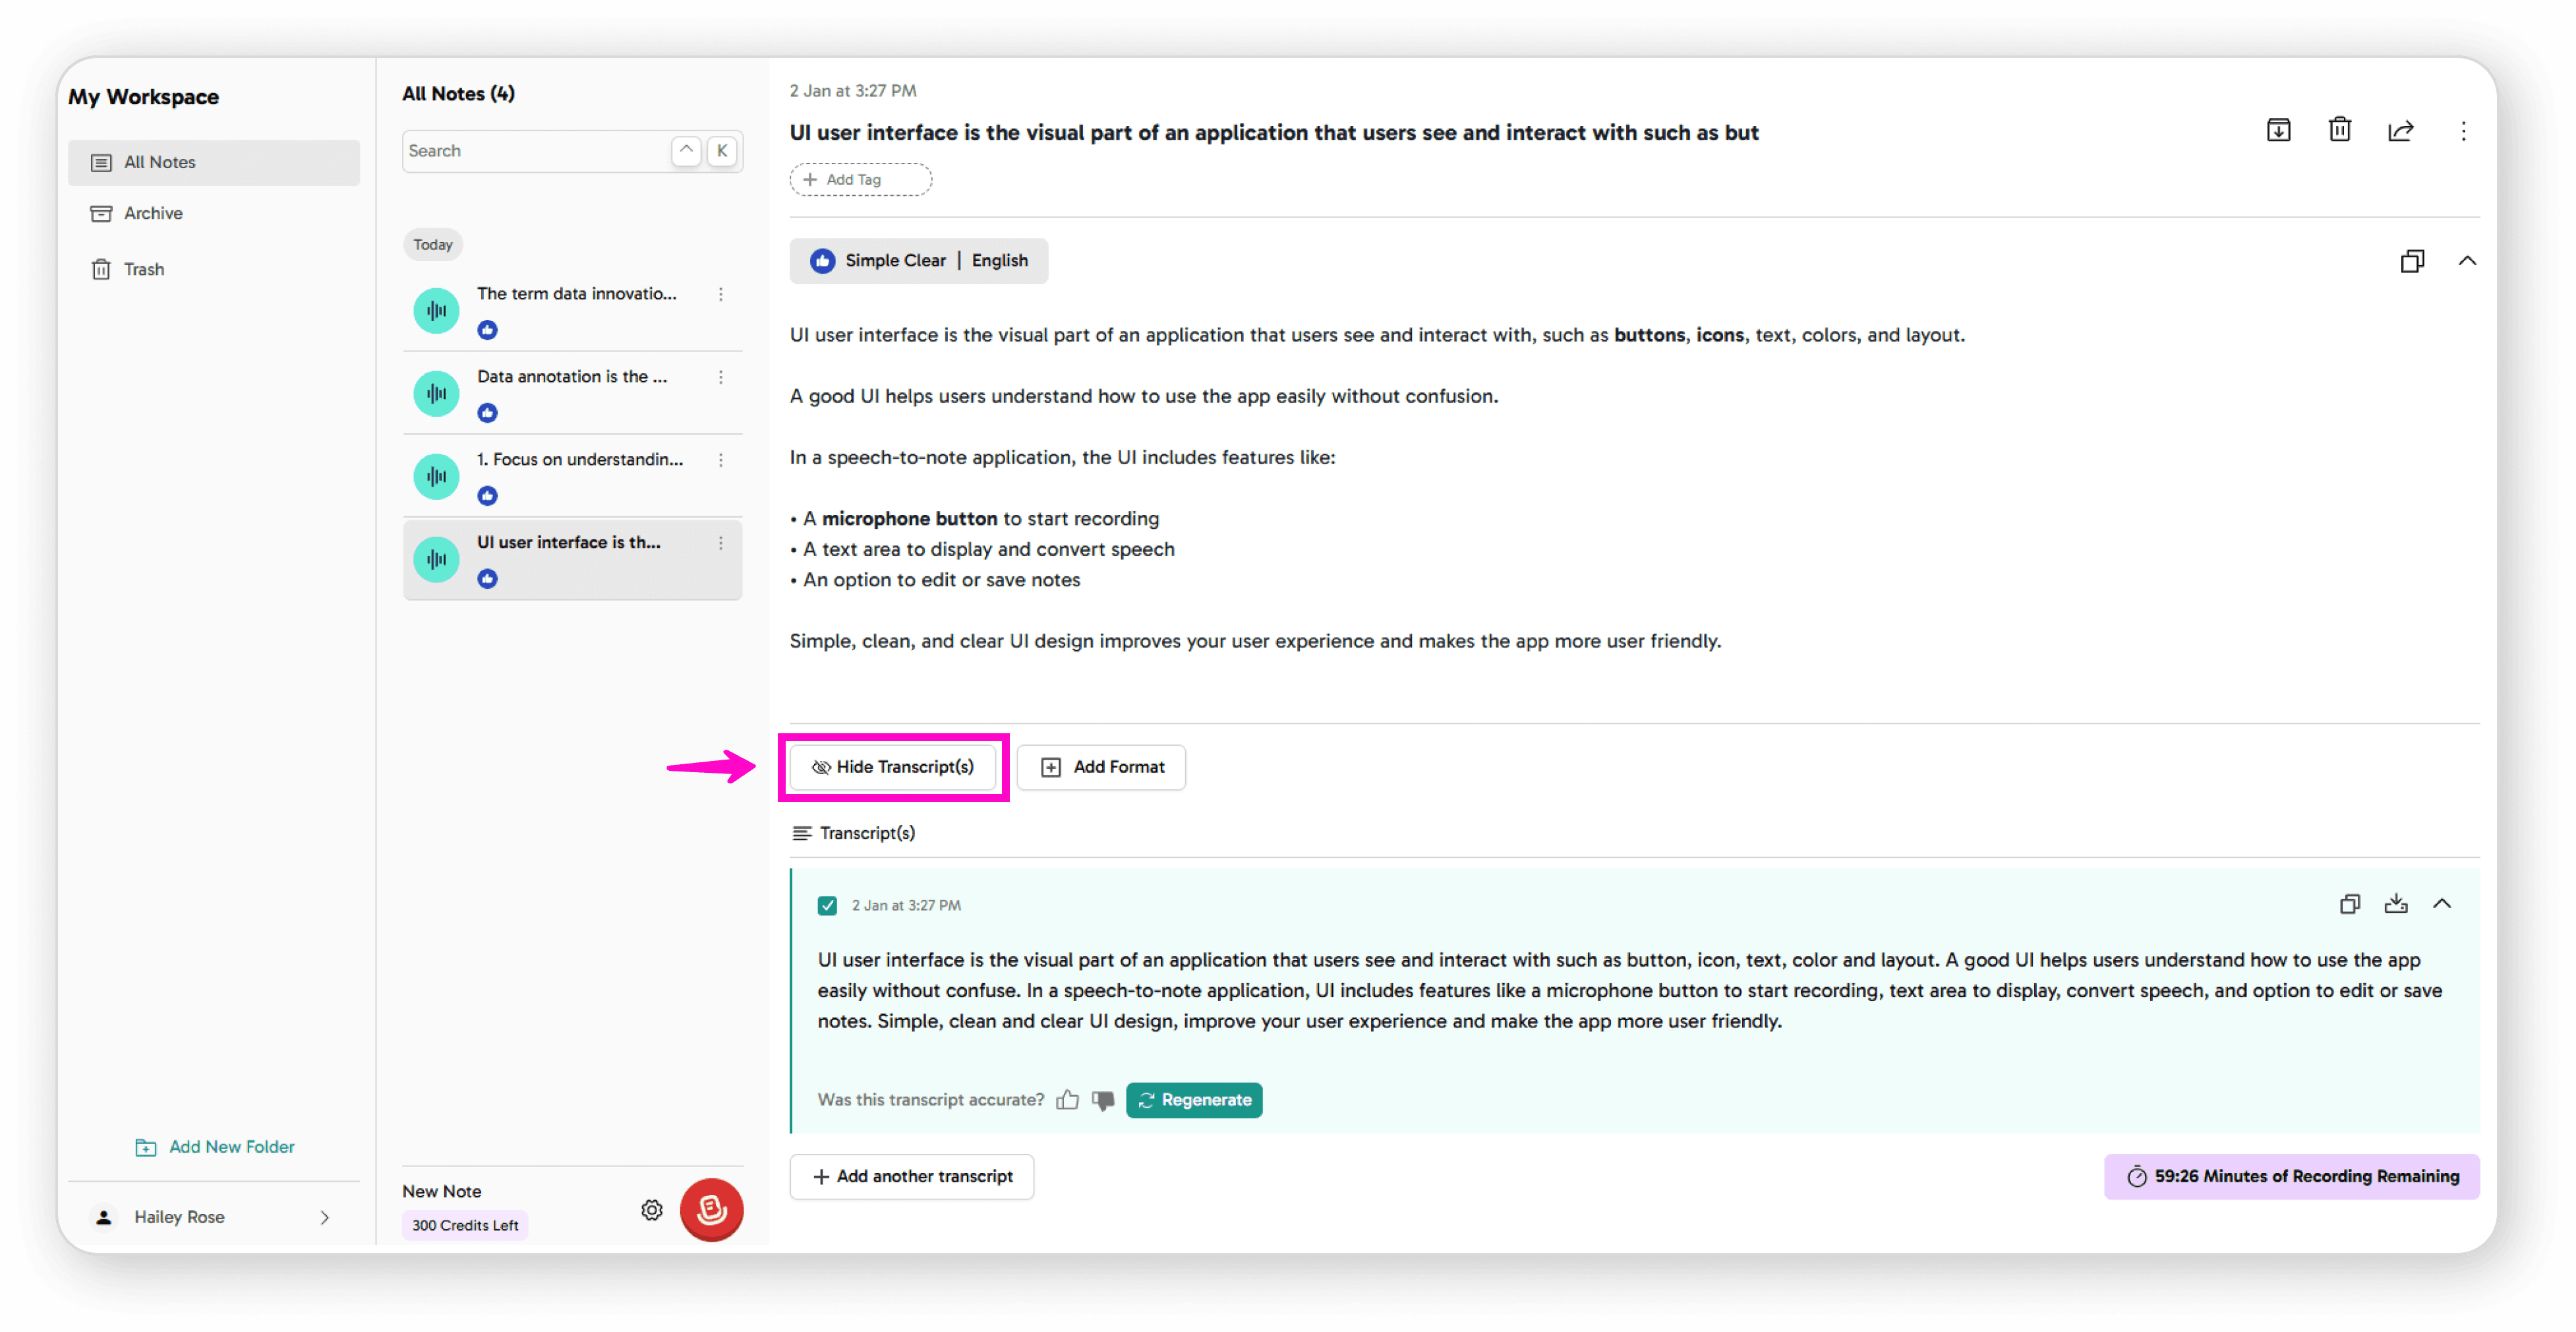
Hide transcript if needed
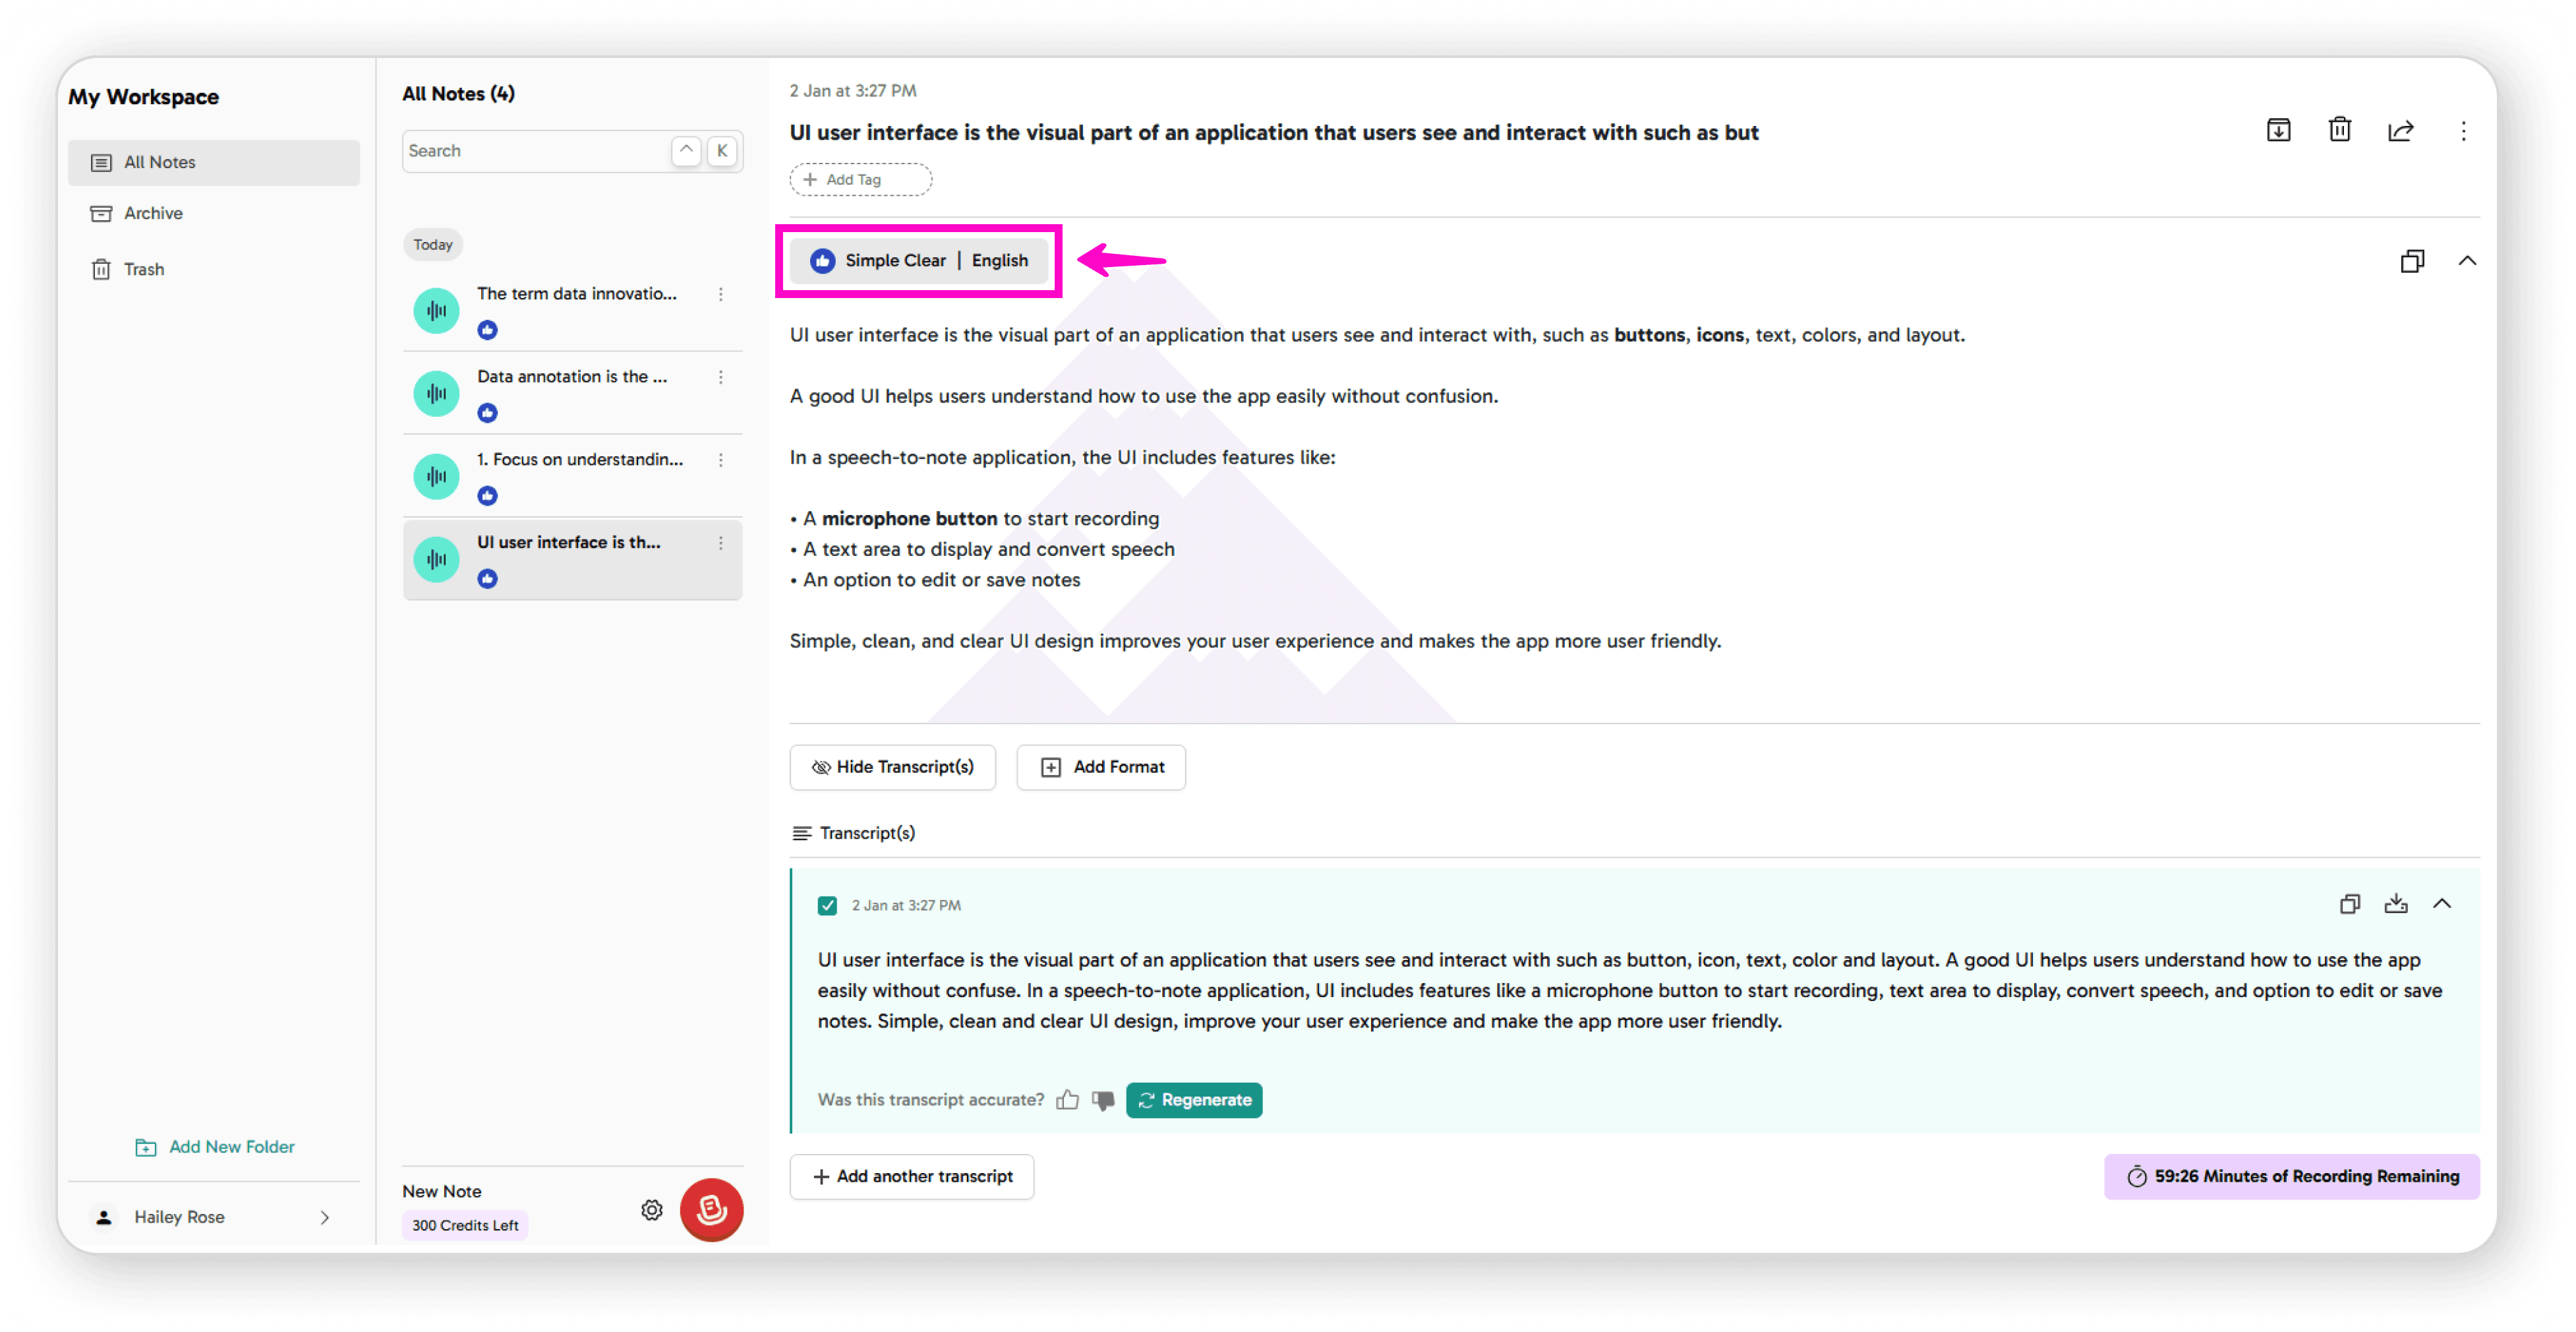
Add formatting and language options
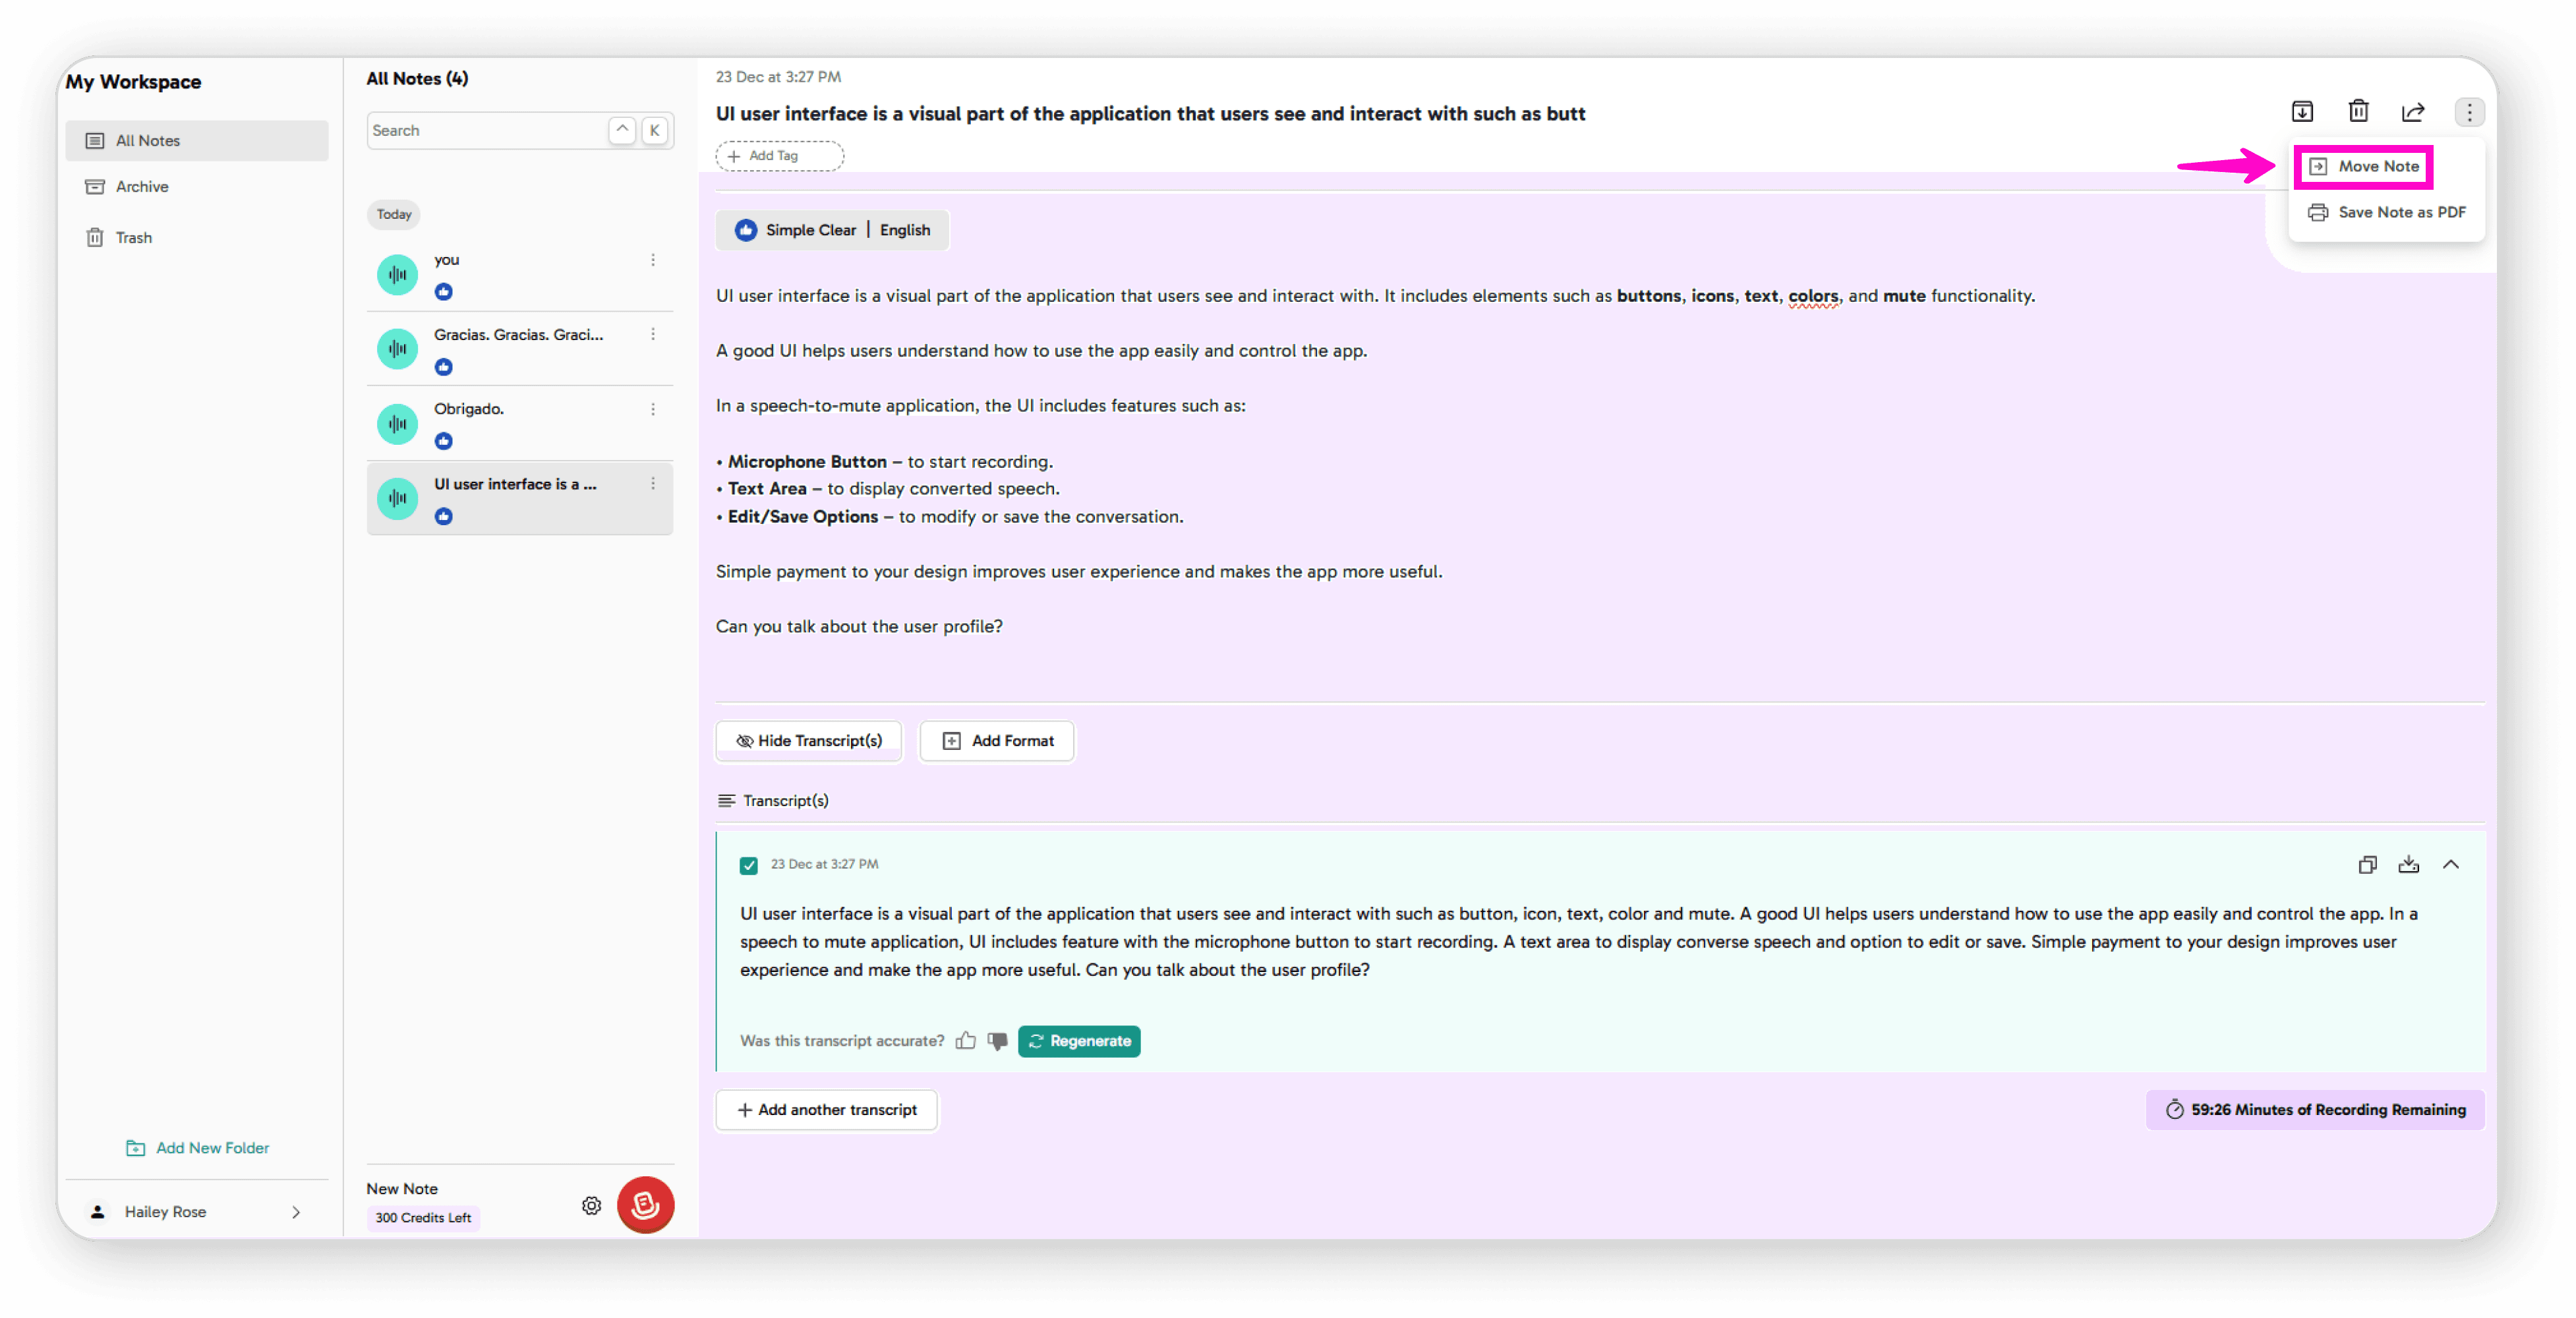
Organizing Notes
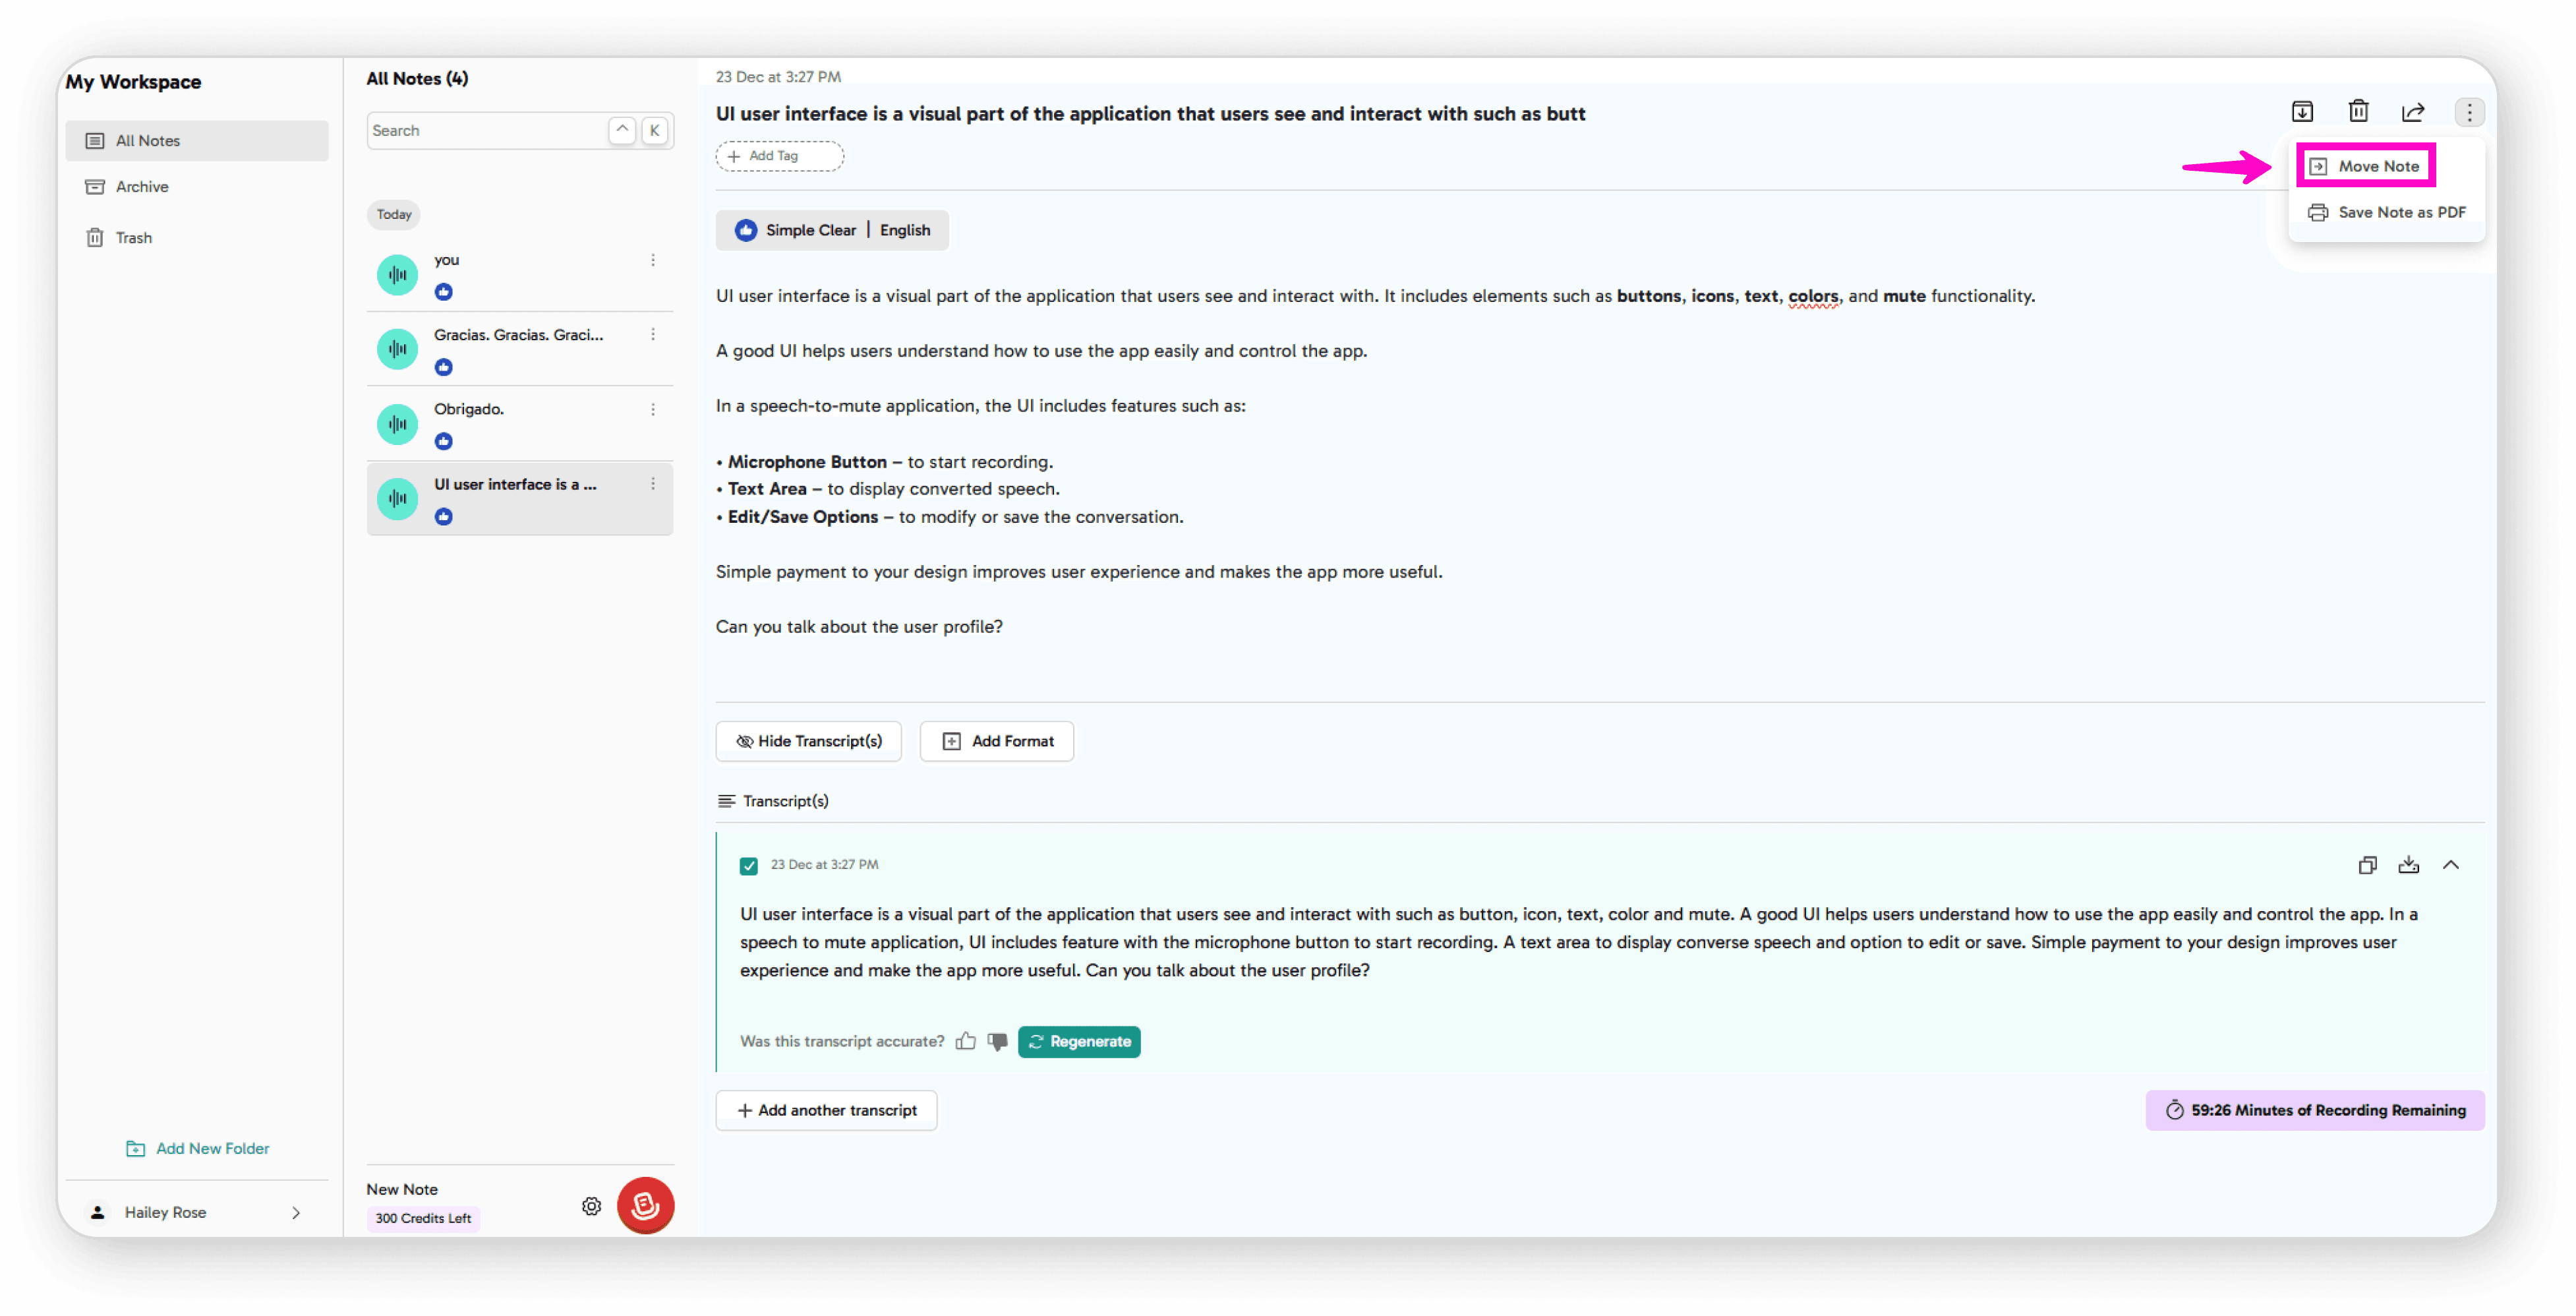
Click the 3-dot menu for more actions:
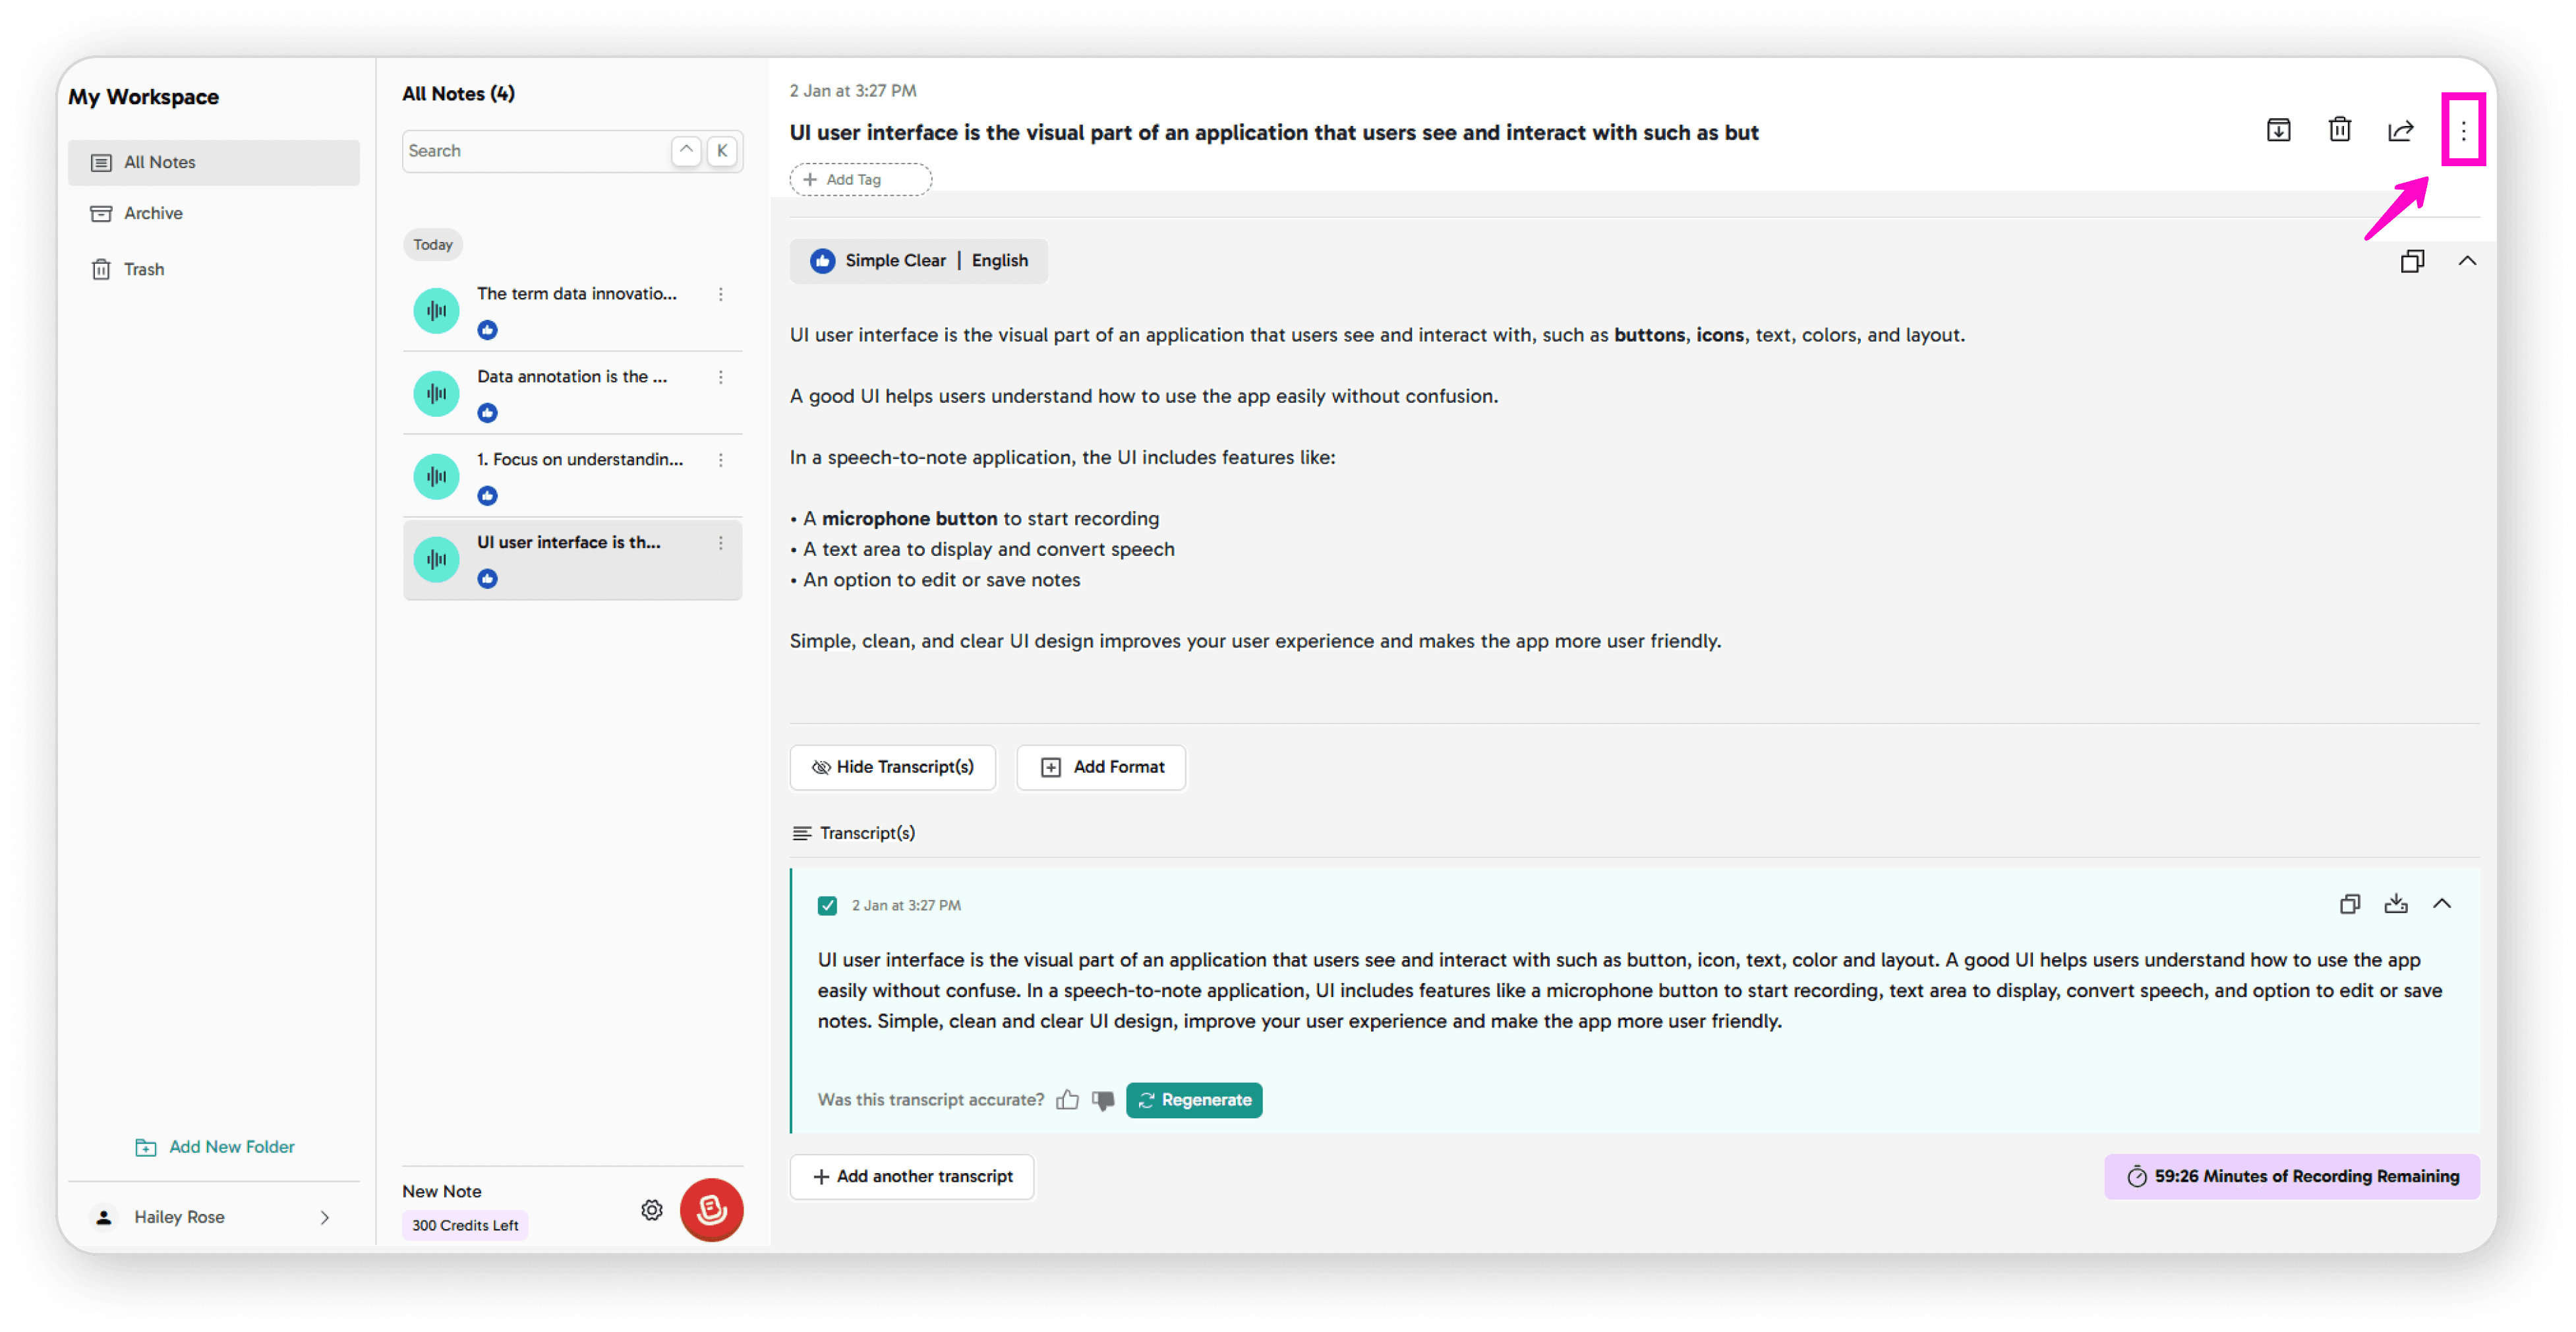
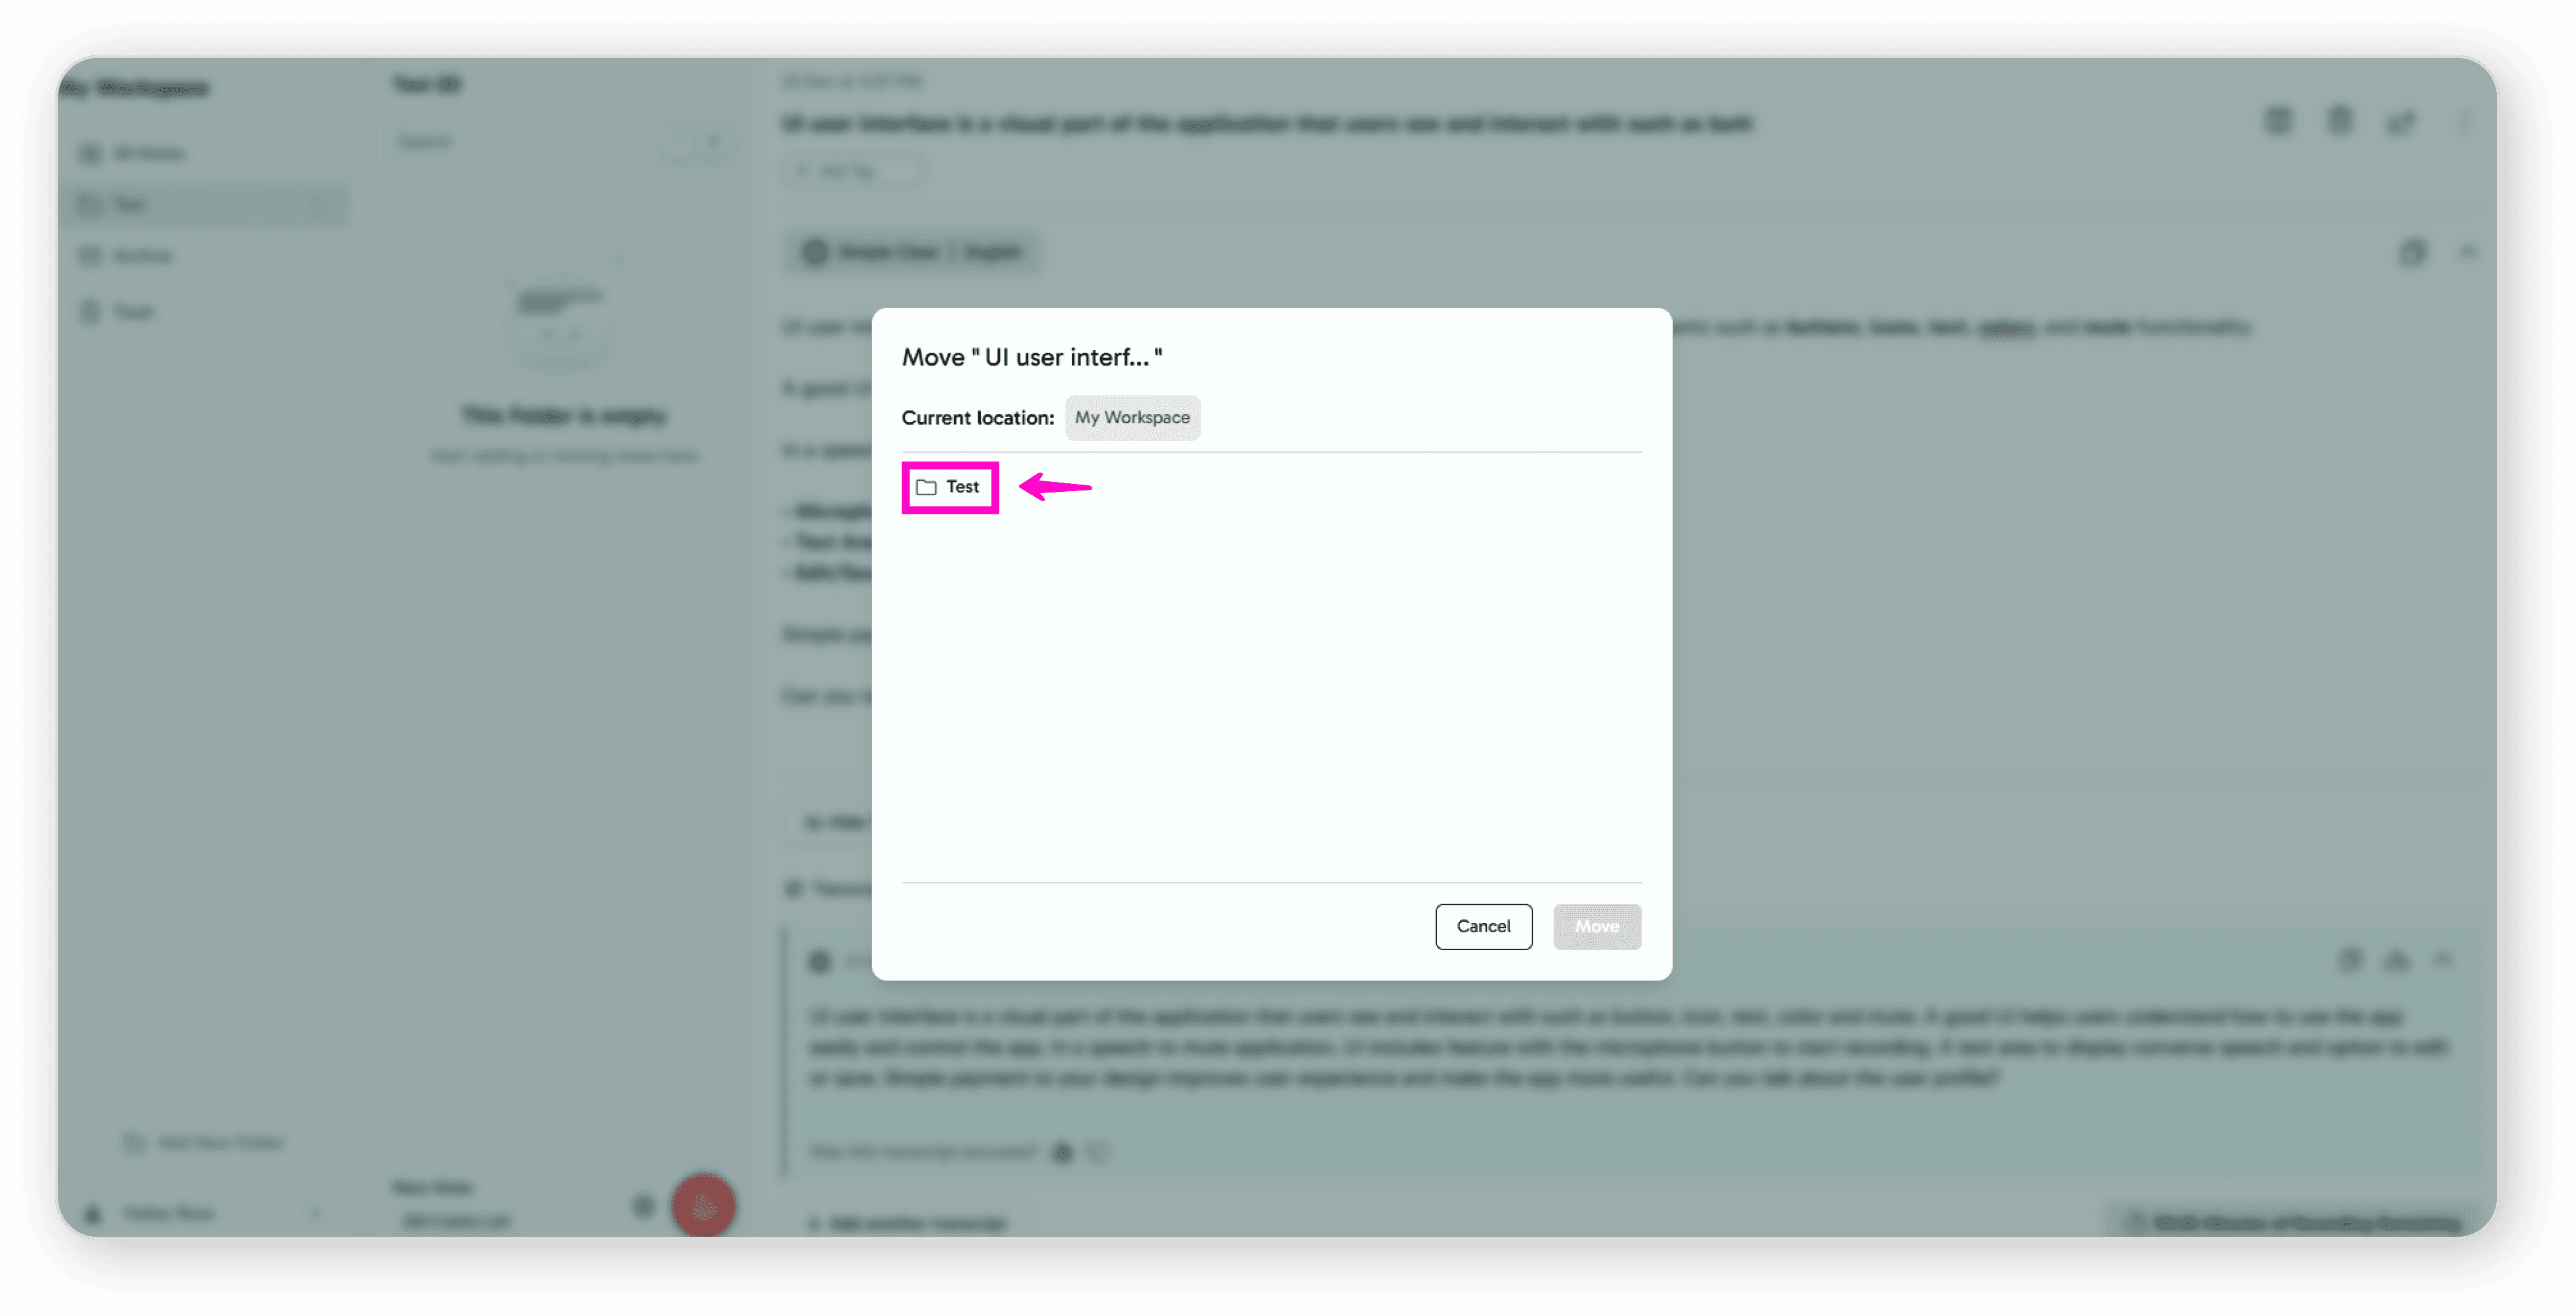
Move Note: Select a folder from the move screen to relocate your note
Select any folder name
Archive: Click the archive icon
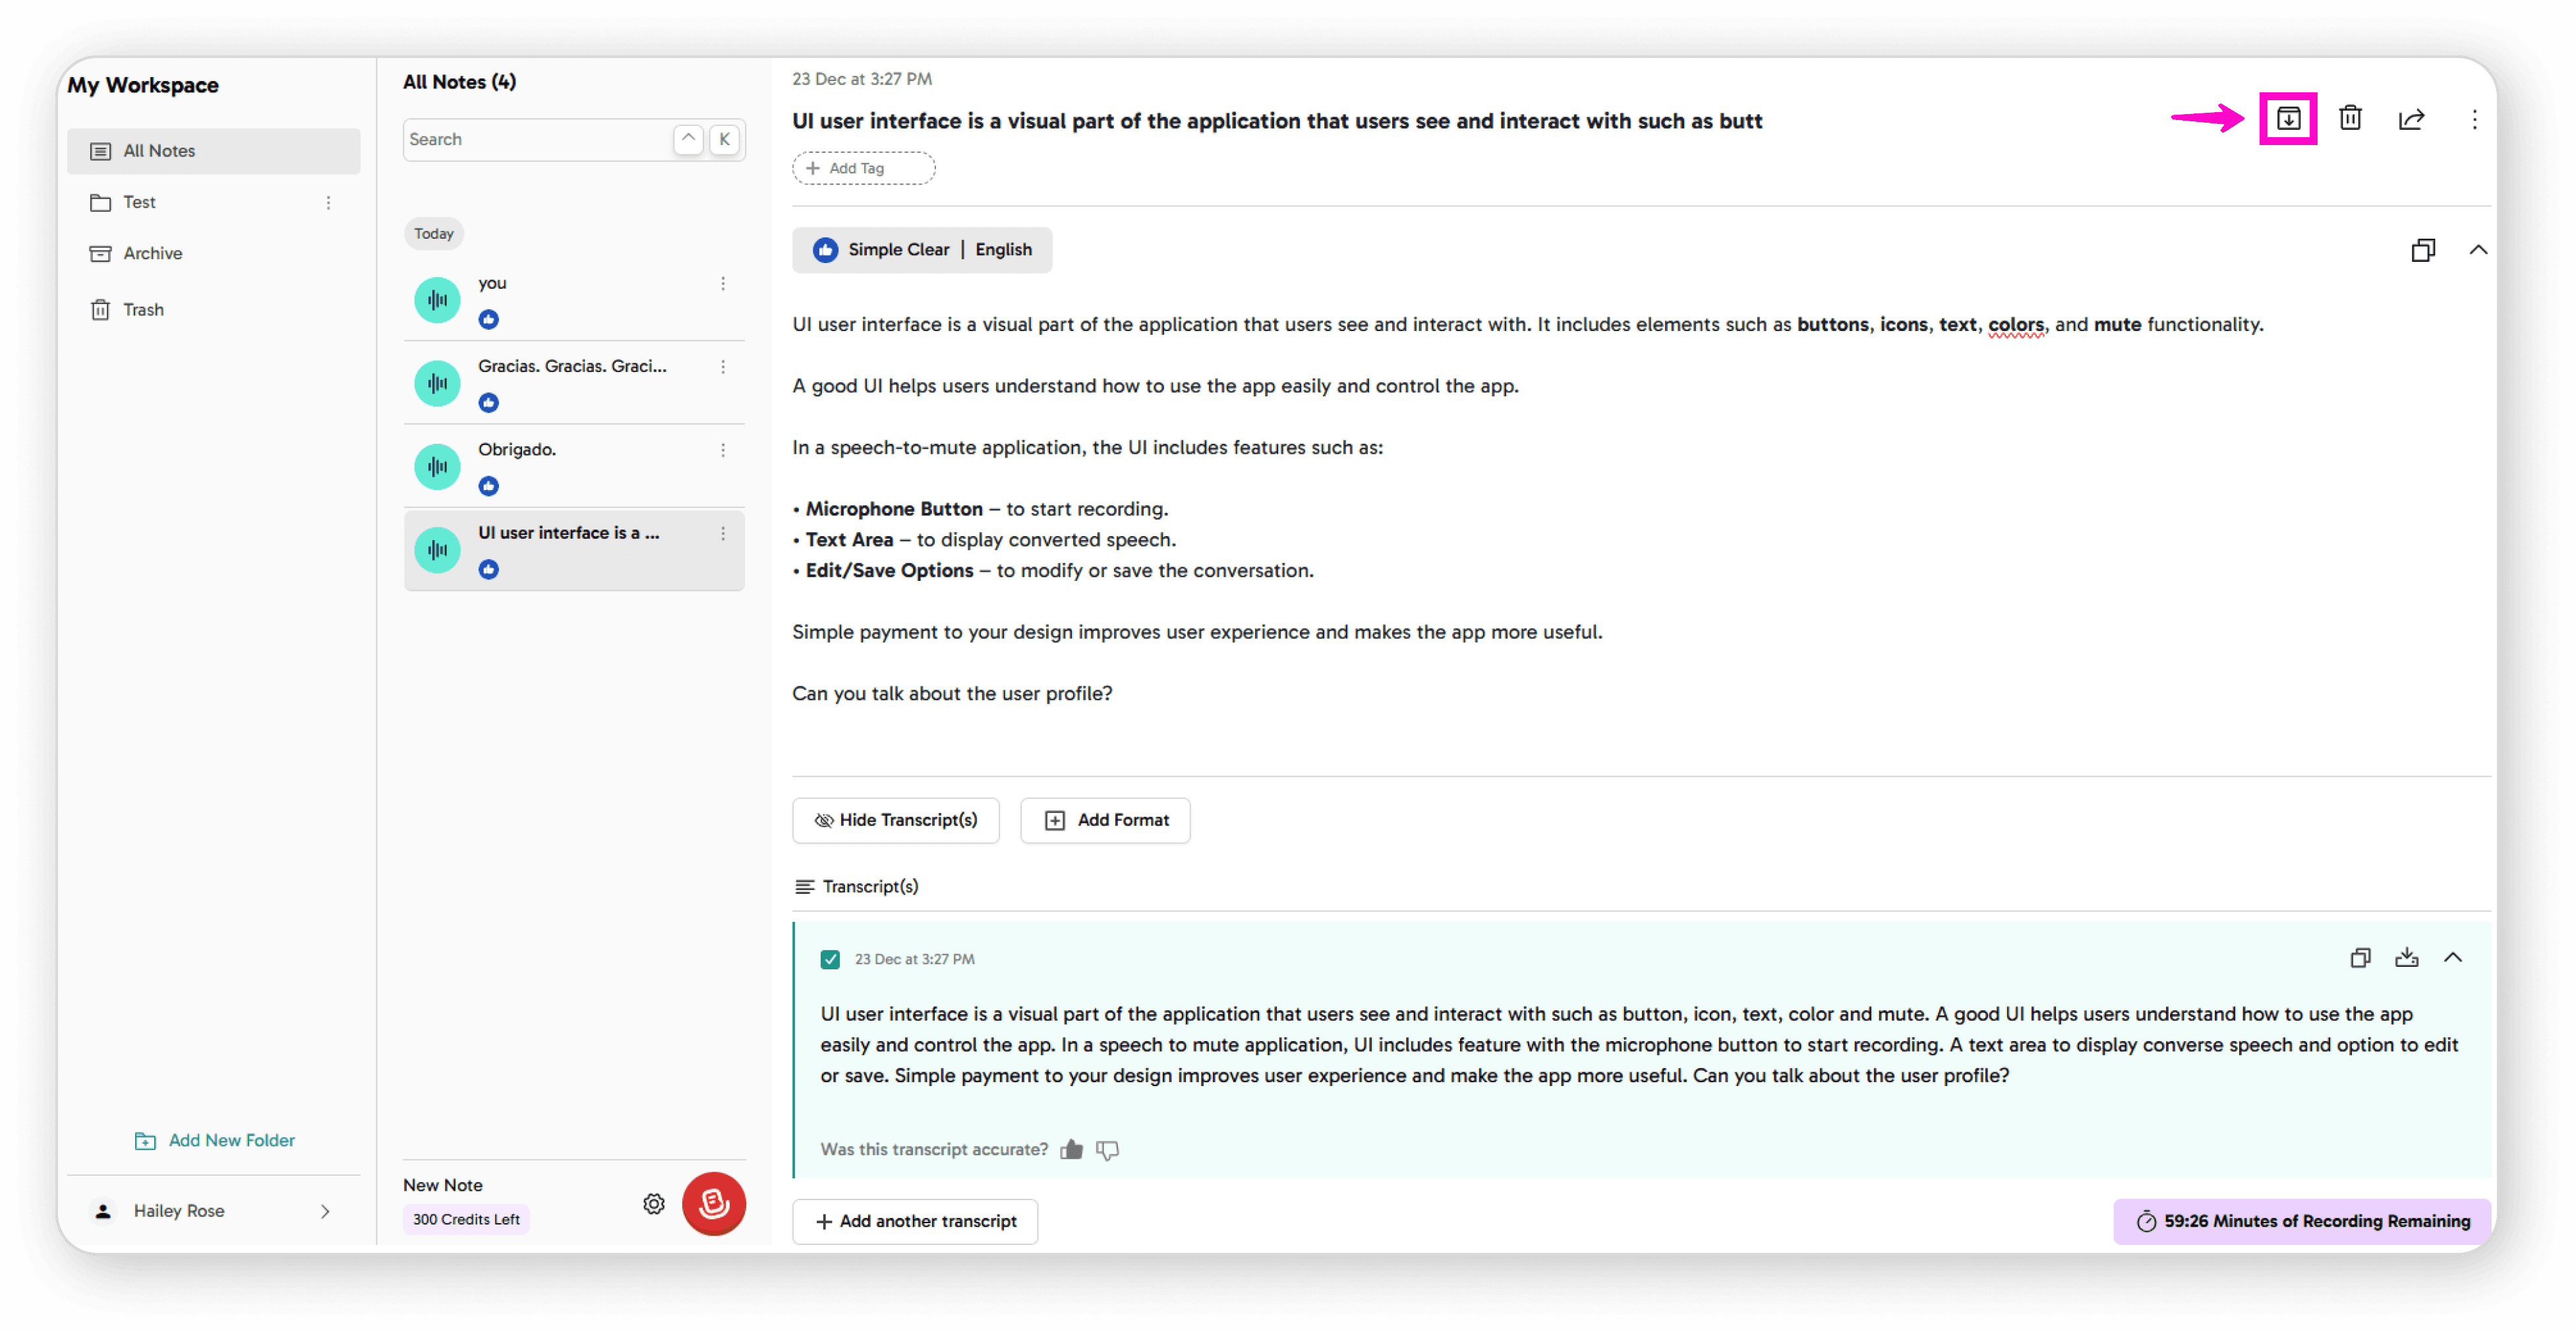
to store notes you want to keep but not see regularly
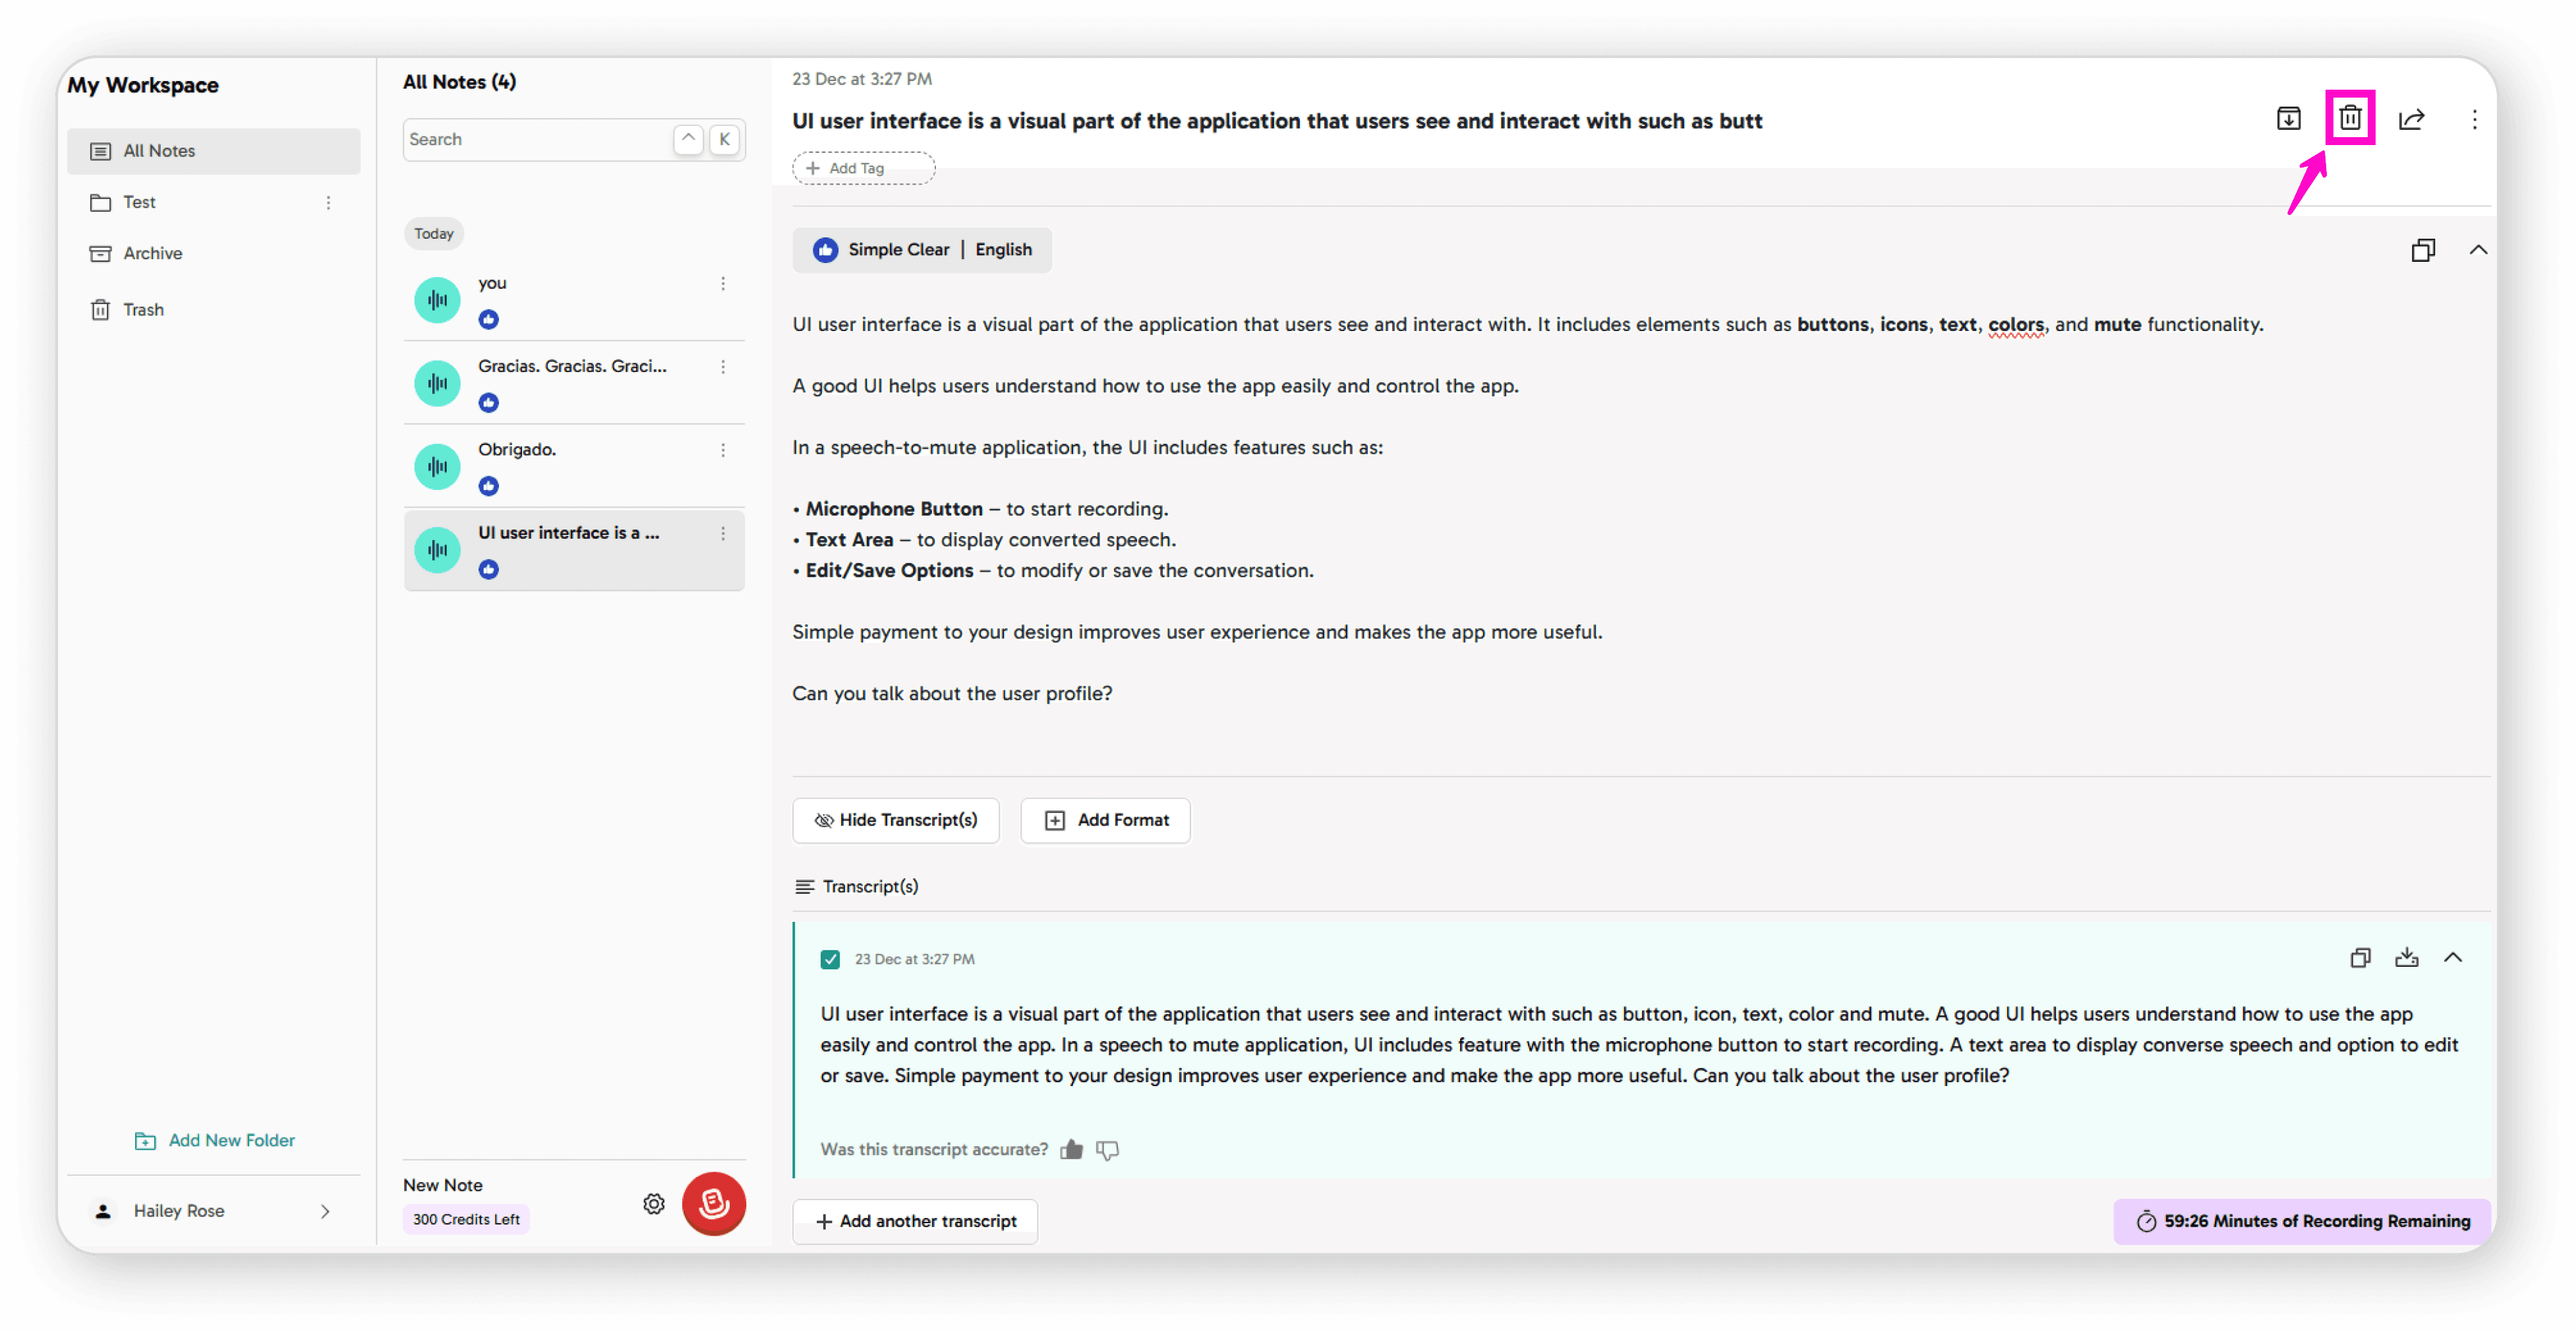
Delete: Click the delete icon to permanently remove notes
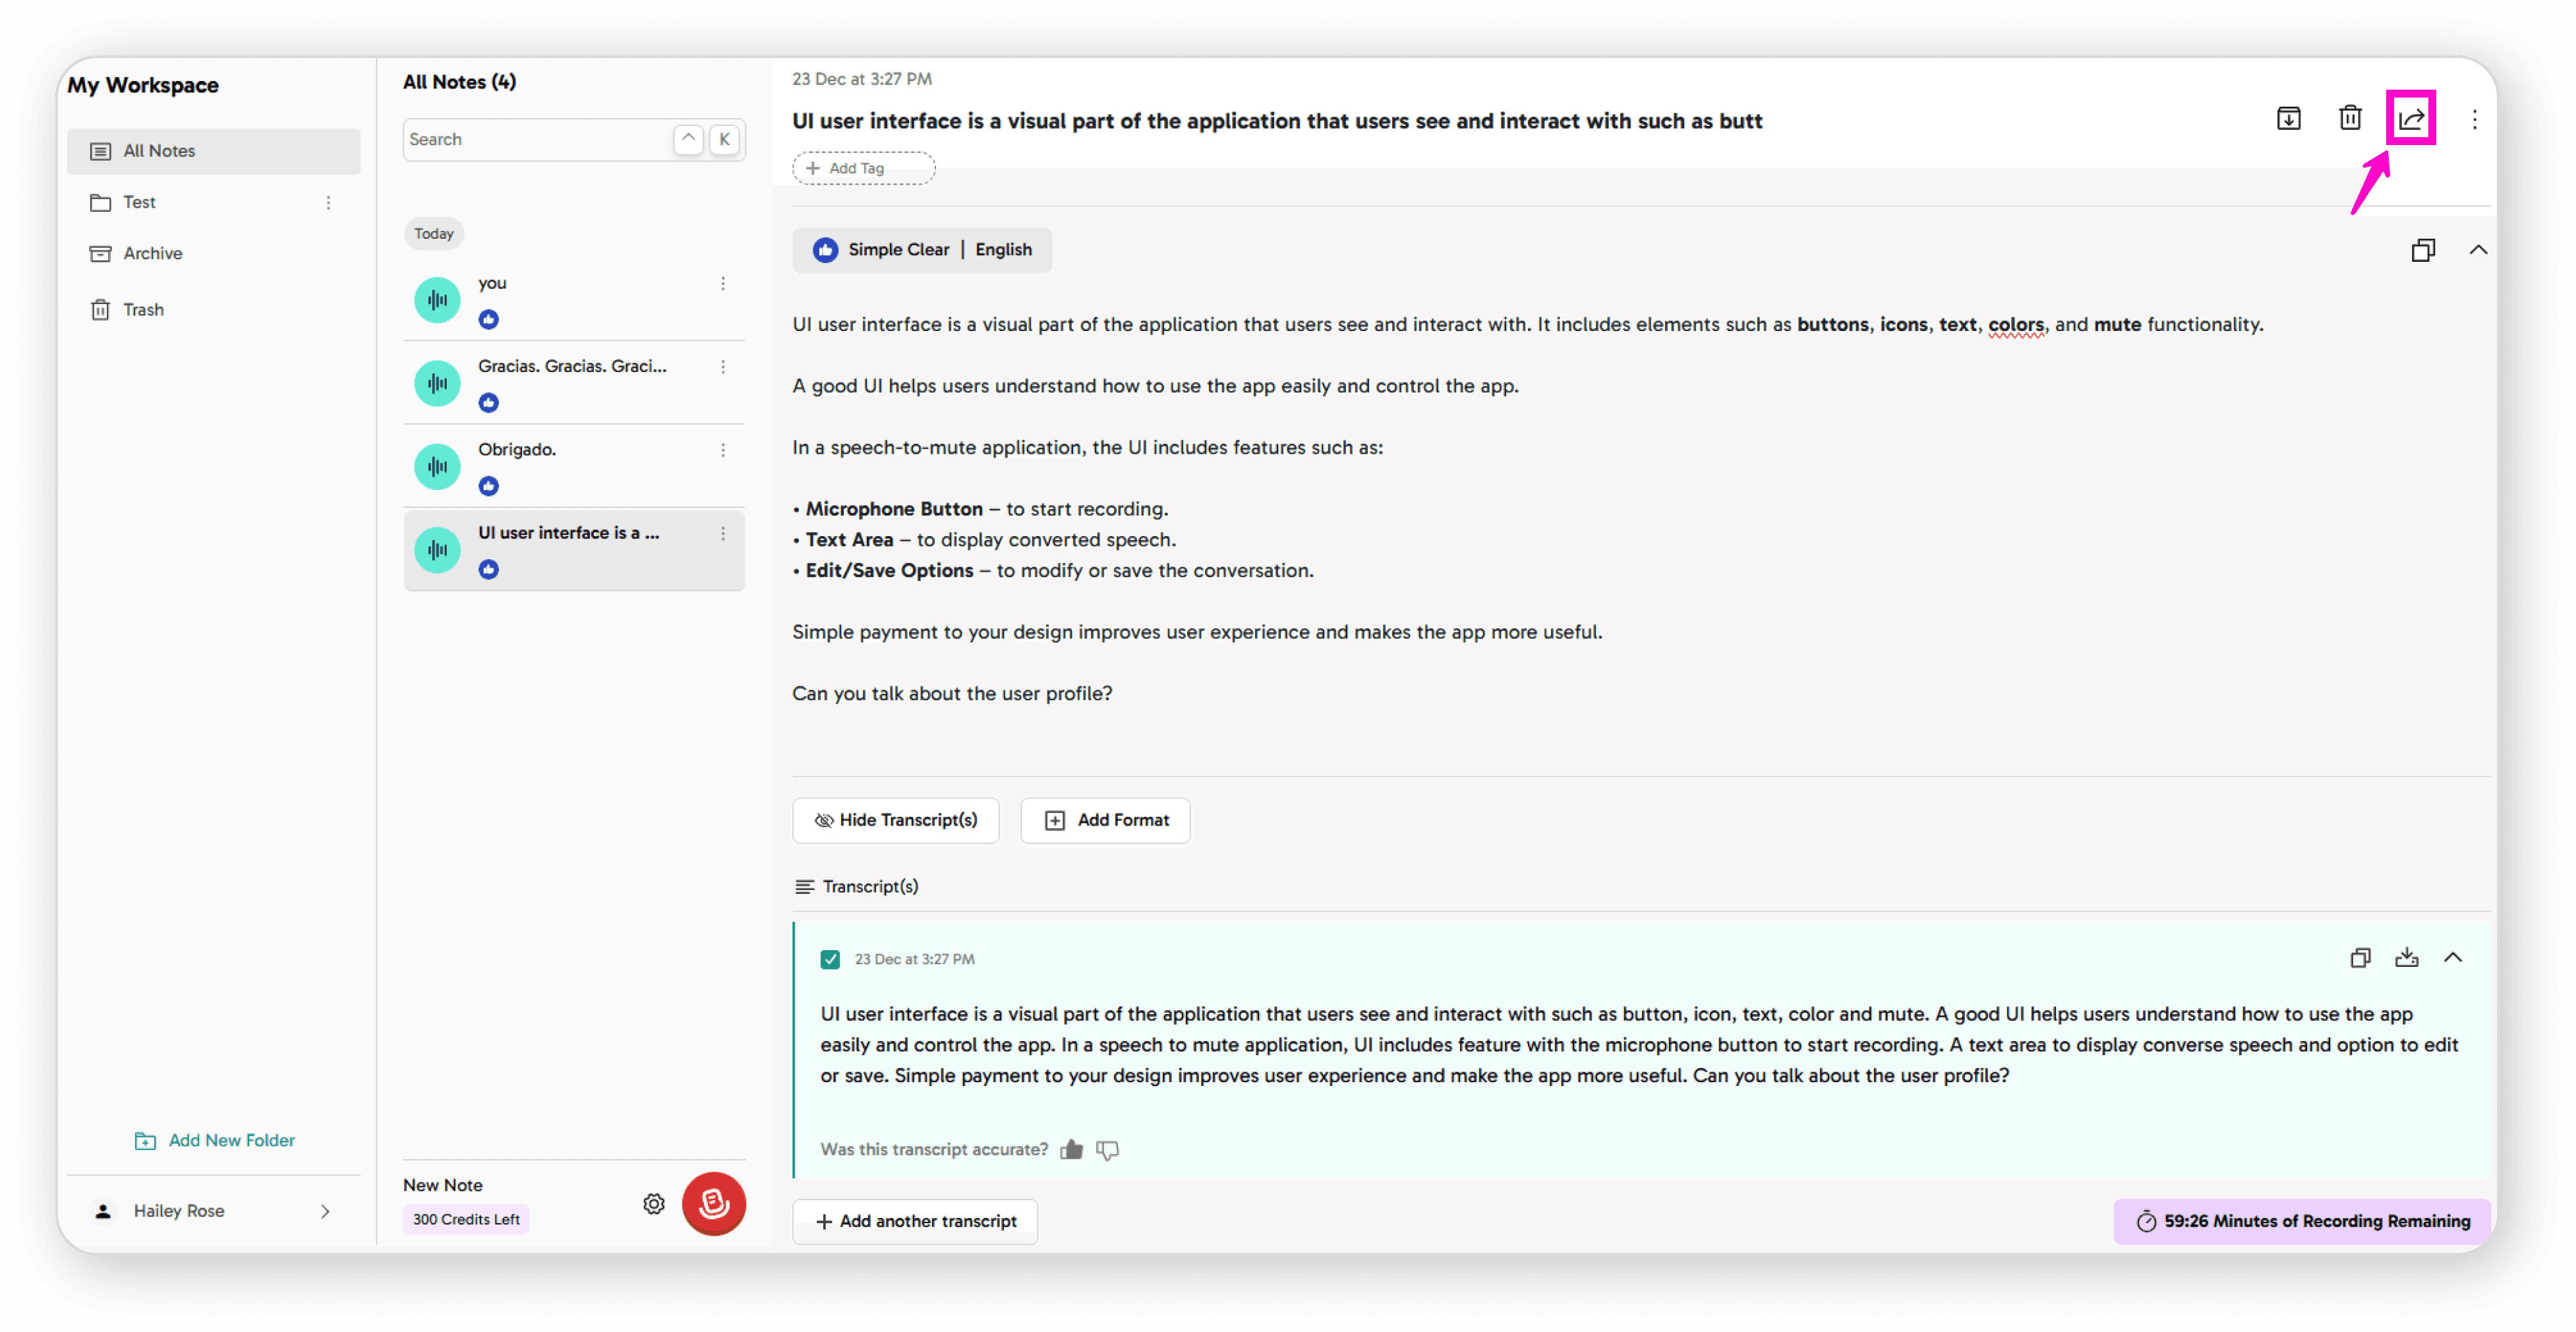
Share: Share notes with others for collaboration
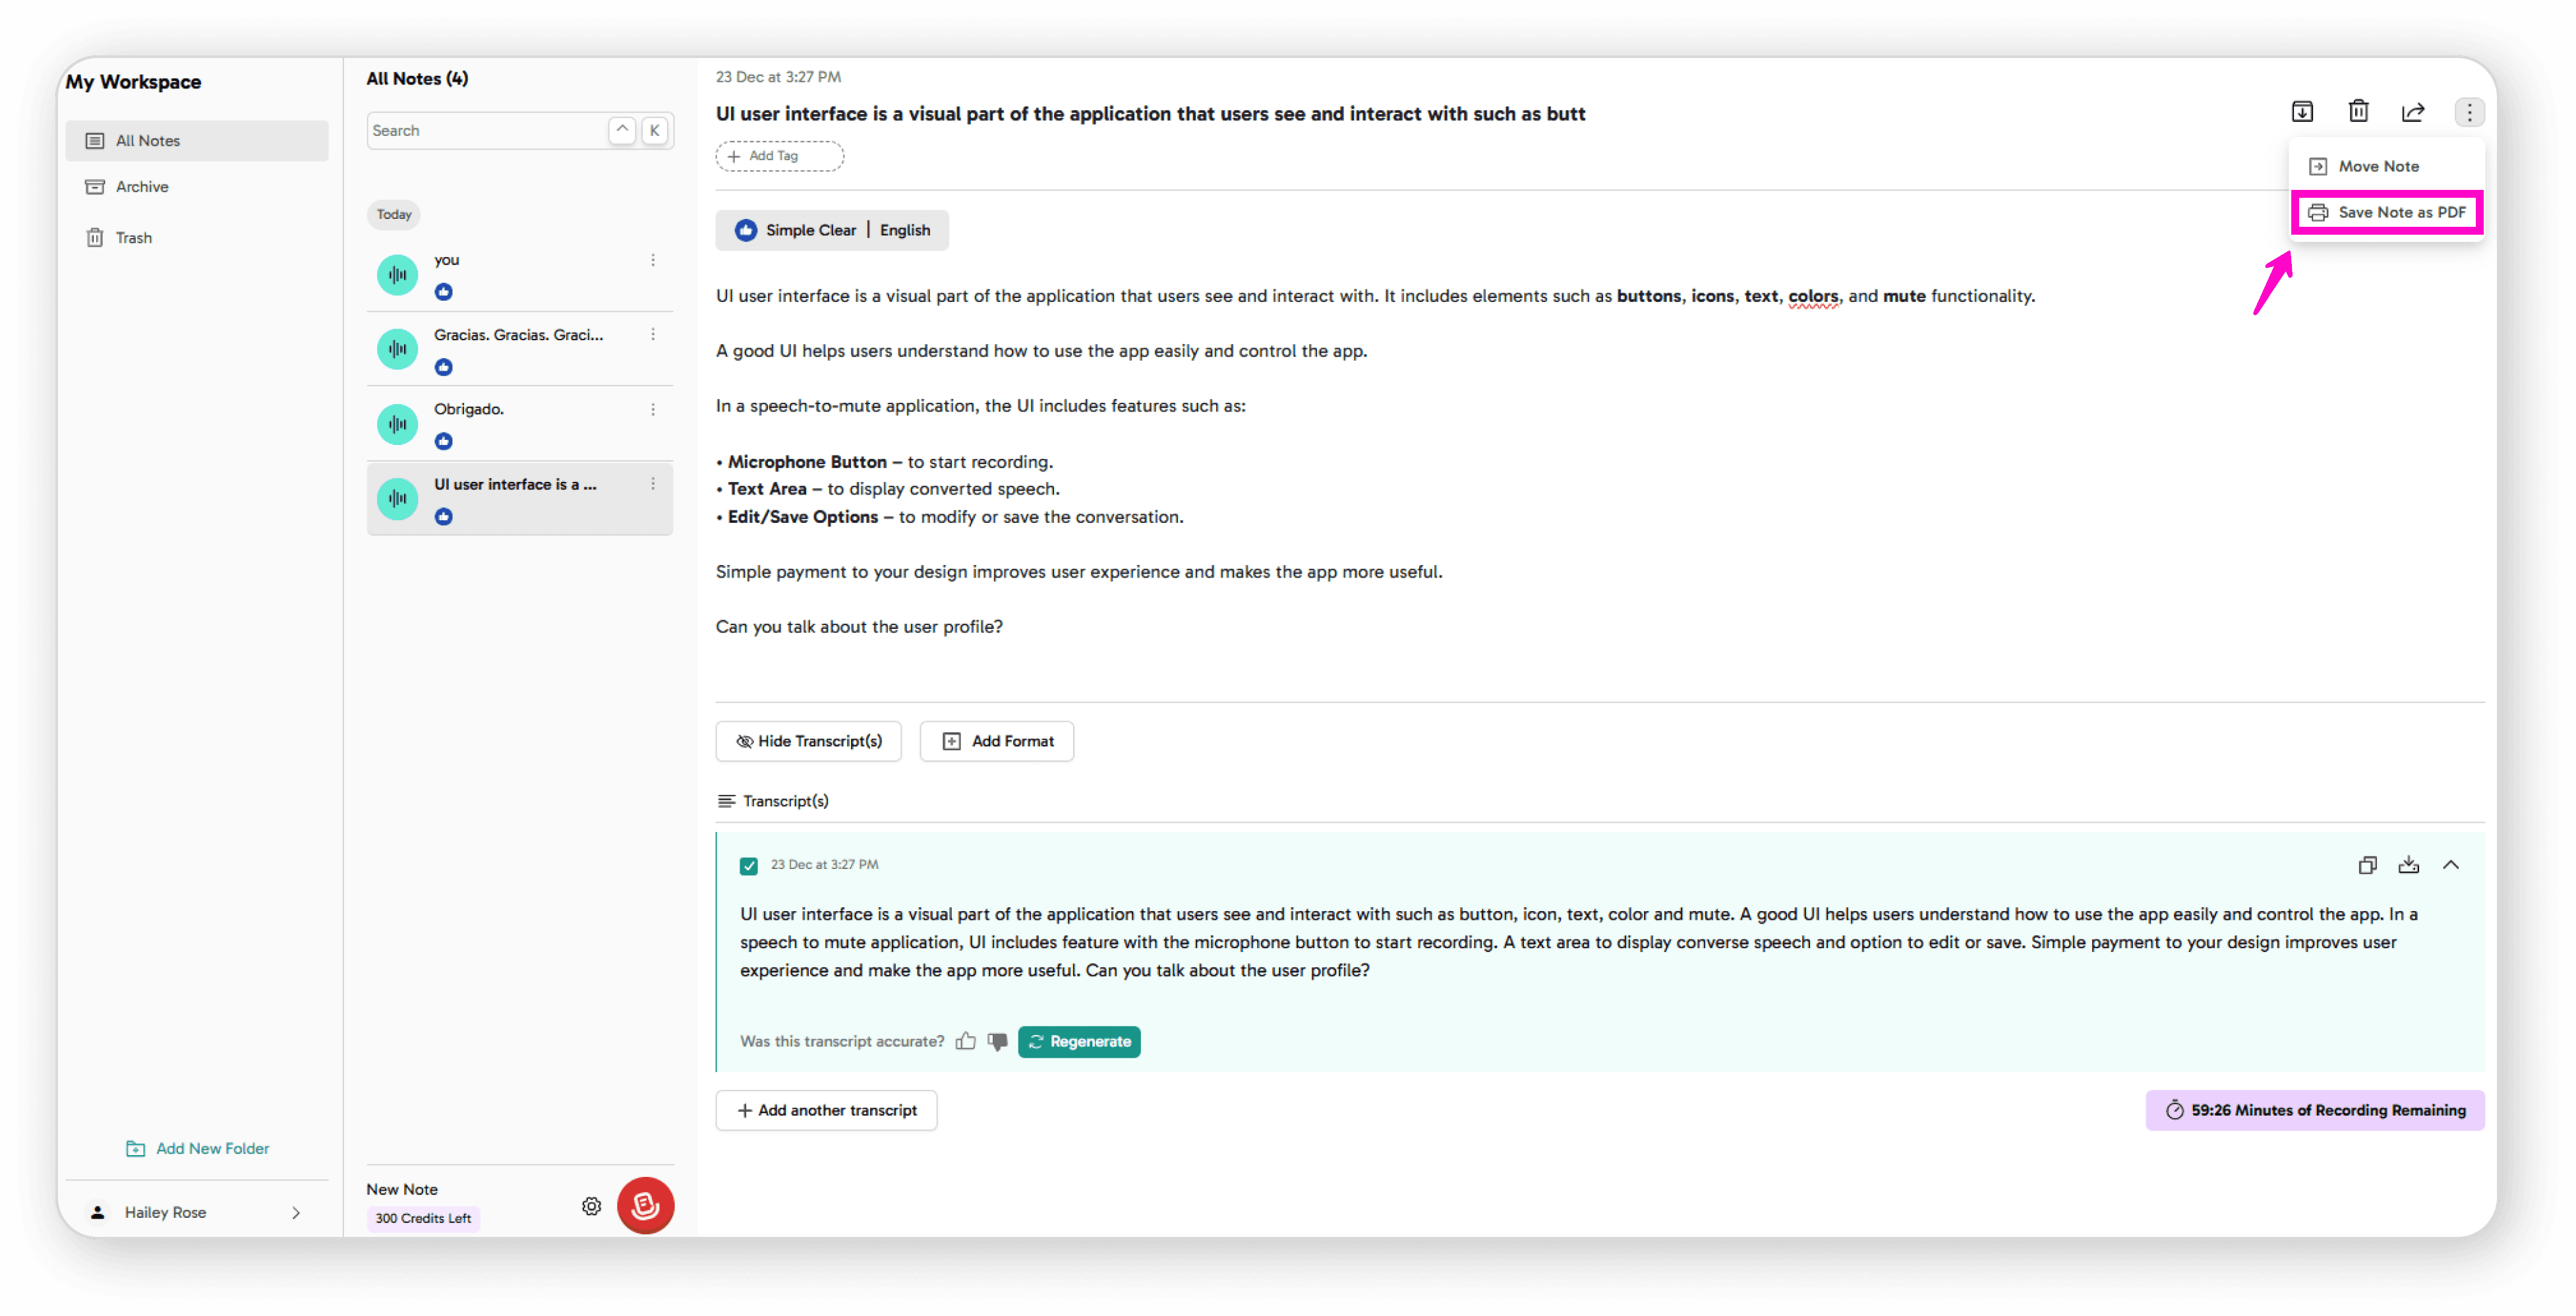
Exporting Notes
Save as PDF: Click "Save note as PDF" to export
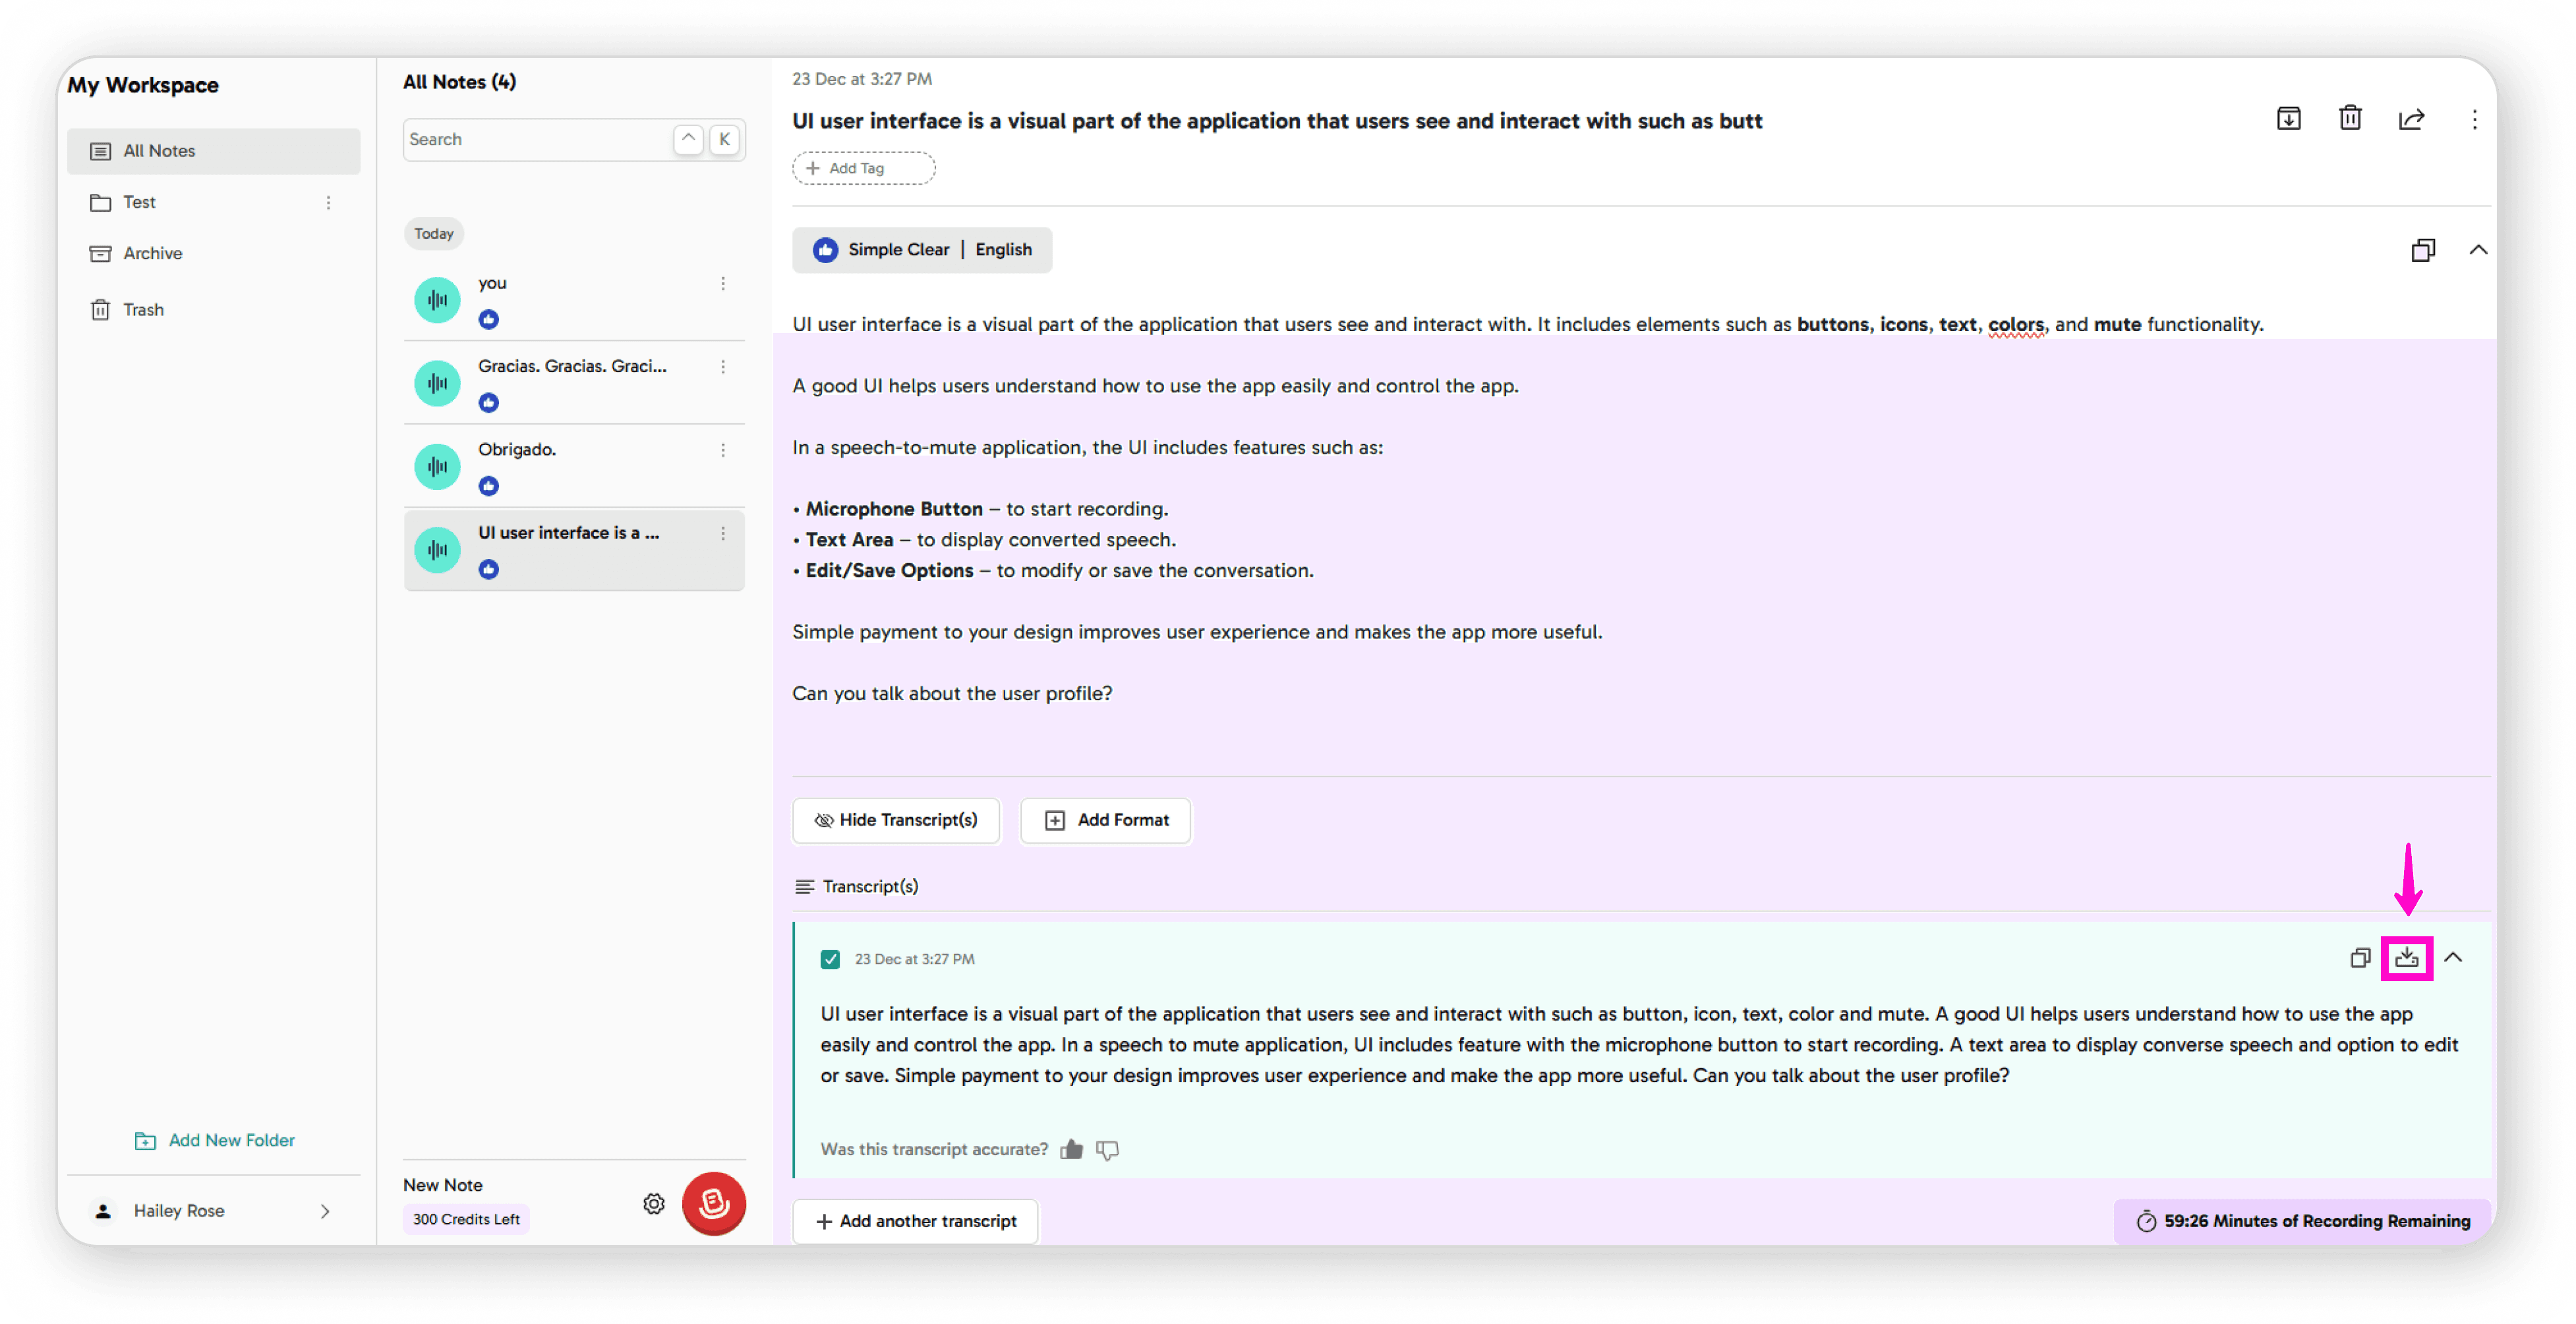
Download: Save notes to your local device
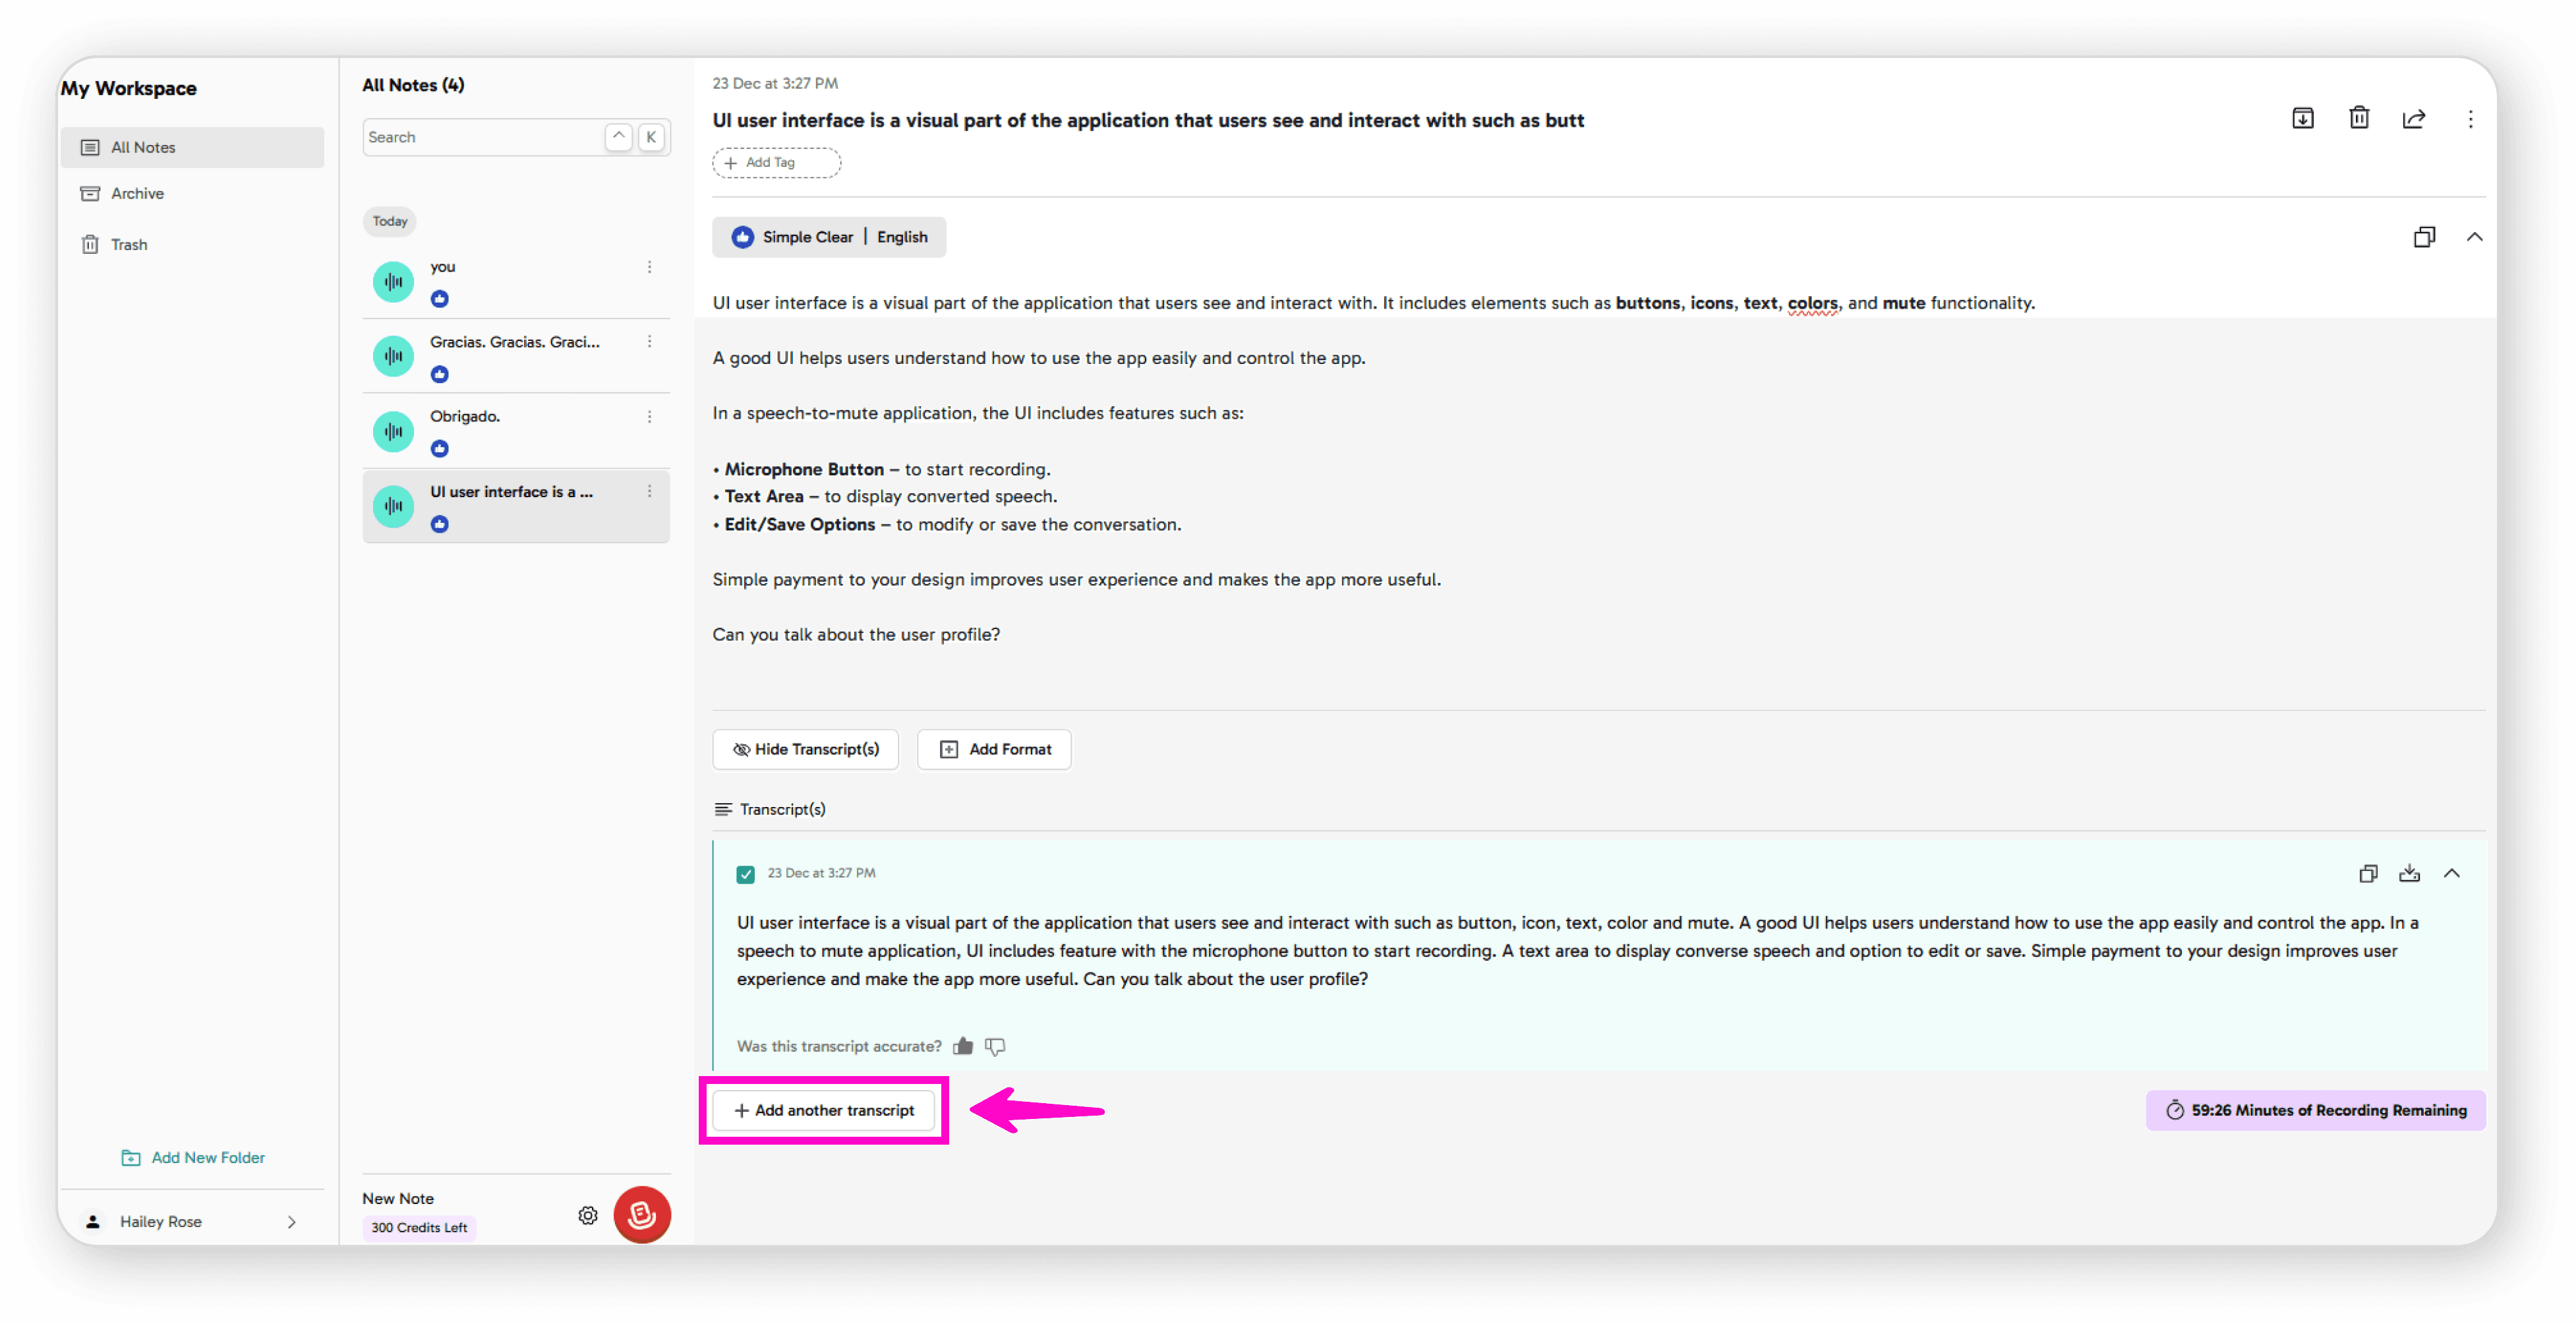
Improving Transcripts
If the audio quality wasn't perfect, click Regenerate Transcript
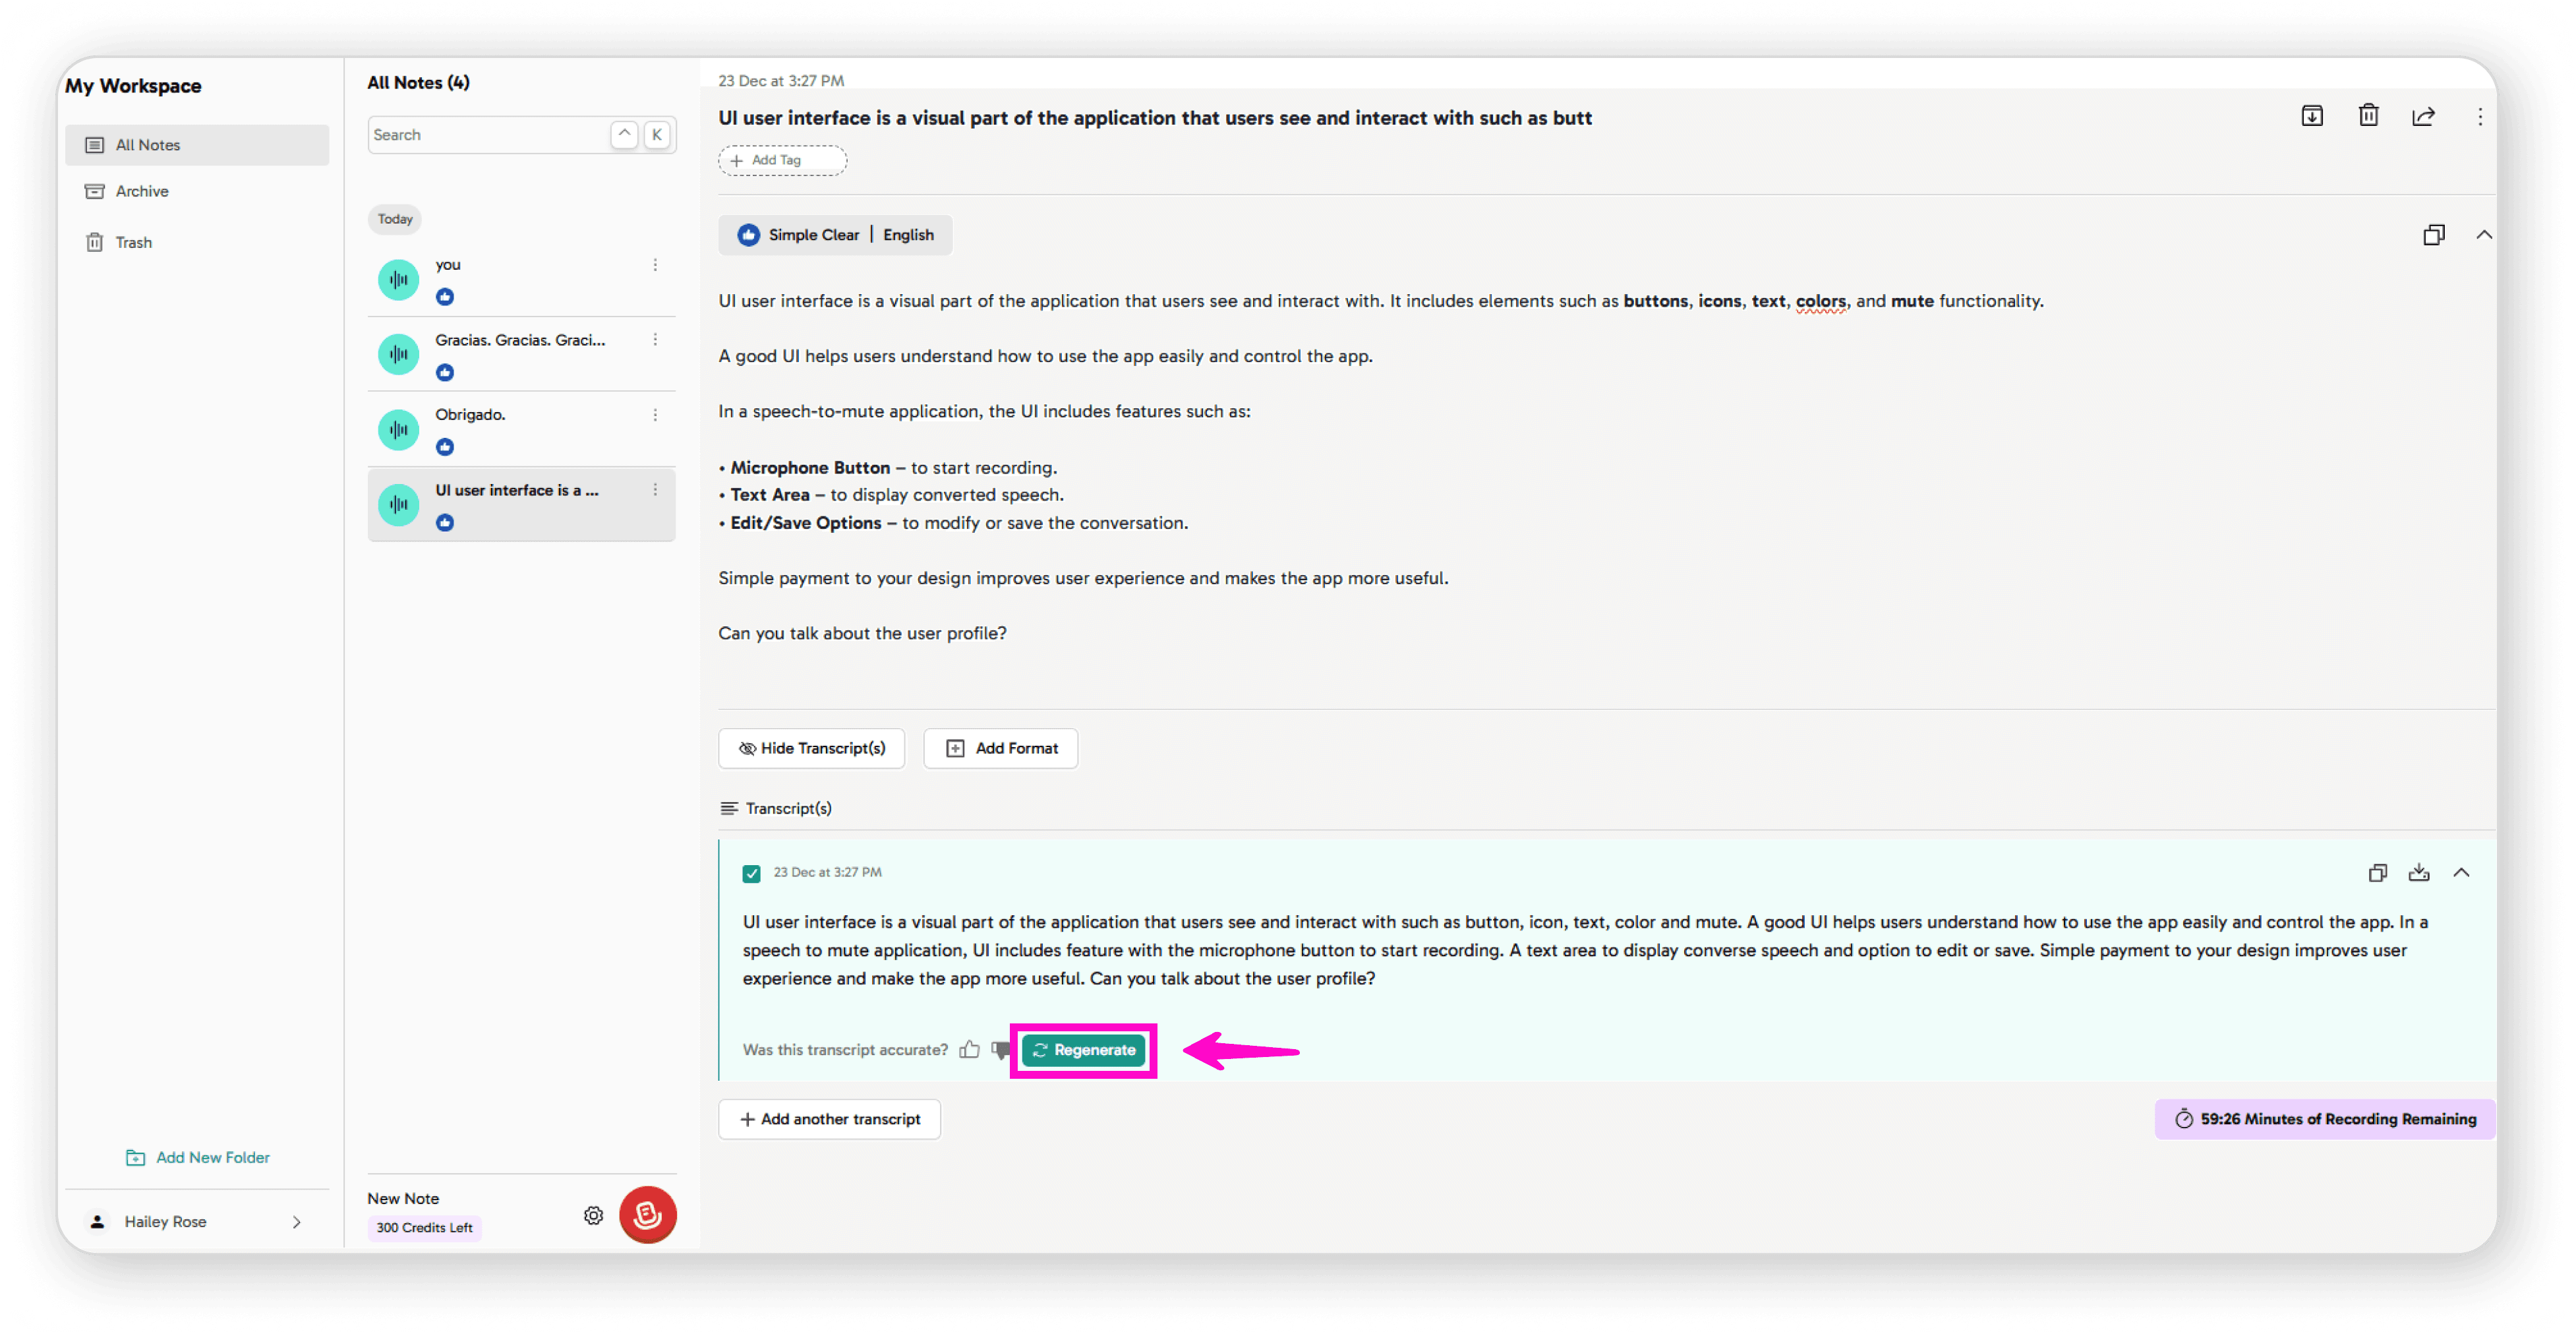
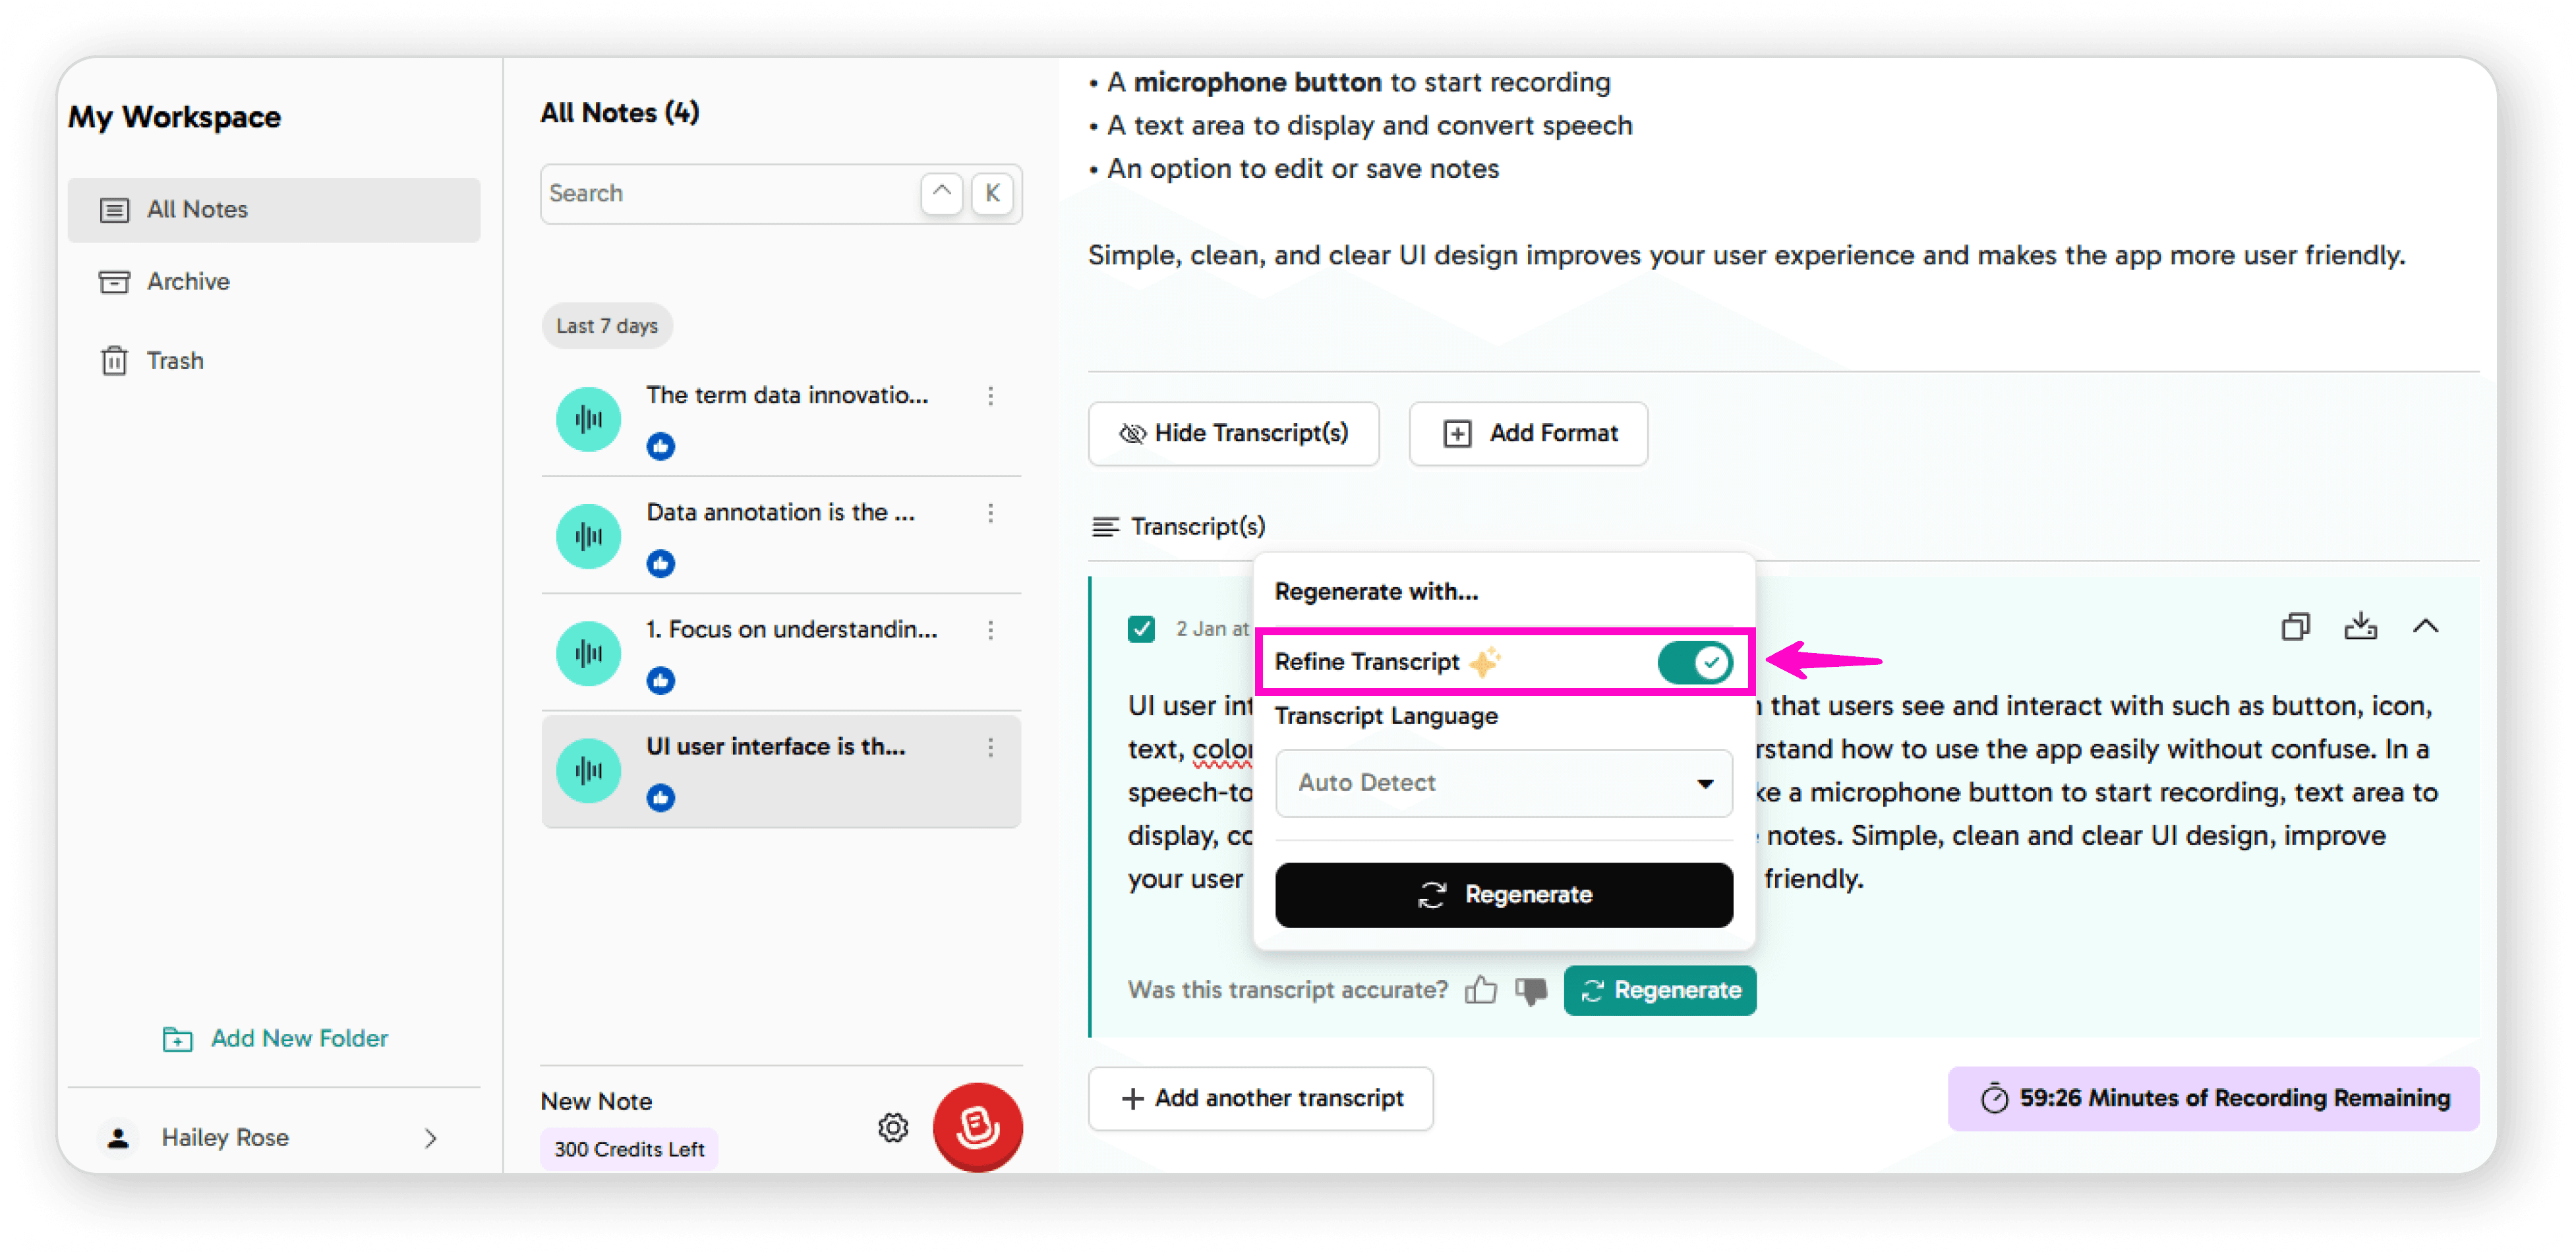
Click to Refine
Click the Refine Transcript button
The system will reprocess your audio to improve accuracy
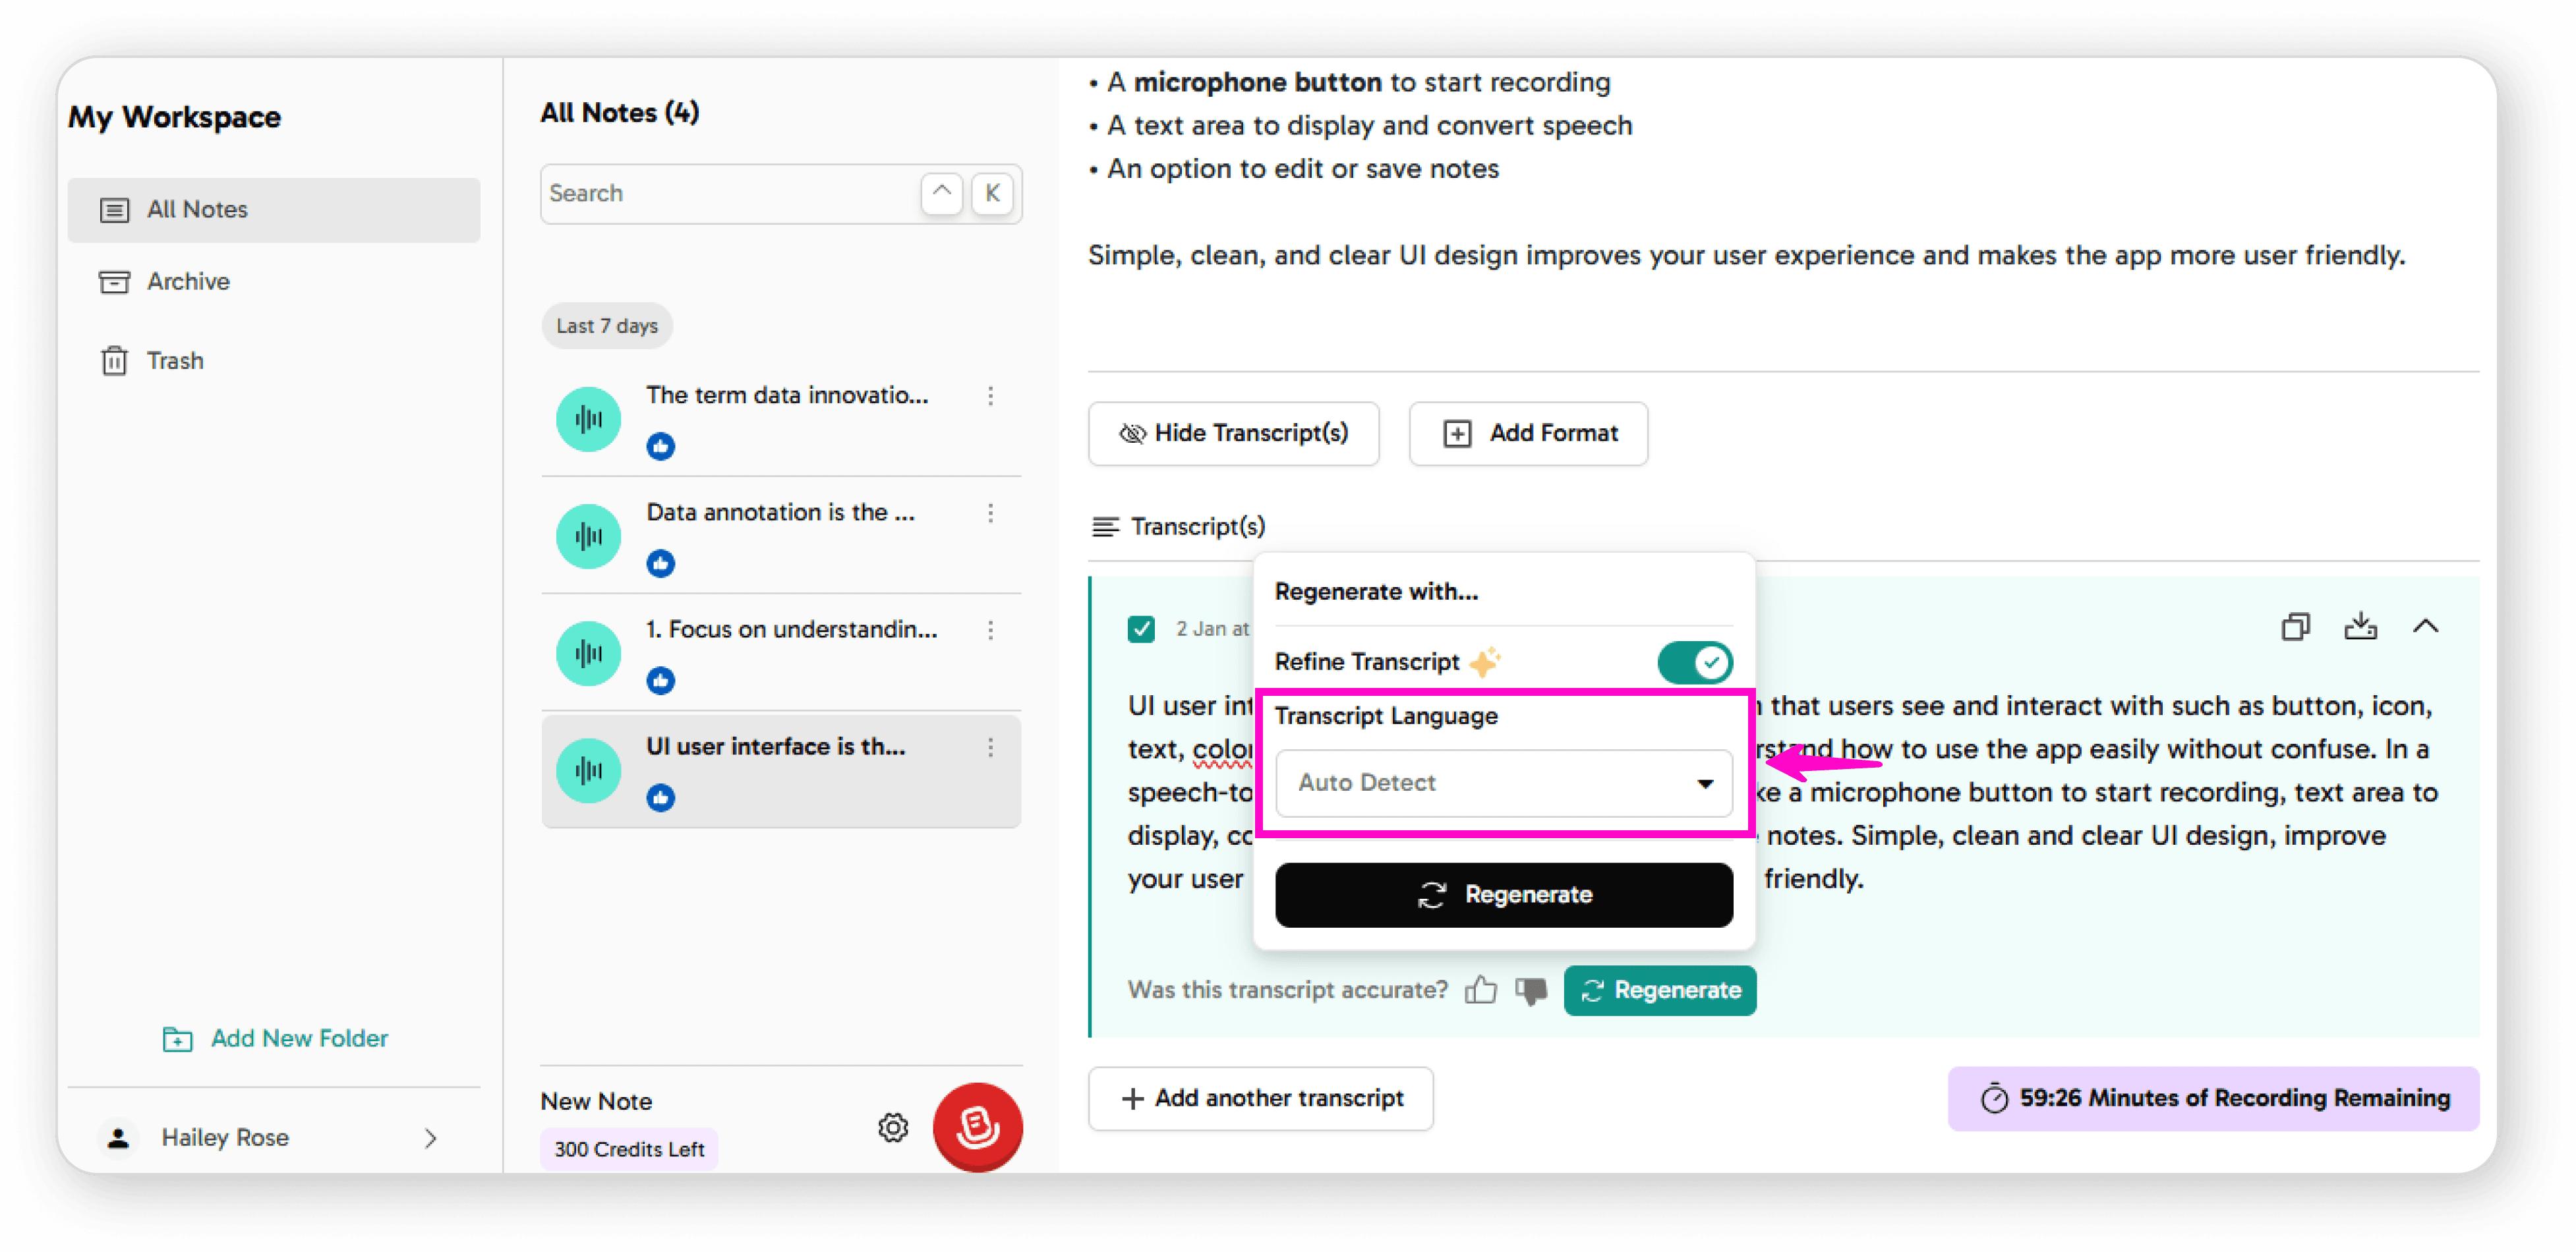
Select your transcript language from the available options
Click Regenerate to process the audio again
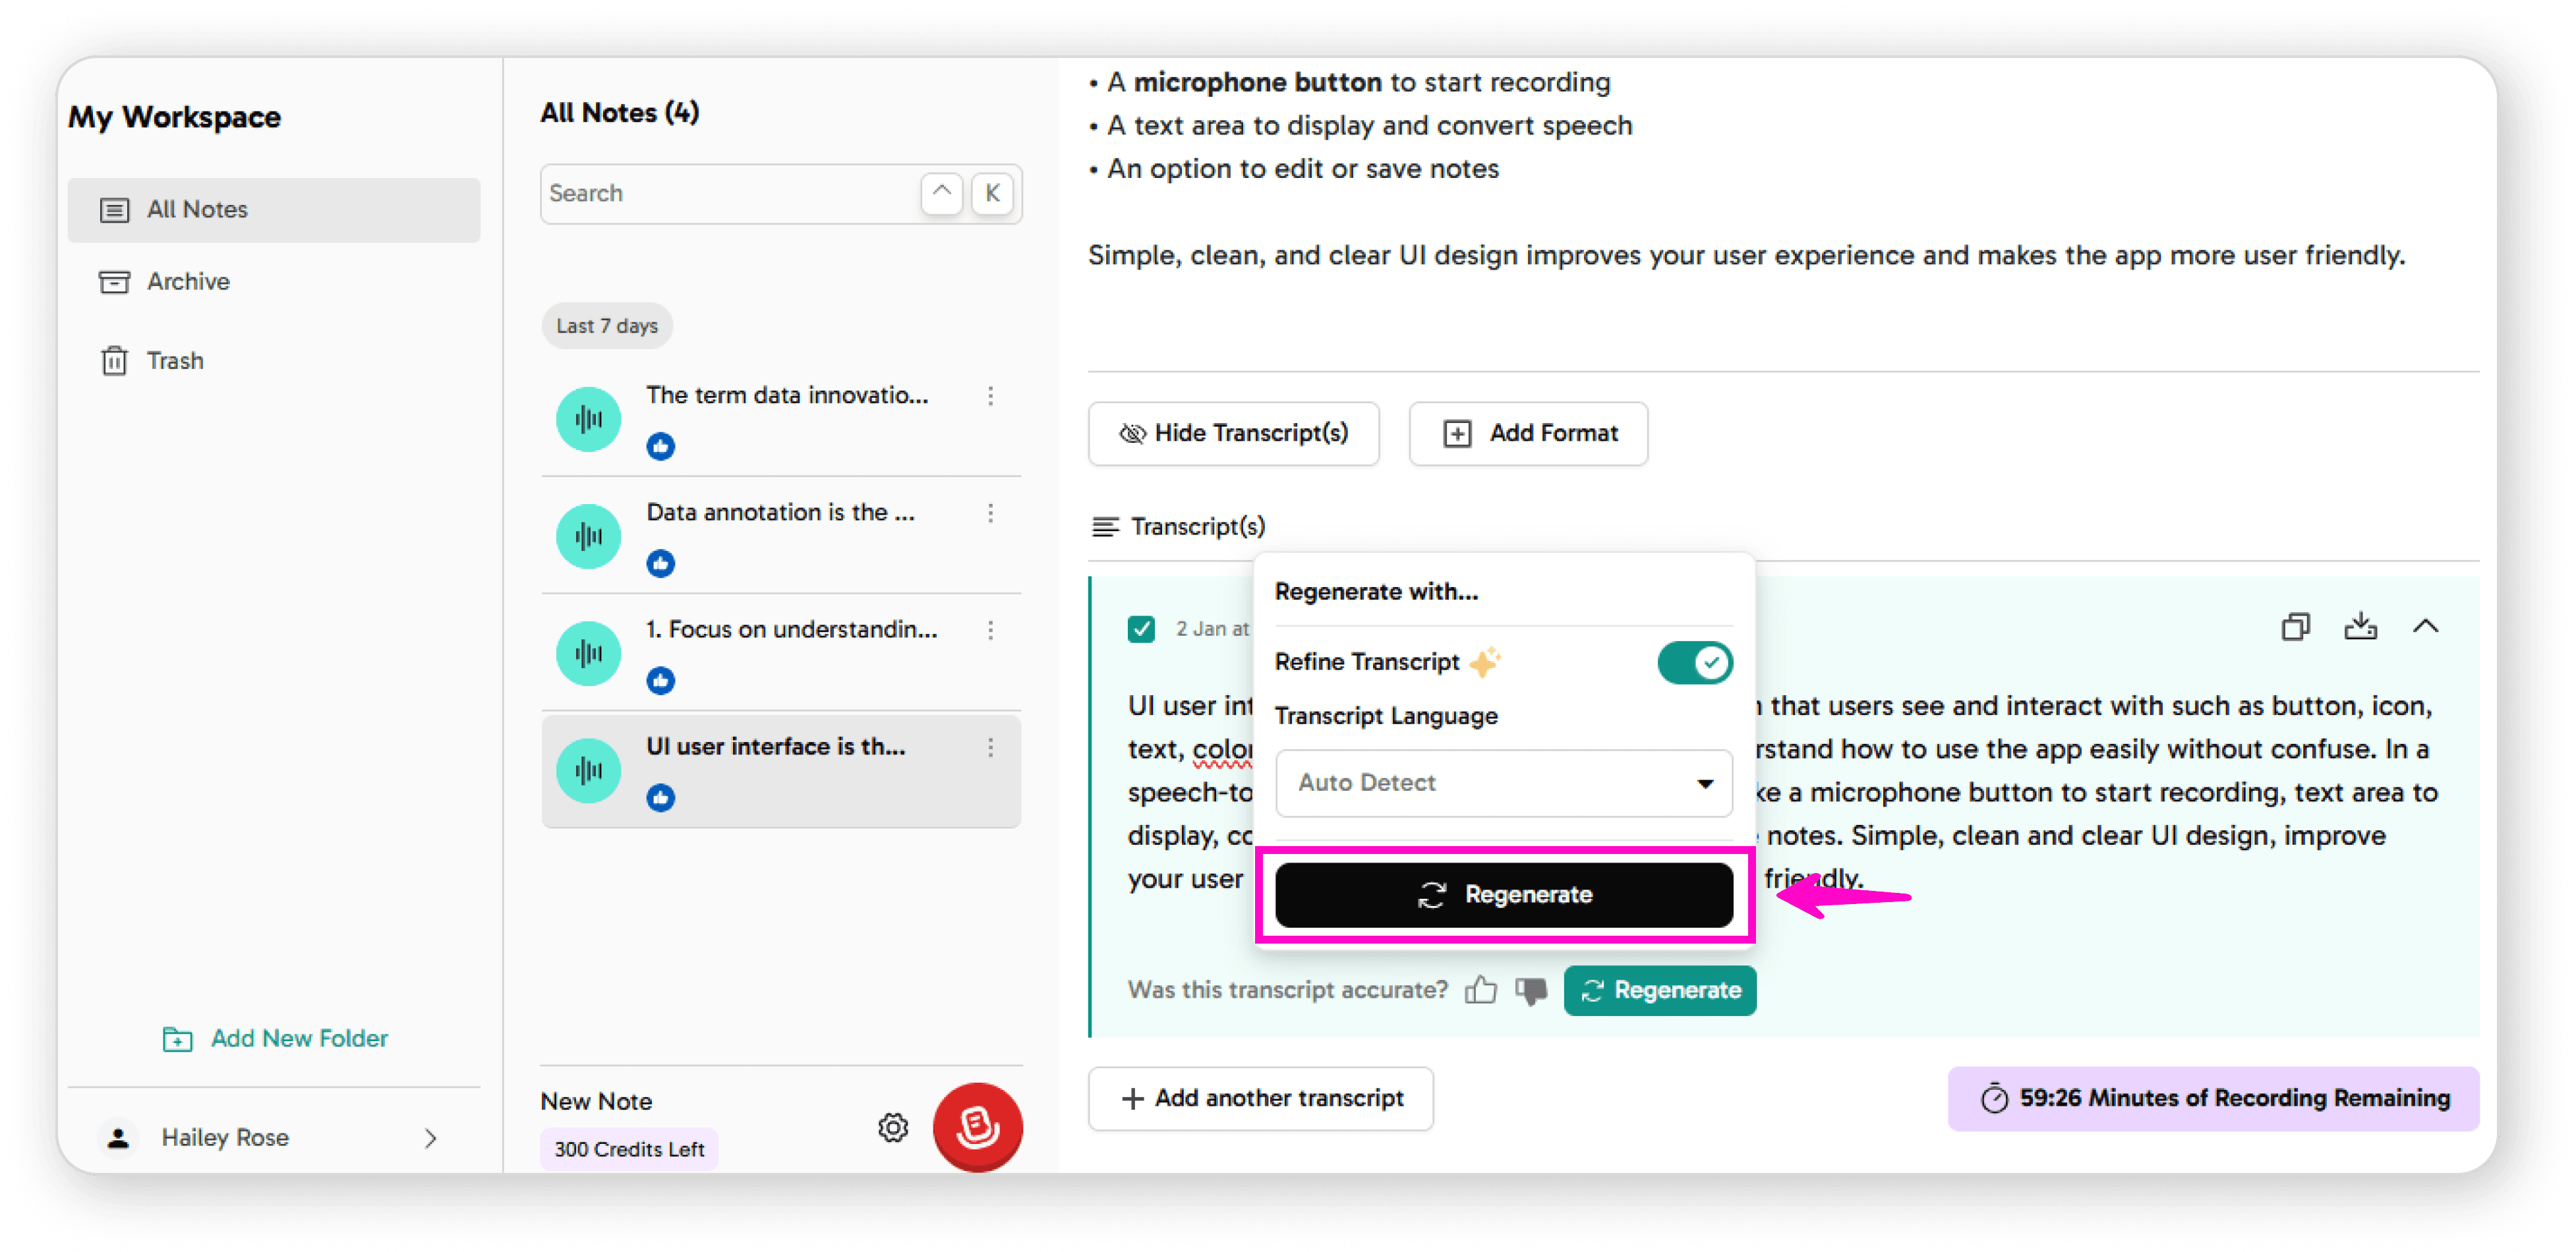
You can also add additional transcripts to the same note
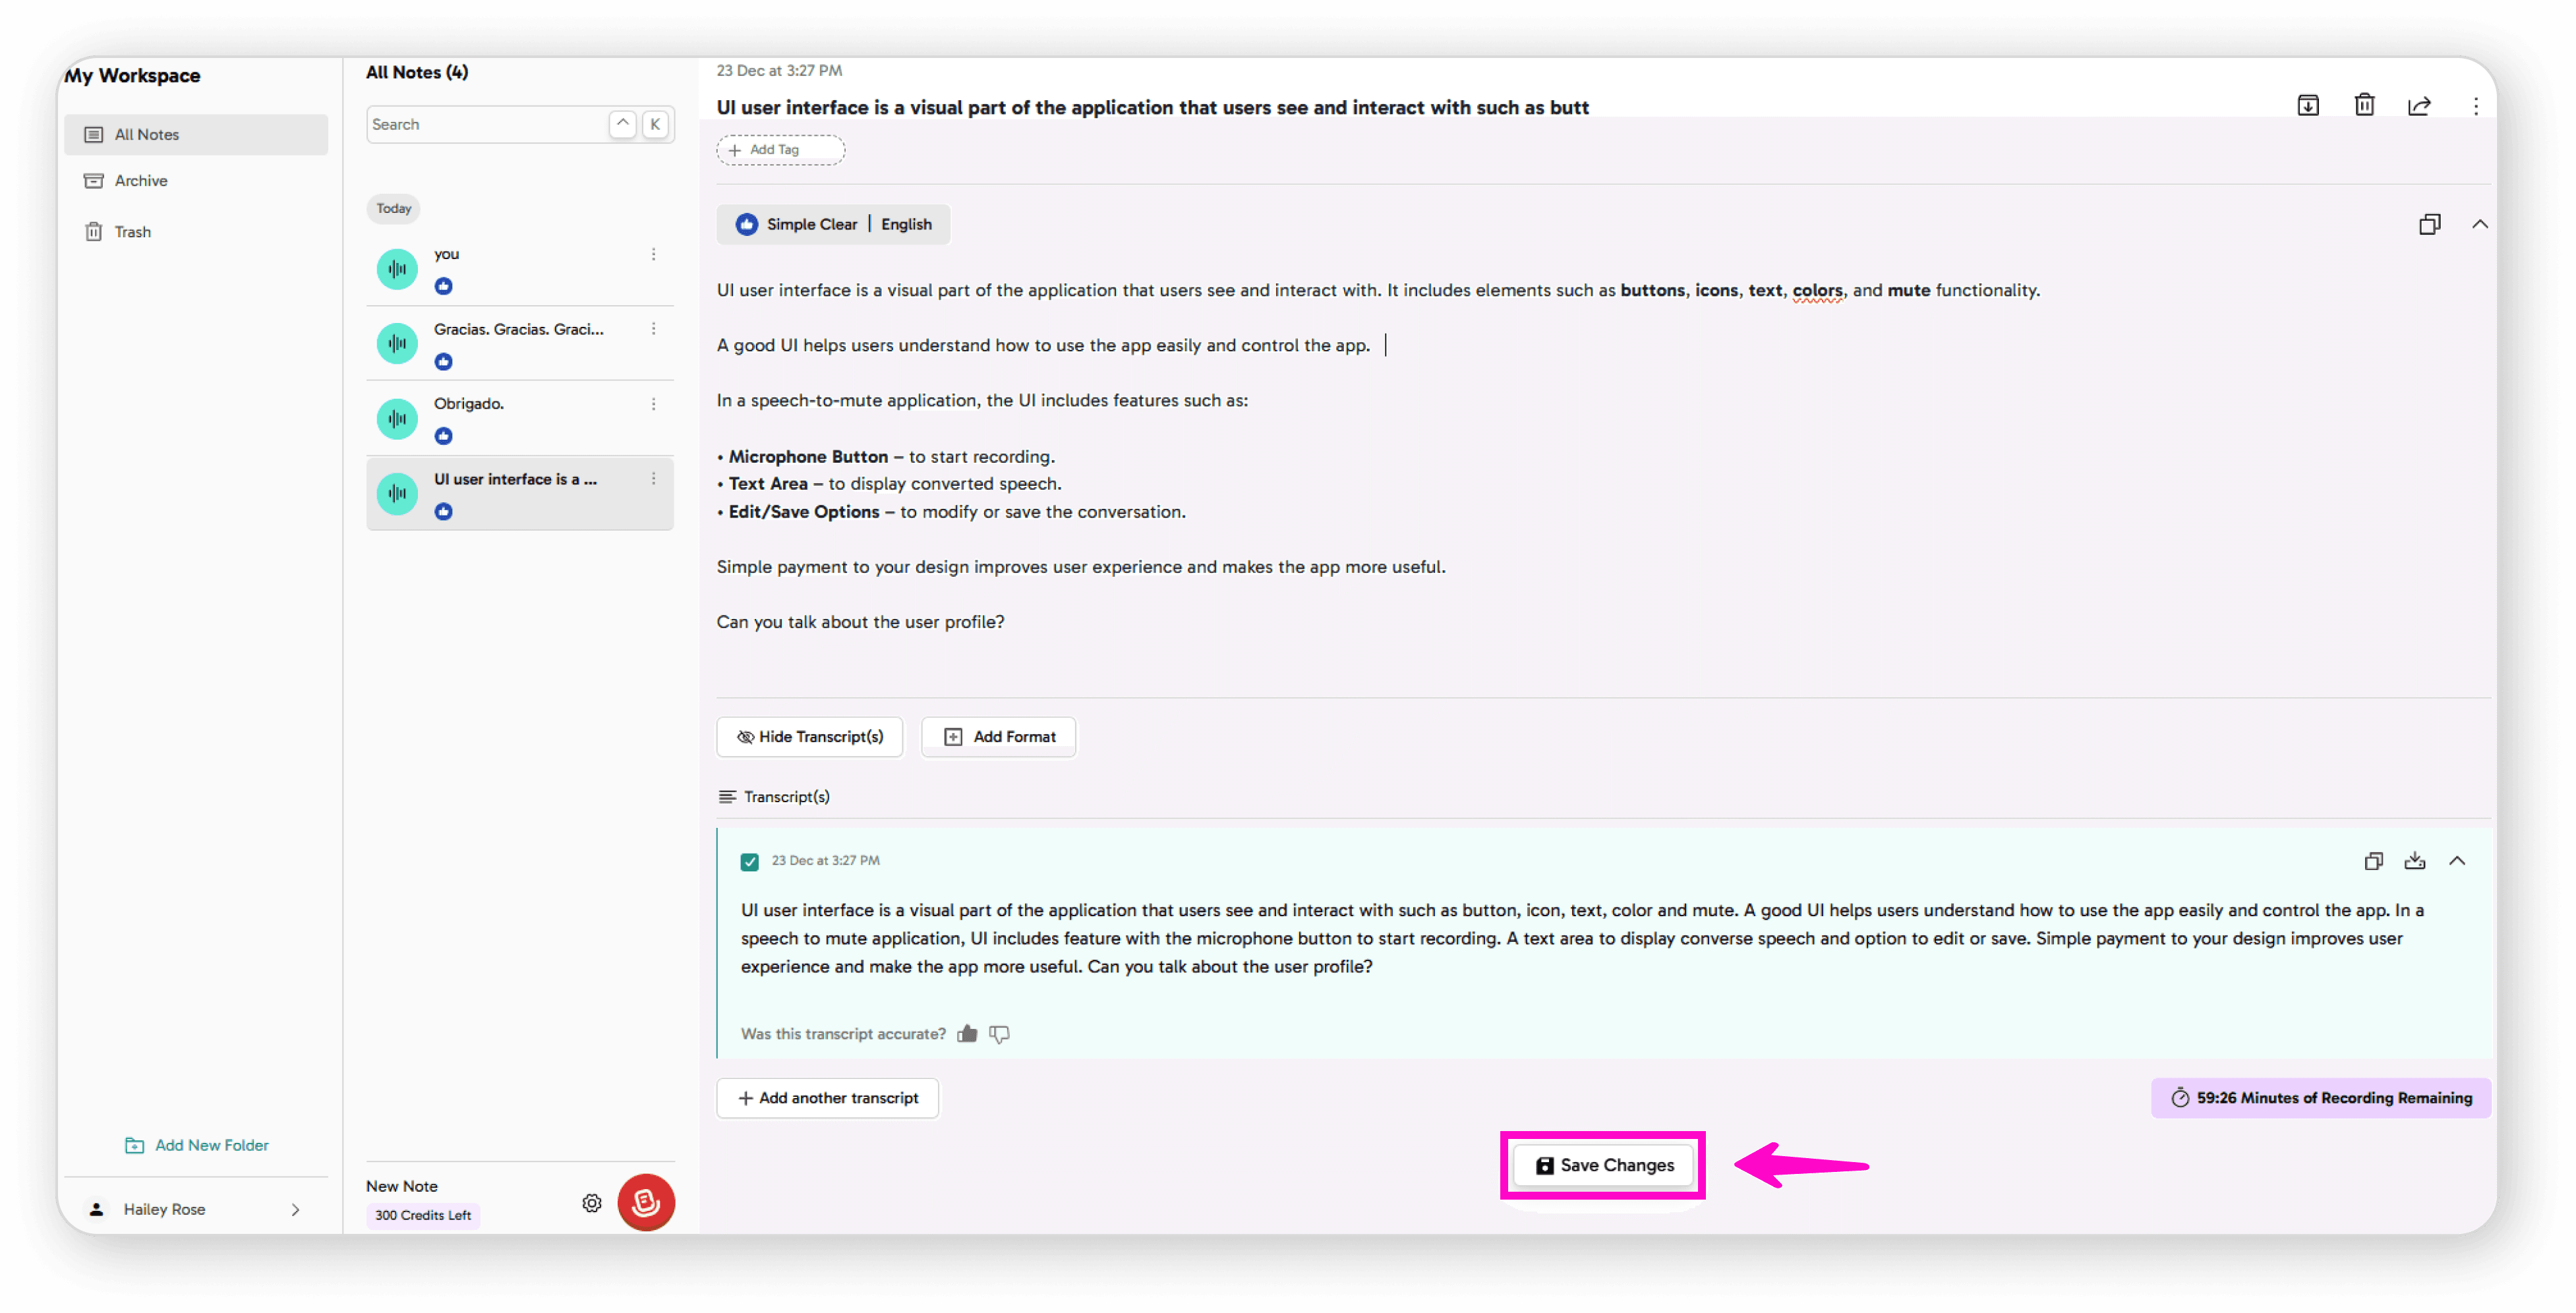
Saving Changes
Update your text as needed
Click Save to apply all changes
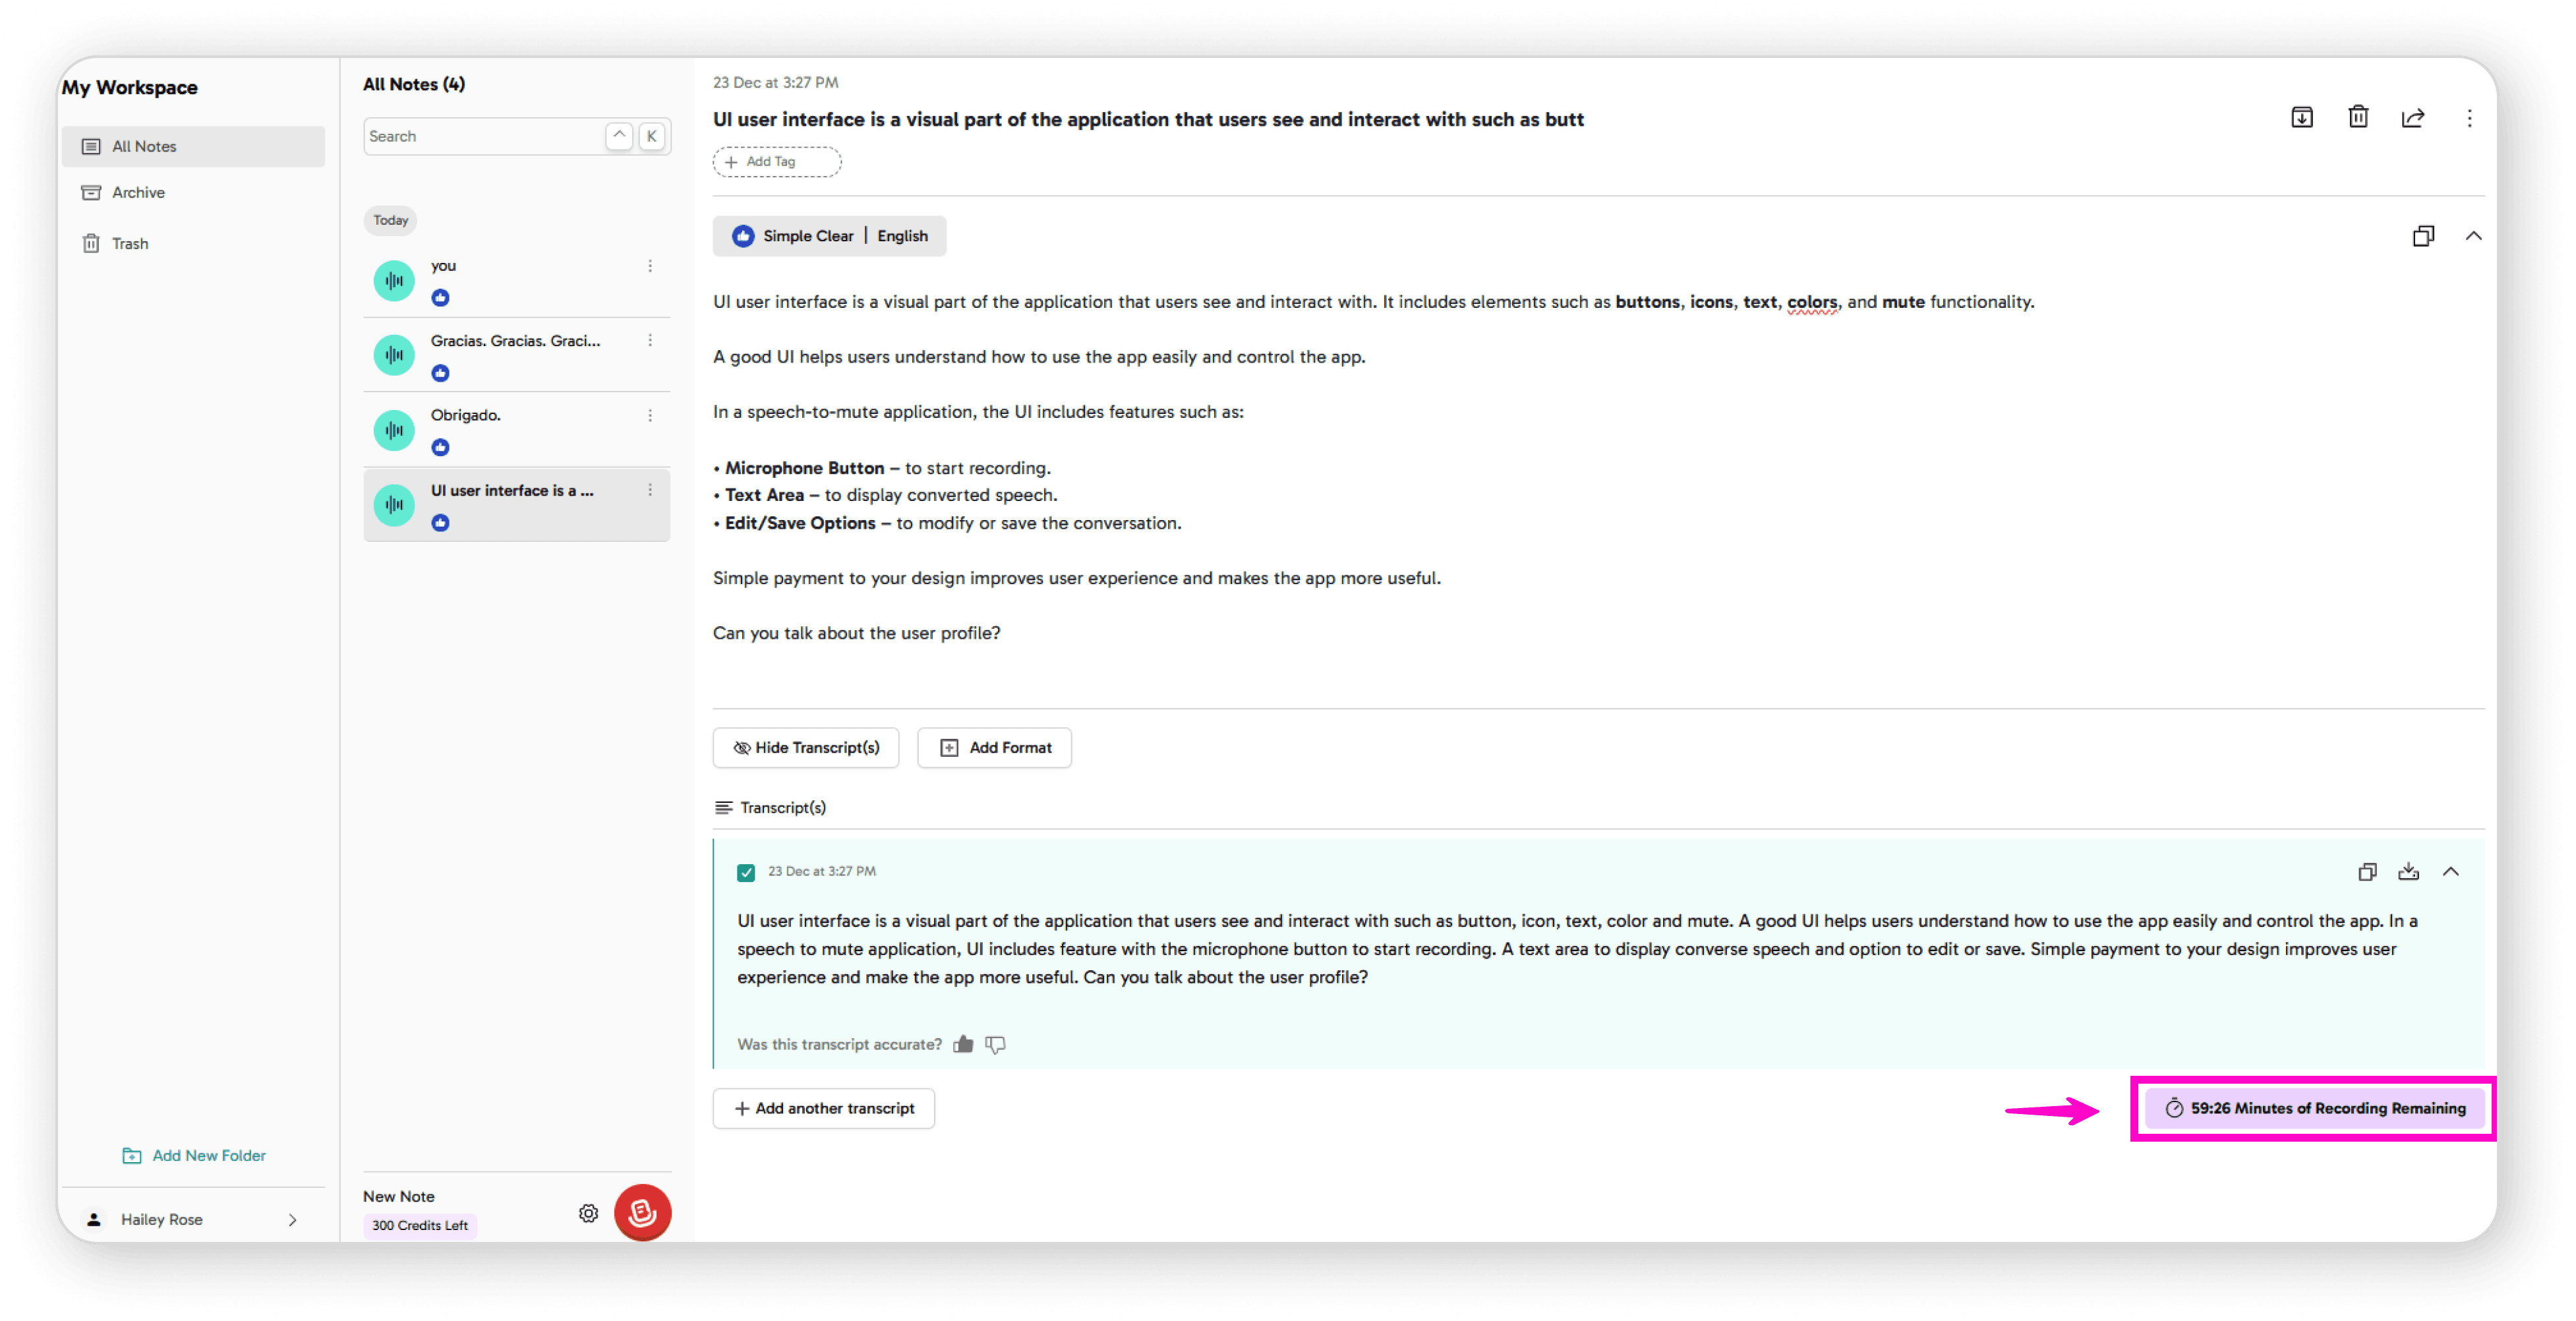
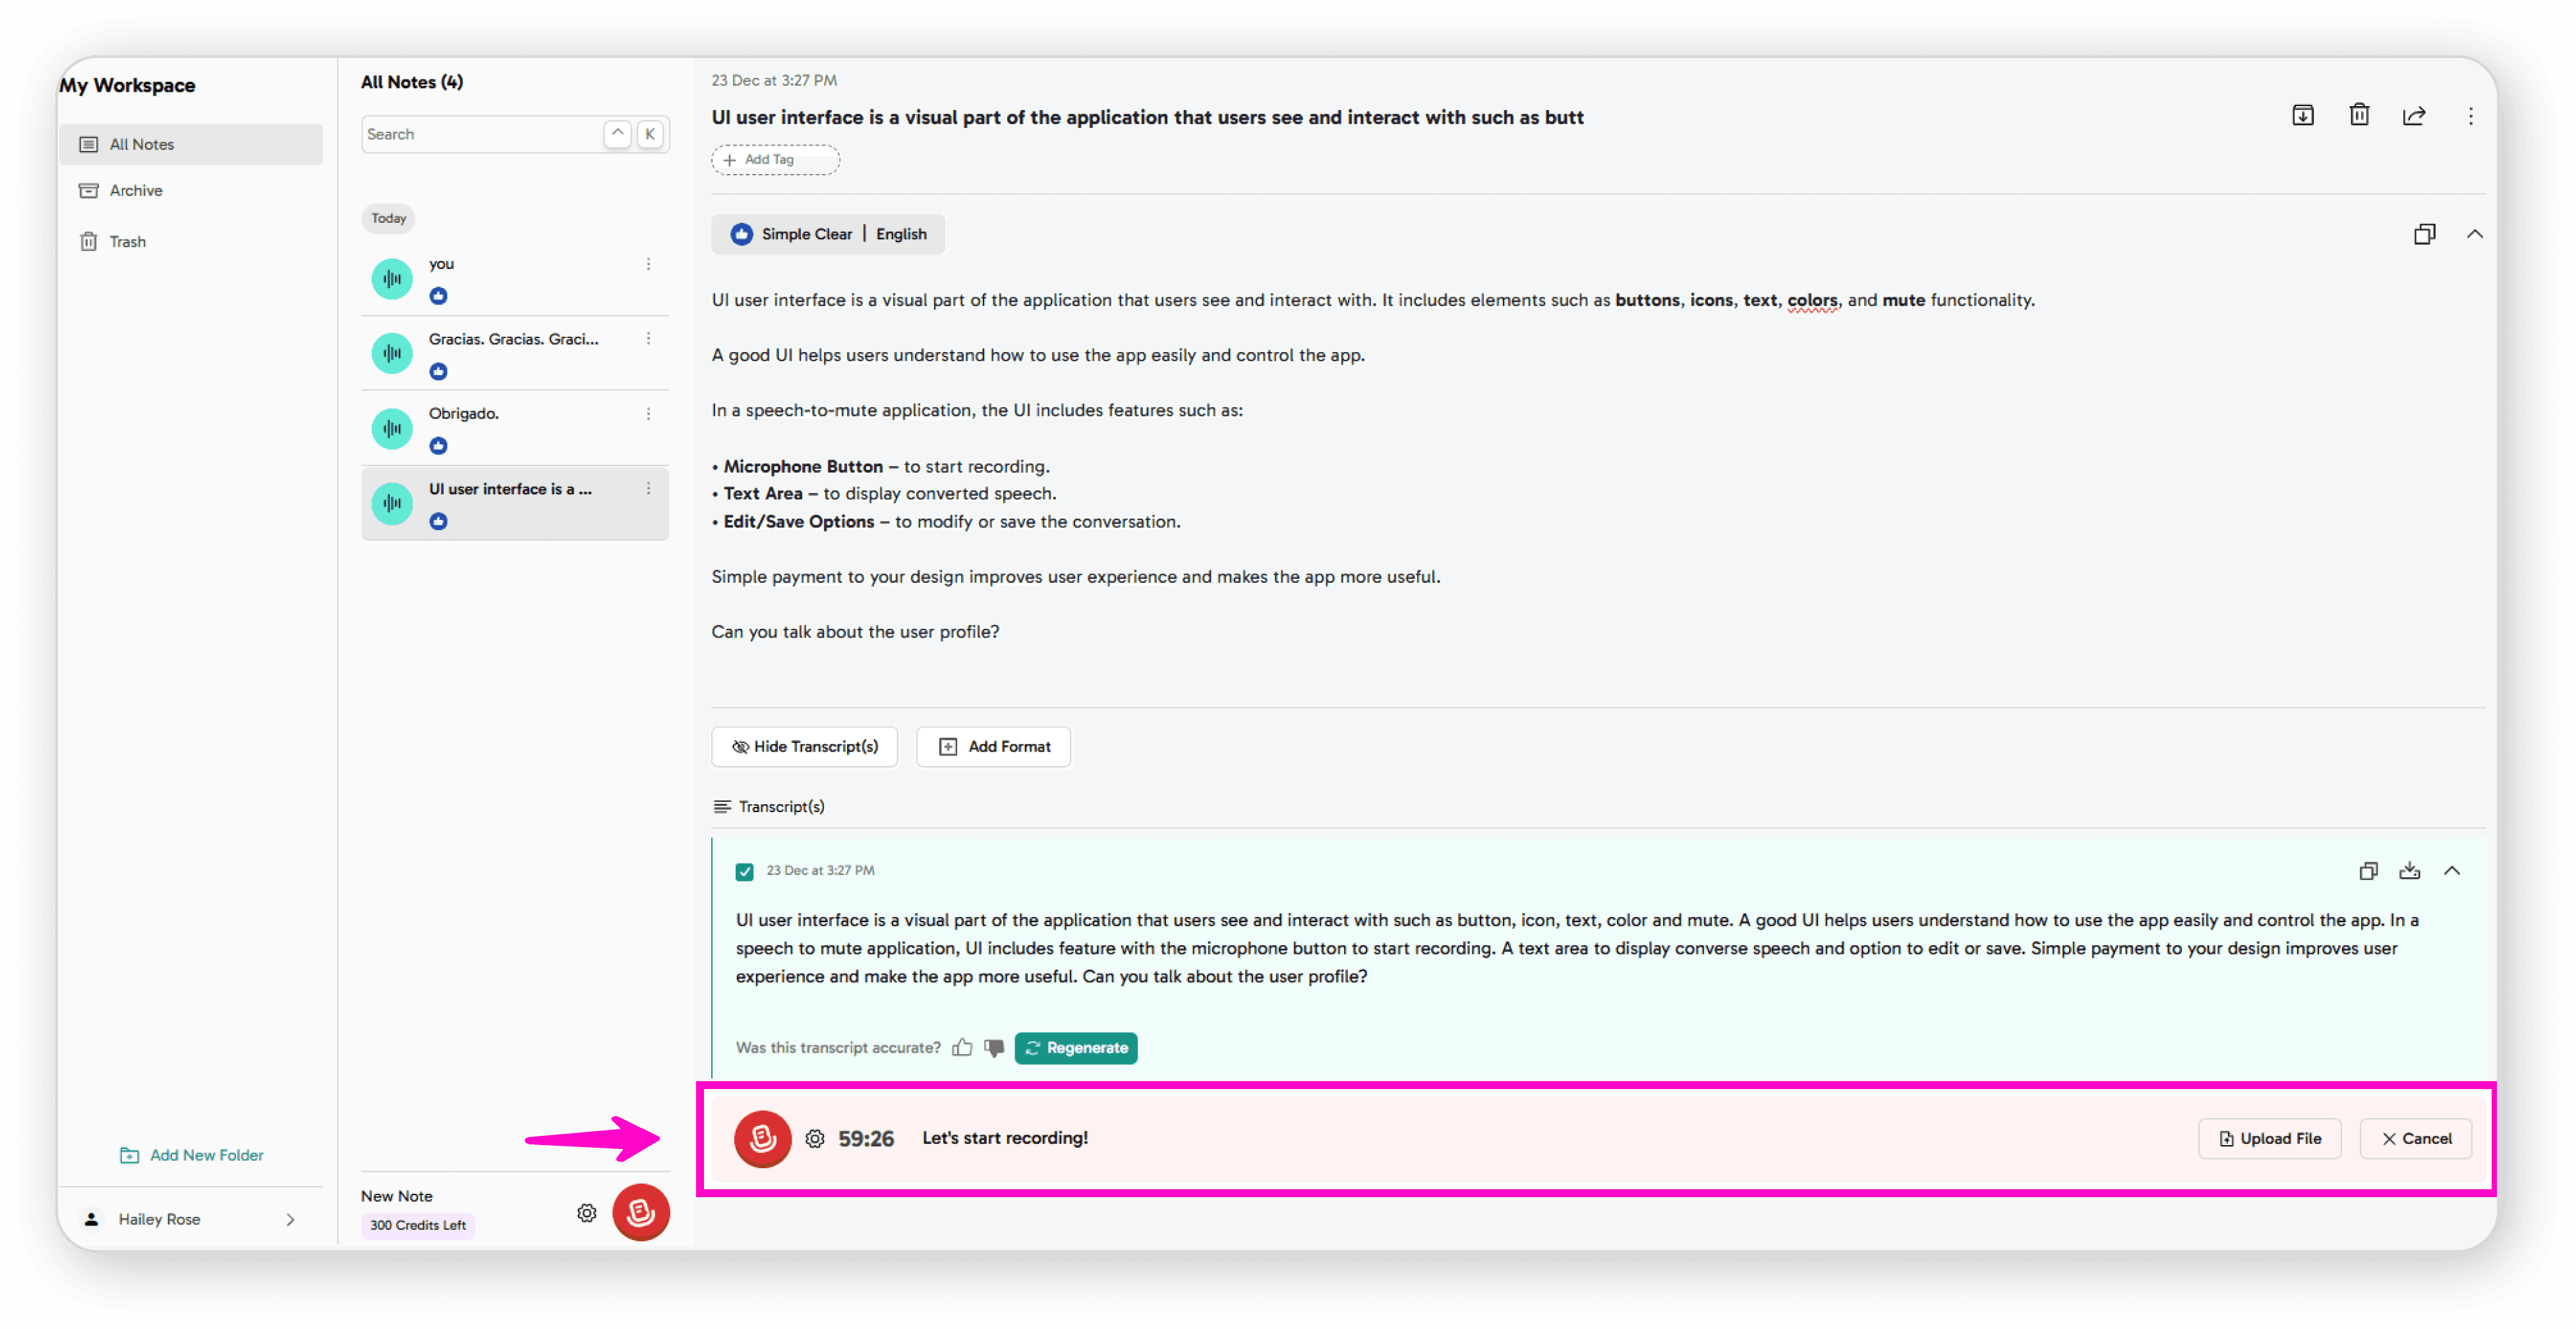
Monitoring Your Usage
Check your remaining recording minutes at any time to keep track of your available quota.
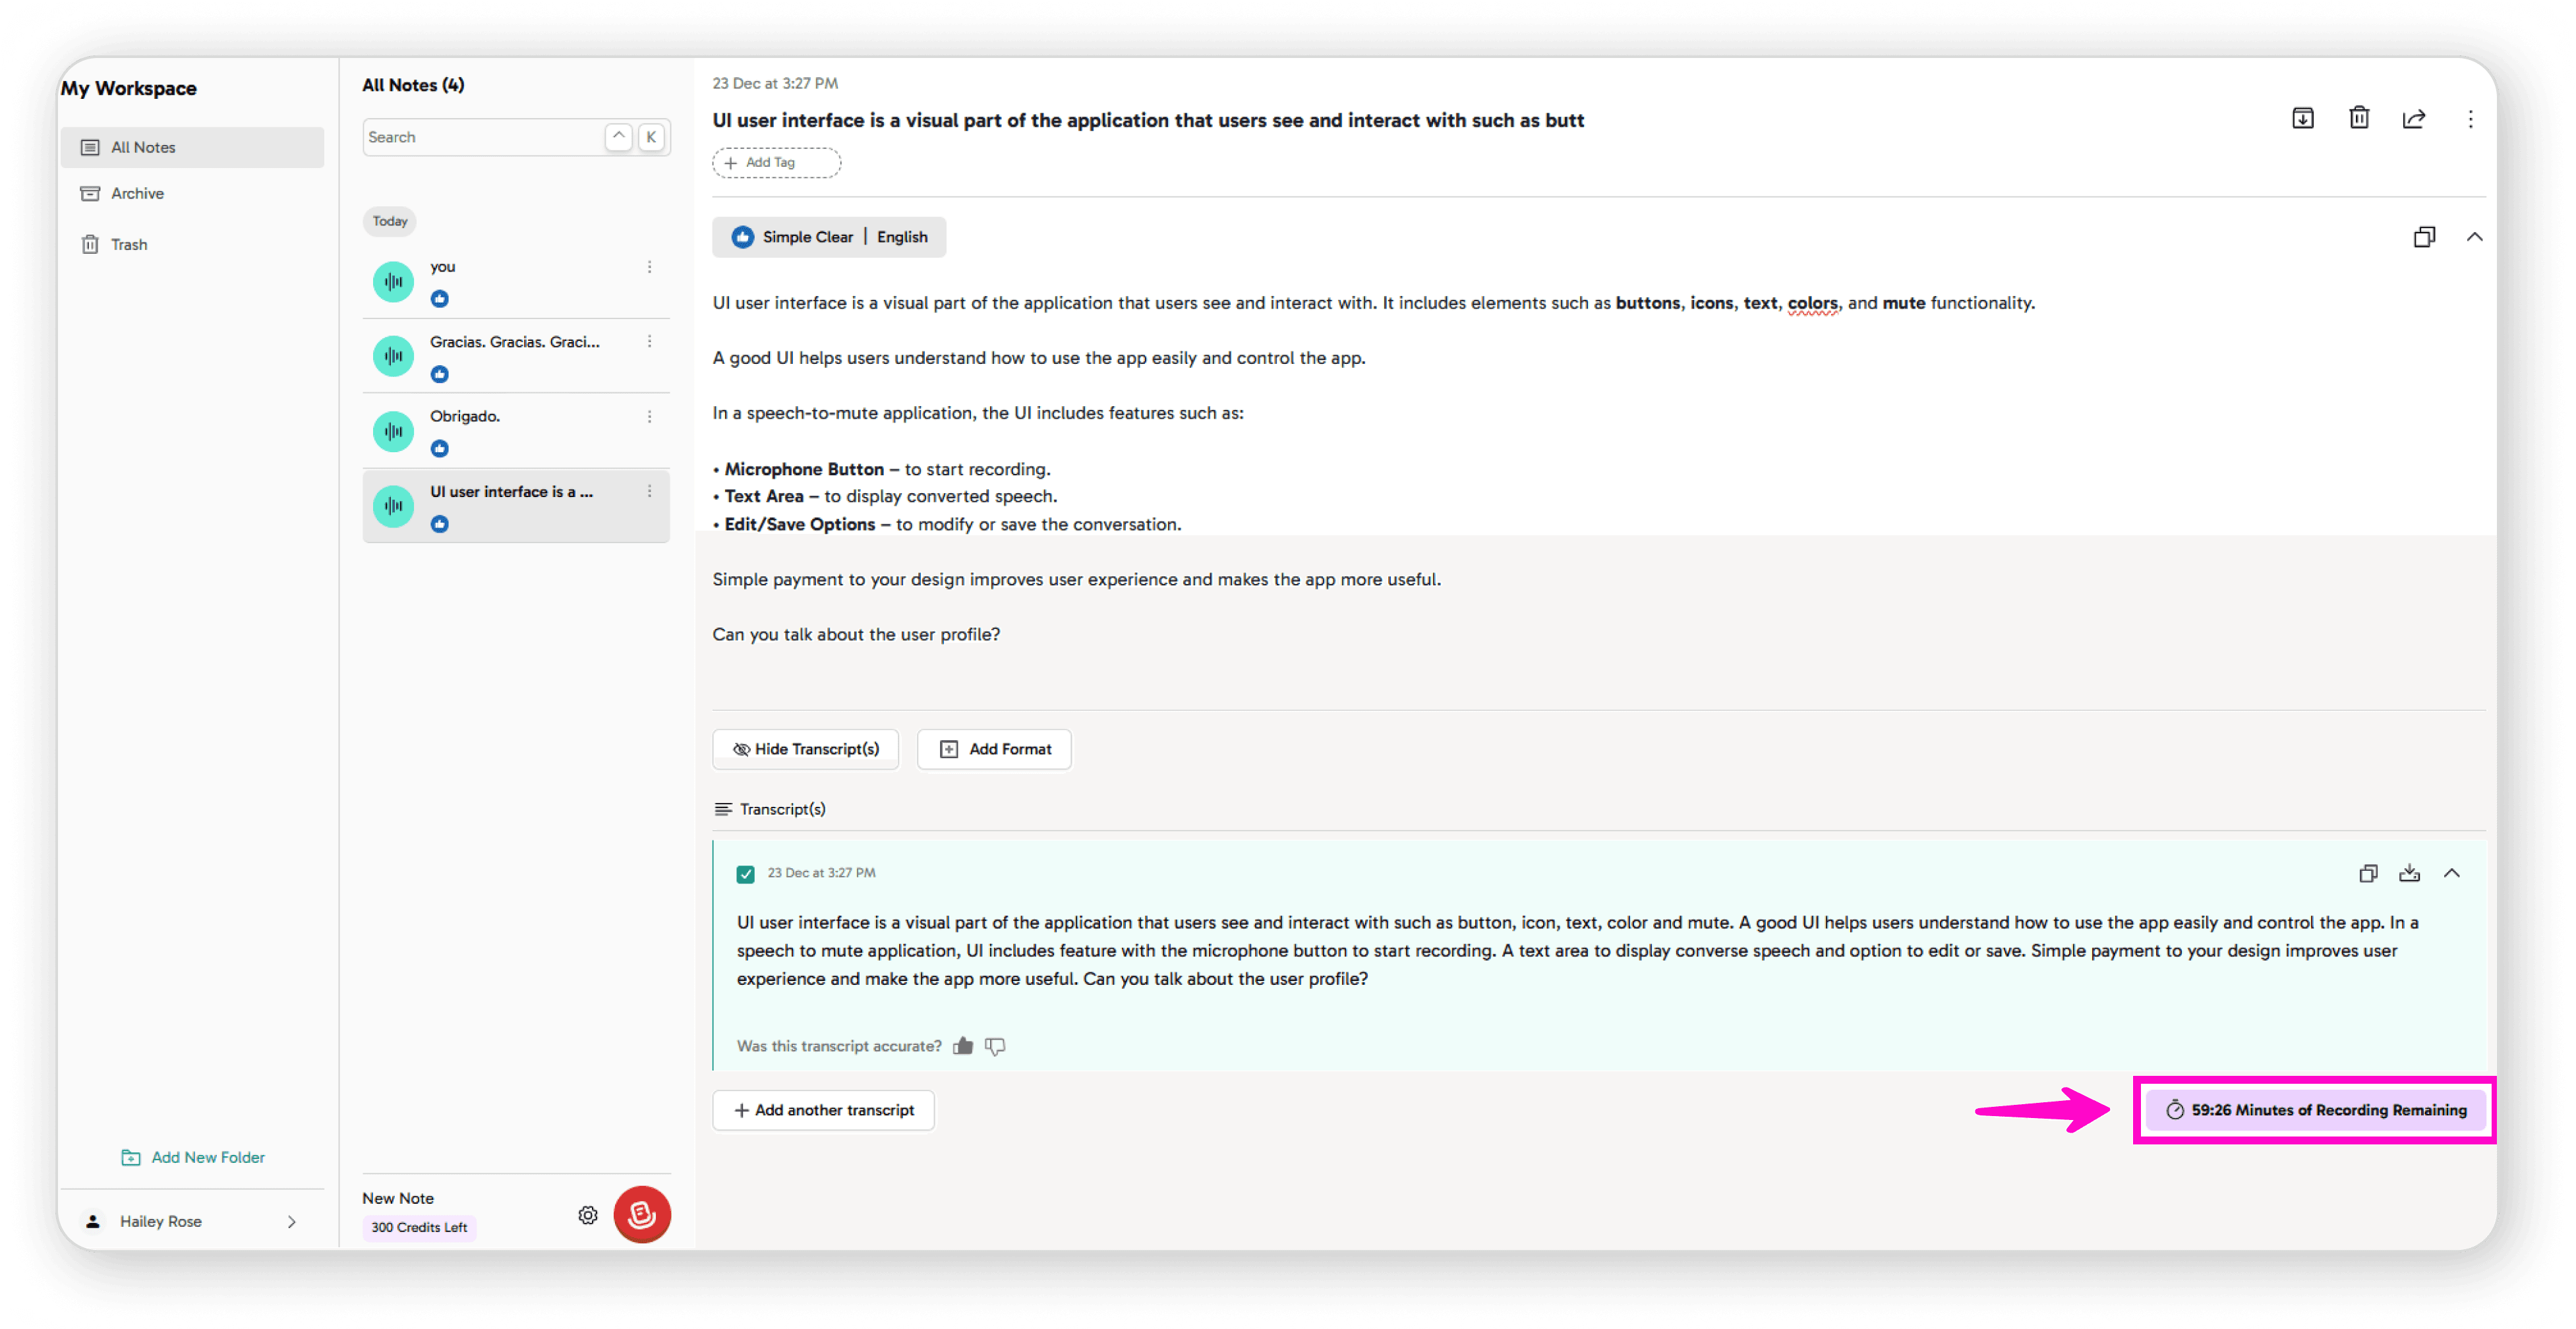
After click on Minutes of recordings remaining's
You can also upload file as well
How to Add a New Folder
Organize your notes by creating folders in just a few simple steps:
Create the Folder
Click on "Add New Folder"
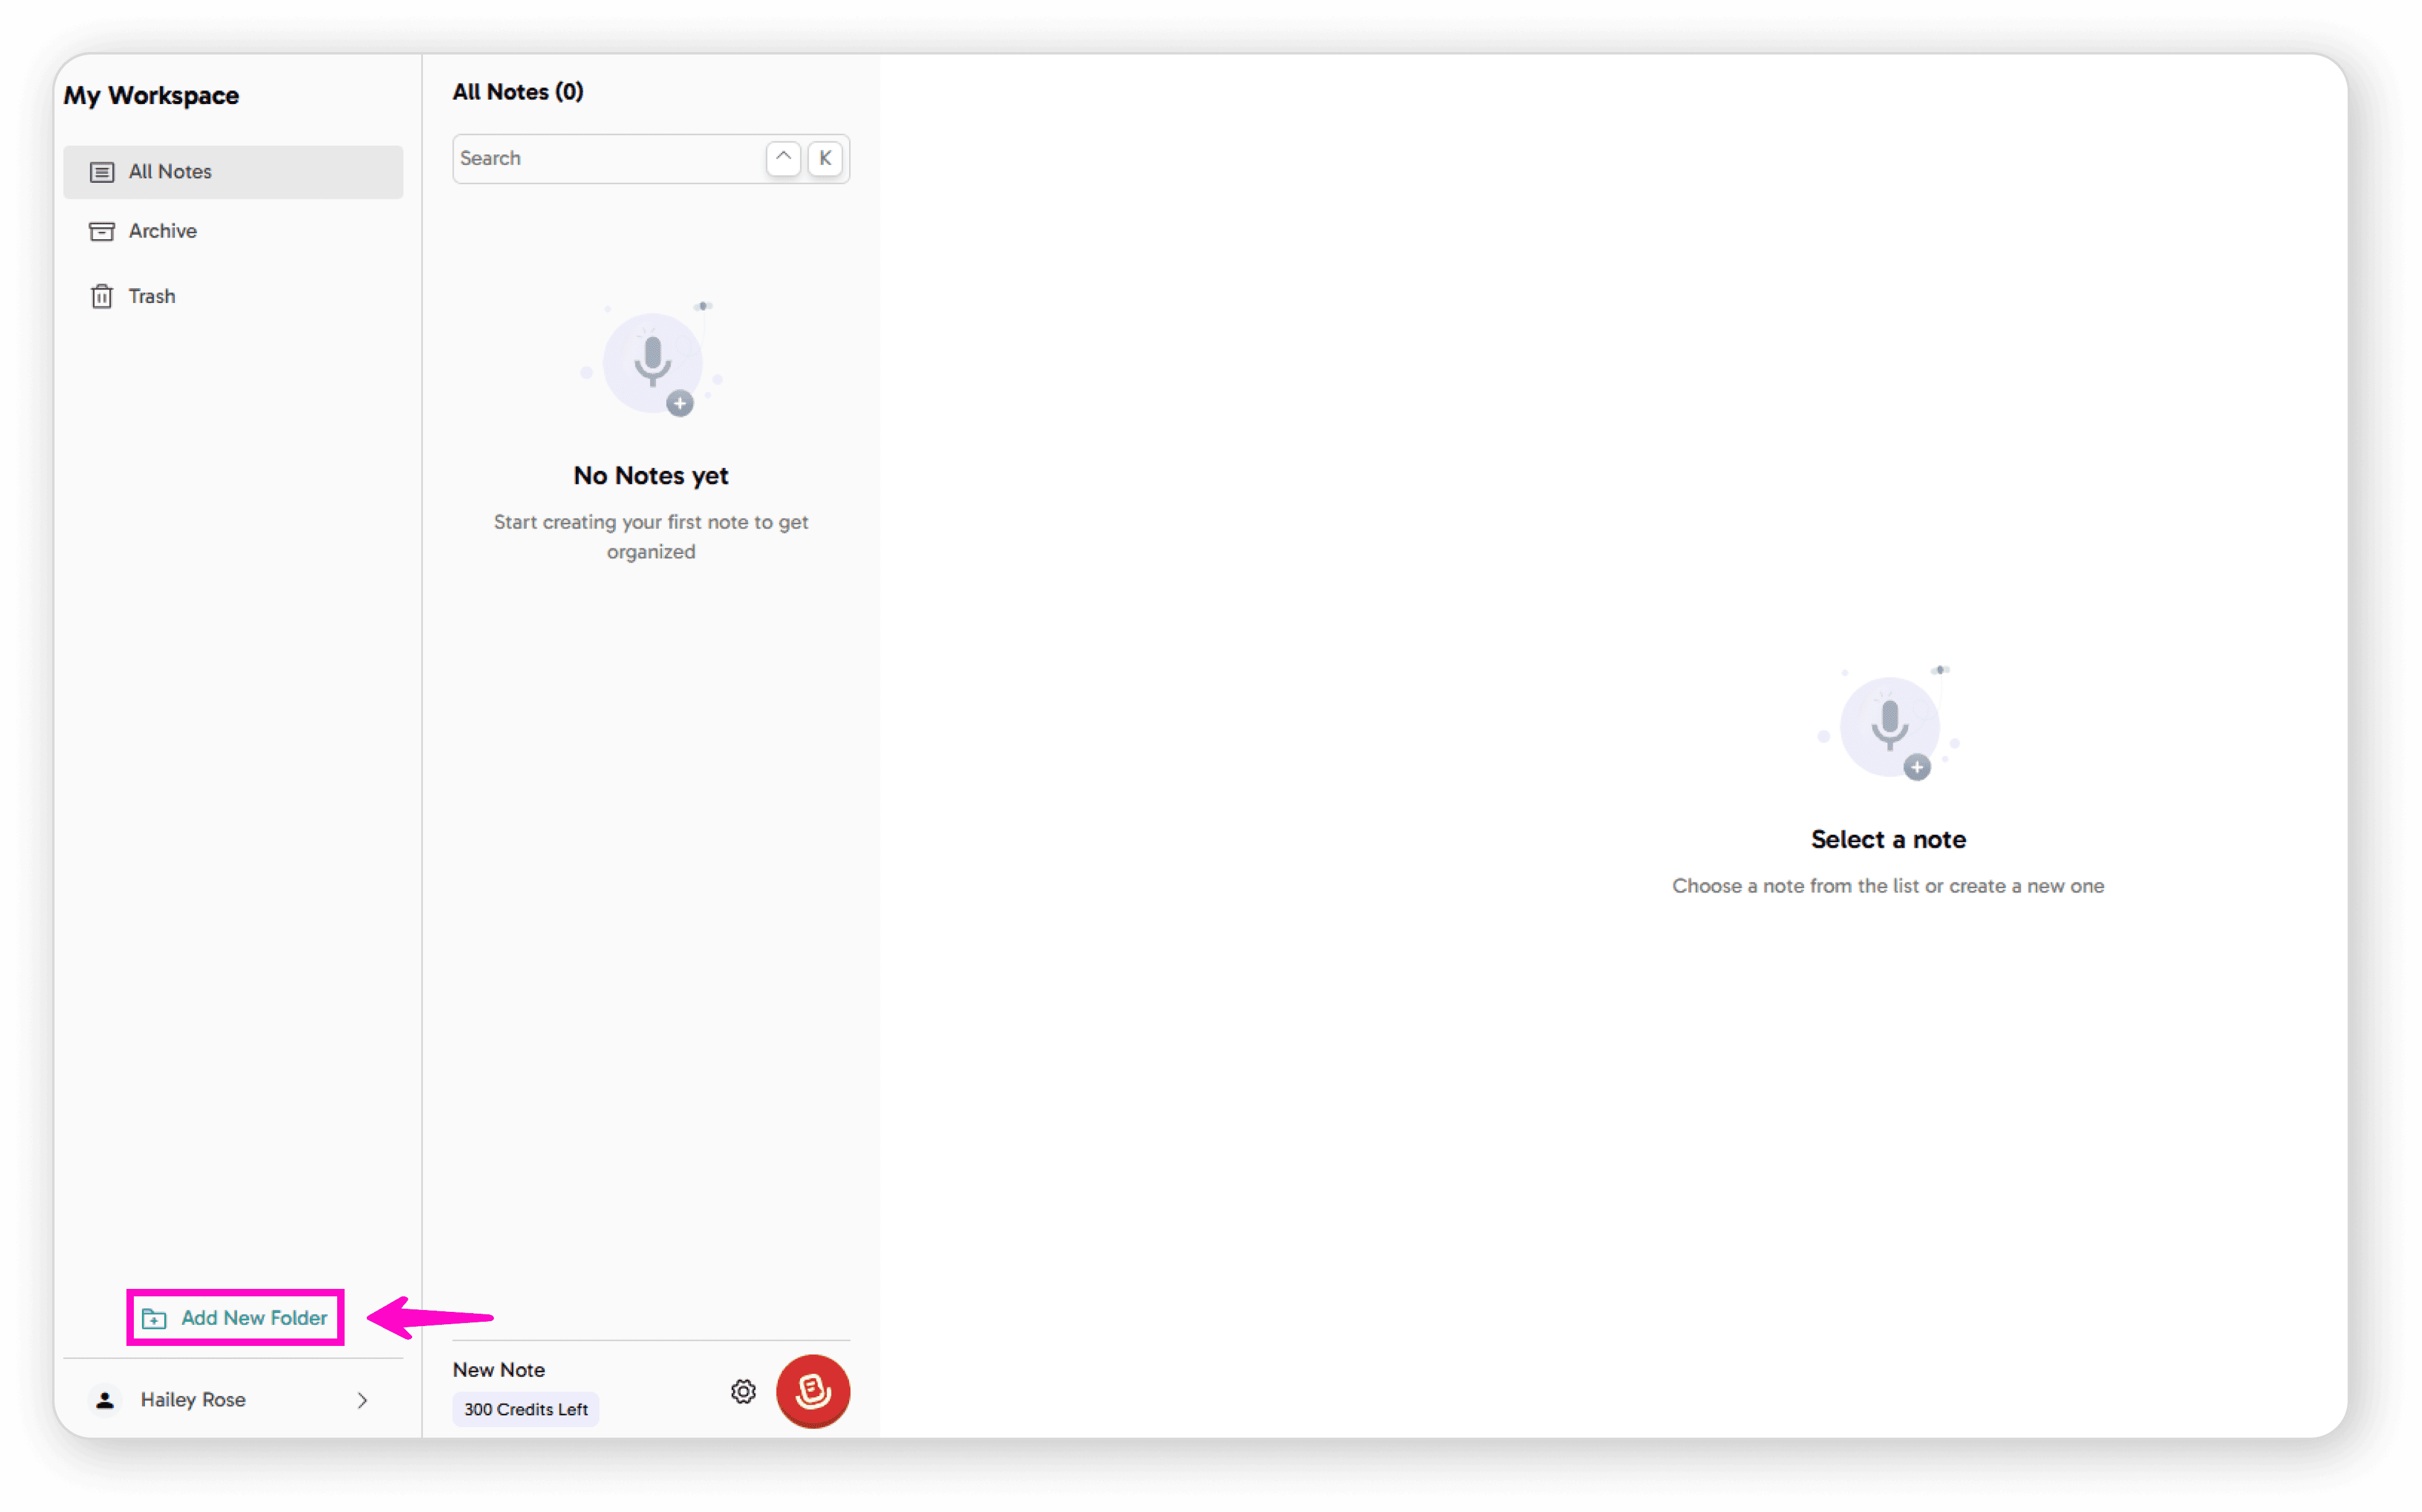
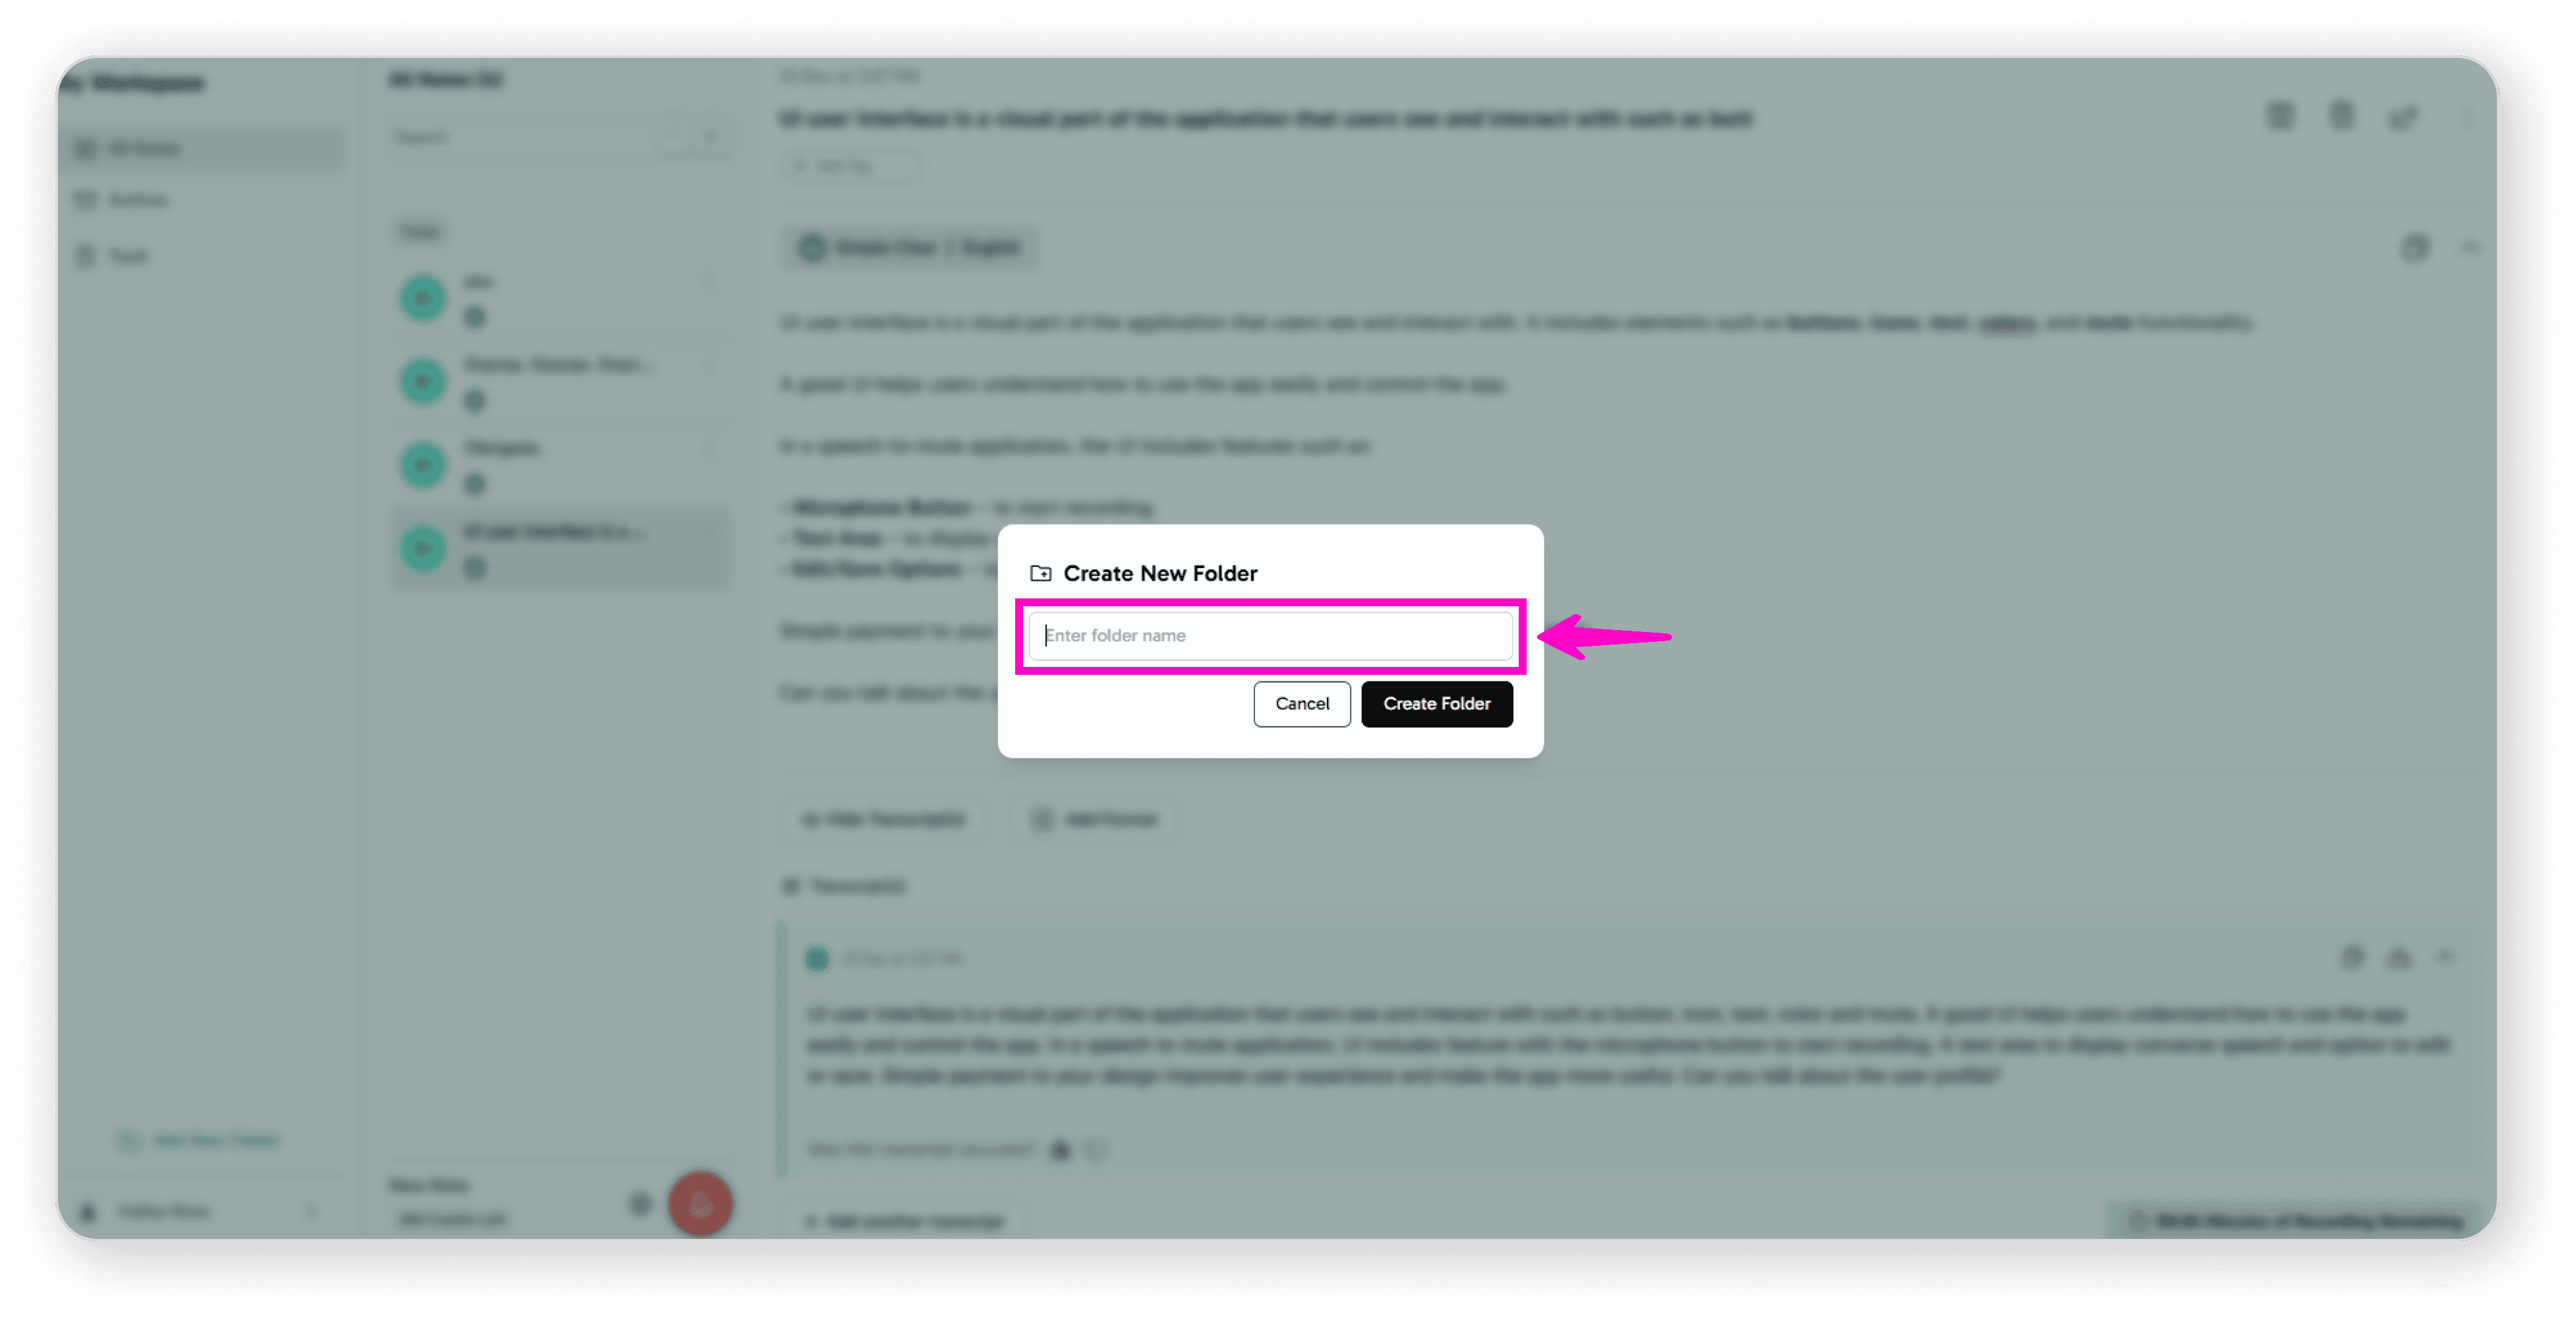
Enter your desired folder name
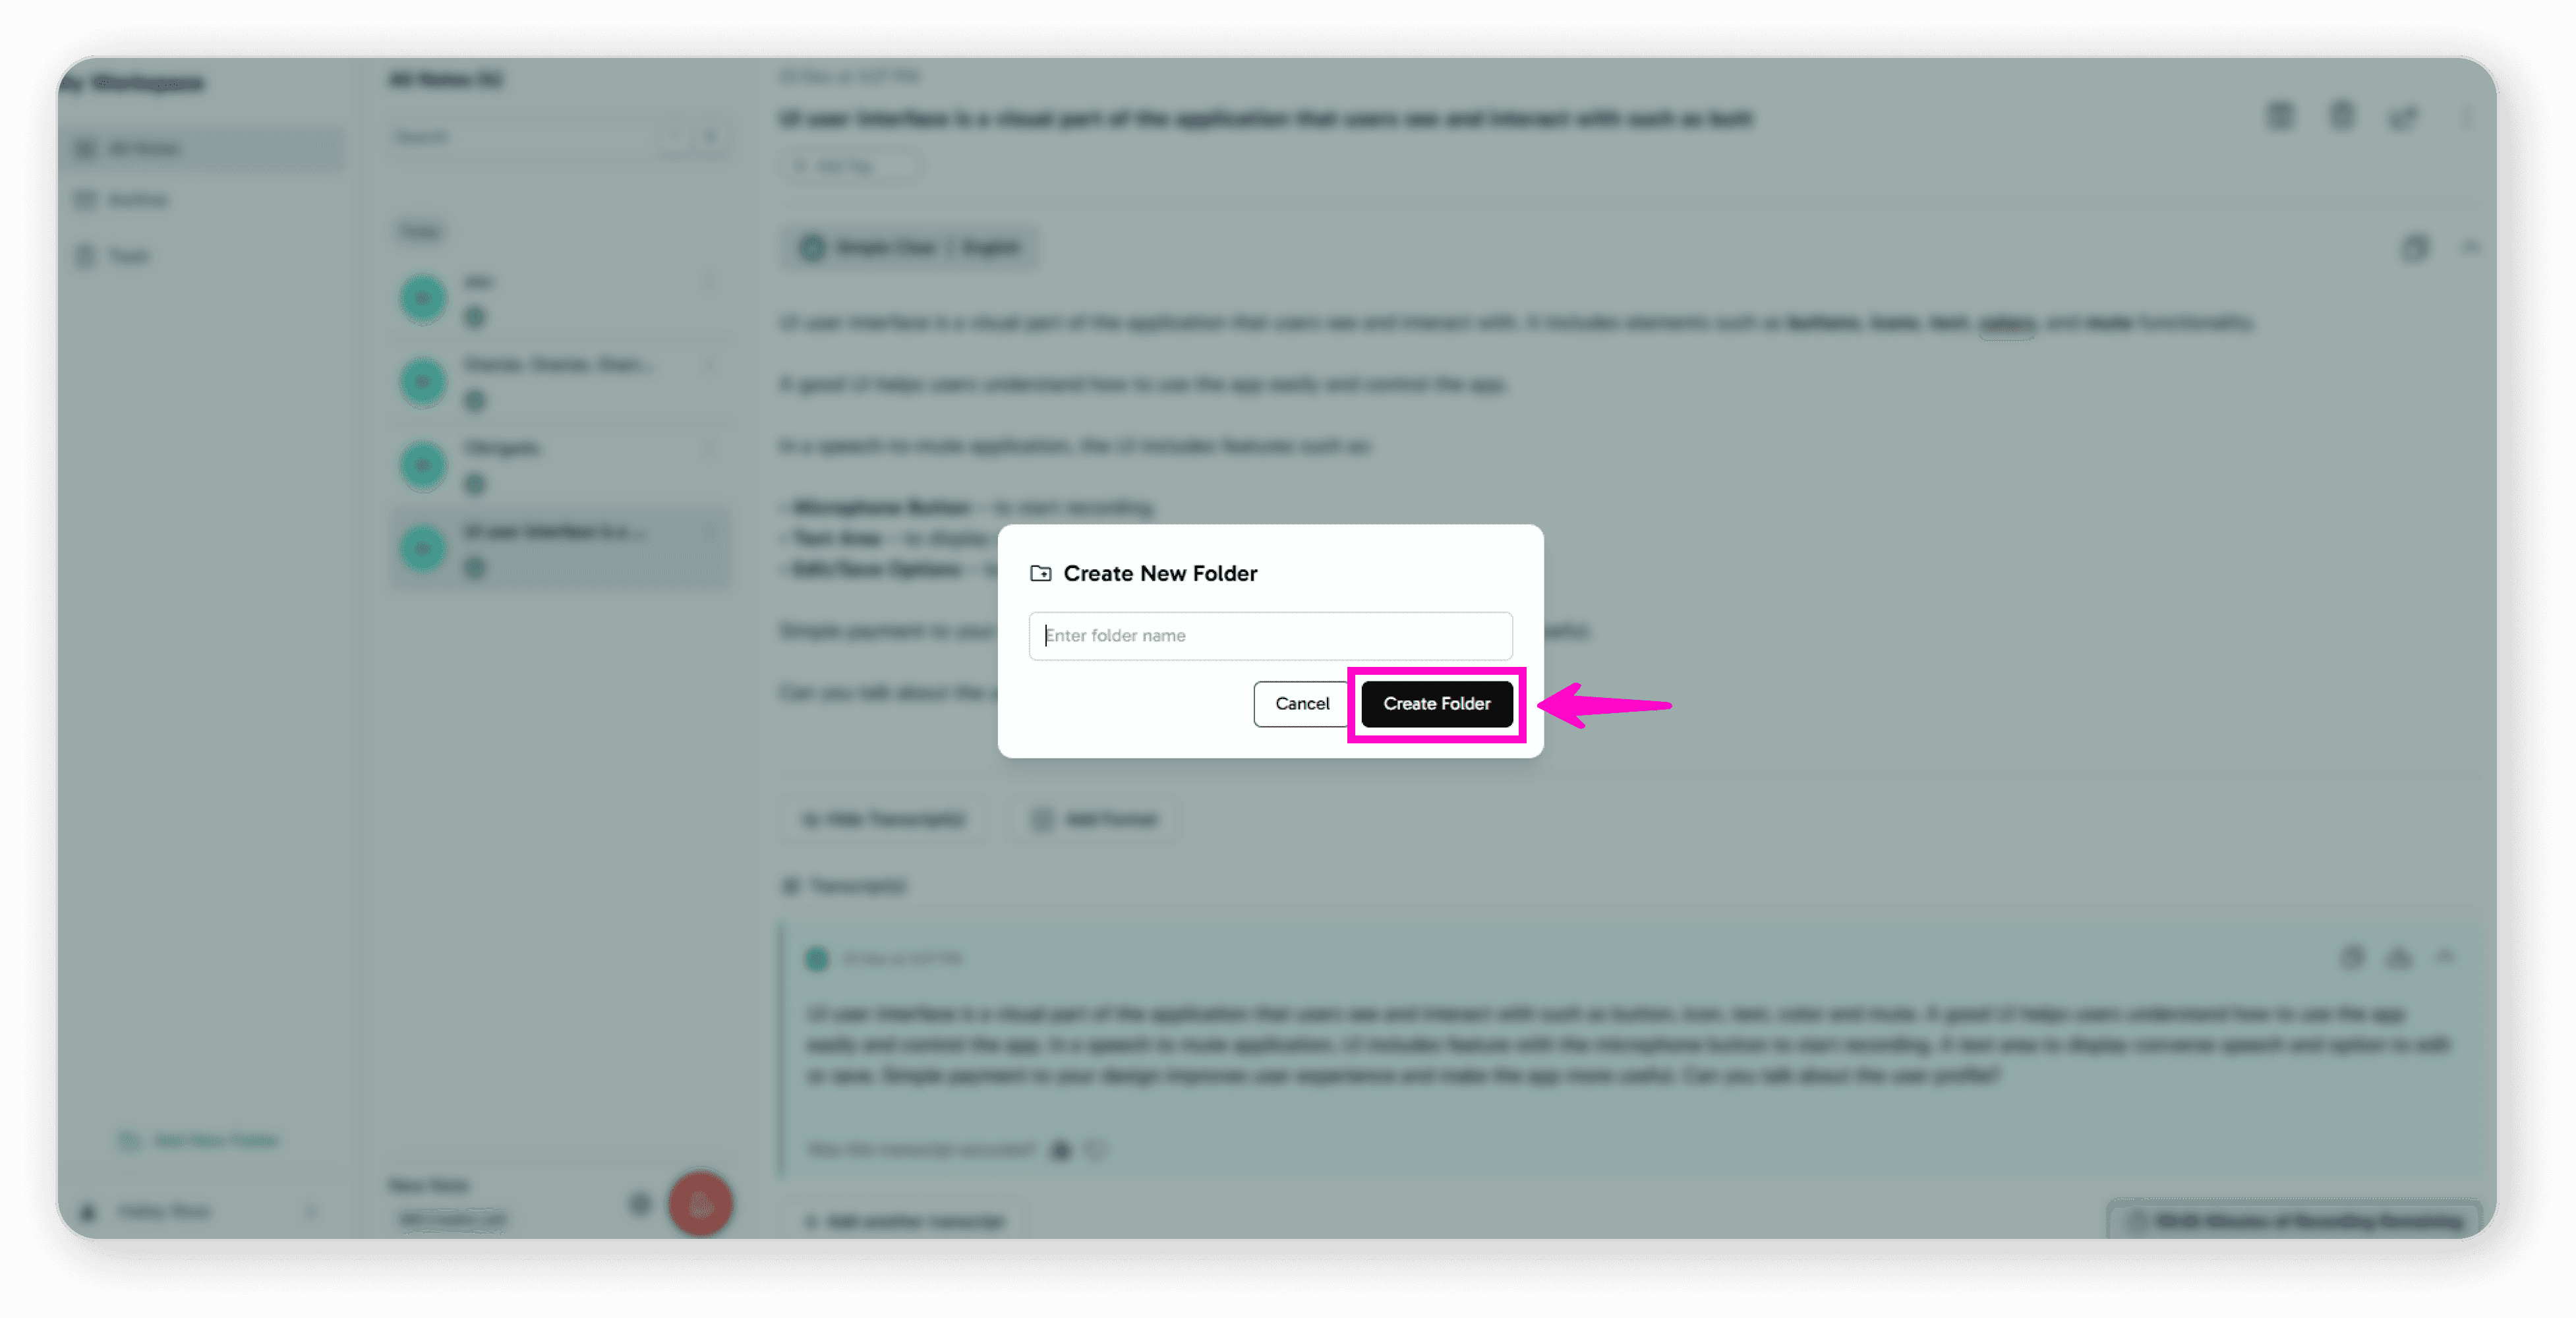
Click "Create Folder"
Access Your Folder
Your new folder will appear on your Dashboard
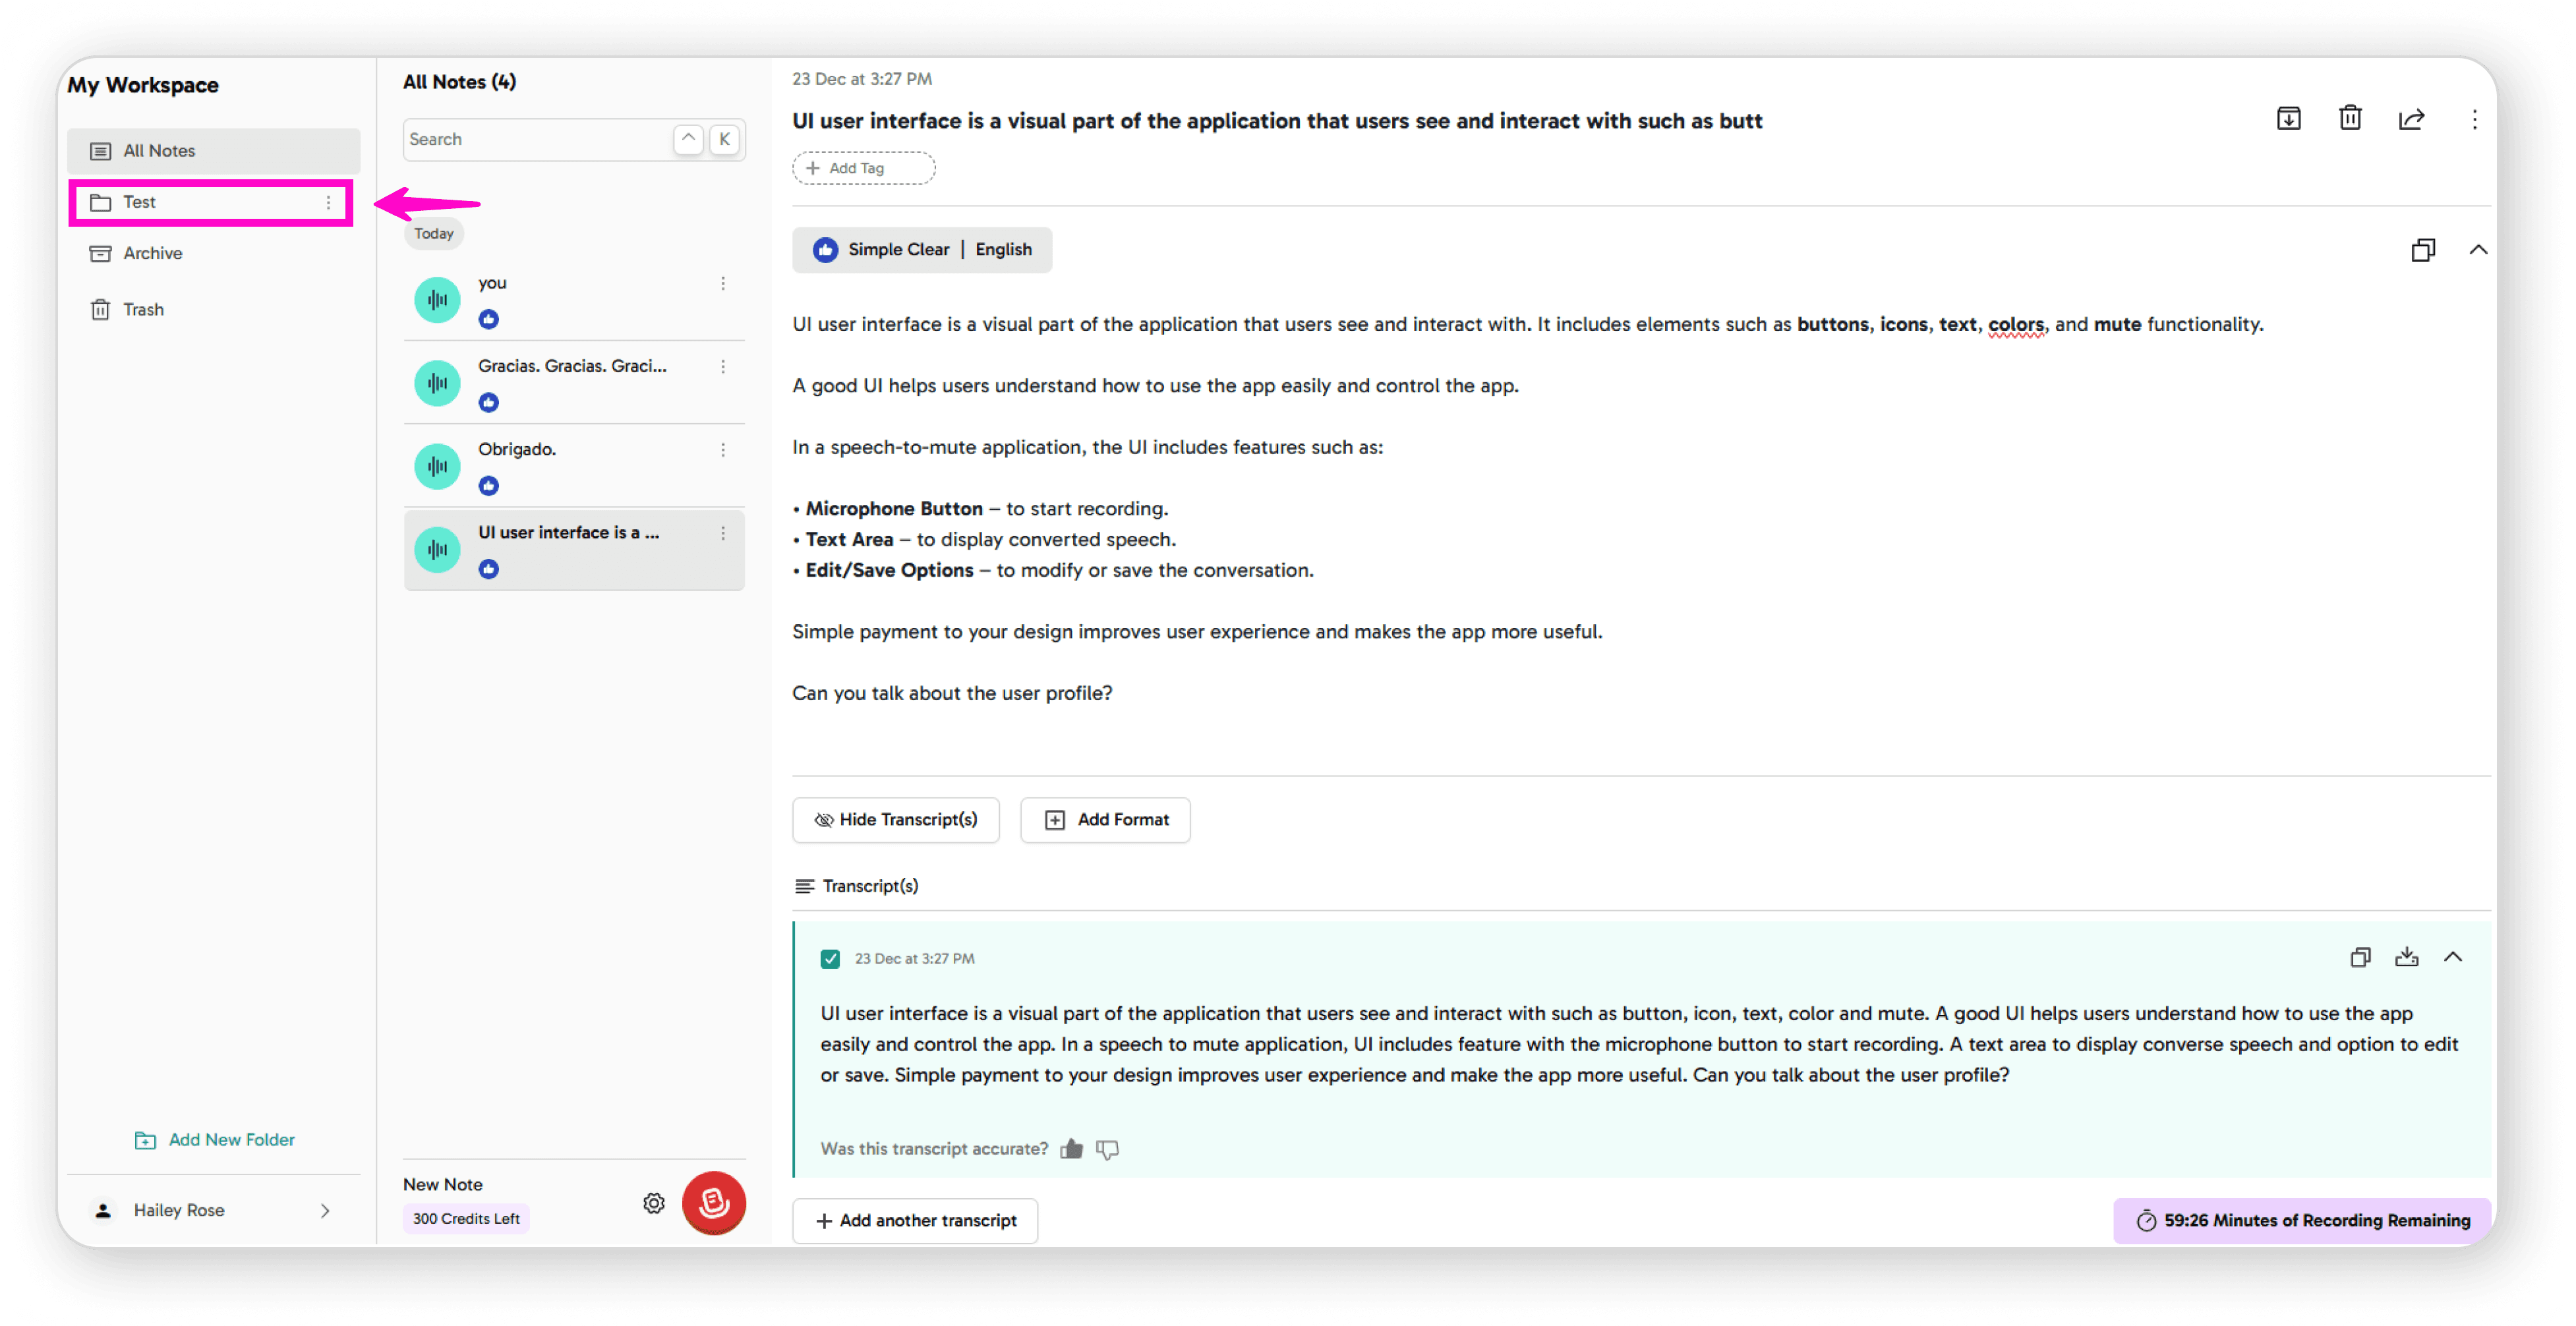
You can now use it to organize your notes
That's it! You can create as many folders as you need to keep your recordings and notes well-organized.
How to Move Notes to a Folder
Moving your notes into folders is simple and helps keep everything organised. Follow these easy steps:
Steps to Move a Note
Select Your Note
Click on the note you want to move
Open the Options Menu
Click on the 3-dot icon (⋮)

Choose Move Option
Click on "Move Note"
Select Your Destination
You'll see your folder screen with all available folders
